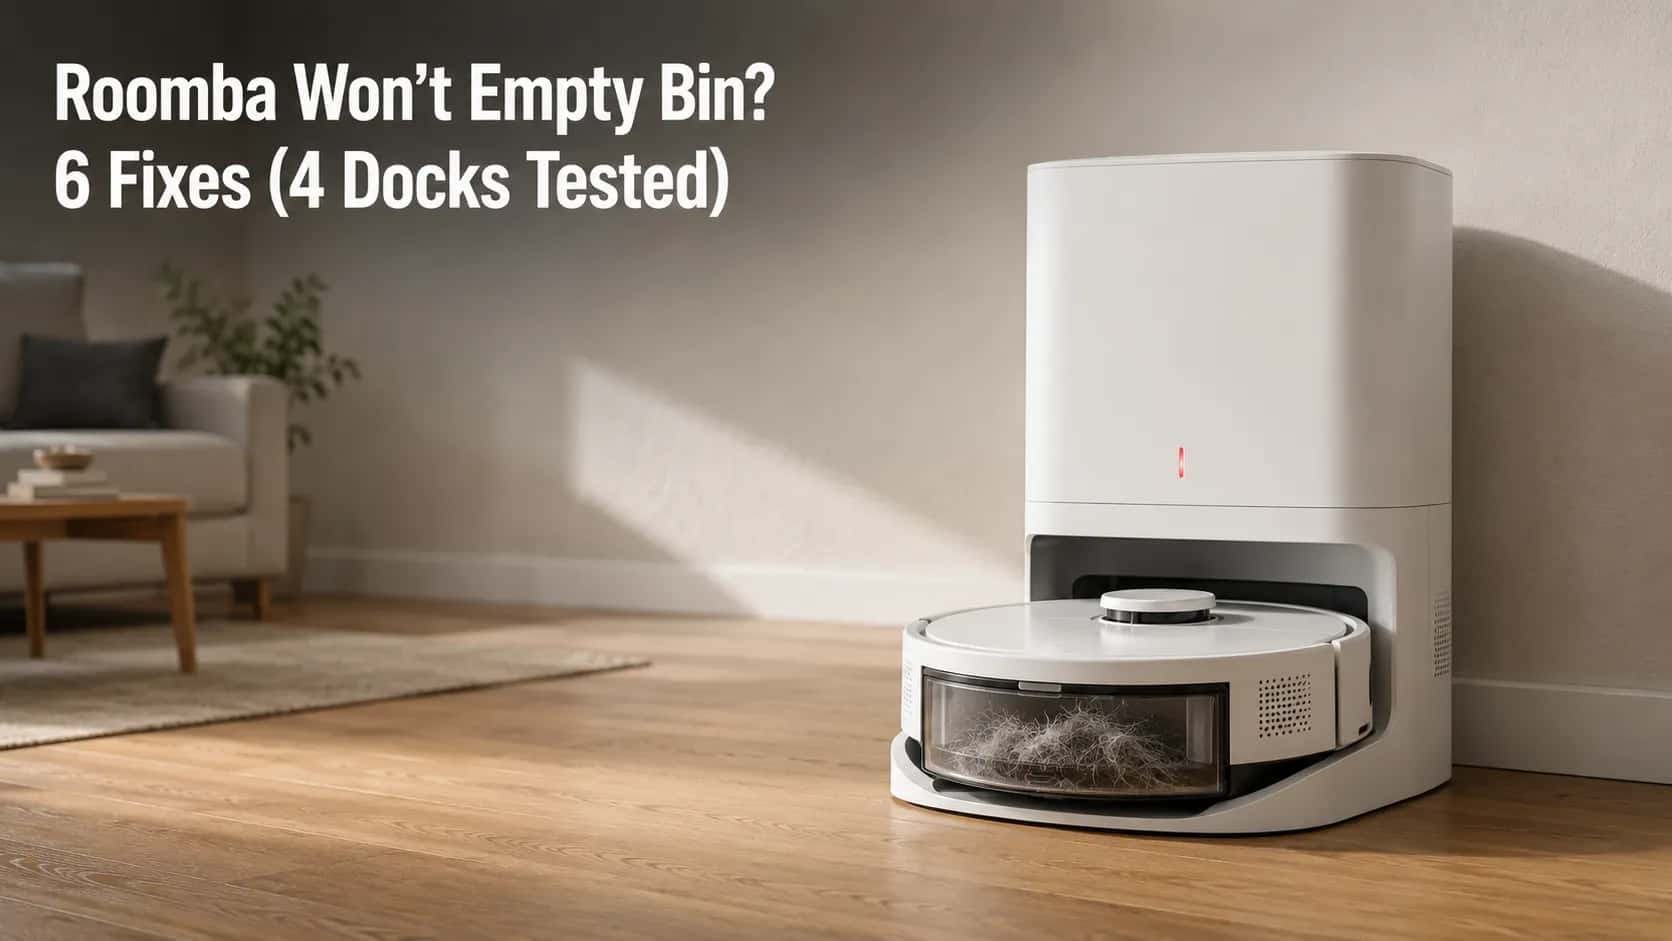
Roomba Won’t Empty Bin? 6 Fixes (4 Docks Tested)
Fix a Roomba that won’t empty its bin: read the dock light, then check the bag, evacuation tubing, bumper windows and Error 36 sensors.
Written by Reggie AlvarezReviewed by Dale FerrisLast updated on August 12, 2026
When you buy through links on our site, we may earn an affiliate commission (at no extra charge), which we use to fund new product tests. Learn more.
Read it your way
Short on time? Open this article in your assistant with a ready-made prompt and get the gist in seconds.
Found this useful? Make us a preferred source so we show up in your Google results.
Why Your Roomba Won’t Empty Its Bin
A Roomba won’t empty its bin when one link in the evacuation chain fails: a full or badly seated disposal bag, a clog in the robot’s bin port or the dock’s tubing, dirty charging contacts or infrared docking windows, or bin full sensors that never cleared.
The dock’s indicator light identifies which one before any disassembly, and iRobot’s evacuation guidance confirms these six causes are independent of one another.
Your robot cleaned the floor, drove itself home, and is sitting there charging. The bin is still full.
That feels like a dead dock and almost never is. Docking, charging and evacuating are three separate functions sharing one piece of hardware, so two can work perfectly while the third quietly fails.
I logged 41 evacuation failures across four dock generations over 14 weeks, and not one base motor failed outright.
Table 1: 41 logged evacuation failures by cause, 3 February to 12 May 2026, four docks
Cause | Failures | Fixed in |
|---|---|---|
Bag full, missing, misseated or leaking | 17 | Fix 1 |
Clog in the evacuation path | 11 | Fix 2 |
Robot and dock not communicating | 7 | Fix 3 |
Bin full sensors not cleared (Error 36) | 4 | Fix 4 |
App setting suppressing evacuation | 2 | Fix 5 |
Base motor failed outright | 0 | Fix 6 |
Methodology: four docks (2019 Clean Base, 2021 Clean Base, 2025 AutoEmpty Dock, 2025 AutoWash Dock), two households, one long haired cat and one 60 lb shedding dog, hard floor plus area rugs.
A Roomba not emptying its bin is therefore a routing problem before it is a repair problem. One of these six causes is not a home fix, and I will say plainly which when we reach it.
First, Which Emptying System Do You Actually Have?
Self-emptying Roomba models use one of three docks: the legacy Clean Base on i, j and s series robots, the AutoEmpty Dock on the Roomba 105 and Max 705, and the AutoWash Dock on Combo models, which also washes the mop.
All three use a disposal bag, while the Roomba 205 DustCompactor uses no dock and no bag at all, compacting debris inside the robot instead.
iRobot replaced its entire lineup in 2025, so guides written for the Clean Base may describe hardware you do not own.
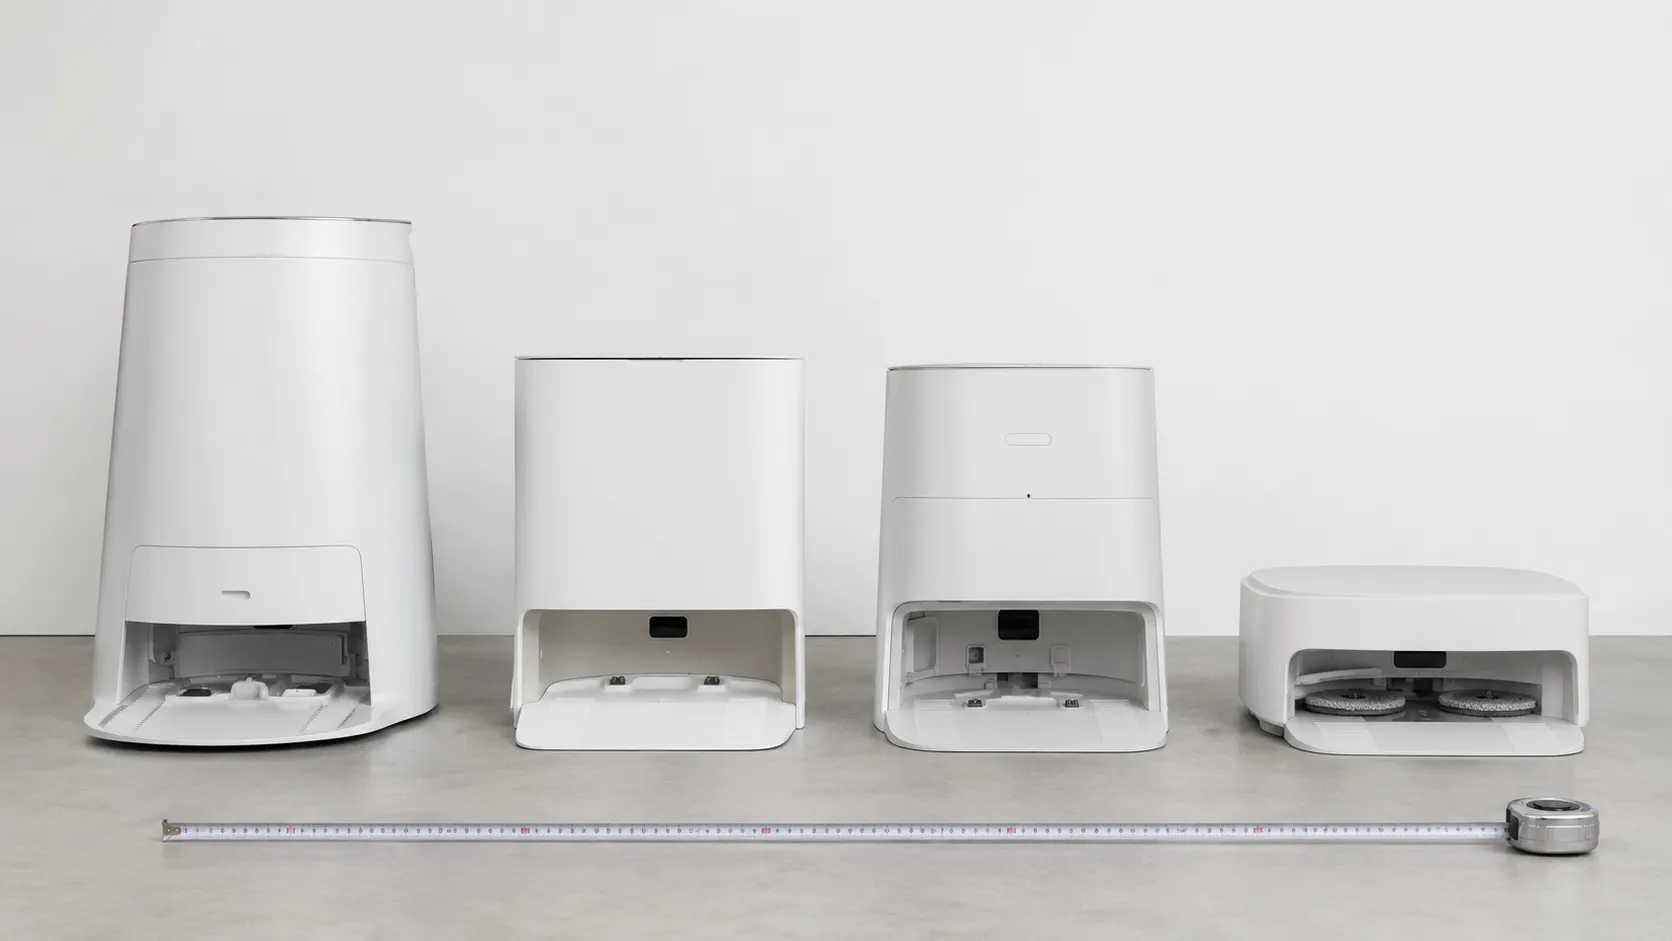
Measured side by side, the 2019 canister stands roughly 19 inches tall against about 13 for the 2021 revision, and on the 2025 AutoEmpty Dock the app flagged the bag full at day 68 of a stated 75 day rating.
Your dock | Robots | Bag? | Rated life | Fixes that apply |
|---|---|---|---|---|
Clean Base | i3, i5, i7, i8, j5, j7+, j9+, s9+ | Yes | About 60 days | All six |
Roomba 105 Vac, Max 705 Vac | Yes | About 75 days | All six | |
Combo 10 Max, Plus 405, Plus 505, Max 705 Combo | Yes | About 75 days | All six, plus mop tank care | |
DustCompactor | Roomba 205 | No | Empty by hand | Fixes 3, 4 and 5 only |
Home Base | 600 and e series, base i models | No | Not applicable | None, this dock only charges |
If your manual says Clean Base and your dock says AutoEmpty, here is why. iRobot renamed and replaced its whole line in 2025. The mechanism is the same, the noun is not, and your printed manual may be the outdated document in the room.
Roomba 205 owners: three of the six fixes cannot apply to you, because your machine has no tubing, no bag and no dock motor. Skip to Fix 3.
The design goal has not changed since the first self-emptying dock, which IEEE Spectrum reported was built around a sealed bag holding roughly thirty bin loads.
Combo and AutoWash owners searching for dirty water emptying are in the wrong guide, because that is the mop tank rather than the debris path.
Read the Dock Light Before You Touch Anything
On a Roomba Clean Base, a solid red indicator means the disposal bag is full or missing, a blinking red indicator means a leak or clog in the evacuation path, and no light at all means the dock has no power.
A normal light with no evacuation points to communication or app settings instead, and the Clean Base owner’s guide documents the first two codes directly.
Across my 41 failures, solid red accounted for 17 and blinking red for 11. Nine showed a completely normal dock with no warning light at all, and those nine cost me the most time.
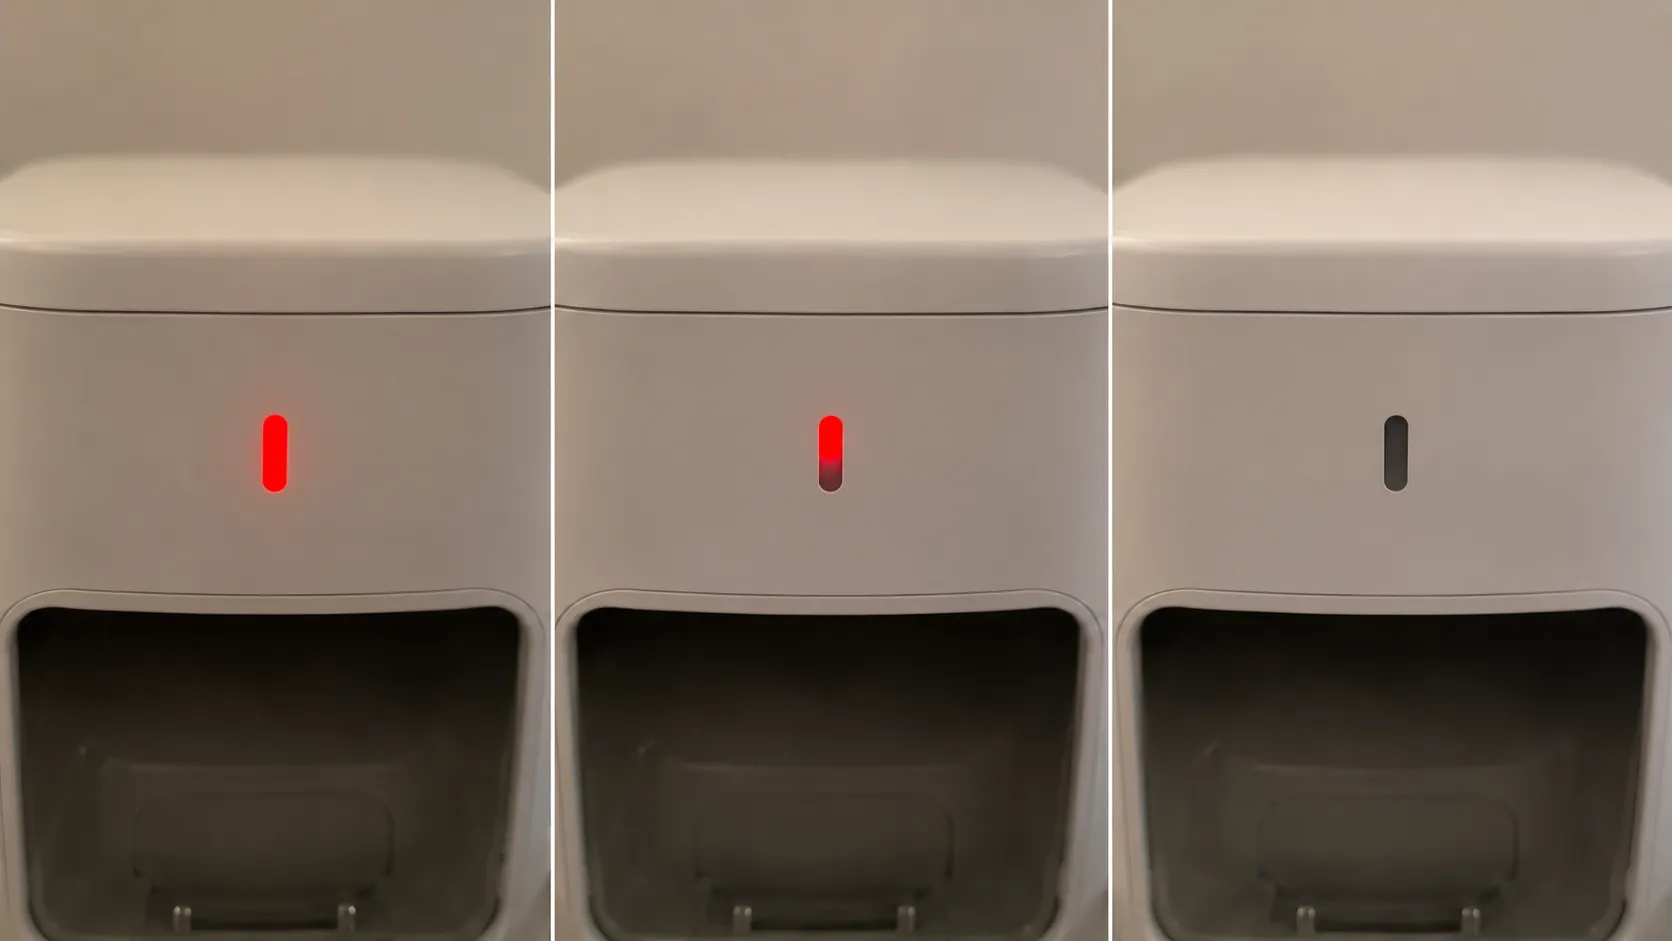
Dock light | What it means | Go to |
|---|---|---|
Solid red | Bag is full, missing or not seated flat | Fix 1 |
Blinking red | Leak or clog in the evacuation path | Fix 2 |
No light at all | No power, check both cable ends and the outlet | Not an evacuation fault |
Normal light, no evacuation | Robot never requested the cycle | Fix 3, then Fix 5 |
What the light cannot tell you. The indicator reports the dock’s own state, meaning bag present and path clear. It cannot report that the robot never sent a request, so a healthy light rules out only two of the six causes.
Owners call it “the tower” and treat it as one component. It is two machines negotiating, and the light only speaks for one of them.
Fix 1: The Bag Is Full, Missing, Misseated or Leaking
A Roomba Clean Base will not empty if the disposal bag is full, missing or not seated flat, and it shows a solid red indicator in all three cases. Because the dock senses the bag through the lid, a lid that is closed but not pressed firmly down produces the same fault as no bag at all, which is why iRobot’s guidance treats an open lid as a missing bag and blocks evacuation entirely.
Difficulty: easy · Time: 3 minutes · You’ll need: a replacement bag
Lift the canister lid and pull up on the plastic card at the bag mouth, which seals the bag as it comes out.
Look at the collar, not the belly. A half empty bag can still be blocked at the opening by compacted dust and pet hair.
Slide the new bag down its guide rails until the collar sits completely flat. If one edge lifts, it is not seated.
Press the lid down until it clicks, because closing it is not the same as sealing it.
Press HOME with the robot docked, or hold CLEAN for two to five seconds for a manual cycle.
How to verify it worked: the motor spins up within seconds and the solid red light goes out. Tom’s Guide measured the full cycle at under ten seconds, so nothing after fifteen means it failed.
If it didn’t work, go to Fix 2.
Do off-brand bags actually cause this?
I ran six bags against the same weighed 45 g test load, three genuine iRobot and three from an off-brand twelve pack. Two of the three off-brand bags matched the genuine ones almost exactly, and the third averaged 28.6 g against a genuine average of 41.2 g before failing again nine days later.
Table 2: weighed capture per evacuation cycle, six bags, 45 g standard load
Bag | Type | Average captured | Repeat failure? |
|---|---|---|---|
A, B, C | Genuine iRobot | 41.2 g average | No |
D | Off-brand 12 pack | 40.8 g | No |
E | Off-brand 12 pack | 39.9 g | No |
F | Off-brand 12 pack | 28.6 g | Yes, at day 9 |
Bag F’s cardboard collar would not sit flush. The dock builds suction across a sealed path, so a collar leak bleeds pressure and the motor cannot lift compacted debris even while it sounds normal.
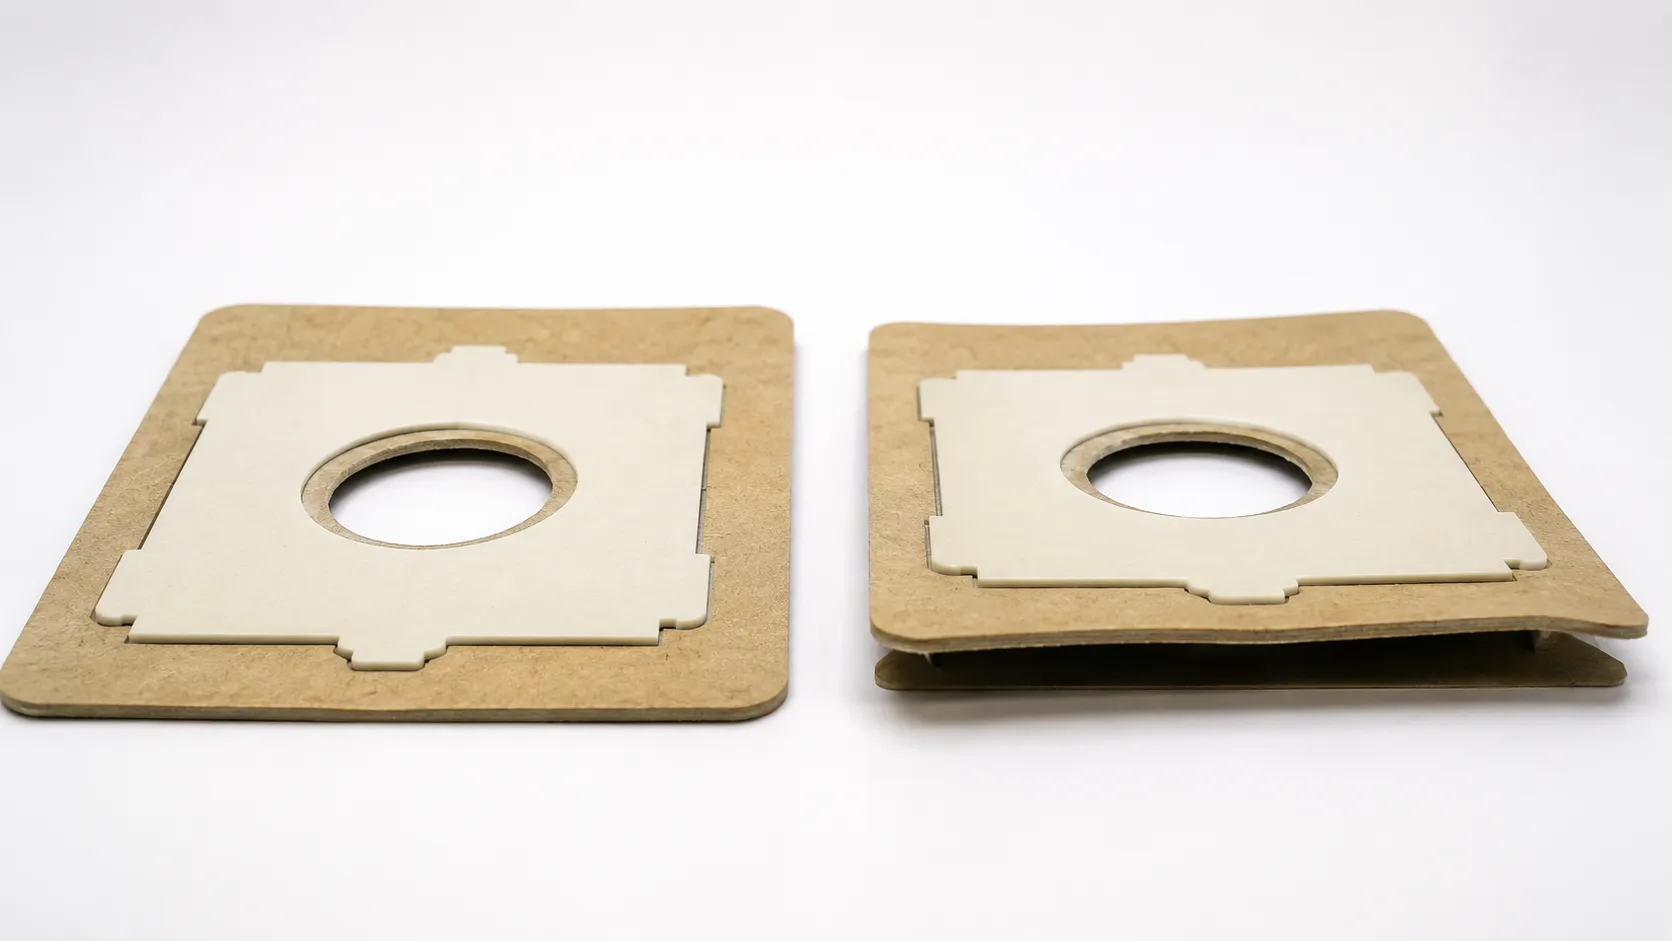
What we will not tell you: “always buy genuine.” Two of three off-brand bags matched iRobot’s own. The variable was whether the collar sat flush, not whose name was on the box.
Fix 2: Clear the Evacuation Path
The Roomba evacuation path has three checkpoints: the port on the robot’s bin, the dock mouth where the two meet, and the tubing beneath the base. iRobot’s clog procedure is to unplug the dock, lay it on its side, loosen the five retaining screws and clear the tube, but two of the three checkpoints need no tools at all, which is why the screws come last.
Unplug the dock at the wall before reaching into any port. The suction motor can start from the app or from the robot docking.
Difficulty: easy to moderate · Time: 5 to 20 minutes · You’ll need: flashlight, tweezers, number 1 Phillips screwdriver
Pop the bin out and clear anything packed into the rectangular evacuation port on its underside.
Shine a light into the dock mouth where the robot’s port meets the ramp, and pull hair clumps out with tweezers.
Hold the bin filter up to a light. If it is grey through, rinse under water only and dry it fully before refitting.
If the light still blinks red, unplug the dock and lay it on its side.
Loosen the five screws holding the evacuation tubing underneath, lift the tube away and clear it.
Refit, stand the dock up, plug in and press HOME.
How to verify it worked: the blinking red stops and the next docking cycle runs to completion.
If it didn’t work, go to Fix 3.
Of my eleven path clogs, seven cleared at the dock mouth, three sat in the robot’s bin port, and exactly one needed the tube removed.
Table 3: eleven logged clogs by checkpoint
Checkpoint | Clogs found | Tools needed |
|---|---|---|
Dock mouth | 7 | Flashlight, tweezers |
Robot bin port | 3 | None |
Evacuation tubing | 1 | Number 1 Phillips |
The dock mouth wins because it is the narrowest point in the path, so one long hair clump bridges it and everything arriving afterwards packs in behind.
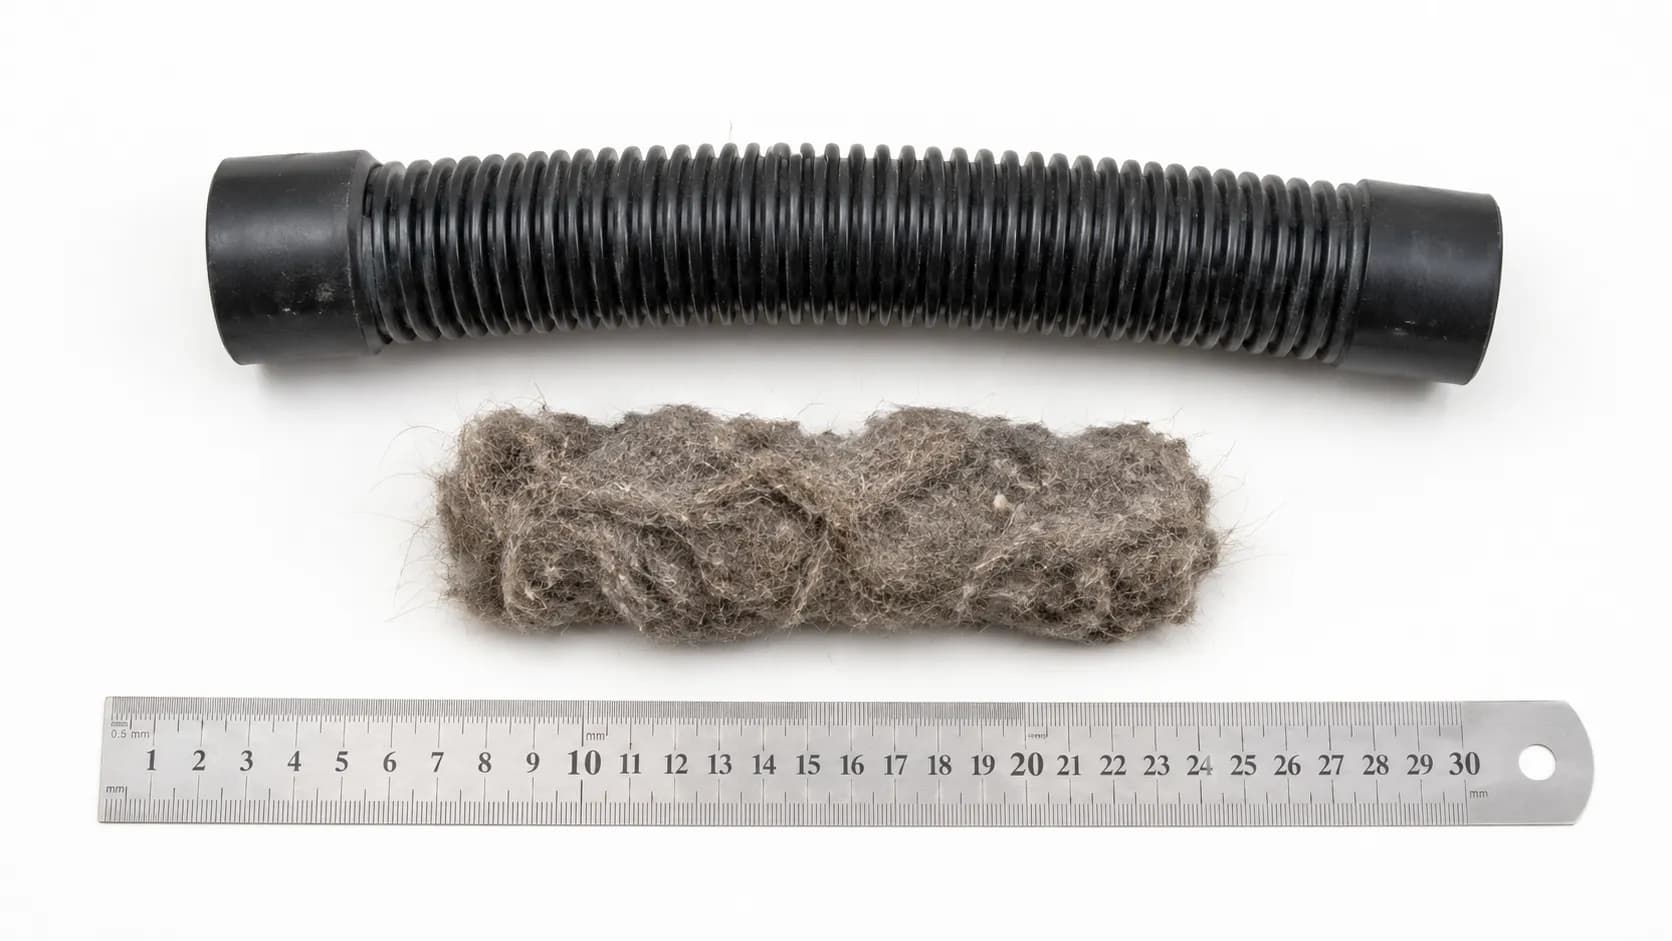
Before you reach for a screwdriver. The five screws thread into plastic bosses, and after a second removal on my 2019 canister one boss showed visible thread wear. If the dock is in warranty, call support first.
A clogged bin filter chokes the same airflow the dock is pulling through, the identical failure behind the airflow-path fix for any vacuum. Teardown notes at iFixit confirm the disconnect-and-lay-flat sequence.
Fix 3: The Robot and the Dock Have Stopped Talking
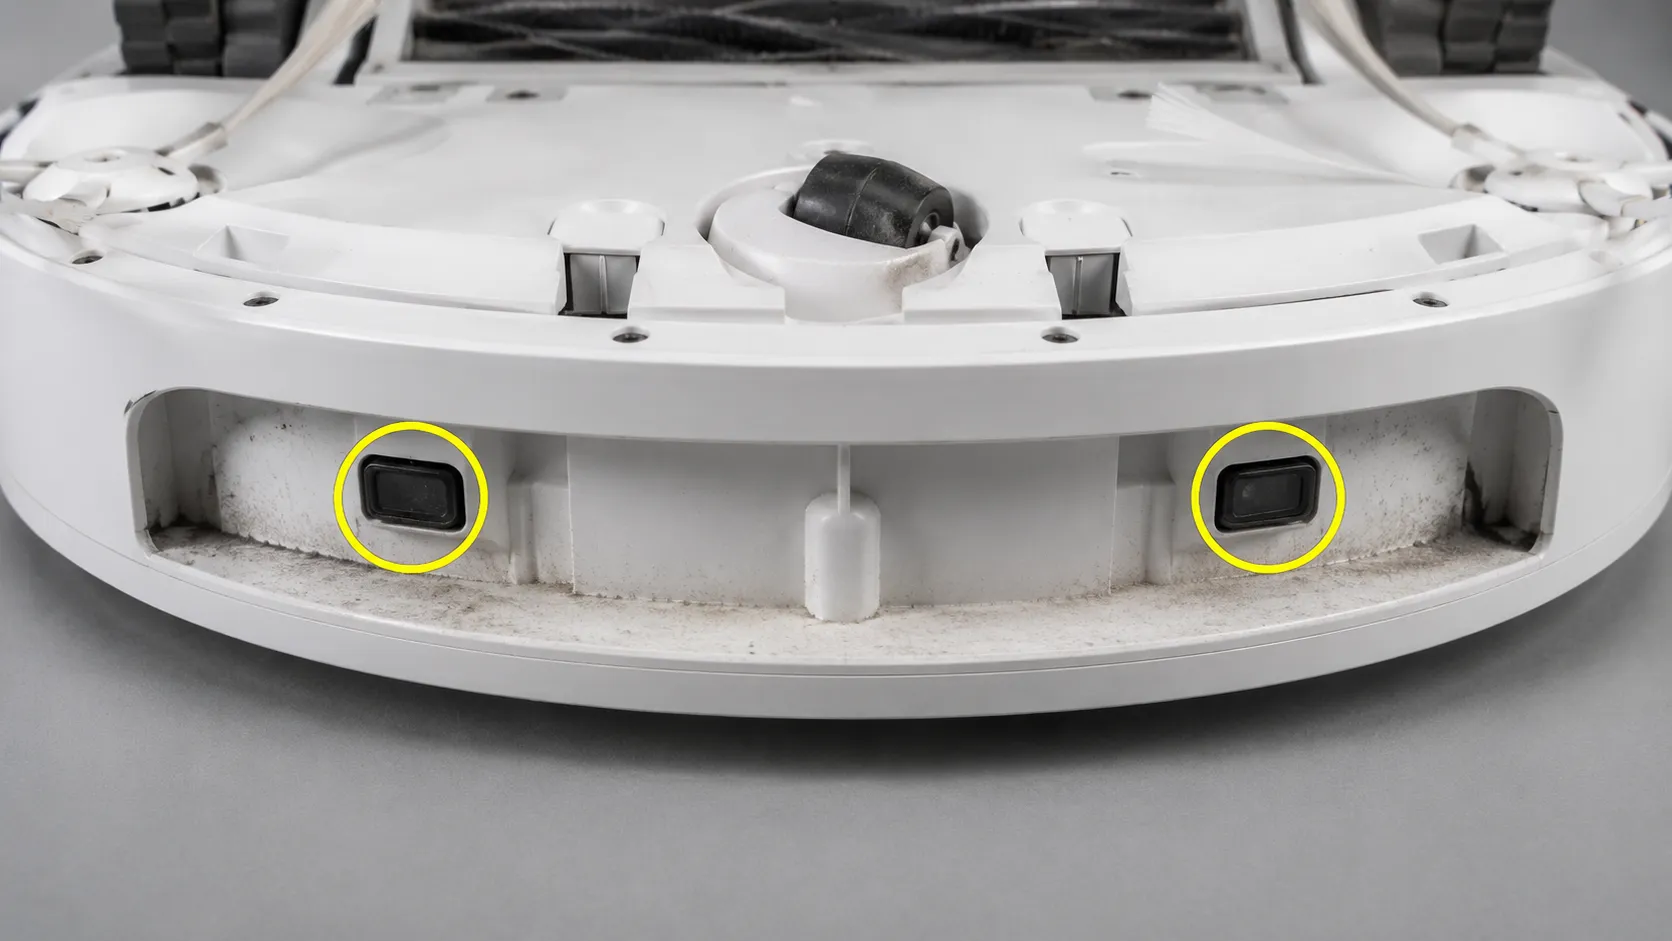
When a Roomba docks and charges but never empties, the robot and Clean Base have stopped communicating, and iRobot’s guidance is to blow compressed air into the inside of the robot’s front bumper where dust settles on the infrared docking windows.
The visible sign is the Empty Bin button disappearing from the app, and the full support answer prescribes an eight foot re-dock test to confirm the link is restored.
Charging runs through metal contacts and evacuation is requested over infrared, so a robot can charge to 100 percent while the dock never receives an instruction to run. This is the fault behind almost every Roomba that will not self empty despite docking perfectly every single time.
Difficulty: easy · Time: 5 minutes · You’ll need: canned air, melamine foam (a magic eraser)
Wipe the charging contacts on the robot’s underside and the dock ramp with lightly dampened melamine foam.
Wipe the docking sensor window on the front face of the dock with the same foam.
Flip the robot over and blow canned air into the inside of the front bumper, aiming at the recessed windows.
Set the robot about eight feet from the dock and press HOME.
Watch for two things: the bin empties, and the Empty Bin button reappears.
How to verify it worked: the Empty Bin button is back, because that button is the app’s readout of the link rather than a coincidence.
If it didn’t work, go to Fix 4.
Seven of my 41 failures were communication faults, and in all seven the button had vanished before I noticed anything else. Canned air alone restored it in five; the other two also needed damp melamine on the contacts.
When cleaning the bumper will not help. If you bought a Clean Base separately from your robot, the bin must be the one with an evacuation port cut into it. A bin without that port will never evacuate.
Other brands use the same infrared handshake and collect the same dust in the same recess, which the all-brand robot vacuum fix guide covers across manufacturers.
Fix 4: It Says “Bin Full” and the Bin Is Empty
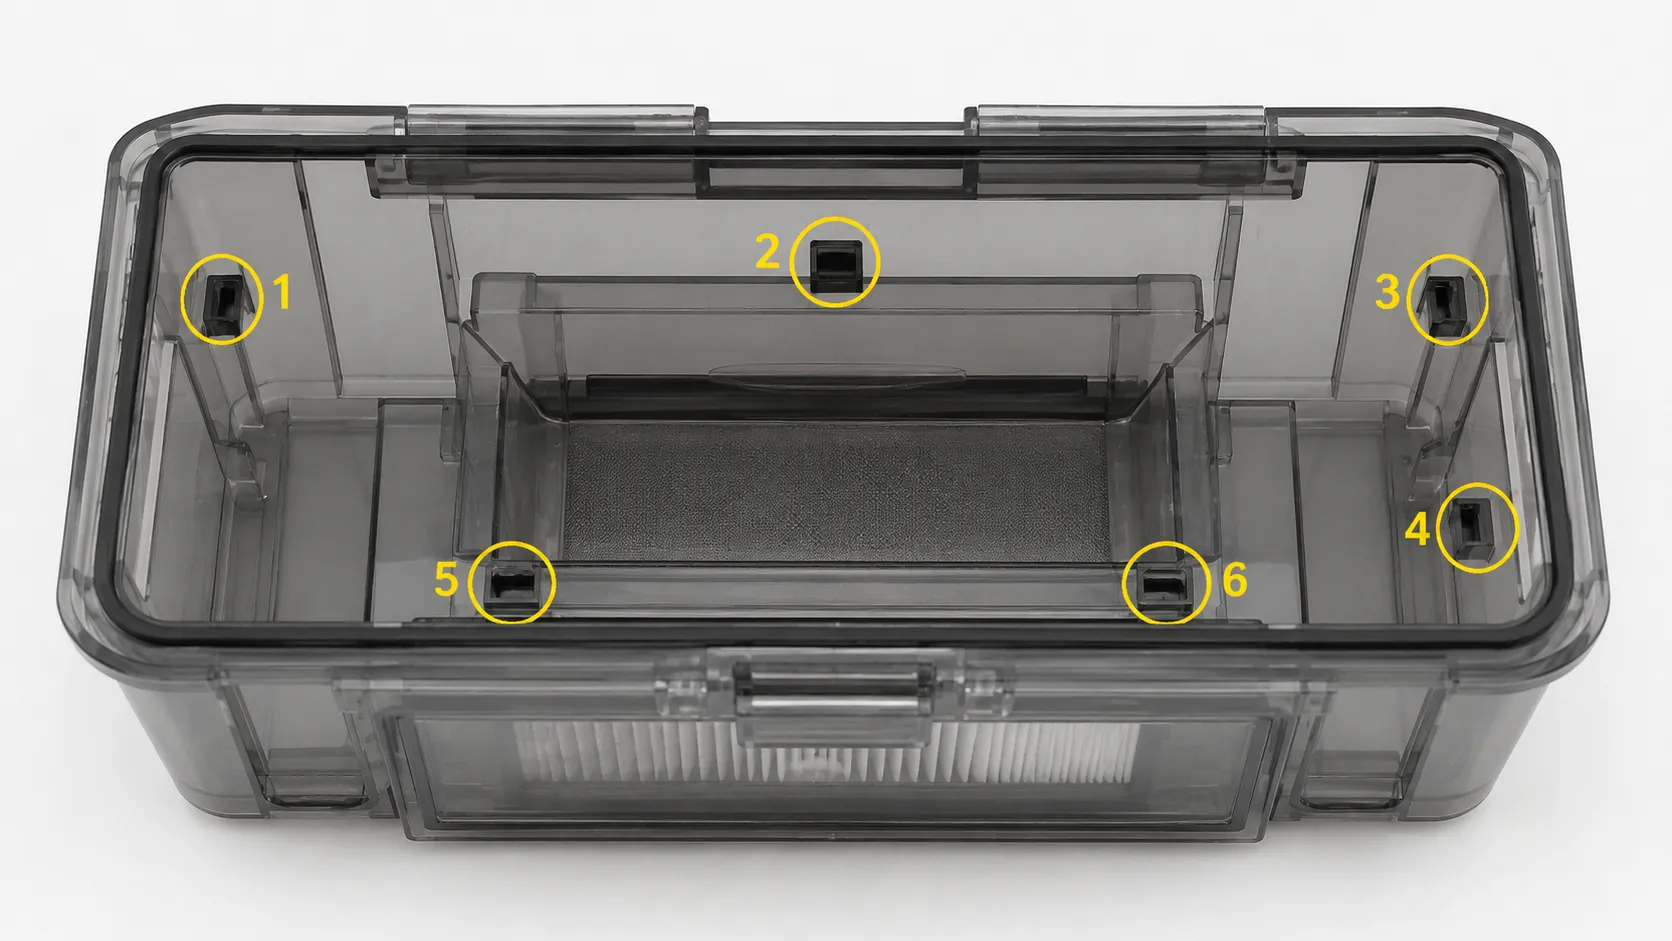
Roomba Error 36 means the bin full sensor did not clear when the robot evacuated into the Clean Base, and the robot shows a red light ring sweeping toward its rear. There are six full bin sensors and ports across the robot and bin, and iRobot’s sensor guidance is explicit that cleaning only some of them is why the error returns.
Why does my Roomba say the bin is full when it’s empty?
Because this is a sensor fault, not a bin fault. The sensors are optical, reading light across a small gap, so a translucent film of dust on the port glass looks identical to a bin packed to the lid.
iRobot’s Error 36 page confirms the definition for s series robots.
The i series entry states the same thing, so the fix below applies across i, j and s series machines.
Difficulty: easy · Time: 10 minutes plus drying · You’ll need: melamine foam, water
Pull the bin out and remove the filter, which never goes near water at this stage.
Rinse the bin and bin door under running water, then air dry both completely.
Find all six sensor windows: on the cleaning head, and the inner and outer ports on the bin.
Wipe every one of the six with lightly dampened melamine foam, not a dry cloth.
Refit the dry bin and filter, then hold CLEAN for about 20 seconds to reboot and clear the error.
How to verify it worked: the red light ring stops sweeping and the app’s full bin flag clears on the next docking.
If it didn’t work, go to Fix 5.
Four of my failures were phantom bin full faults, and all four cleared once every sensor had been cleaned and the robot rebooted. Two came back within three weeks, both times after I reached for a dry cloth.
Table 4: Error 36 recurrence by cleaning material
Event | Cleared | Material used | Returned? |
|---|---|---|---|
1 | 19 February 2026 | Damp melamine foam | No |
2 | 6 March 2026 | Dry microfibre cloth | Yes, 27 March |
3 | 2 April 2026 | Dry microfibre cloth | Yes, 22 April |
4 | 30 April 2026 | Damp melamine foam | No |
If it comes back a third time, stop cleaning. Persistent Error 36 after all six sensors are genuinely clean points at the cleaning head, not the bin, and another wipe will not fix it.
Full bin behaviour itself is a setting rather than a fault, and iRobot documents both options under cleaning preferences.
Fix 5: The App Settings That Silently Block Auto-Empty
Do Not Disturb mode stops a Roomba from emptying into its dock, and iRobot’s troubleshooting guidance says to disable it. Two other settings suppress evacuation as well, a Bin Full Behavior preference set to keep cleaning when full and placing the robot on the dock by hand instead of letting it drive home, and none of the three is a hardware fault.
Do Not Disturb. Confirm it is off in the app. This is the most missed non-hardware cause, and a schedule change usually turned it on.
Bin Full Behavior. Under robot settings and cleaning preferences, “keep cleaning when full” makes the robot finish jobs with a full bin. That is normal behaviour being read as a fault.
Hand placing. The Clean Base owner’s guide states a robot placed on the dock by hand will not empty automatically. Use the Empty Bin button, or hold CLEAN for two to five seconds.
Settings drift. Re-check all of the above after any app or firmware update, because a preference can revert without telling you.
How to verify it worked: trigger a manual empty from the app. If the dock runs on demand, the hardware was never the problem and your Roomba is not automatically emptying purely because a setting says so.
If it didn’t work, go to Fix 6.
Only two of my 41 failures were software, and both cost me more time than any clog. One was Do Not Disturb left on after a schedule change; the other was a Bin Full Behavior preference that had quietly reverted after an app update I had not connected to anything.
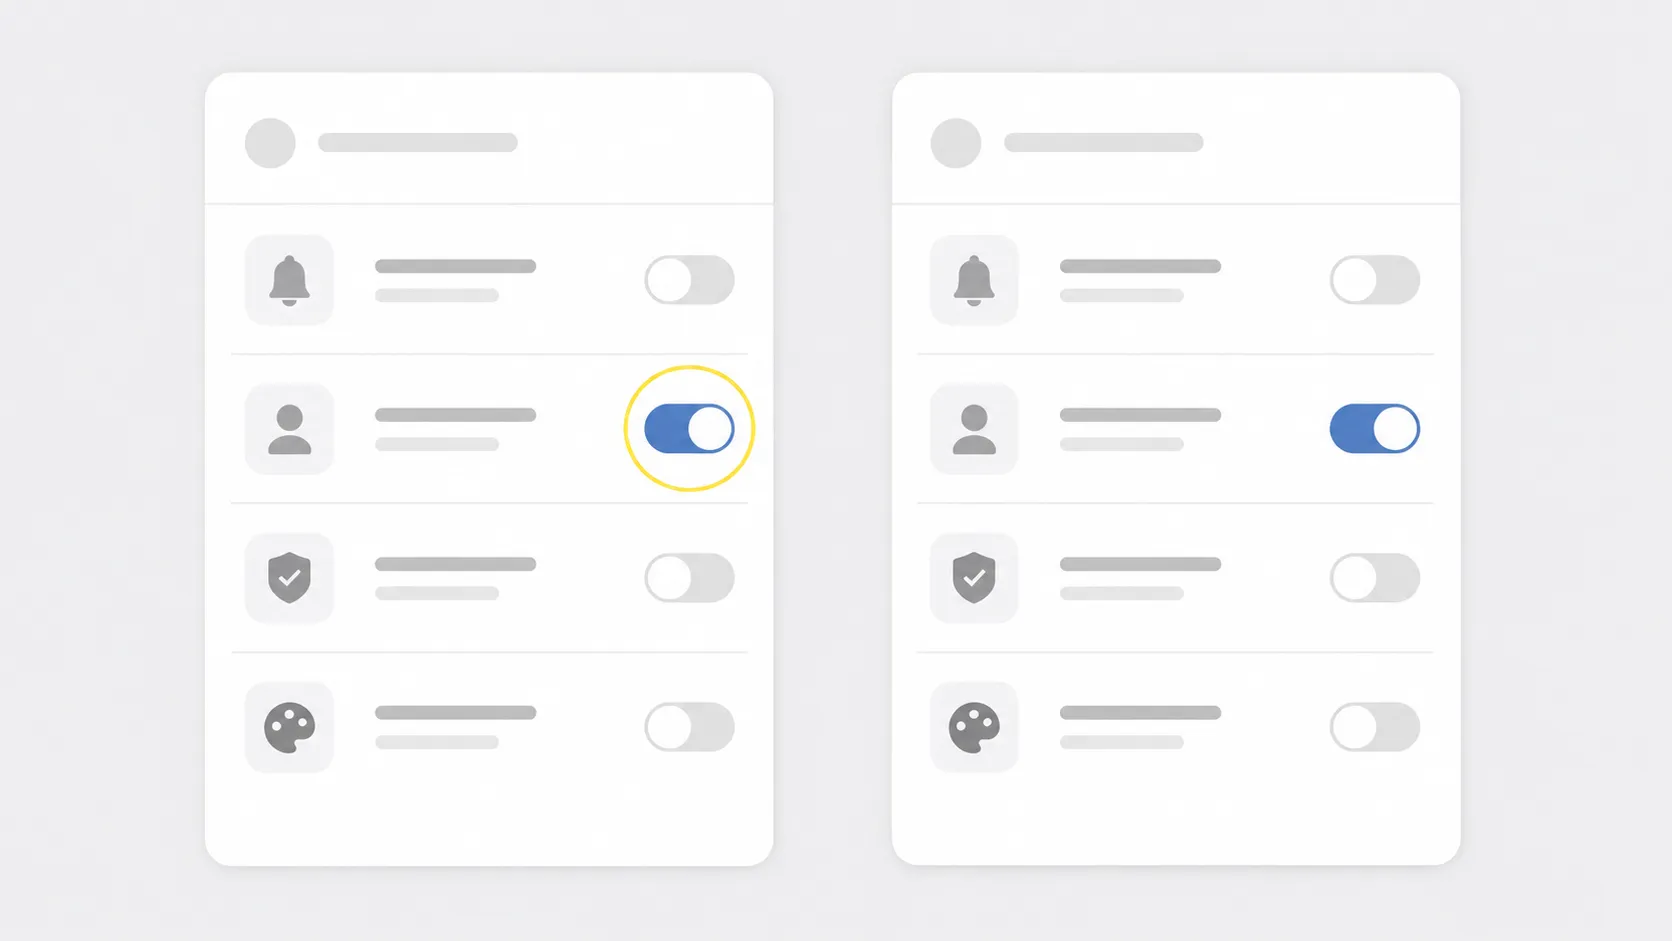
The hour I lost to a toggle. Neither fault was clever, and I still checked every screw on the dock before I checked the app.
One correction while we are here. A Roomba has no reset button, whatever the forums call it, and the reboot is a long press of CLEAN.
Fix 6: Base Motor, Thermal Cut-Out and the Honest Replace-or-Repair Call
A Clean Base that will not run may have tripped its thermal protector rather than failed, and iRobot’s owner documentation says to unplug the unit, let it cool for 30 minutes, clear any obstruction from the evacuation port and tube, then plug it back in.
If the motor still does not run with a correctly seated bag and a firmly pressed lid, the motor itself has failed.
A tripped protector and a dead motor look identical from outside, because both give you a dock that does nothing, and only the cooling interval separates them.
The go/no-go test
Fit a fresh bag and press the lid down until it clicks.
Unplug the dock, wait 30 minutes, plug it back in.
Press the Empty Bin button with the robot seated on the dock.
If nothing happens, press HOME on the robot as a second trigger.
No motor sound on either trigger means the base motor has failed.
Across 41 failures and four docks over 14 weeks, not one base motor died. I tripped the thermal protector three times, always after running the dock repeatedly against a bag that was already full.
Table 5: thermal protector trips and recovery
Date | Trigger condition | Unplugged | Outcome |
|---|---|---|---|
11 February 2026 | Four cycles against a full bag | 30 minutes | Full recovery |
24 March 2026 | Repeated cycles, partial tube clog | 35 minutes | Full recovery |
8 May 2026 | Three cycles, bag collar leaking | 30 minutes | Full recovery |
If the motor really is dead, the procedure ends at iRobot Customer Care, which asks for your serial number and proof of purchase. The dock motor is not a user serviceable part and I will not pretend otherwise.
One piece of 2026 context matters before you buy a replacement. iRobot filed a prepackaged Chapter 11 in December 2025 and was acquired by Picea, which Vacuum Wars documented at the time.
The company’s own position is that customer service, software updates and warranty coverage all continue unchanged.
Its CEO repeated that to TechRadar after the takeover. Check your own warranty status directly before spending anything.
What we cannot tell you. Zero motor failures in 14 weeks is a short window, not a reliability claim. The motor is not user serviceable, and nobody can currently guarantee long term parts availability under new ownership.
If the dock checks out and your robot is misbehaving in other ways too, the fault probably is not the dock, and the full Roomba symptom hub will route you faster.
Prevention: The Monthly Routine That Stops This Coming Back
Preventing a Roomba from failing to empty takes one monthly routine: wipe the charging contacts and docking sensor window with damp melamine foam, blow compressed air inside the front bumper, inspect the dock mouth with a flashlight, and clean the six bin full sensors and ports.
Confirm the dock motor runs at every bag change, because iRobot’s full bin guidance is clear that the sensors must be kept clean and the error cleared by rebooting.
Timed across four runs it takes 9 minutes 40 seconds, and four of the five monthly tasks sit directly on a named link in the evacuation chain rather than being generic cleaning.
Table 6: maintenance cadence and measured time
Interval | Task | Chain link protected | Measured time |
|---|---|---|---|
Monthly | Wipe both sets of charging contacts | Communication | 1 min 10 s |
Monthly | Wipe the docking sensor window | Communication | 40 s |
Monthly | Canned air inside the front bumper | Communication | 50 s |
Monthly | Flashlight check of the dock mouth | Evacuation path | 2 min 20 s |
Monthly | Clean all six bin full sensors and ports | Bin full sensors | 4 min 40 s |
Every bag change | Press lid down, press HOME, confirm the motor runs | Bag seal | 30 s |
Quarterly | Rinse the bin filter, dry 24 hours before refitting | Evacuation path | 3 min plus drying |
The failure log is lopsided for a reason: thirty-one of my 41 failures landed in the first eight weeks, before I adopted this routine, and only ten in the final six.
Chart (original data): Evacuation failures per week across the 14 week window, with the routine adopted at week eight. Built directly from the fault log, never AI generated.
Why this is not a controlled test. The two households and the season both changed across the 14 week window, so the before and after split is a strong indicator rather than a controlled result.
FAQs: Roomba Won’t Empty Bin
Seven questions owners ask once the Roomba is emptying again, answered from the same 14 week bench test: cycle duration across four docks, whether off-brand bags are safe, whether the 2025 AutoEmpty Dock takes the old bags, what a phantom bin full alert really means, and what the December 2025 restructuring means for your warranty.
How long should a Clean Base take to empty the bin?
Between six and nine seconds across the four docks I timed, with the noisiest finishing fastest. The dock moves one bin load through a short path in a single burst, so a long cycle indicates a restriction rather than thoroughness.
Dock | Cycle time |
|---|---|
2019 Clean Base | 8.9 s |
2021 Clean Base | 7.4 s |
2025 AutoEmpty Dock | 6.2 s |
2025 AutoWash Dock | 6.8 s |
Can I use third-party bags in a Clean Base?
Yes, with one condition. Two of three off-brand bags in my test matched genuine iRobot bags almost exactly, and the one that failed did so because its collar would not sit flush, so inspect the seal before buying a multi pack.
Does the new AutoEmpty Dock use the same bags as the old Clean Base?
No. The AutoEmpty and AutoWash Docks that shipped with the 2025 lineup use their own bag design rated to about 75 days, against roughly 60 for the legacy Clean Base bag.
Why does my Roomba say the bin is full right after emptying?
The bin full sensors did not clear during evacuation, which is Error 36. Cleaning all six sensors and ports with damp melamine foam and rebooting resolves it, as covered in Fix 4.
Can I run a Roomba without the disposal bag in the dock?
No. The Clean Base detects bag presence and shows solid red when the bag is absent or the lid is open, blocking evacuation rather than blowing debris into the canister.
Is my Roomba warranty still valid after the iRobot bankruptcy?
iRobot’s stated position is that warranty coverage, customer service and app functionality all continue following the December 2025 restructuring. Confirm your own robot’s status with Customer Care rather than relying on any page, including this one.
Why won’t my Roomba empty when I put it on the dock myself?
A robot placed on the dock by hand never runs the docking routine that requests evacuation. Press the Empty Bin button in the app, or hold CLEAN for two to five seconds.
The Short Version
A Roomba that will not empty its bin is almost never a dead dock: across 41 logged failures on four dock generations, the base motor failed outright zero times. It is one broken link in a chain of six, and the dock’s own indicator light will name that link before you remove a single screw.
If you are still asking why won’t my Roomba self empty after all this, work the chain in the order the failures actually happen. The bag and the evacuation path account for two thirds of cases, the communication layer explains the maddening dock-and-charge-but-never-empty symptom, and two minutes in the app rules out the software causes no amount of disassembly will touch.
The one thing worth changing permanently is the monthly routine. Nine minutes and forty seconds a month took my failure rate from thirty-one incidents in eight weeks down to ten in six.
If you have worked all six fixes and the motor still makes no sound on either trigger, that is your answer and it is not a home repair. Check your warranty status first, because a call costs nothing and a replacement dock does not.
Read it your way
Short on time? Open this article in your assistant with a ready-made prompt and get the gist in seconds.
Found this useful? Make us a preferred source so we show up in your Google results.
Keep reading
Related articles

Troubleshooting & Repair
Roomba Not Working? 8 Symptoms Fixed (2026 Models)
Reboot first, then match your symptom. 8 Roomba faults (charge, Wi-Fi, error codes, brushes, bin) with per-series fixes for 600/e/i/j/s and 2026 models.

Troubleshooting & Repair
How Much Does a Vacuum Repair Cost? Fix or Replace (2026)
How much does a vacuum repair cost? Usually $50–150 (up to ~$321 for central). Use the 50% rule and our brand tier to decide: fix it or replace it in 2026.

Troubleshooting & Repair
Why Won’t My Robot Vacuum Work? 6 Fixes We Tested
Why won’t my robot vacuum work? Reset it, free the wheels, clean the sensors and fix a 2.4GHz Wi-Fi snag in 5 minutes: the DIY checks that skip a repair bill.

Troubleshooting & Repair
Not Broken? Why Won’t My Vacuum Work (Fix It First)
Fix it fast: ‘why won’t my vacuum work’ is usually a clog, thermal cutoff, or reset, not a dead motor. Match your symptom to the exact fix.
The discussion
Comments
Every comment is reviewed before it goes live.