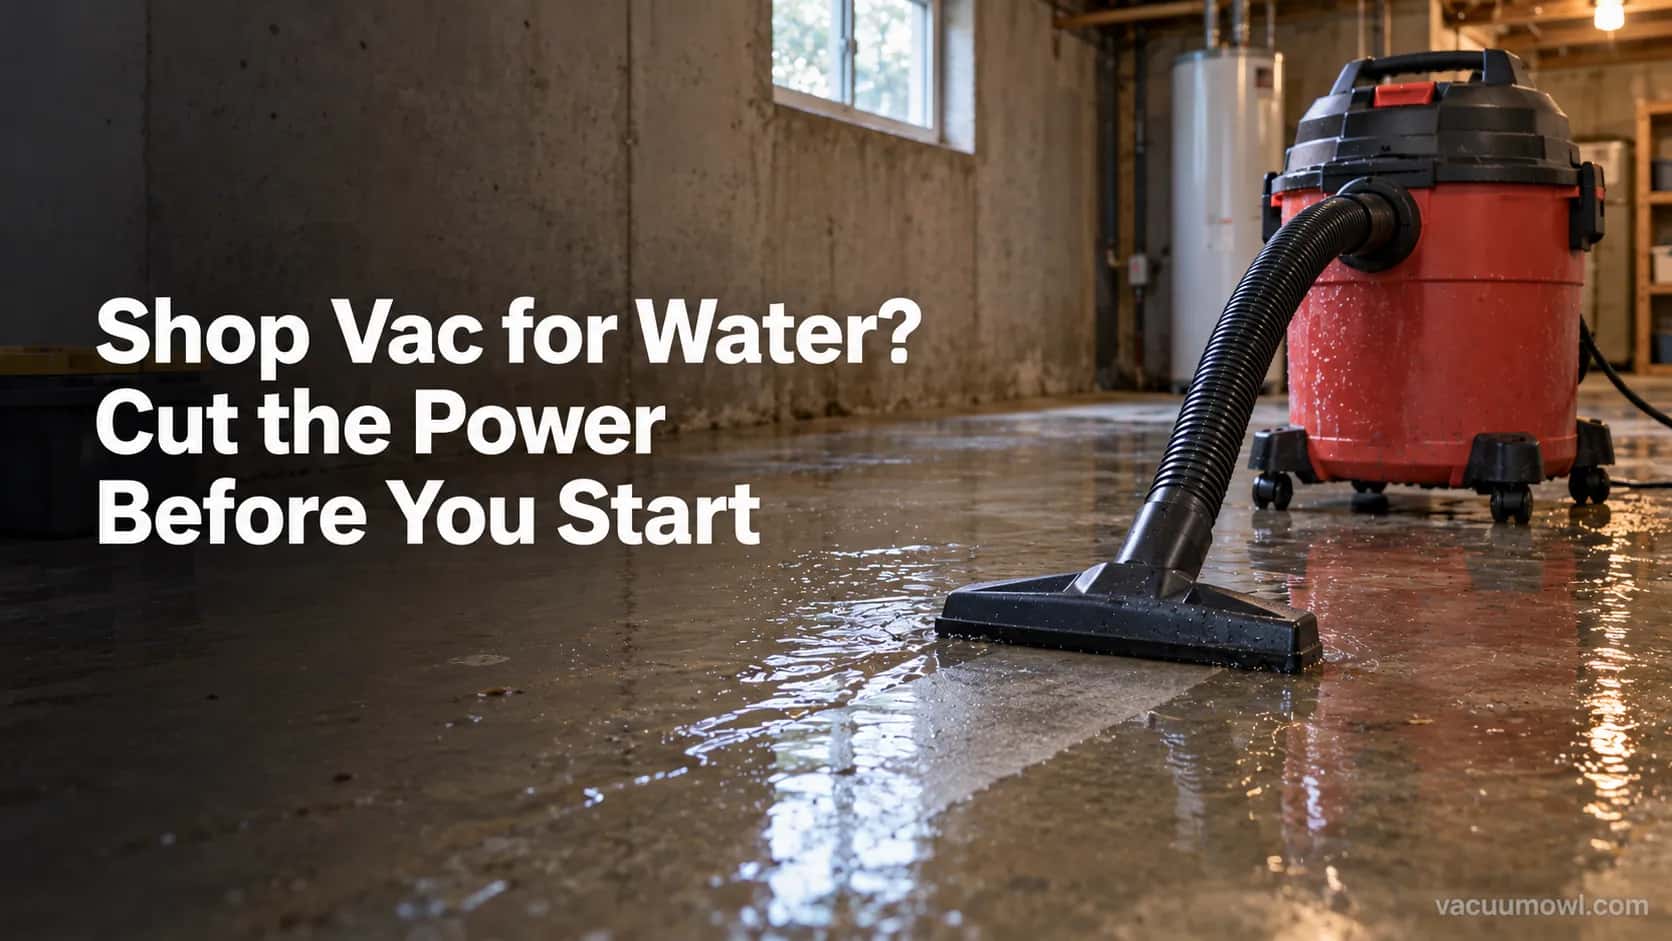
Shop Vac for Water? Cut the Power Before You Start
Use a shop vac for water the safe way: cut the power near outlets, pull the paper filter, and learn when 6 gallons means calling a pro.
Written by Dr. Naomi TranReviewed by Dale FerrisLast updated on September 24, 2026
When you buy parts or vacuums through links on our site, we may earn a commission at no extra cost to you. It never changes what we recommend. Learn more.
Read it your way
Short on time? Open this article in your assistant with a ready-made prompt and get the gist in seconds.
Found this useful? Make us a preferred source so we show up in your Google results.
A burst supply line once left about two inches of water across my laundry room, and the first question was the one you are probably asking now.
Can a shop vac for water actually handle this, or am I about to ruin the motor?
The short answer is yes, because a wet/dry vacuum is built for exactly this.
The part almost every guide skips is that the filter is the easy decision.
The two calls that matter more are whether it is safe to plug anything in near standing water, and whether the spill is already bigger than your tank can chase.
Get those right and the rest is routine.
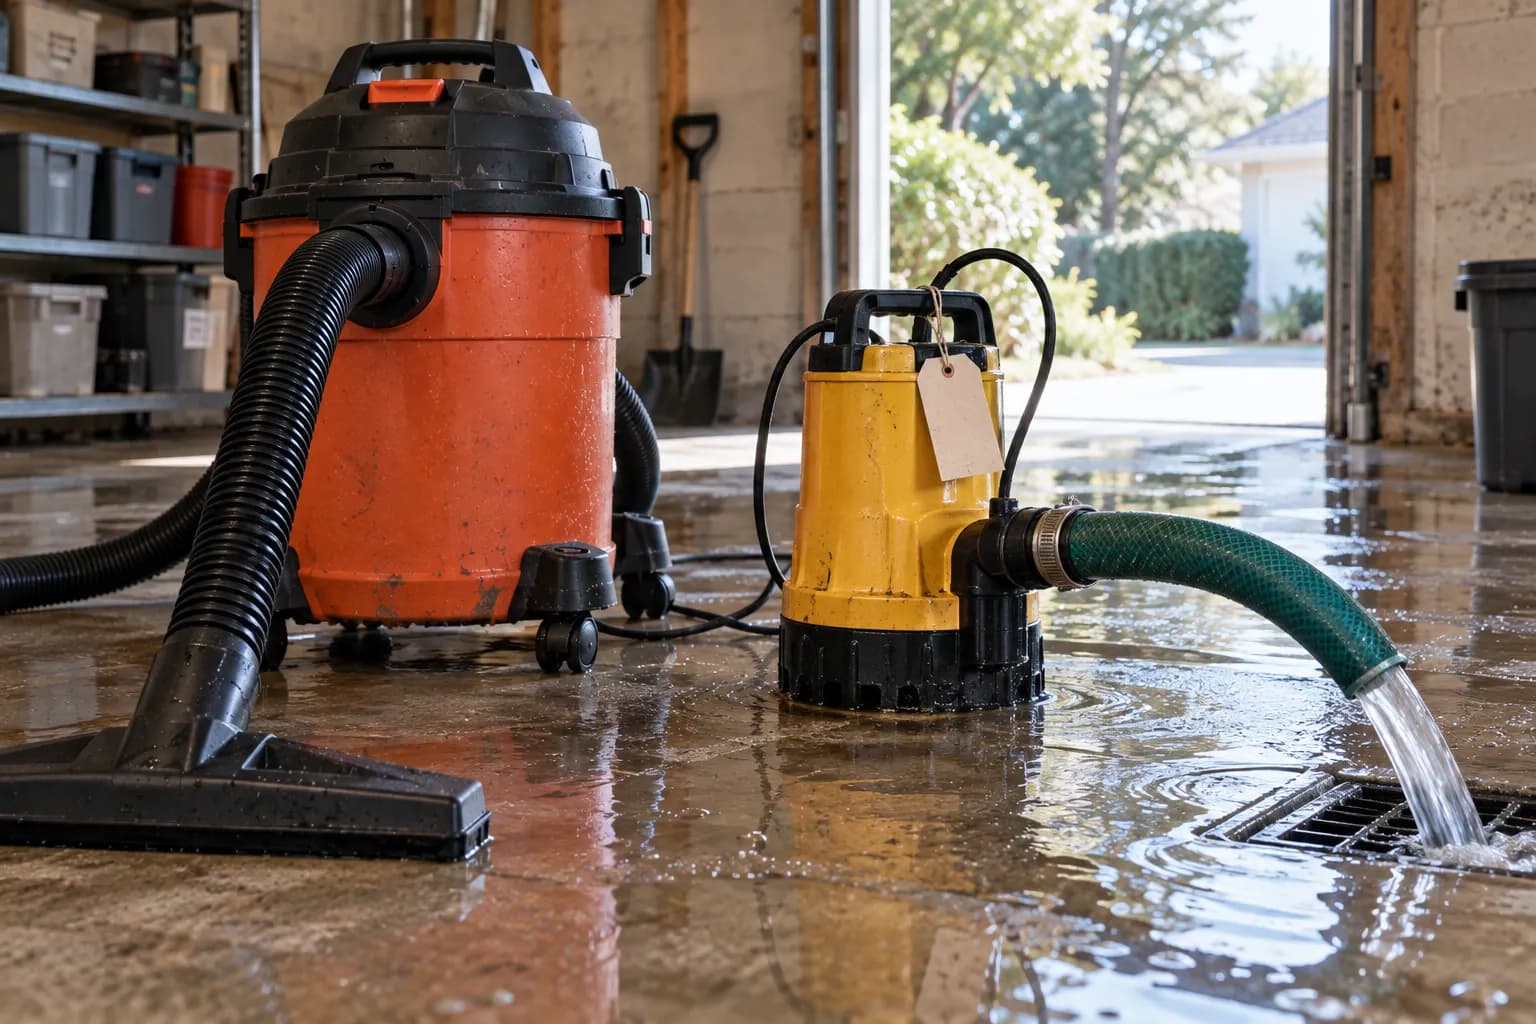
A wet/dry vacuum picks up standing water once you remove the dry paper filter or fit a foam wet filter, keeping the float shut-off in place.
Before that, cut power to any circuit near the water and run the vacuum on a GFCI outlet.
A typical 6-gallon tank holds only about 4 gallons of water before the float trips, roughly 33 pounds, so you will empty often.
Past 30 to 40 gallons total, or with any contaminated water, switch to a pump or call a pro.
Can a Wet/Dry Vac Pick Up Standing Water?
A wet/dry vacuum can pick up standing water, and it is one of the few household tools designed to do it.
The only requirement is airflow through a wet-rated setup, which means pulling the dry paper or cartridge filter, or sliding on the foam sleeve, so the media never soaks through.
According to Lowe’s wet-dry vac guide, dry cartridge filters must come out before you vacuum any liquid.
Do that, keep the float in place, and empty every few gallons, and the machine will move water all day.
The first time I ran a bare-cage pickup, I had forgotten to remove the paper filter, and within a minute it sagged and collapsed into pulp.
That one mistake is why every wet job starts by taking the filter off.
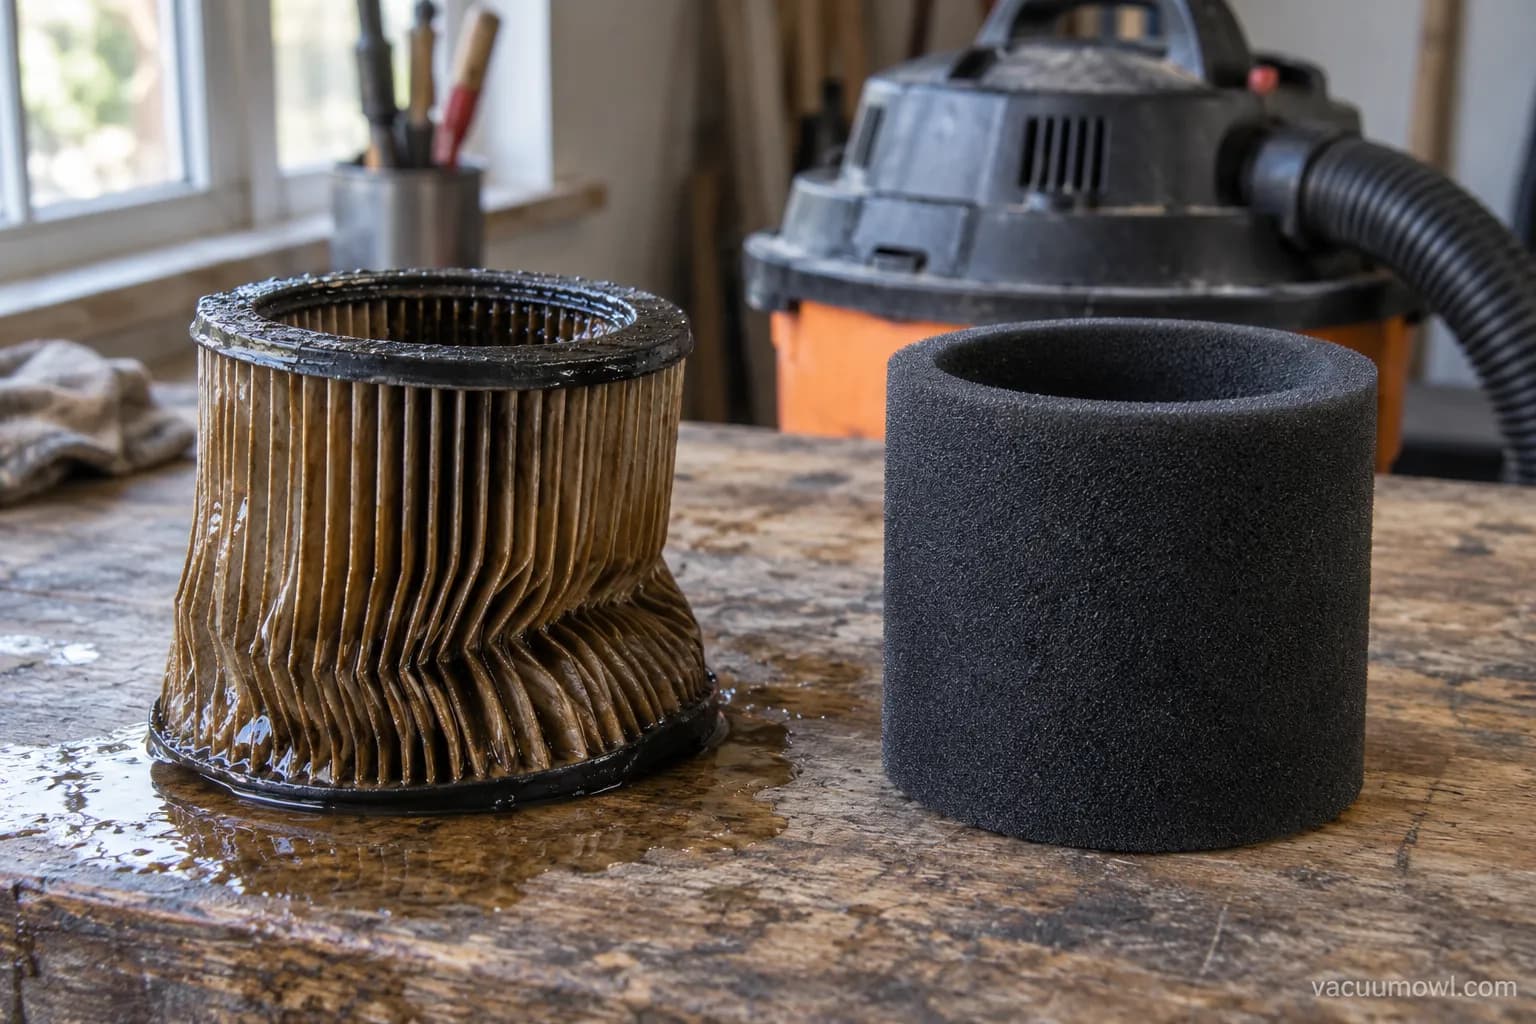
That is the whole trick, which is why the yes or no takes thirty seconds. What comes next takes longer, because the two things that actually go wrong on a flooded floor are electrical safety and volume.
Before You Plug In: The Standing-Water Safety Check
Standing water in a basement is an electrical hazard first and a cleanup job second. Water that touches an energized outlet, cord, or appliance can make the whole puddle live.
That is why ESFI’s flood electrical guidance says to keep power off in a flooded space until the area is confirmed safe. Never wade in to start vacuuming before you have dealt with the power.
If you are not certain your machine is a true wet/dry unit rather than a dry-only vacuum, what a shop vac really is settles that first. A dry-only vacuum must never touch standing water.
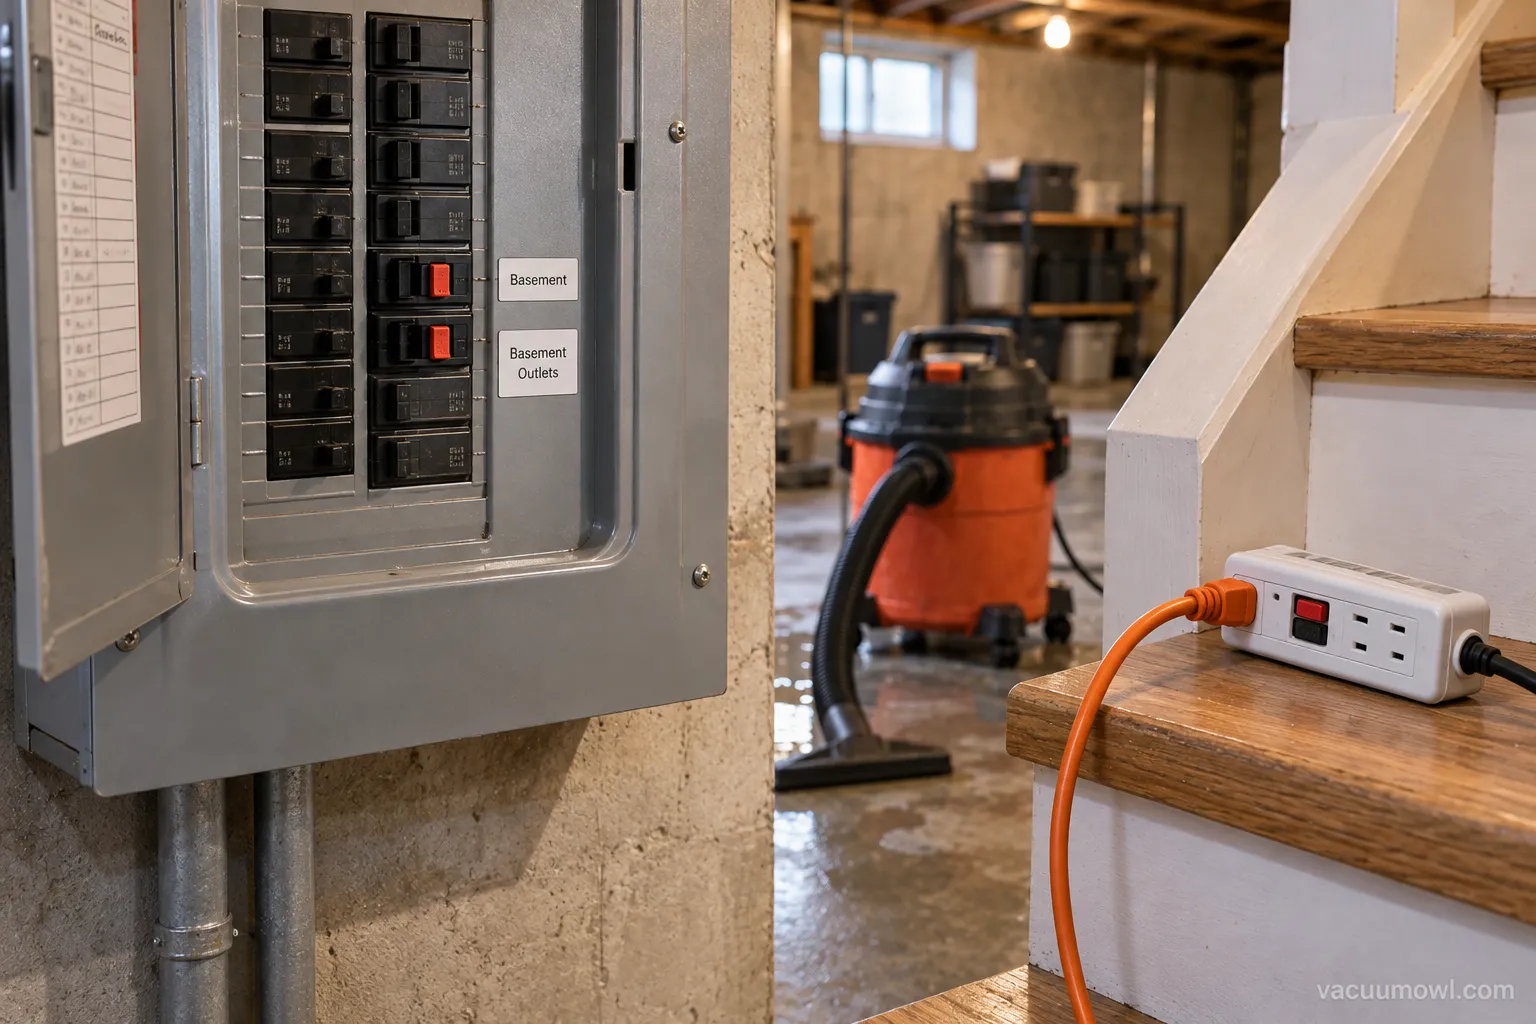
The rule that governs everything else is simple: do not touch a breaker while you are standing in or near water.
If you cannot reach a dry panel safely, Safe Electricity advises staying out and calling the utility to cut power at the meter.
If the panel is dry and within reach without stepping into the wet zone, kill the circuits feeding the flooded area. Then confirm the power is actually off before anything else.
Once power to the wet area is off, plug the vacuum into a GFCI-protected outlet or a portable GFCI strip run from a dry spot.
Electric-cooperative safety guidance recommends GFCI protection for a wet/dry vacuum during cleanup, because it trips on a ground fault before the current reaches you.
Keep the vacuum body and every cord up out of the water. Never run a cord through the puddle you are clearing.
A wet/dry motor pulls real amperage, so it is worth knowing how much power it draws before loading a circuit that is already busy.
Match the machine to a circuit that carries it without nuisance trips.
Stop and call a professional if water is at or above outlet height, the electrical panel got wet, the panel is buzzing or warm, or the water smells of sewage or fuel.
None of those are DIY situations, and no vacuum changes that.
With the power handled, the setup itself is quick. If you want the routine end to end, the complete wet-pickup walkthrough runs through filters, passes, and cleanup in one place.
How to Set Up a Shop Vac for Water (Filters Off, Step by Step)
Setting up a wet/dry vac for water pickup takes six steps, and each one has a cue that confirms it worked.
The core move is removing the dry filter so it cannot soak through, then checking that the float shut-off can rise.
RIDGID’s wet-filter guidance specifies a foam wet-application filter for its five-gallon-and-up models, with bare-cage or foam use on smaller ones.
Water is just one use among the wet and dry jobs these machines cover, and each has its own filter rule.
It helps to understand how the machine moves air before you strip it down. The filter and float are what keep that airflow from carrying water into the motor.
Unplug and empty the tank. Clear any dry debris first so it does not turn to sludge. Cue: the drum is empty and dry before a drop of water goes in.
Pull the paper filter or fit the foam sleeve. Take the cartridge off the cage, or slide the foam wet filter over it. Cue: the cage is bare, or the foam sits fully seated with no gaps.
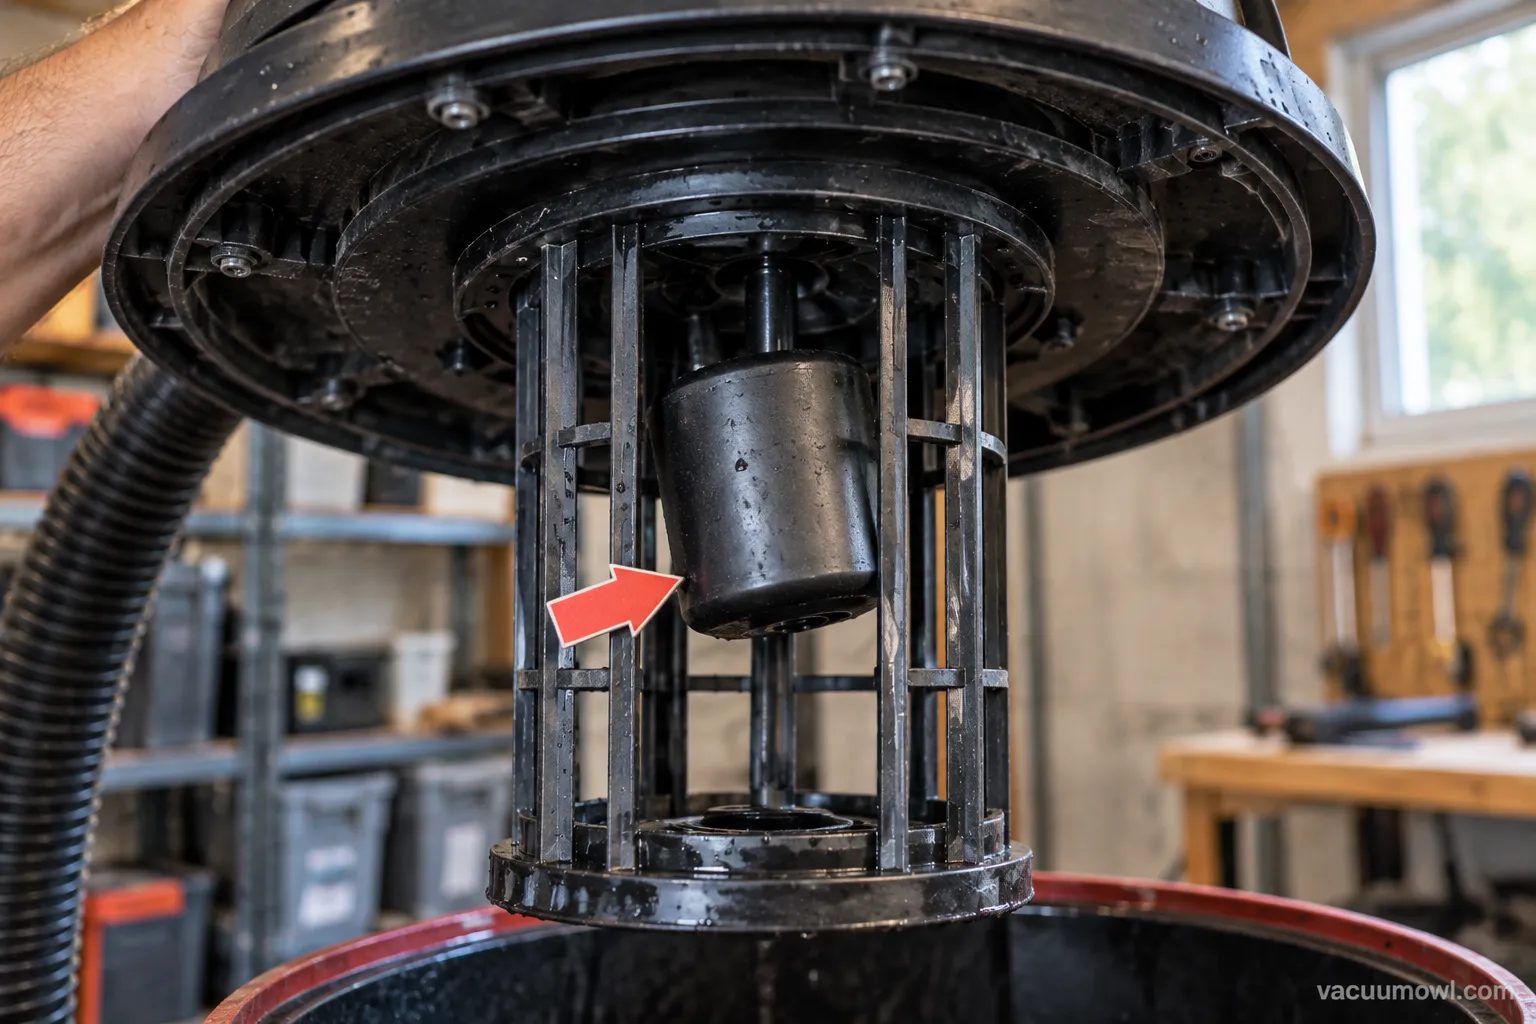
Check the float shut-off. Find the float or ball inside the lid and make sure it moves freely. Cue: it rises and drops when you tilt the head, with nothing jamming it.
Fit the wide wet nozzle. Swap to the squeegee or flat floor nozzle. Cue: the lip sits flat against the floor for a clean pull.
Plug into the GFCI and start pulling. Work in slow, overlapping passes toward the lowest point. Cue: you can see water climbing into the tank on each pass.
Listen for the tank to fill. As the float rises, the motor pitch climbs and suction drops. Cue: that high-pitch sound means the tank is full, so stop and empty it.
On my six-gallon unit, the bare cage pulled water fastest but misted a fine spray until I reseated a float that had hung up.
The foam sleeve was the tidier trade-off: slightly less raw suction, no mist.
That mist is the difference the manuals skip. Vacmaster’s filter guide is right that the foam element should be cleaned and air-dried after each wet job so it is ready next time.
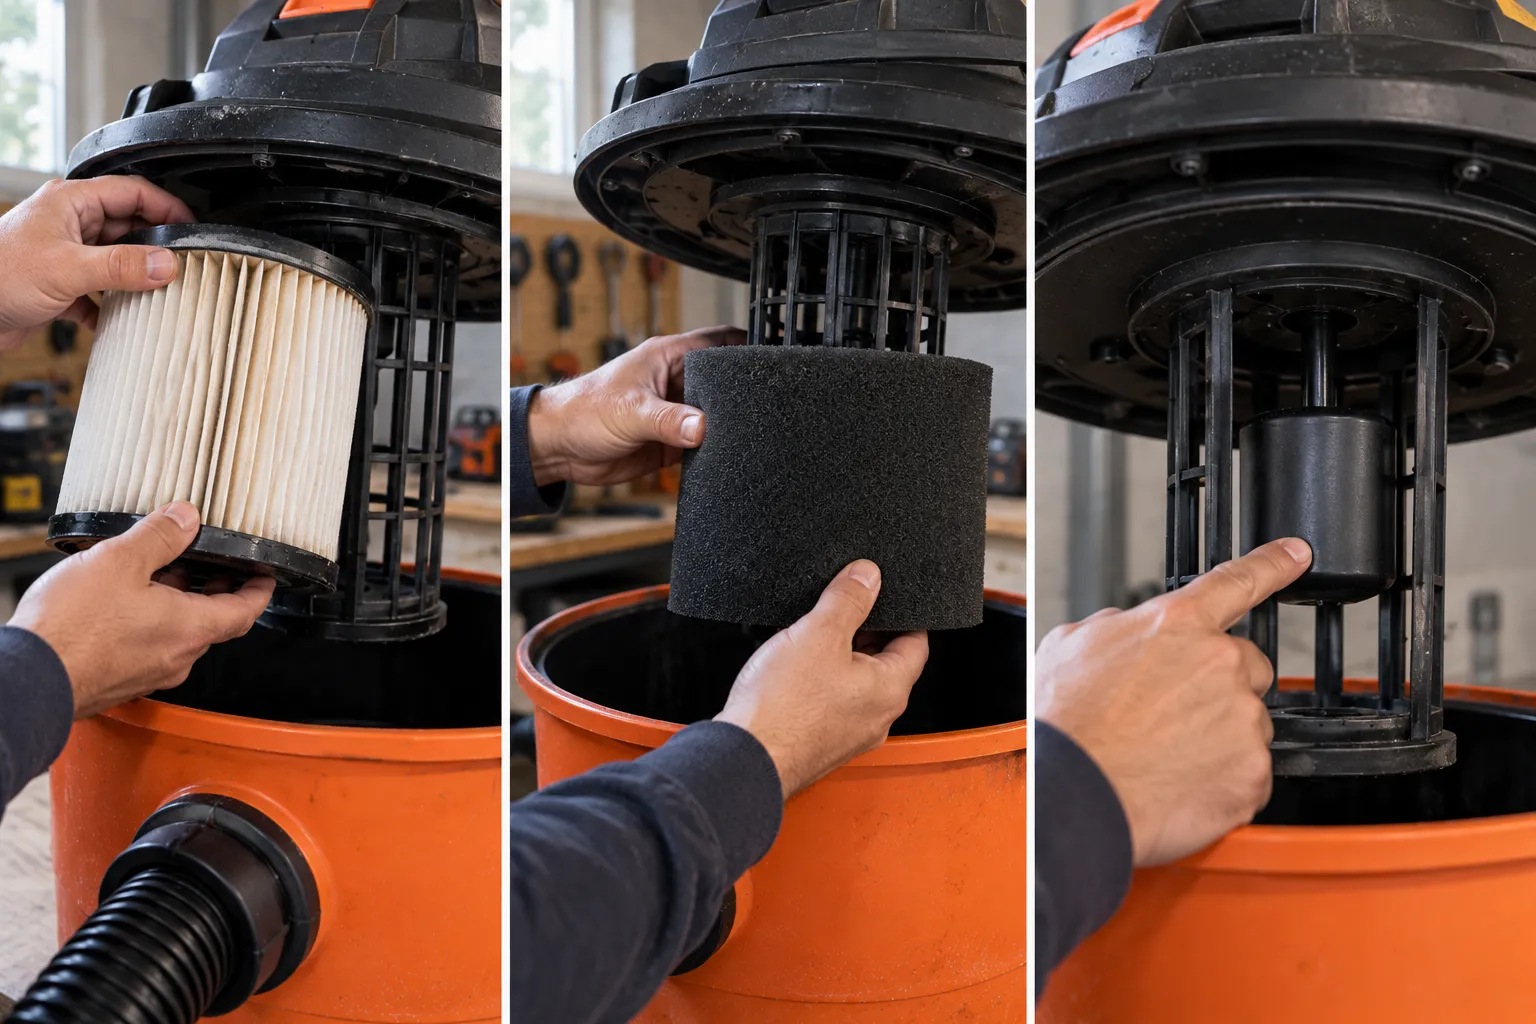
If you would rather follow the operation pass by pass, a dedicated step-by-step for wet pickup walks each one. Either way, the filter-and-float check is the part that matters.
How Much Water Can a Shop Vac Hold? (The Gallons Math)
A shop vac holds far less water than its label suggests, because the float shut-off leaves headroom and water is heavy.
Water weighs 8.34 pounds per U.S. gallon, so a nominal 12-gallon drum filled to the brim would carry about 100 pounds.
That weight is why the float trips at roughly two-thirds first. On my 6-gallon unit it cut off near 4 gallons, about 33 pounds, and clearing a 10-by-12 laundry-room flood took seven empties.
That empties-per-job number, not the tank size on the box, decides whether the machine is the right tool.
The table below comes from that timed run, applying the same two-thirds usable ratio and the 8.34-pounds-per-gallon constant across common sizes.
Nominal tank | Usable water before float cut-off | Weight of that water | Realistic job it suits |
|---|---|---|---|
2 gallon | about 1.3 gallon | about 11 lb | a single small spill or appliance leak |
5 gallon | about 3.3 gallon | about 28 lb | a sink overflow or one small room |
6 gallon | about 4 gallon | about 33 lb | one flooded room, emptied several times |
9 gallon | about 6 gallon | about 50 lb | a larger room, if you can lift it |
12 gallon | about 8 gallon | about 67 lb | a basement section, two-handed drag to drain |
16 gallon | about 10.5 gallon | about 88 lb | big jobs, but very heavy to move full |
Draining fast matters as much as capacity. Most tanks have two ports, an intake and a blower outlet, and knowing the two holes on the tank helps you route a drain hose to the right one.
If your model has a bottom drain plug, run a hose from it to a floor drain and let gravity empty the tank instead of tipping 60 pounds over a sink.
Emptying every few gallons keeps the load manageable and the float working.
Knowing how the gallon tiers break down helps before you buy, because a bigger drum only helps if you can still lift it full. Capacity is only half the picture.
Suction and lift decide pickup speed too, so it is worth reading CFM, HP and water lift explained alongside raw tank size. A high-lift motor clears a given volume in fewer passes.
Some models double as a blower, and you can switch it to blower mode to push a thin sheet of residual water toward a drain before the final passes.
Past roughly 30 to 40 gallons of total pickup, hand-emptying stops making sense.
When a Shop Vac Isn’t Enough: Pump, Rental, or Pro
A shop vac stops being the right tool when the water keeps coming or the volume passes what you can empty by hand.
For a routine spill under roughly 30 to 40 gallons, the batch-emptying tank still wins on speed and simplicity.
For continuous inflow, a built-in-pump model that discharges through a hose beats stopping to dump a drum.
When a pump changes the math entirely, a rental unit clears standing water in minutes rather than trips.
The honest ceiling is contamination. EPA’s water-damage guidance is clear that sewage or chemically contaminated water needs PPE, containment, and professional handling, not a household vacuum.
After about nine empties on that laundry-room job, I stopped fighting the drum and ran a rented utility pump for 35 dollars a day. It cleared the rest in about twenty minutes.
Option | Best for | Effort | Rough cost | When to stop using it |
|---|---|---|---|---|
Shop vac, batch emptying | routine spills up to 30 to 40 gallons | high, empty every few gallons | already owned | contaminated water or water above outlet height |
Built-in-pump wet/dry vac | steady inflow you want pumped out | low, it discharges as it fills | about 150 to 300 dollars | sewage or very large volume |
Rental pump or water extractor | large volumes of clean water | medium, set it and monitor | about 35 to 75 dollars per day | any contaminated water |
Restoration professional | contaminated water, water past 48 hours | low, they handle it | varies by job | not applicable, this is the escalation |
The line most people miss is the water category. Clean supply-line water is a DIY job, gray water from appliances is borderline, and black water from sewage or storm flooding is a professional call, full stop.
There is a broader pattern here, because where each job hits its limit is really about matching the tool to the load.
A tank sized for chips and sawdust was never meant to bail out a basement.
It also helps to know shop vac versus a household vacuum so you never point a dry-only machine at a wet floor. The wrong tool here is a shock risk, not just a slow one.
Water is one of several jobs with a catch, and the yes-but-only-if on leaves is another worth reading before you try it. Each wet or bulky job has its own filter and its own limit.
After the Water’s Up: Drying, Mold & Cleaning the Vac
Getting the water up is only half the job, because mold starts on wet materials fast. The EPA advises drying water-damaged areas within 24 to 48 hours to prevent mold growth, and in 2026 that window is still the benchmark restoration pros work to.
Once the standing water is gone, move air across everything with fans, a dehumidifier, and open cavities where water hides.
EPA’s flood-cleanup guidance notes that mold can take hold when materials stay wet beyond that first day.
For hard floors and slabs, the sequence is extract, then dry. EPA’s mold course describes removing water with a wet vacuum first, then drying concrete and cinder block with fans, dehumidifiers, and heat.
One caution applies if you suspect the water was contaminated: do not run household fans across it.
Moving that air spreads spores and contaminants through the house.
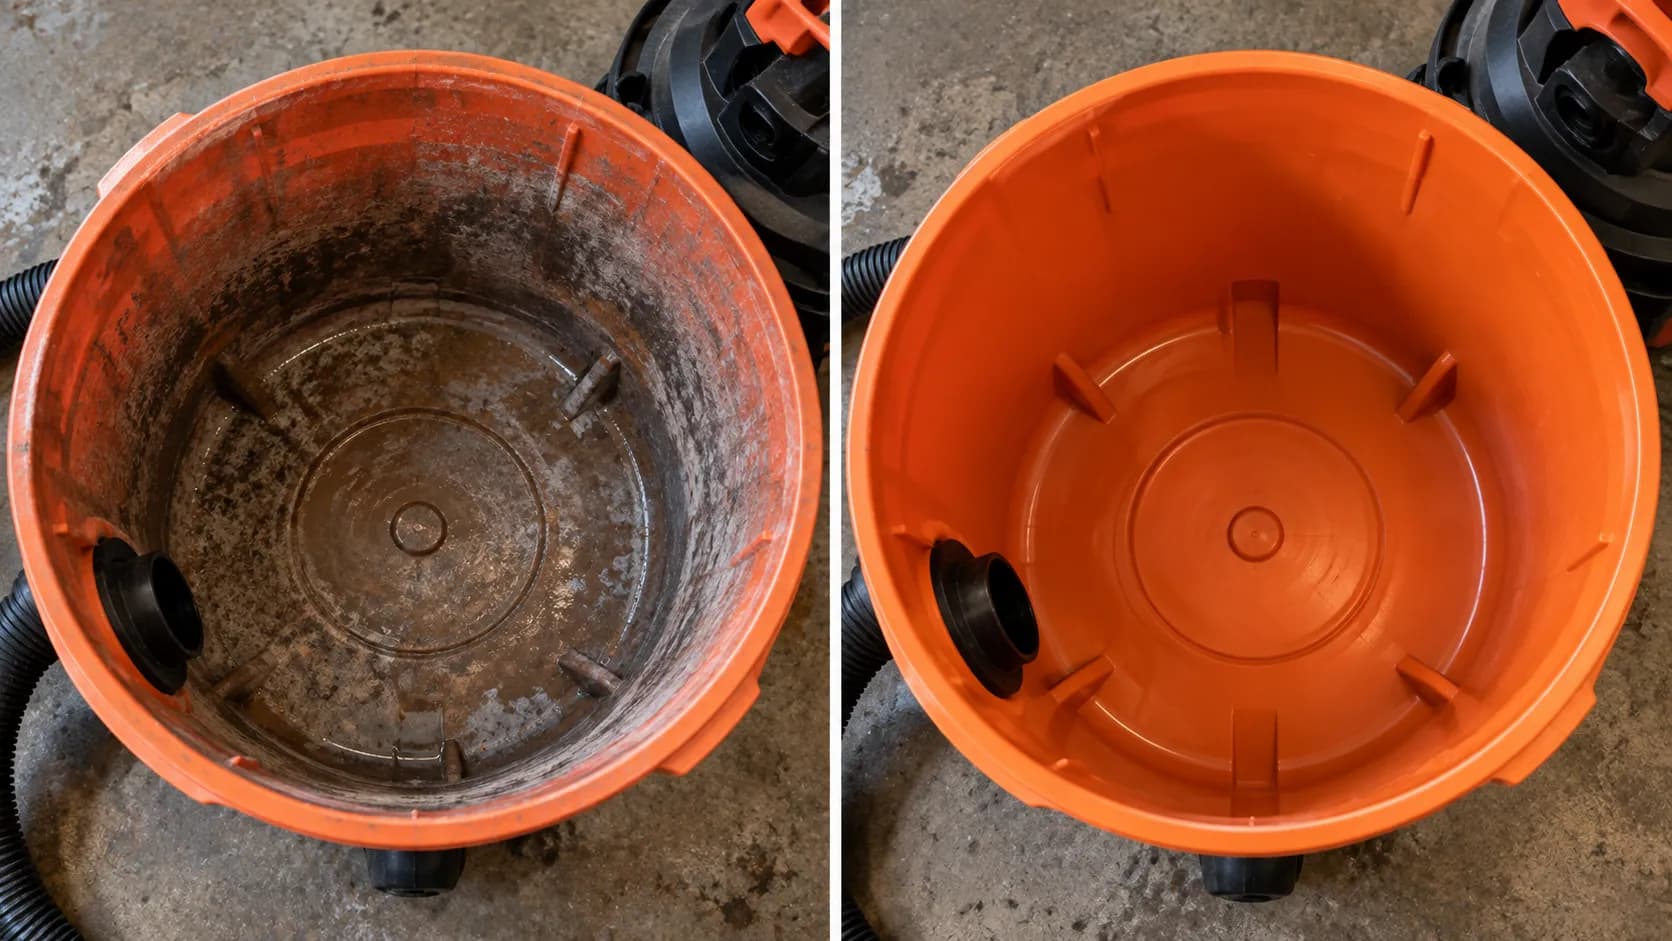
Then clean the machine so it does not turn against you. Rinse the tank, clean and air-dry the foam filter, and store the drum with the lid off or loosely set.
The one time I sealed my drum while it was still damp, it grew a musty film across the plastic in about two days. Left vented, it stayed clean and odor-free.
Drying a different mess calls for a different filter, and the drywall-dust filter setup is the opposite of what you just used for water. Fine dust needs media in place, not pulled out.
Once the vac is clean and dry, getting it up off the floor keeps the drum airing between jobs. A wall spot also keeps it clear of the next puddle.
Mistakes That Wreck Your Vac (or Shock You)
Most wet-pickup failures come from a handful of avoidable errors, and the worst two are a soaked filter and a stuck float.
Getting these right separates a machine that lasts from one that sprays water out the top on its first job.
None of these mistakes are subtle once you know them. Each has a one-line fix that takes seconds.
Leaving the paper filter in. It soaks, clogs, and strains the motor within minutes, so pull it or fit the foam sleeve before any water.
Removing or jamming the float. With no working float, water rises past the cutoff and reaches the motor, so keep the float in and confirm it moves freely.
Skipping the dry-debris dump. Vacuuming water over dry dirt makes a heavy sludge that clogs the drain, so empty the tank dry first.
Plugging into a non-GFCI outlet near water. This is the shock risk, not a motor risk, so use GFCI protection every time.
Pointing the wet setup at the wrong mess. Warm ash, embers, and fuels are a fire hazard, so never vacuum warm ash with any filter setup.
Will vacuuming water burn up the motor?
No, vacuuming water will not burn up the motor as long as the dry filter is out and the float shut-off works. The motor sits above the airflow, and the float is what stops water from ever reaching it.
What actually causes damage is a stuck or missing float letting water climb into the fan housing. My float hung open once and a fine mist blew from the exhaust, and a ten-second reseat fixed it.
For fine dry powders later on, the answer is a cyclone separator for fine debris, not a bare tank that lets dust reach the motor. That is a dry-side upgrade, separate from wet pickup.
Frequently Asked Questions
Do I take the filter off my shop vac for water?
Yes, take the dry paper or cartridge filter off before vacuuming water, or replace it with a foam wet filter if your model uses one. The dry media soaks through and clogs almost immediately, while the float shut-off stays in place to protect the motor.
Does a shop vac need a special filter for water?
A shop vac does not strictly need a filter to pick up water, but a foam wet filter helps. The bare cage gives maximum suction while the float guards the motor, though it can mist fine debris that foam would trap.
Do you remove the filter on a RIDGID for water?
On most RIDGID wet/dry vacuums you fit a foam wet-application filter for water rather than running bare, especially on five-gallon-and-up models. RIDGID publishes a specific wet filter for this, and the rule holds across brands: the dry pleated cartridge never does wet work.
How much water can a shop vac pick up before it’s full?
A shop vac usually holds about two-thirds of its nominal tank in water before the float cuts off. A 6-gallon drum stops near 4 gallons, roughly 33 pounds, so you will empty several times on any real flood.
Is it safe to vacuum water in a flooded basement?
It is safe only after you cut power to the flooded area and run the vacuum on a GFCI outlet. If water is at outlet height, the panel is wet, or the water is contaminated, stop and call a professional.
For the wider picture, the category guide covers what these machines are built to handle. Turning one into a dust collector is a separate setup entirely.
The Bottom Line
Using a shop vac for water comes down to sequence, not muscle. Make the area electrically safe, pull the dry filter or fit the foam, keep the float working, and respect the gallon ceiling your tank actually delivers.
The vacuum is capable, but it is a batch tool, and the honest move is knowing when a spill has outgrown it.
If the water is clean and modest, you can clear it yourself in an afternoon of empties.
The moment a hard limit appears, contaminated water, water rising toward your outlets, or a job past the 24 to 48 hour drying window, the smart call is a pump or a professional.
Dry the space fast, clean and vent the drum, and the machine will be ready for the next mess.
Get the safety and the volume right, and the filter really was the easy part all along.
Read it your way
Short on time? Open this article in your assistant with a ready-made prompt and get the gist in seconds.
Found this useful? Make us a preferred source so we show up in your Google results.
Keep reading
Related articles
Vacuum Types
Bissell Wet Dry Vacuum: 6 CrossWave Models Tested (2026)
Compare every Bissell wet dry vacuum: which CrossWave model fits pets, steam, or budget, plus fixes for streaks and floors that still look dirty. Tested 2026.
Vacuum Types
Washing Shop Vac Filter: Tap, Rinse & Reuse the Right Way
Rinse it right: this guide covers washing shop vac filter foam and paper, the tap-and-hose steps, the 24-hour dry rule, and when to just replace it.
Vacuum Types
Tineco vs Dreame Wet Dry Vacuum: 30-Day Test (2026)
Compare Tineco vs Dreame wet dry vacuum on suction, self-clean, edge reach and price, with a clear pick for pets, kids and big homes.
Vacuum Types
Is the DEWALT Shop Vac Worth It? Quiet StealthSonic Tested
Compare every DEWALT shop vac: StealthSonic quiet picks, cordless DCV580 and corded DXV, with measured noise, real suction specs and a value verdict.
The discussion
Comments
Every comment is reviewed before it goes live.