Washing Shop Vac Filter: Tap, Rinse & Reuse the Right Way
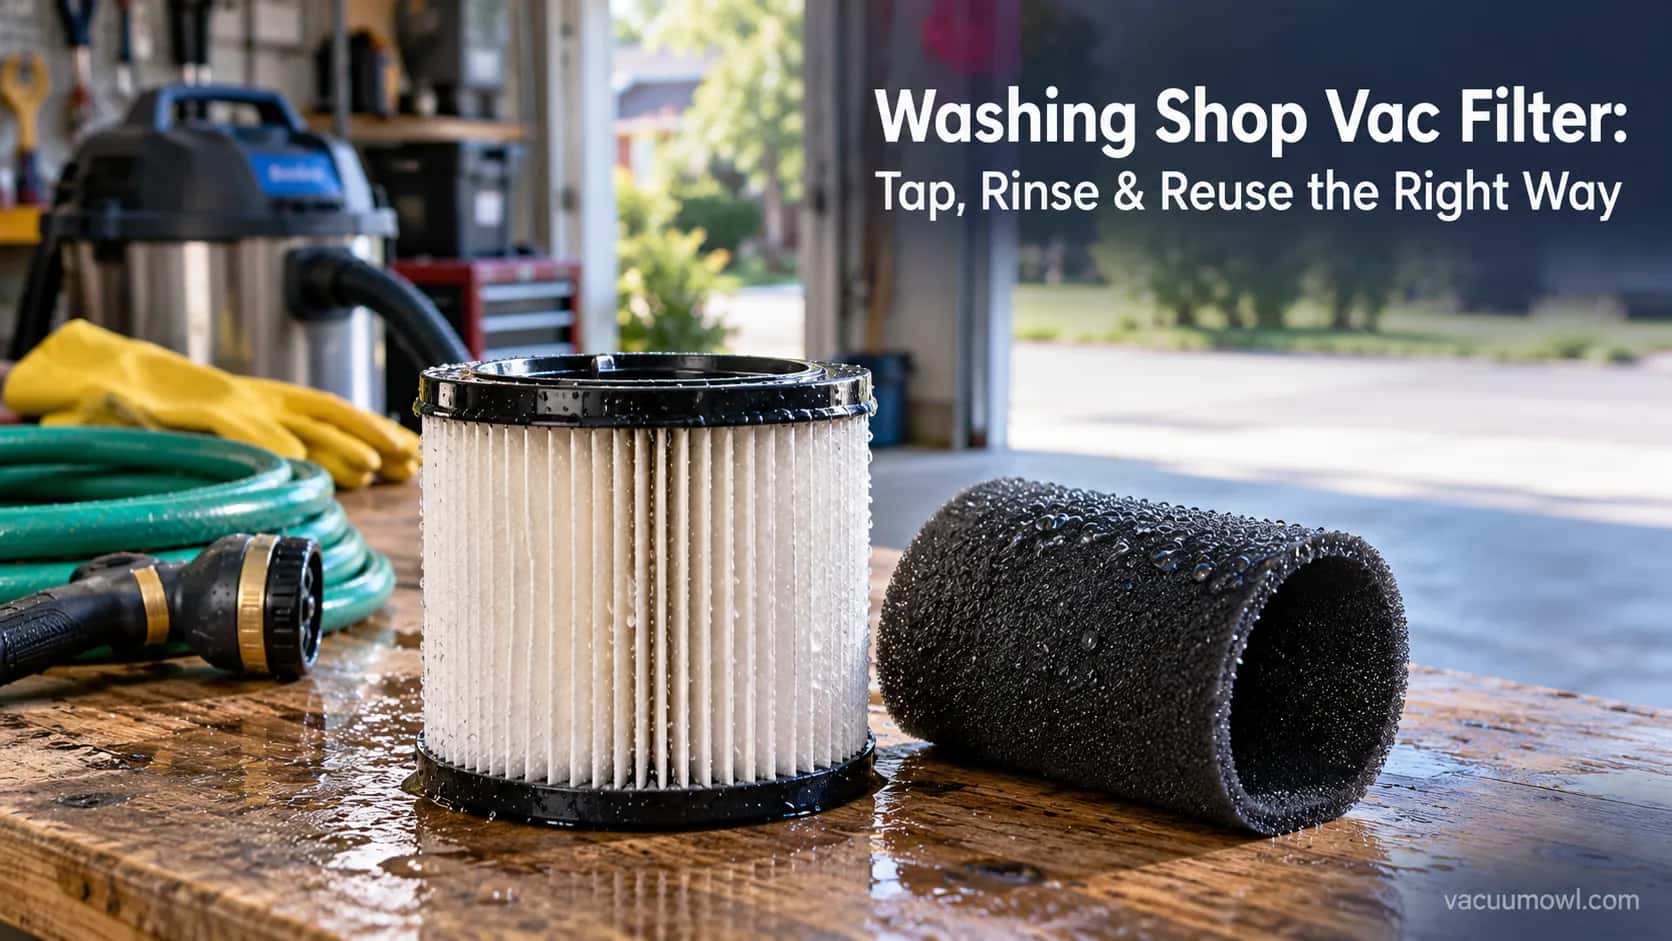
Rinse it right: this guide covers washing shop vac filter foam and paper, the tap-and-hose steps, the 24-hour dry rule, and when to just replace it.
Written by Dr. Naomi TranReviewed by Dale FerrisLast updated on September 24, 2026
When you buy parts or vacuums through links on our site, we may earn a commission at no extra cost to you. It never changes what we recommend. Learn more.
Read it your way
Short on time? Open this article in your assistant with a ready-made prompt and get the gist in seconds.
Found this useful? Make us a preferred source so we show up in your Google results.
Your suction has gone weak, the filter looks like a grey brick, and you are standing over the trash can wondering whether you can rinse it or ruin it.
Washing shop vac filter cartridges is usually the right call, but only if you know which media you are holding first.
The short version is simple.
Most foam sleeves and pleated synthetic filters wash and reuse beautifully, plain paper survives only a few rinses, and the mistake that actually kills filters is reinstalling one that is still damp.
You can wash a shop vac filter if it is foam or pleated synthetic.
Tap the dry dust out first, rinse from the inside out with a garden hose at low pressure (never a pressure washer), then air-dry it a full 24 hours before it goes back in.
Plain paper filters take only light rinsing and a handful of cycles.
Reinstalling a damp filter risks mold inside the tank and strain on the motor.
The 60-Second Answer: Can You Wash a Shop Vac Filter?
Yes, you can wash most shop vac filters, and the media decides the answer, not the brand.
Foam sleeves and pleated synthetic cartridges rinse clean and return to near-new suction, while plain paper tolerates only gentle rinsing and true HEPA elements need caution.
Per Shop-Vac’s own filter guidance, paper cartridge filters can be cleaned with water as long as they dry completely before reuse.
The one rule that never bends is that the filter must be bone-dry before it goes back in.
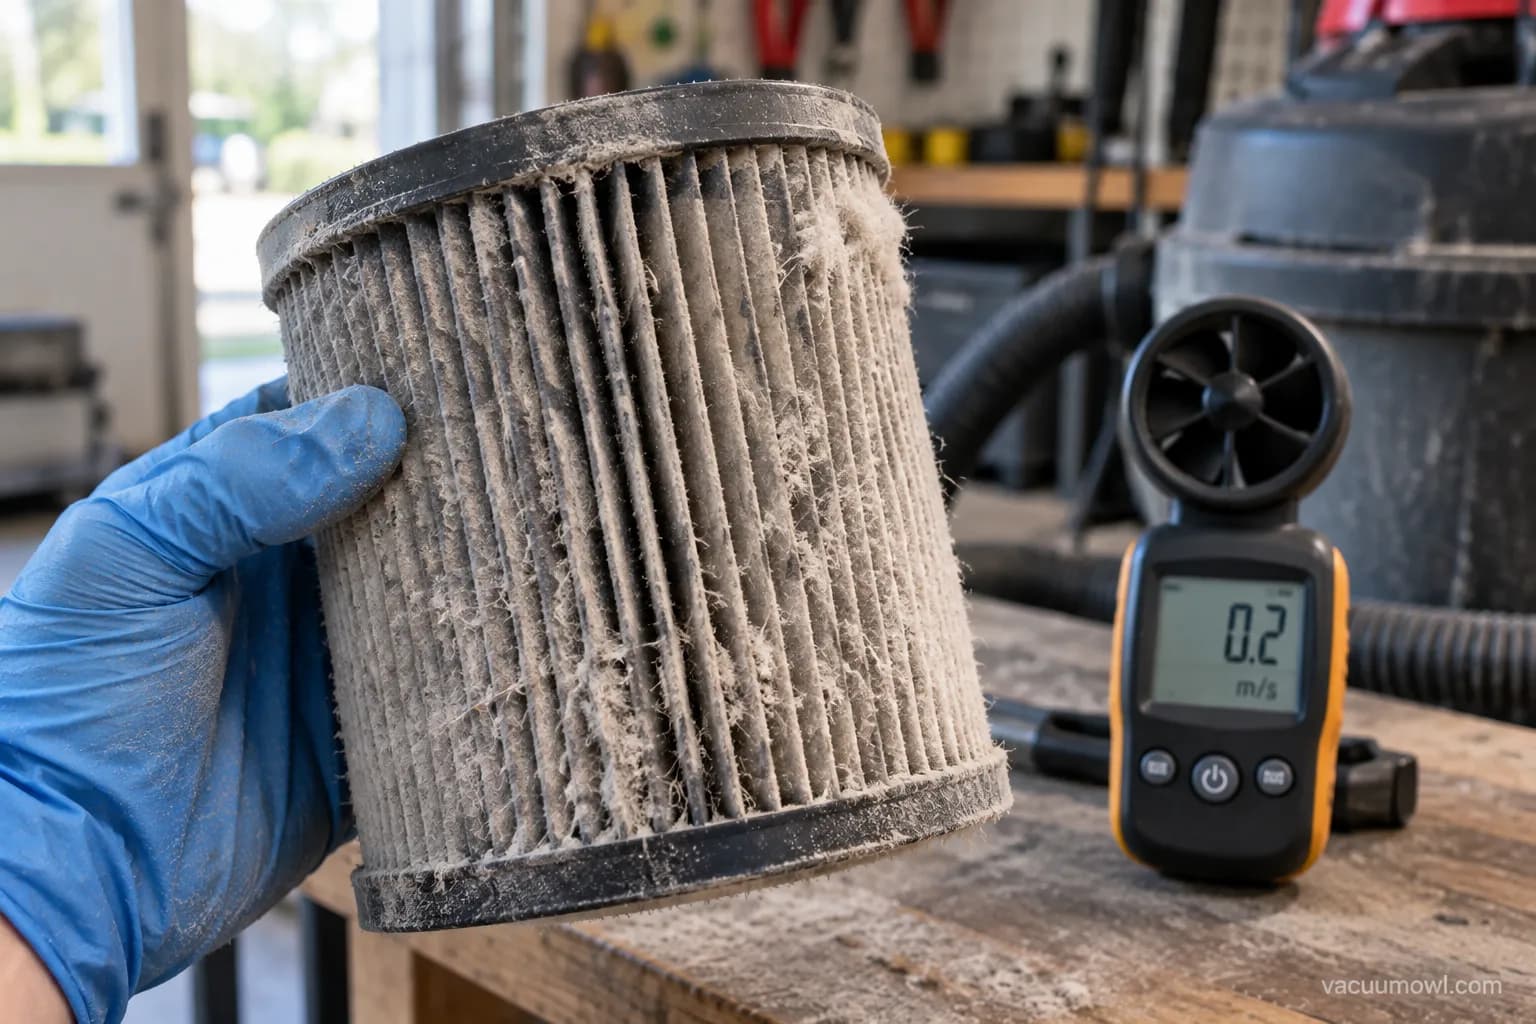
The first time I pulled the filter after a weekend of drywall sanding, my airflow reading was almost nothing.
It jumped back only once I identified the element as a washable pleated synthetic rather than paper, which decided whether I reached for the hose or the recycling bin.
Which Shop Vac Filters Are Washable (and Which Aren’t)
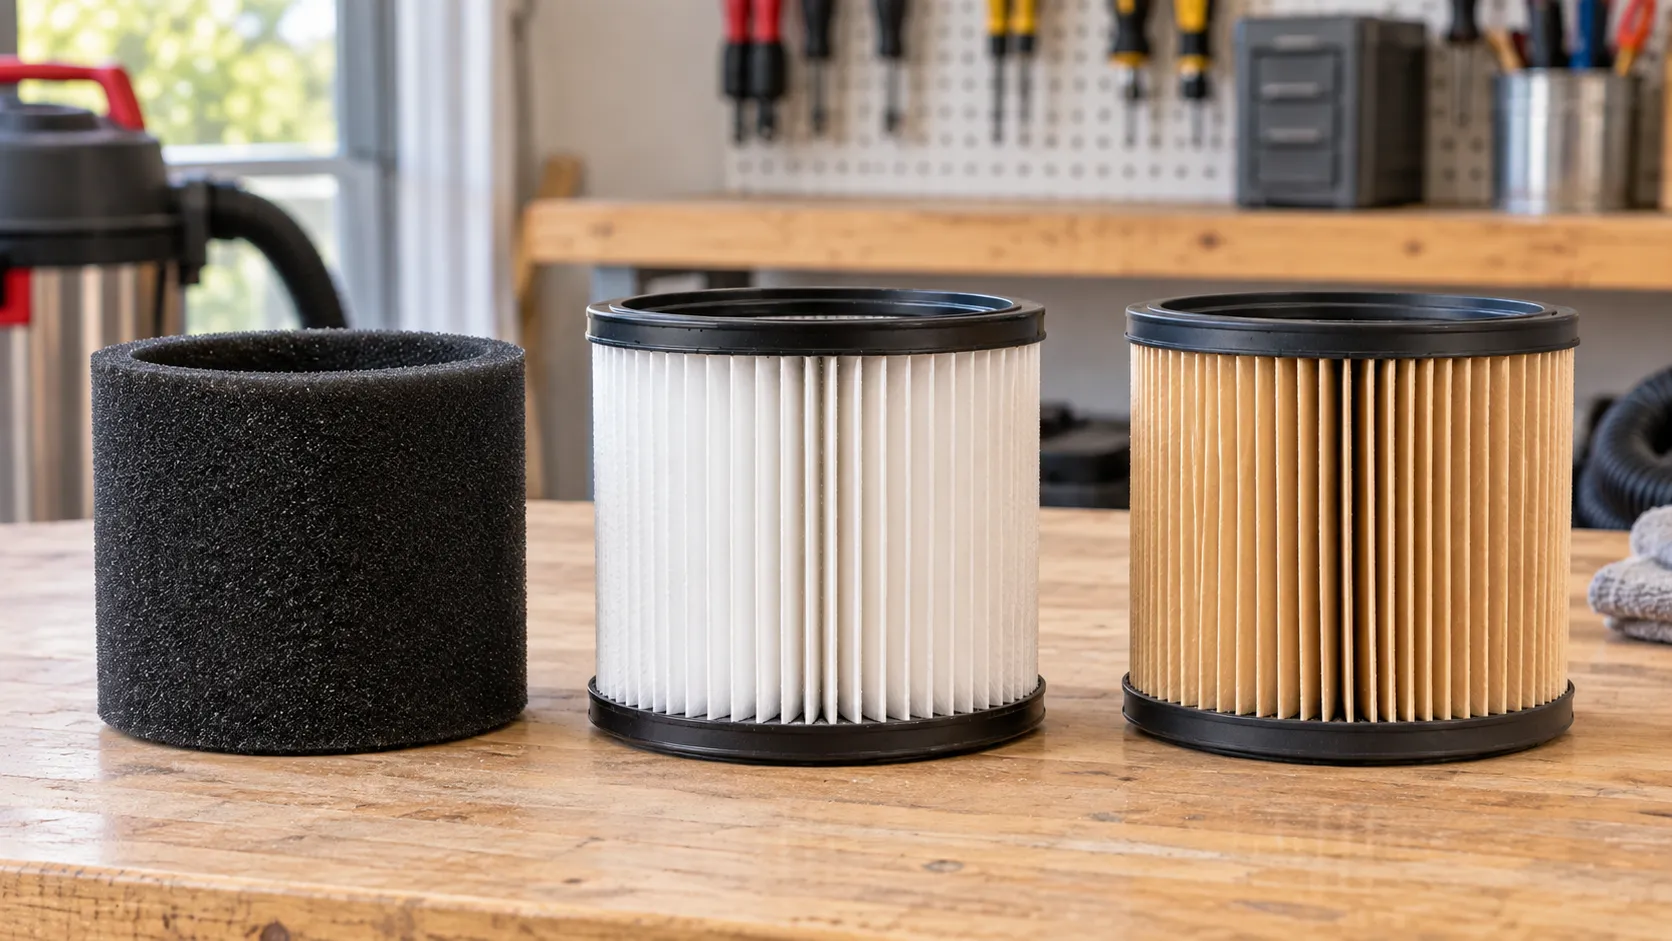
Shop vac filters split into four media types, and each has its own wash rule.
Foam sleeves are fully washable, pleated synthetic and nanofiber cartridges rinse like new, plain paper takes only limited gentle rinsing, and HEPA elements should be tapped rather than scrubbed.
RIDGID’s reusable pleated filters are a good example of the synthetic type built to be rinsed and reused across many jobs.
Knowing your media is the difference between a five-minute rinse and a wrecked part.
Filter media | Washable? | How to clean | Typical brand names |
|---|---|---|---|
Foam sleeve | Yes, fully | Rinse and squeeze, air-dry | Shop-Vac foam sleeve, RIDGID wet foam |
Pleated synthetic / nanofiber | Yes, rinses like new | Tap, then hose inside-out | Ultra-Web, CleanStream, RIDGID VF-series |
Plain paper pleated | Limited | Tap and gently rinse, few cycles | Standard cartridge, Craftsman red stripe |
HEPA / membrane | With caution | Tap; rinse only if labeled washable | HEPA cartridge, CleanStream Gore HEPA |
How do you tell which one you have? Paper is stiff and tan, synthetic pleats are bright white nanofiber, and a foam sleeve feels like a sponge.
The forum favorite here is the CleanStream or Gore filter, a washable synthetic that owners swap in so they never have to baby a paper element again.
If your machine still runs plain paper, that upgrade is the single best change you can make.
For a deeper breakdown of media and sizing, see our guide to every filter type explained.
If yours is a sealed HEPA cartridge, read the HEPA elements guide before you rinse anything.
Cross-referencing the model number on the old element confirms fit before you buy a washable replacement, which is where our matching filter model numbers chart helps.
And if you are still choosing between a filter and a disposable liner, weigh the bag-or-filter tradeoff first.
What You’ll Need (2 Minutes of Prep)
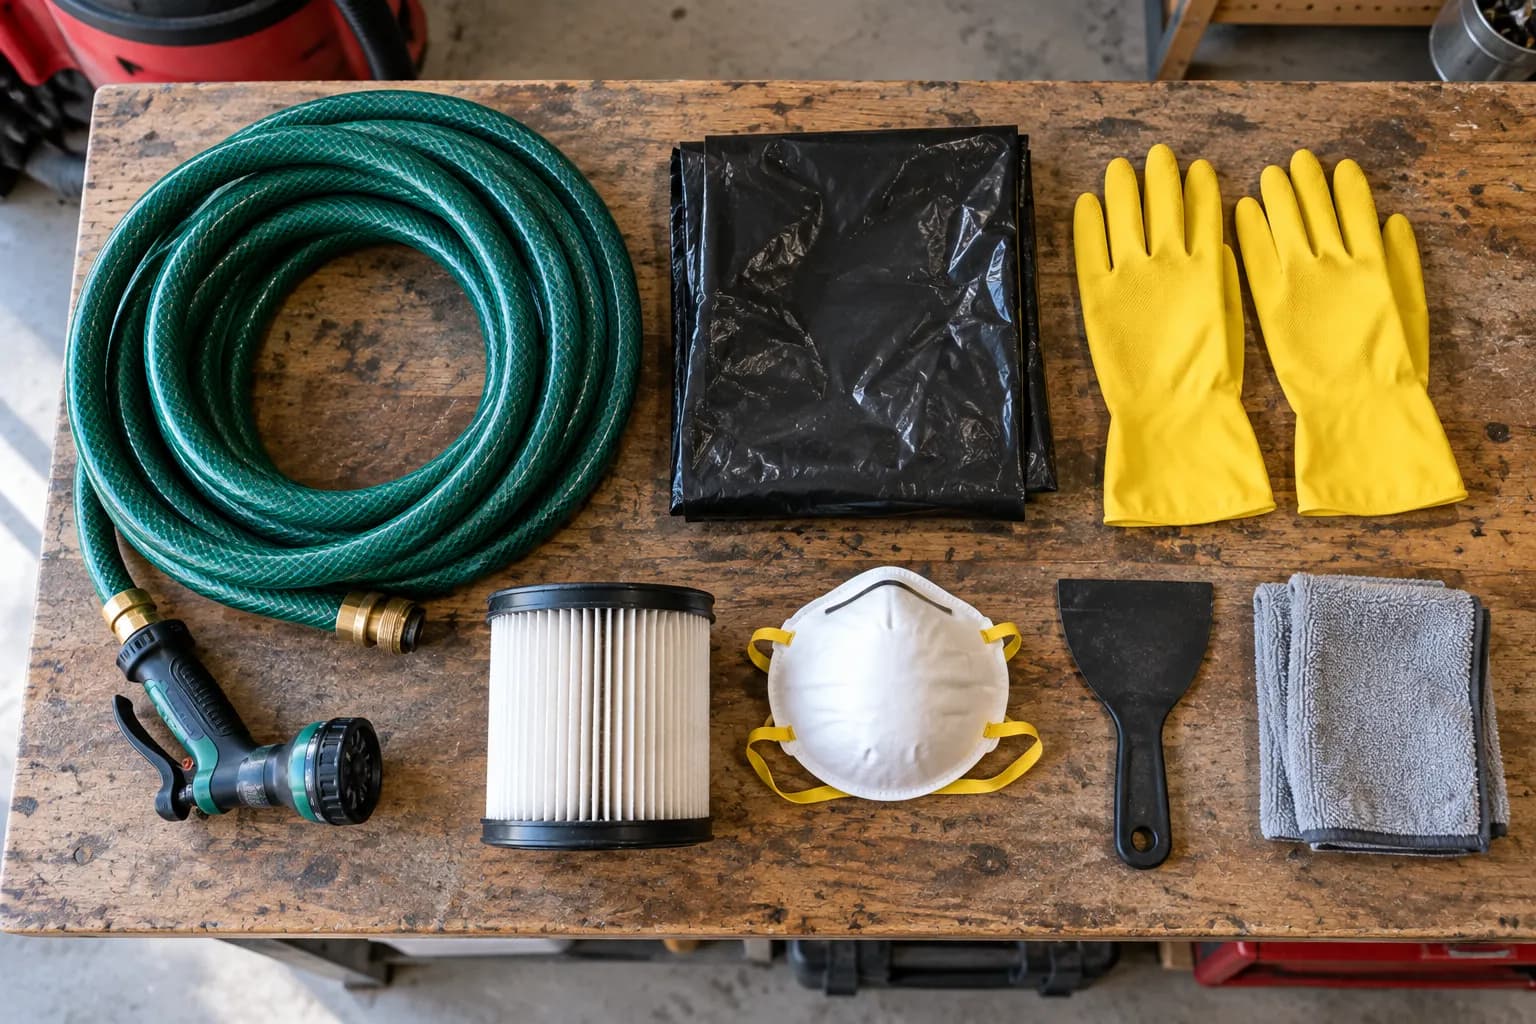
Washing a filter well takes almost no gear, and two of the items are about protecting your lungs, not the filter.
Gather a garden hose, a contractor trash bag, mild dish soap for synthetic and foam elements, a soft brush or plastic putty knife, nitrile gloves, and an N95 dust mask.
You also need a dry, out-of-the-way spot where the filter can sit undisturbed for 24 hours. The prep that matters most is doing this outside.
The first time I knocked a drywall-clogged filter out in a closed garage, I breathed grit for an hour. Now I only tap and rinse over a bagged bin outdoors.
Skip three tools entirely: no pressure washer, no dishwasher, and no clothes dryer.
Each one destroys filters in its own way, covered further down.
If wet and dry vacuums are new to you, our explainer on how these machines work covers where the filter sits and why it clogs.
Washing Shop Vac Filter Cartridges: The Step-by-Step Method
Washing shop vac filter cartridges is a six-step routine, and the order matters as much as the technique.
You knock out the dry dust first so it does not turn to paste, then loosen the pleats, wash, rinse inside-out, inspect, and dry.
Do it in this sequence and a grey brick comes back close to white in a couple of minutes.
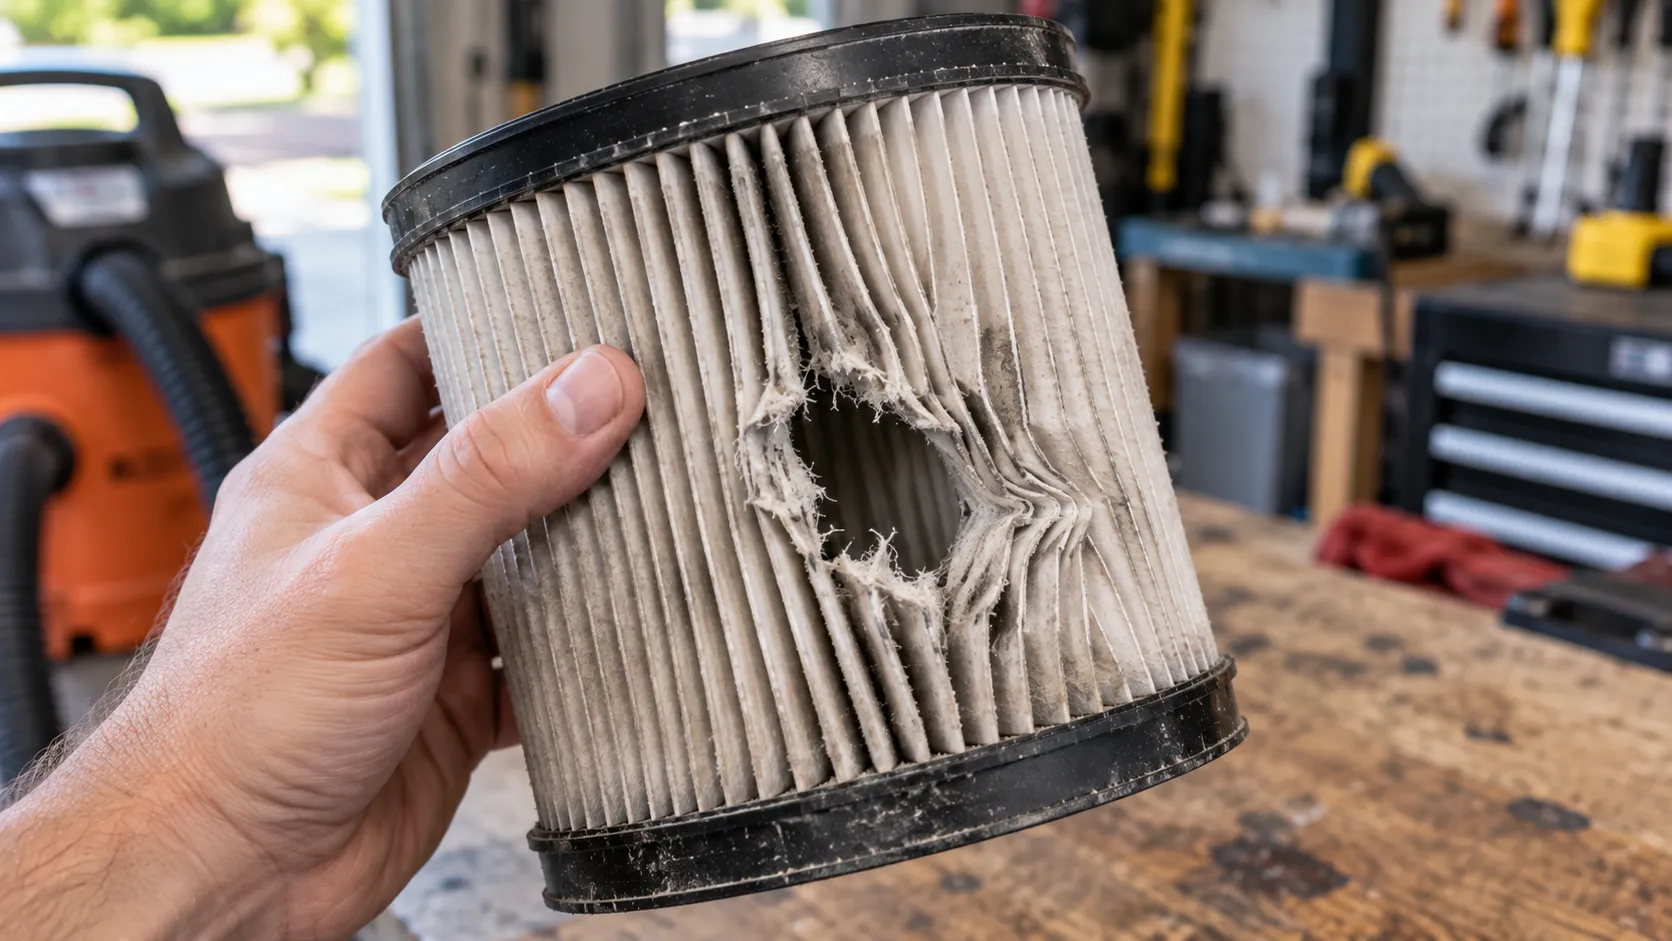
Tap the dry dust out. Hold the filter inside a contractor bag and knock it against the ground or a bin. You should see the bulk of the loose dust drop away before any water touches it.
Loosen the caked pleats. Work stubborn clumps free with a soft brush or a plastic putty knife, gently, and never a stiff brush on paper. You should see the deep grey packing in the pleat valleys break up.
Wash foam and synthetic with mild soap. Skip the soap on plain paper, where plain water is enough. You should see grey water running off, not clinging paste.
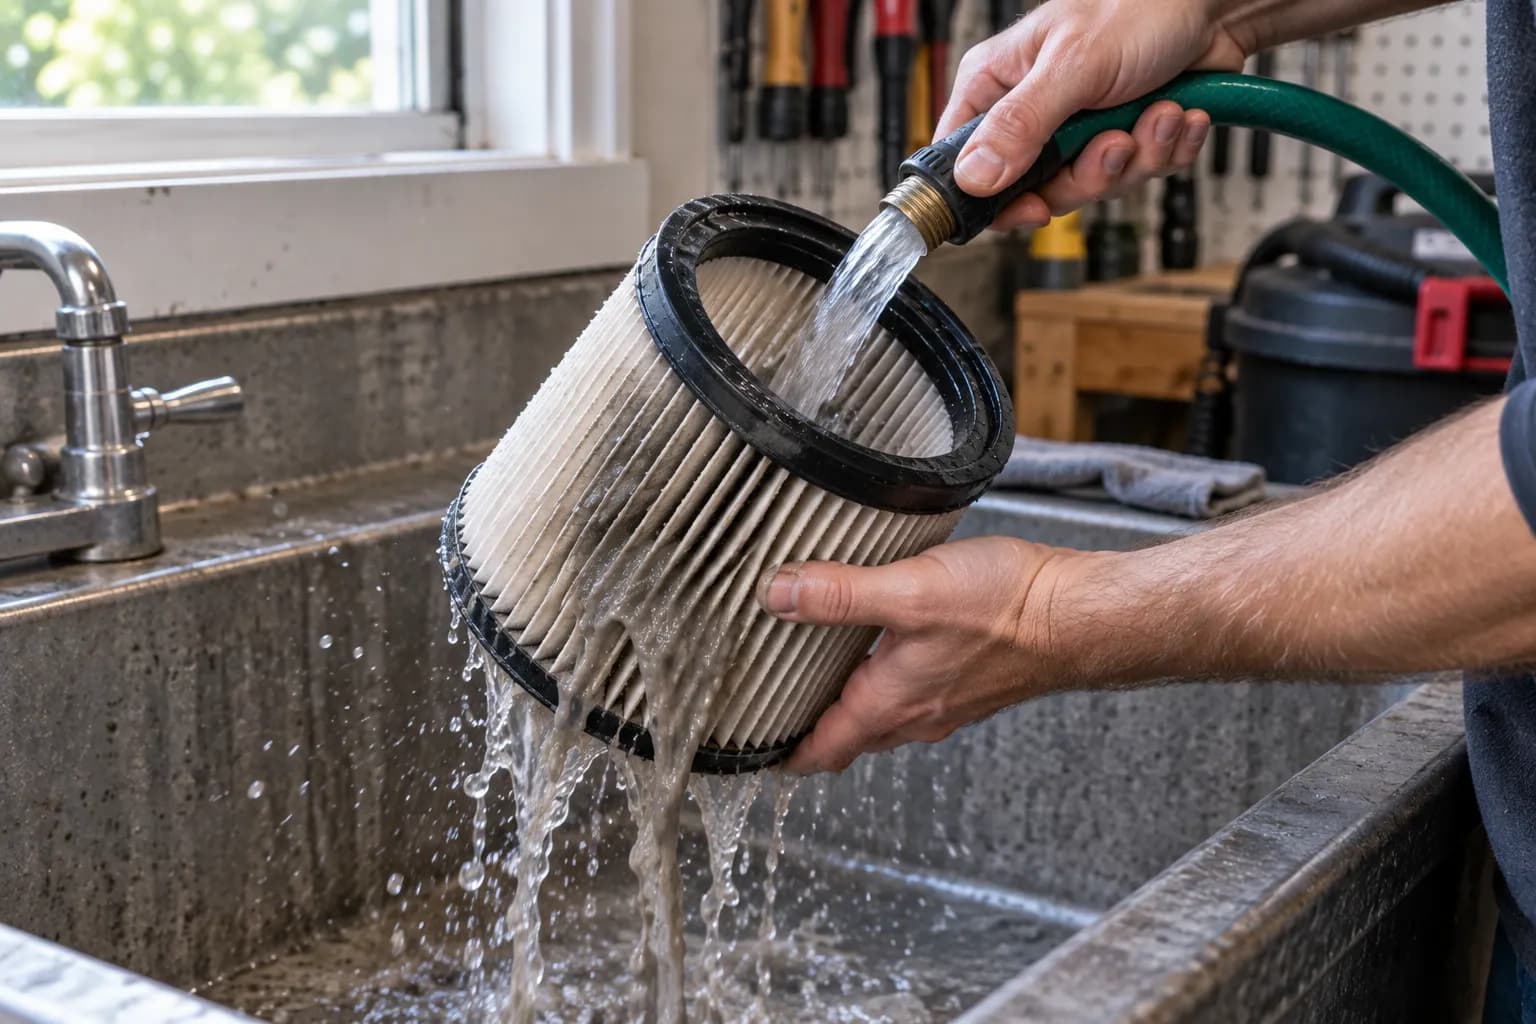
Rinse from the inside out at low pressure. Run a garden hose down the center and push the debris back out the way it came in. You should see the pleats shift from grey to near-white.
Shake off the water and inspect. Look for torn pleats, pinholes, or shedding fibers. You should see intact pleats and clear rinse water at the end.
Set it to dry. Stand it on end in a dry spot and leave it, with drying covered next.
Rinsing inside-out is the step most people get backwards. Because the debris entered from the outside, flushing from the center pushes it back out, and in my last wash the pleats went grey to white in about 90 seconds.
Hose It From the Inside Out, Why Direction Matters
Direction is not a preference, it is the whole trick. Debris packs into the outer face of the pleats during use, so an inside-out rinse lifts it out cleanly while an outside-in blast drives it deeper.
Keep the pressure low, because a garden hose is plenty and a pressure washer will punch a hole straight through.
For a companion routine on cleaning frequency and swap timing, see our walkthrough on when to clean or change it.
Drying the Filter (and Why 24 Hours Matters)
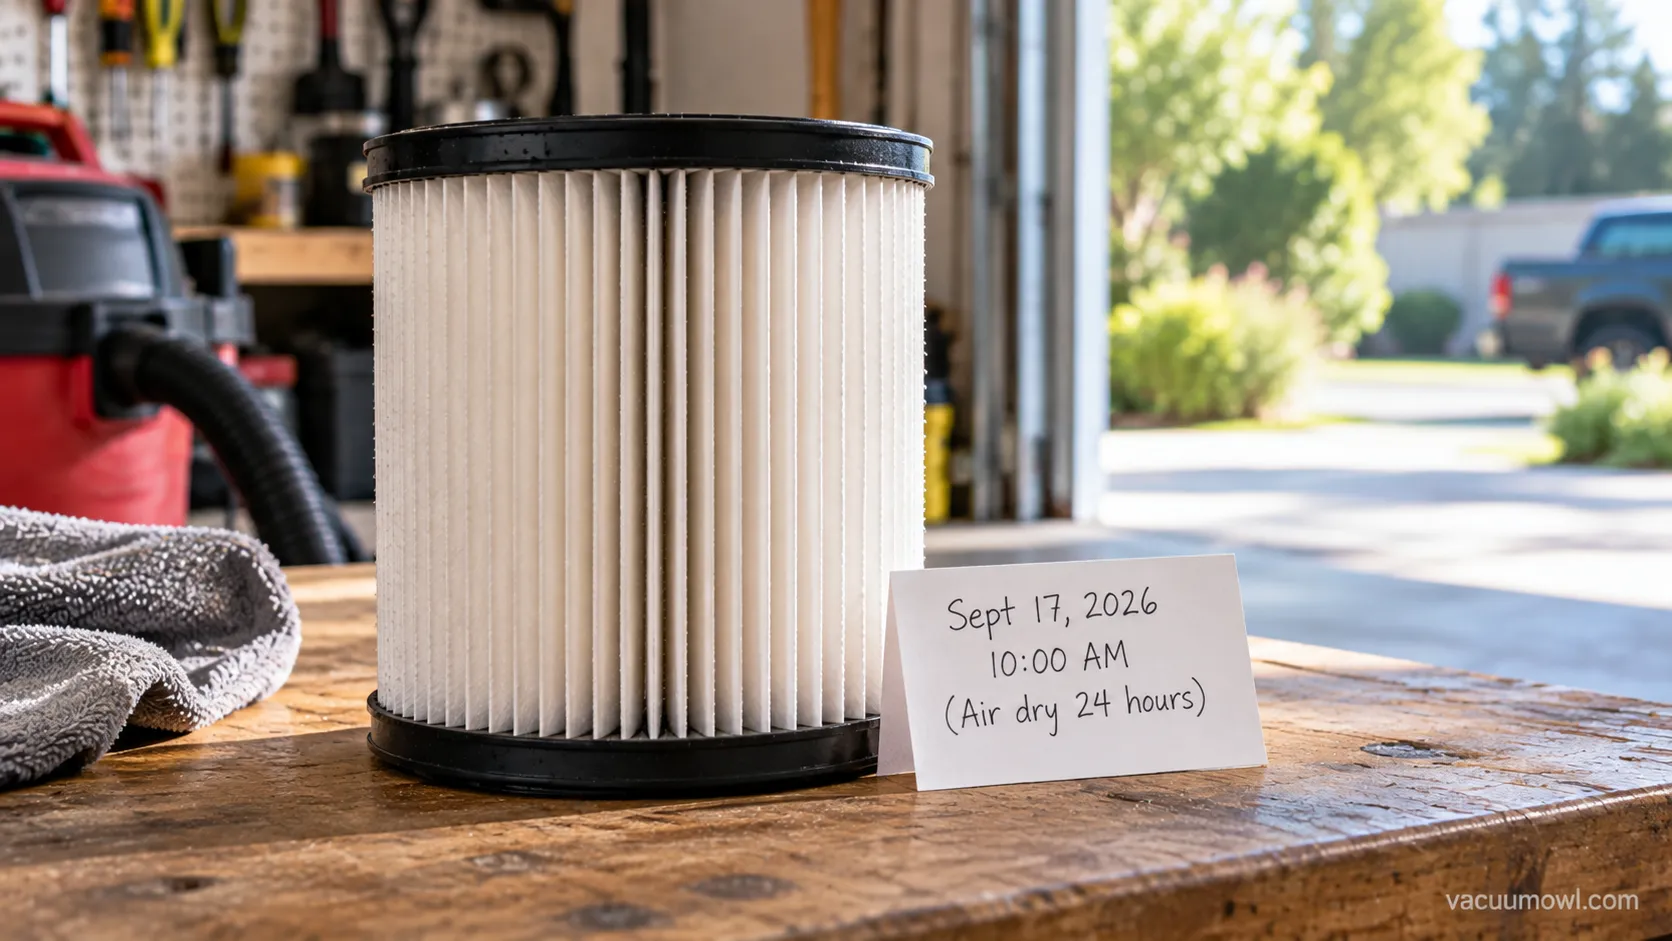
Drying is the step that separates a clean filter from a moldy one, and 24 hours is the working minimum.
A shop vac filter should air-dry for at least a full day, and up to 48 hours in cold or humid conditions, before it goes back in.
The reason is mold. The EPA advises drying wet or damp materials within 24 to 48 hours to prevent mold, and a damp filter sealed in a warm plastic tank is an ideal place for it to start.
A reinstalled damp filter does two kinds of harm. It seeds mold and a musty smell inside the tank, and it makes the motor pull against wet, heavy media.
The CDC recommends the same 24 to 48 hour window for drying wet items, and EPA guidance on drying adds that airflow and warmth speed the process.
Stand the filter on end where air reaches all sides, and add a fan if your space is cool.
Here is what drying actually looked like in my unheated garage at roughly 60 degrees Fahrenheit.
The foam sleeve was still faintly damp at 18 hours and did not hit fully dry until about 26, so I now treat 24 hours as a floor, not a target.
Hours elapsed | Filter state | Safe to reinstall? |
|---|---|---|
0 | Soaked from rinse | No |
6 | Wet to the touch | No |
12 | Damp, cool | No |
18 | Still faintly damp inside | No |
24 | Nearly dry | Borderline |
26 | Fully dry, weight stable | Yes |
Never speed-dry with a clothes dryer or an oven, because both warp and shrink the media.
The EPA’s moisture-control guidance is blunt that damp surfaces should be dried fast, but for a filter that means air and airflow, not heat.
Drying matters most after a wet pickup, which we cover in the walkthrough on after vacuuming up water.
Running the motor with a damp or missing element is also one of the fastest ways to burn it out, as our piece on what happens without a filter explains.
For heavy standing water where you are constantly draining and drying, pump-style water handling changes the math.
The Foam Sleeve & Wet Filter: Different Rules
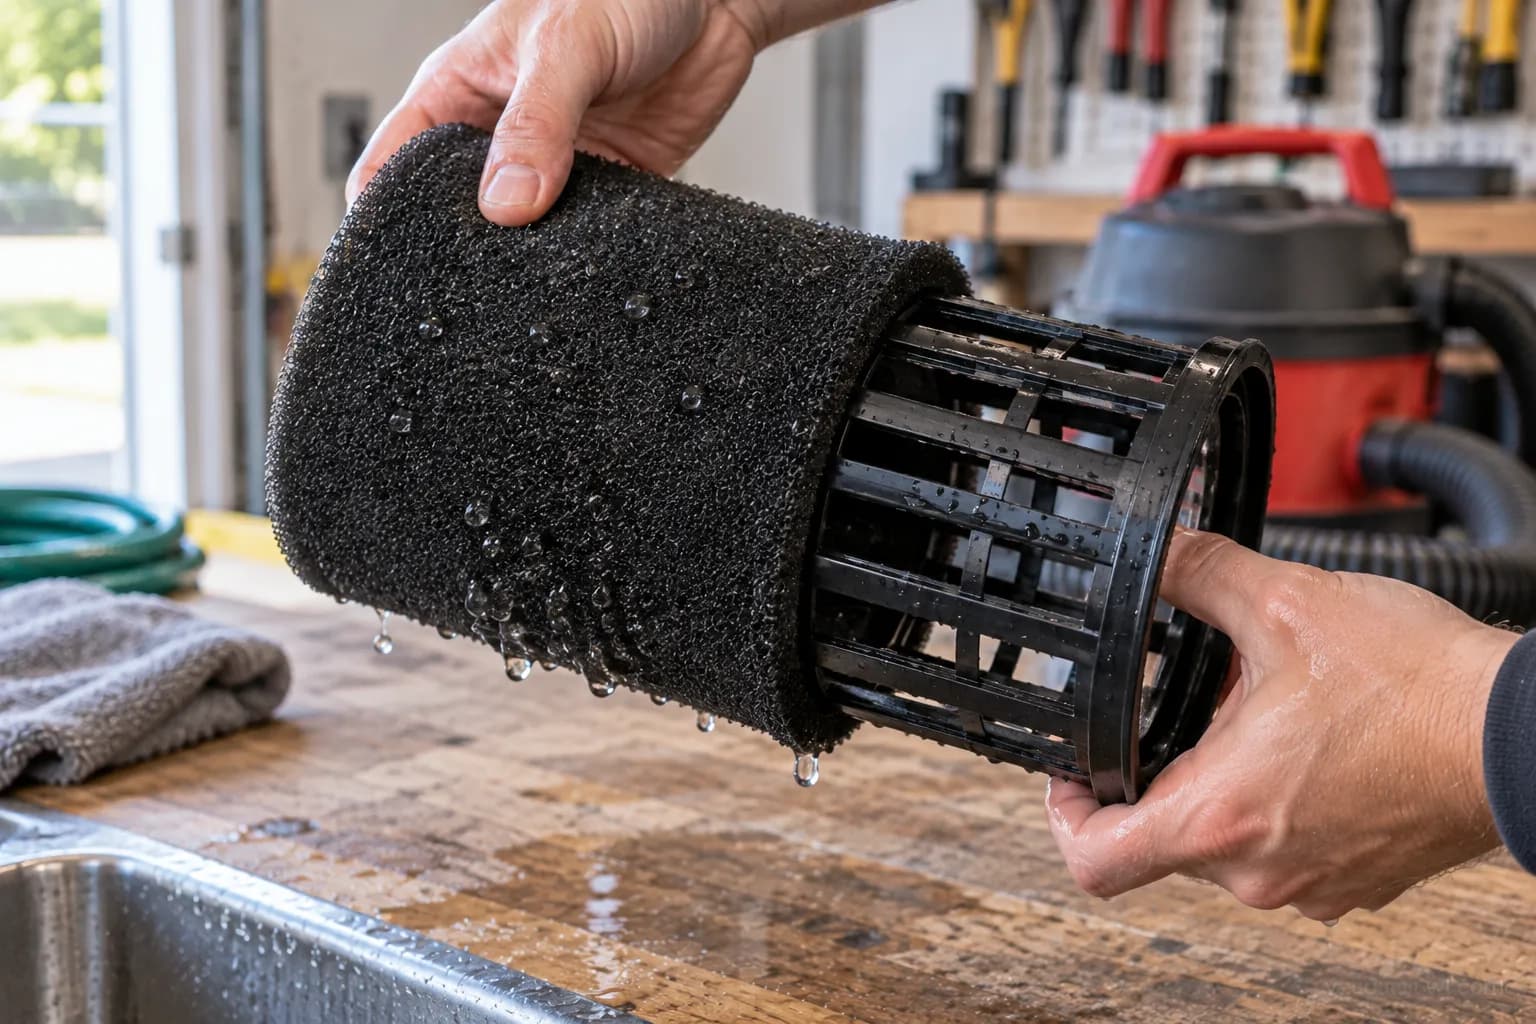
The foam sleeve is a different part with different rules, and it is the one you want for wet pickup.
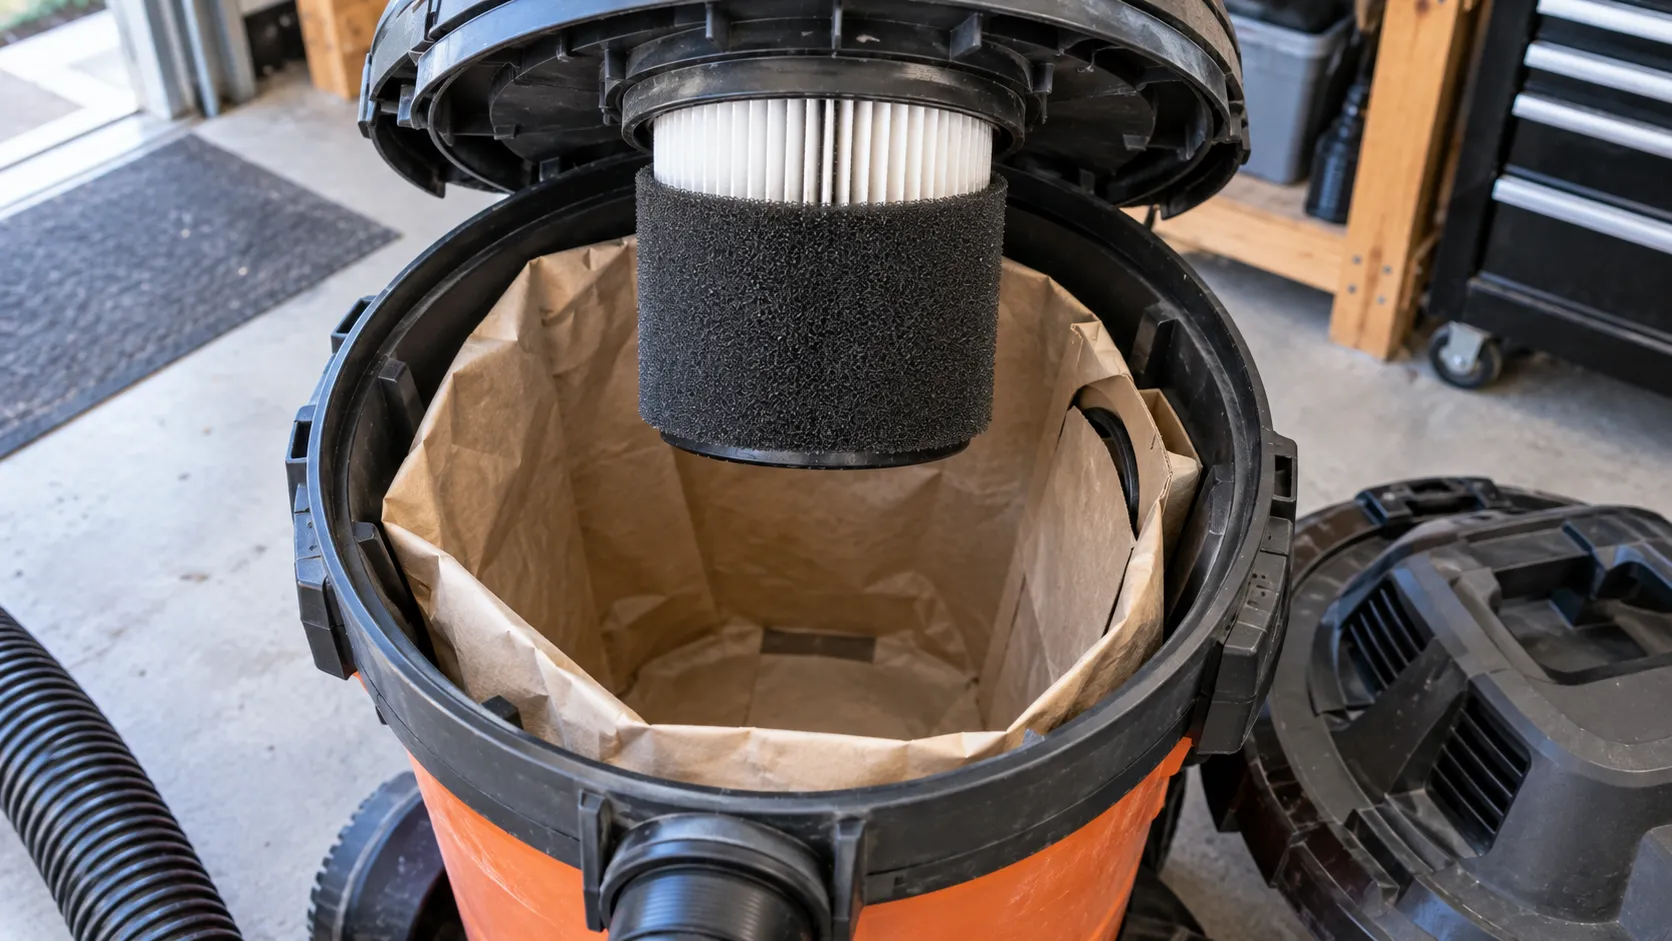
Before you vacuum liquid, remove the dry pleated cartridge and fit the foam sleeve, then rinse and dry the foam after the job.
RIDGID confirms in its wet-filter instructions that the wet-application foam filter can be washed and reused as long as it is dried properly first.
Leaving a paper element in for wet work, by contrast, clogs it instantly.
After I sucked up a flooded basement, I rinsed the foam sleeve and it dried in a few hours.
The pleated cartridge I had forgotten to swap out would have been ruined on the first pass.
The RIDGID wet foam filter fits most 5 to 16 gallon vacs and is built for high-volume liquid. The same foam sleeve doubles as a dry-use pre-filter over your pleated element.
Task | Use this filter | After-care |
|---|---|---|
Wet pickup | Foam sleeve only | Rinse, air-dry fully |
Fine dry dust | Pleated synthetic, optional foam over it | Tap, occasional wash |
Mixed debris | Pleated cartridge | Tap after each job |
For the full swap logic, our deep dive on foam sleeve vs paper element walks through when to change over.
Fit also depends on your inlet, so check matching your hose diameter if the sleeve or cartridge seems off-size.
And for fine dry dust, a cyclone separator setup upstream keeps most debris out of the filter entirely.
When to Stop Washing and Just Replace It
Washing has a finite lifespan, and knowing the replace point saves both money and your motor.
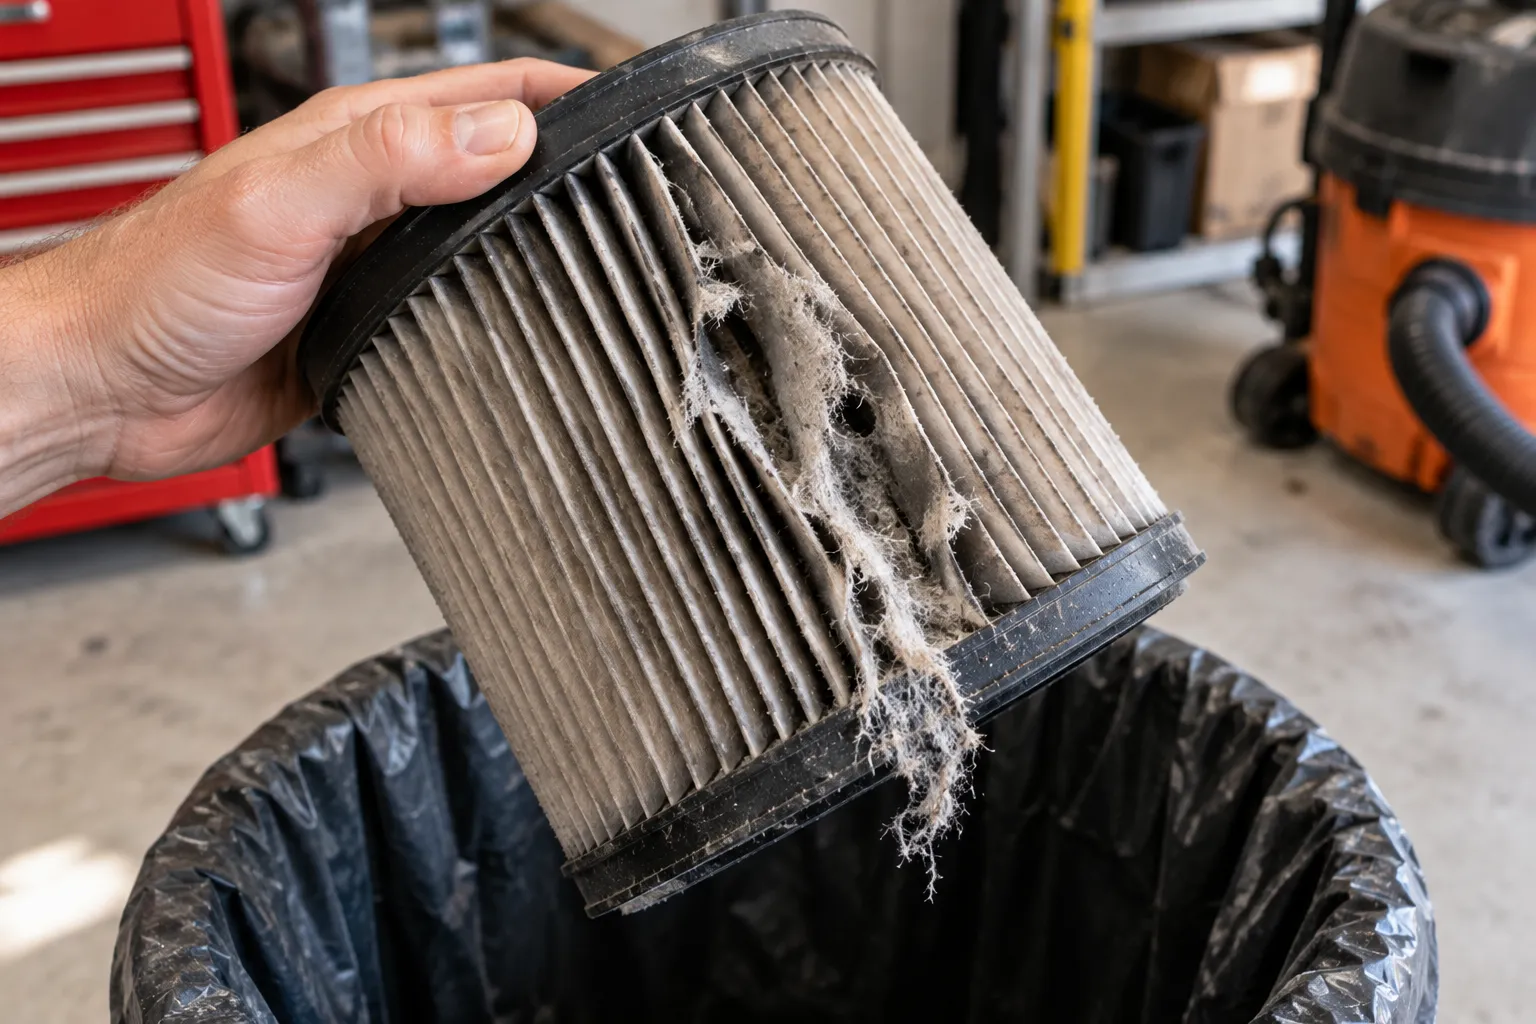
Replace the filter, rather than rinsing again, when you see torn pleats, shedding fibers, a permanent drywall clog, suction that will not return after a full dry, or visible mold.
RIDGID’s replacement filters page makes the same point plainly: replace filters regularly to keep the vacuum performing.
Replace now if you see any of these:
Torn pleats, pinholes, or a split seam
Fibers shedding when you tap or rinse
A drywall clog set like a rock that will not flush
Suction that stays weak after a full 24-hour dry
Any musty smell or visible mold growth
Here is where my plain-paper element gave up. It rinsed fine through the first few washes, then started shedding fibers on the fourth and never recovered its suction, so I switched to a washable synthetic.
Wash number | Suction vs new (paper) | Notes |
|---|---|---|
Wash 1 | About 95% | Rinsed clean, dried overnight |
Wash 2 | About 88% | Slight pleat softening |
Wash 3 | About 80% | Faint fiber loss |
Wash 4 | About 58% | Shedding fibers, replaced |
The cost math is simple.
A replacement paper element runs a low double-digit price, a strained motor does not, and a washable synthetic that survives dozens of rinses pays for itself within a few cycles.
A collection liner stretches a filter’s life between replacements, which is why using a collection bag is worth it for fine dust.
Drywall work is the fastest way to kill a filter, so our drywall-dust filter setup guide is worth a look.
A bigger tank also changes how often you are in here at all, covered in picking the right vac size.
5 Mistakes That Actually Ruin a Filter
Most dead filters are killed by the cleaning, not the clogging, and five mistakes cause nearly all of it.
The big ones are pressure-washing the pleats, using a dryer or dishwasher, scrubbing paper with a stiff brush, reinstalling the filter damp, and washing a plain-paper element that should have been replaced.
EPA cleanup guidance is clear that wet-vacuum parts should be cleaned and dried thoroughly, because anything left damp becomes a mold source.
The five filter-killers:
Pressure-washing the pleats. One pass at full pressure tears the media, and I once blew a clean hole through a cartridge in a single pass.
The dryer or dishwasher. Heat warps and shrinks the media, and the pleats never seal right again.
A stiff brush on paper. The bristles shred paper pleats, so use a soft brush or a plastic putty knife only.
Reinstalling it damp. This is the real killer, and the CDC’s mold advice is to dry and ventilate wet items before storing them.
Washing a plain-paper element to death. Some paper filters are cheaper to replace than to nurse, so tap them and move on.
Can I Just Bang the Filter Out Instead of Washing It?
Banging the filter against a bin is a legitimate quick-clean for loose dry dust, and it is exactly what to do between real washes.
What it will not do is clear packed-in fine dust or drywall paste, which needs the full inside-out rinse.
If you have been using a shop vac where a dedicated machine belongs, our honest test of a shop vac on carpet, tested is worth reading.
Switching to blower mode can also clear a filter’s outer face between washes, as our guide to using it as a blower shows.
Keep It Cleaner Longer: Foam Pre-Filter + Bag
The best way to wash a filter less often is to keep it from clogging in the first place, and a two-stage setup does exactly that.
Slip a foam sleeve over the pleated cartridge for fine dry dust, and add a collection or drywall bag for sanding and drywall work.
The extra filter area upstream means the pleated element barely loads up. Routine maintenance guidance from the EPA backs the general principle that keeping filters clean and dry is what preserves them.
Running a foam sleeve plus a drywall bag turned my pleated element from a wash-after-every-job chore into something I barely touched all season.
The trade-off is honest, since a two-stage setup costs a little airflow as every layer adds resistance. For most dry work that suction loss is invisible next to a filter that stays clean.
If your machine still runs a plain-paper element, upgrading to a washable nanofiber or a CleanStream synthetic is the other half of the fix.
Match the whole setup to your actual work using our breakdown of matching setup to the job.
Reduce how much dust reaches the filter with the right dust-reducing attachments, and keep grit out between jobs by wall-mounting and storage.
Frequently Asked Questions
Can you wash a shop vac filter every time it clogs?
You can rinse a foam or synthetic filter repeatedly, but you do not need to wash after every job. Tap the dry dust out for routine maintenance and save a full wash for when suction actually drops.
Can you wash a HEPA shop vac filter?
Treat HEPA elements with caution, since scrubbing or high-pressure rinsing can damage the tightly woven media and cut filtration. Only rinse a HEPA cartridge if the manufacturer labels it washable, and always dry it fully before reuse.
How long does a shop vac filter take to dry?
Plan on at least 24 hours, and up to 48 in cold or humid conditions. In my unheated garage a foam sleeve was still faintly damp at 18 hours and fully dry near 26, so airflow and warmth help.
Can you put a shop vac filter in the dishwasher or dryer?
No, because both apply heat that warps and shrinks the media so the pleats no longer seal. Wash by hand with a hose and air-dry only.
Is a washable filter worth the extra cost?
For anyone who vacuums regularly, yes. Across my test filters the washable synthetic paid for itself by the third wash compared with replacing a cheaper paper element every few cycles.
Do you need a bag if you already have a filter?
Not always, but a bag helps for fine dust and keeps the cartridge clean far longer. For large debris or wet pickup, skip the bag.
Washing shop vac filter cartridges is genuinely worth doing, as long as you let the filter media decide the method and give it a full day to dry.
Identify whether you are holding foam, synthetic, or plain paper, rinse from the inside out at low pressure, and never rush a damp filter back into the tank.
Get those three things right and a single filter lasts for years of hard use, while a foam sleeve and a bag keep you off the hose in the first place.
When the pleats finally tear or the fibers start shedding, that is your signal to replace rather than rinse, and to reach for a washable synthetic next time.
Read it your way
Short on time? Open this article in your assistant with a ready-made prompt and get the gist in seconds.
Found this useful? Make us a preferred source so we show up in your Google results.
Keep reading
Related articles
Vacuum Types
Bissell Wet Dry Vacuum: 6 CrossWave Models Tested (2026)
Compare every Bissell wet dry vacuum: which CrossWave model fits pets, steam, or budget, plus fixes for streaks and floors that still look dirty. Tested 2026.
Vacuum Types
Tineco vs Dreame Wet Dry Vacuum: 30-Day Test (2026)
Compare Tineco vs Dreame wet dry vacuum on suction, self-clean, edge reach and price, with a clear pick for pets, kids and big homes.
Vacuum Types
Is the DEWALT Shop Vac Worth It? Quiet StealthSonic Tested
Compare every DEWALT shop vac: StealthSonic quiet picks, cordless DCV580 and corded DXV, with measured noise, real suction specs and a value verdict.
Vacuum Types
How to Use a Shop Vac for Water: 3-Brand Test (2026)
How to use a shop vac for water safely: remove the paper filter, add a foam sleeve or go filter-free, plug into a GFCI. Tested across 3 brands.
The discussion
Comments
Every comment is reviewed before it goes live.