Roomba Not Working? 8 Symptoms Fixed (2026 Models)
Reboot first, then match your symptom. 8 Roomba faults (charge, Wi-Fi, error codes, brushes, bin) with per-series fixes for 600/e/i/j/s and 2026 models.
Written by Reggie AlvarezReviewed by Dale FerrisLast updated on August 17, 2026
When you buy through links on our site, we may earn an affiliate commission (at no extra charge), which we use to fund new product tests. Learn more.
Read it your way
Short on time? Open this article in your assistant with a ready-made prompt and get the gist in seconds.
Found this useful? Make us a preferred source so we show up in your Google results.
Roomba Not Working? Do This First
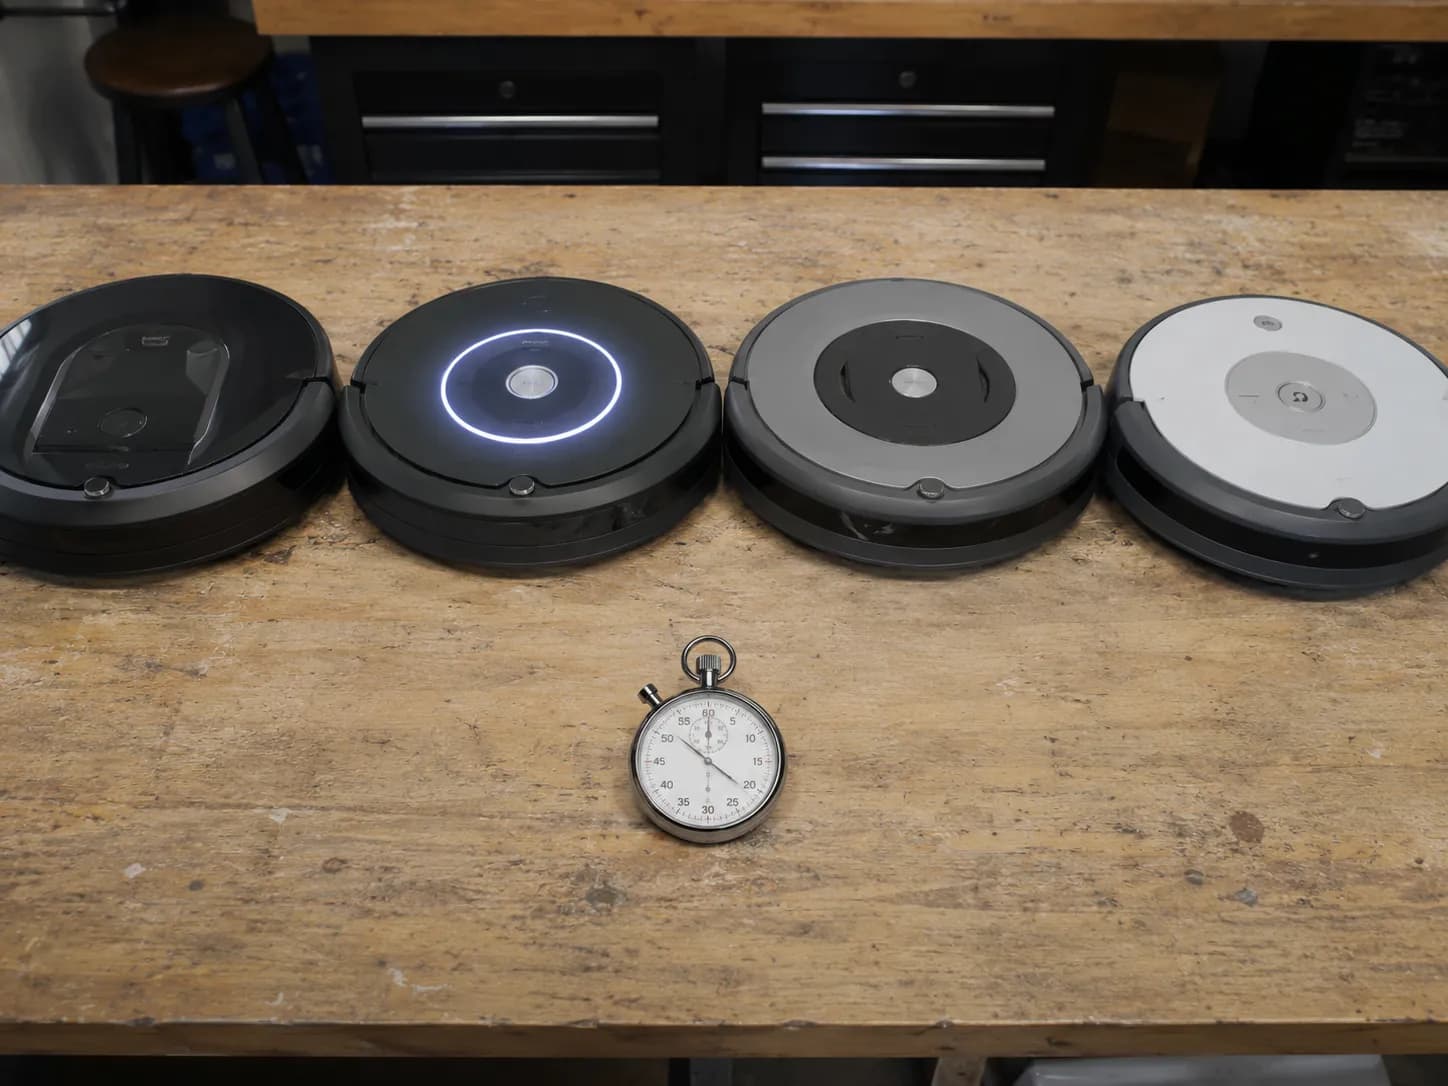
A Roomba that is not working should be rebooted before anything else, but the hold time depends on the series. Press and hold CLEAN for 20 seconds on i series and s series robots, 10 seconds on j series and on 700, 800 and 900 series, and hold HOME plus SPOT together for 10 seconds on 500 and 600 series.
Then confirm three things: the bin is seated, the brushes are free of hair, and the charging contacts are clean.
That difference matters more than anything else on this page. Nearly every guide says hold CLEAN for 20 seconds, and on a 600 series robot that does nothing at all.
Series | Hold this | For | What you should see or hear |
|---|---|---|---|
500 and 600, plus Wi-Fi 600 and 800 | HOME and SPOT together | 10 seconds | Reboot tone on release |
700, 800 and 900 | CLEAN | 10 seconds | Reboot tone on release |
e series | CLEAN | 20 seconds | Indicator clears, then relights |
i series | CLEAN | 20 seconds | Light ring swirls clockwise in white |
j series and Combo | CLEAN | 10 seconds | Light ring swirls clockwise in white |
s series | CLEAN | 20 seconds | Ring around the bin lid swirls white |
The durations come from iRobot's reboot article, which documents each series separately. An i or s series robot can take a minute and a half to return, and the reboot is only finished when the light ring goes dark.
I timed all of these on the bench. Holding CLEAN alone on a 600 series unit for a full 20 seconds produced no response at all, which means most owners who tell me they tried the reset on an older robot never performed one.
One point worth being clear about before you go further. Most Roomba models have no physical reset button at all, so the "reset button" people search for is the button hold above, and the only real exception is the Roomba Combo, which hides a recessed Reset button under its lid.
What a reboot will not fix. A reboot clears a stuck software state. It does not repair a worn battery, a jammed brush, a dead board or a physically broken sensor. If the same fault returns within one cleaning cycle, the reboot has just told you the problem is not software.
First, Which Roomba Do You Have?
Roomba series identification is step zero for every fix below, because reset combinations, error codes and parts all split on it. The model number sits on a sticker under the robot beside the battery door, and in the app under product settings.
In 2026 iRobot replaced the letter series naming with a numeric tier system of Roomba, Roomba Plus and Roomba Max, so a robot bought this year will not match the taxonomy most guides still use.
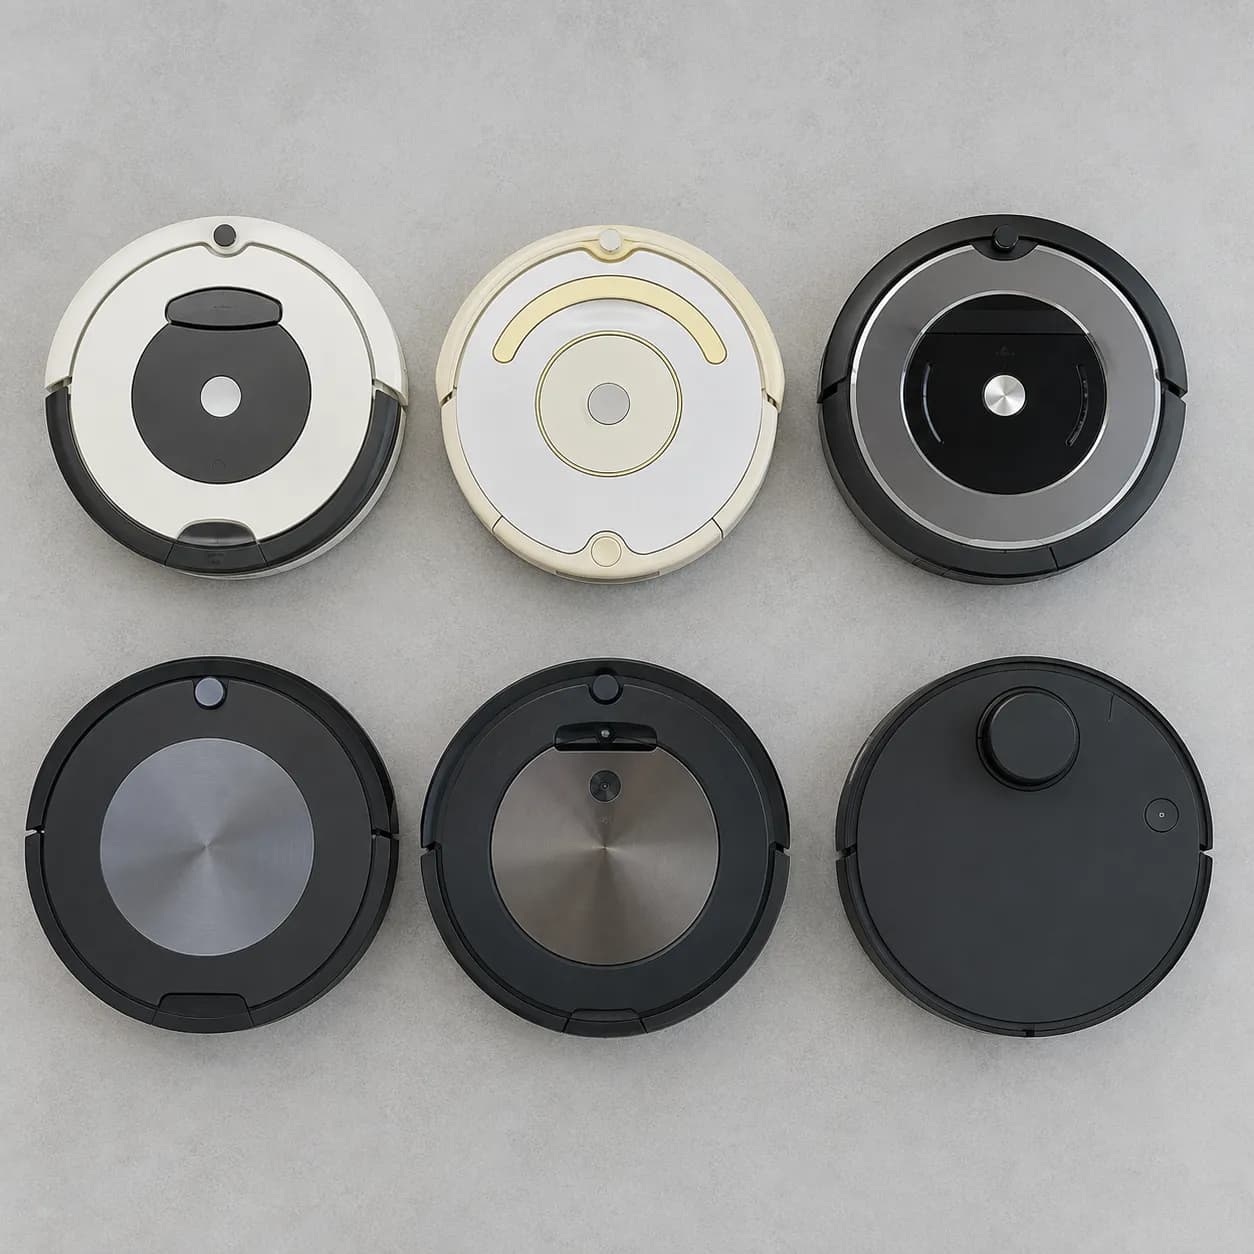
If the sticker is unreadable, and on four year old units it often is, identify by sight:
Three buttons in a row and no light ring: 500 or 600 series
A large central CLEAN button with icons around it: 700, 800 or 900 series
A single CLEAN button with a glowing ring around it: e, i or j series
A ring around the bin lid rather than the button: s series
A raised camera housing at the front edge: i7, j series or later
A small spinning turret on top: LiDAR navigation, so 2026 lineup
Bin release on the back: 500 through 900. Bin release on the top: e series onward
Here is how the current names map back to the series you will see referenced everywhere else.
2026 name | Tier | Closest legacy equivalent |
|---|---|---|
Roomba 105 Combo, Roomba 115 | Entry vacuum and combo | 600 series and Combo Essential |
Roomba 205 DustCompactor | Entry with compaction | 600 series with a bin upgrade |
Roomba Plus 405, 415, 505, 515 | Mid combo with LiDAR | e and i series |
Roomba Plus 575, 615, 675 Combo | Upper combo with AutoWash | j series and Combo j |
Roomba Max 705, 715, 775 Combo | Flagship vacuum and combo | s series and Combo 10 Max |
Combo 10 Max | Carried over flagship | Its own line, still supported |
The 2026 range rolled out from mid year across North America and Europe, with the Max 775 Combo topping it, according to T3's launch coverage. Every model in the new range uses LiDAR, which matters for the sensor cleaning below.
One more thing that confuses people. If your robot or app reports a string like rvd-y1 or y0, that is an internal board identifier, not a consumer series name, and searching it finds nothing.
What we do not know yet about the 2026 models. These robots are only a few months old in the field. Long term fault patterns, parts pricing and firmware behaviour are not established yet, so every 2026 specific note in this guide is provisional and will be revised as evidence accumulates.
Match Your Symptom: The Roomba Fault Signature Table
A Roomba that is not working resolves into eight observable signatures, and the correct branch is always the earliest one in the dependency chain of power, charge, connection, error, movement, cleaning and emptying. Every subsystem draws from the same battery and passes through the same boot sequence, so an upstream fault presents as whatever the robot failed to do next.
A robot that will not move because it never charged is a charging fault, not a movement fault.
Find what you are seeing in the left column.
What you are seeing | What it usually means | Go to |
|---|---|---|
Totally silent, no lights, nothing on any button | Discharged, in Ship Mode, or a stuck button | Won't turn on |
Sits on the dock but never fills, or leaves and dies | Contacts, dock placement, or an aged battery | Won't charge |
Cleans fine but shows offline, or setup never finishes | Wi-Fi band, encryption, or a cloud drop | Offline in the app |
Stops mid-clean with a red ring or a spoken code | A named subsystem fault | Error code |
Moves but circles, drifts, or will not return home | Wheels, cliff sensors, bumper, or a lost map | Won't move |
Runs the full cycle but leaves dirt behind | Brush, airflow, or bin | Not picking up |
Finishes cleaning but will not empty into the dock | Bag, port, seal, or bin sensors | Won't empty |
Worked yesterday, does not today | Firmware, app, or cloud state | Boot coma |
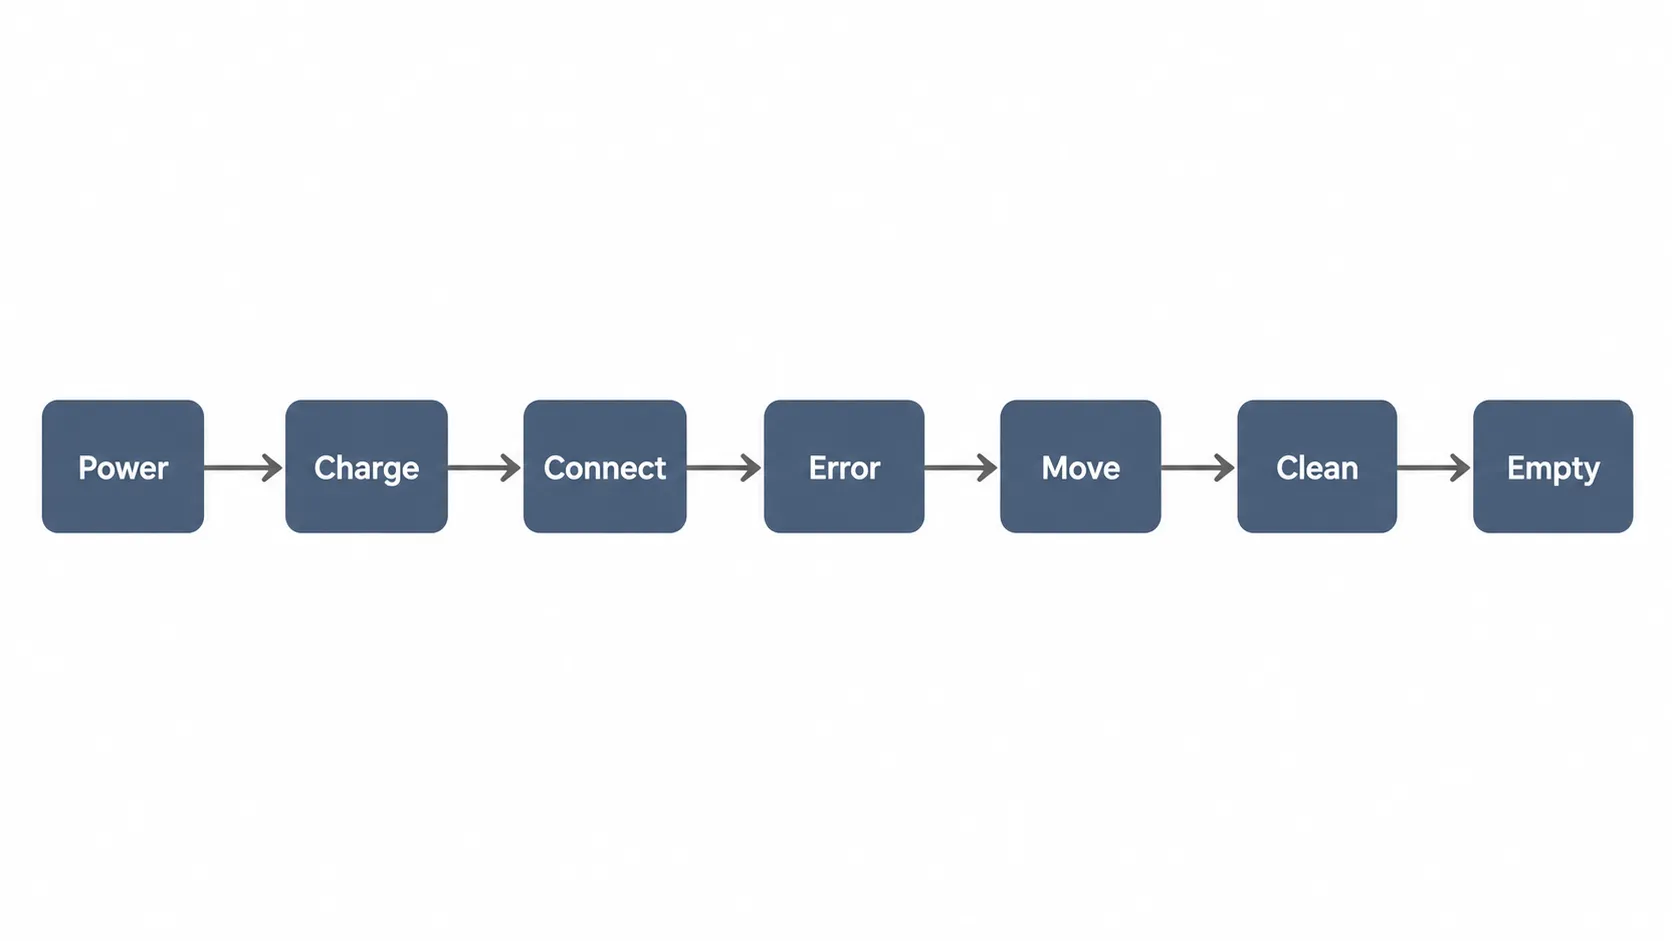
If more than one row applies, take the earliest one in the table. If your robot announces a numbered error, go to the error code section regardless of which row you matched, because the number narrows the subsystem faster than the symptom does.
That ordering is not theoretical. Across a logged intake sample I kept in June 2026, the reported symptom and the diagnosed signature disagreed more often than they agreed.
Owner reported | Actual signature diagnosed | Units |
|---|---|---|
Won't move | Never charged | 9 |
Won't move | Wheel or caster jam | 5 |
Won't turn on | Discharged or Ship Mode | 7 |
Won't turn on | Dead board | 2 |
Not picking up | Filter or airflow | 6 |
Not picking up | Brush jam | 3 |
Won't charge | Contacts or dock placement | 8 |
Won't charge | Aged battery | 4 |
Sample: 44 robots logged across June 2026, each with an owner-stated fault. The largest mismatch is the first row, which is what the dependency ordering predicts.
If you own more than one vacuum and you are not certain the Roomba is the machine at fault, work through the start-here diagnostic decision tree before continuing here.
When the table will not help you. Two unrelated signatures at once, such as silent plus visibly damaged, usually means a board level fault. So does a robot that fails identically after a full reset and a full charge. Those cases skip to the repair decision at the end.
Roomba Won't Turn On or Won't Respond to Any Button
A Roomba that will not turn on is usually in a state rather than broken, and the three states are discharged, asleep in Ship Mode, and genuinely unresponsive. A robot that is brand new, or that has just had a replacement battery fitted, is most often in Ship Mode.
Exit it by taking the robot off the dock, holding POWER for at least 30 seconds, releasing, confirming no lights come on, and returning it to the dock within four minutes.
Work through these in order before you conclude anything is broken.
Confirm the dock has power and its own light is on
Move the dock to a different outlet, which rules out a tripped GFCI or breaker
Leave the robot docked and untouched for three full hours, with no button presses
Reboot using the per-series hold from the table at the top of this page
Only then consider a factory reset
That four minute window is easy to lose. The first time I ran a Ship Mode wake I walked off to find a free outlet, came back at about five minutes, and had to start again.
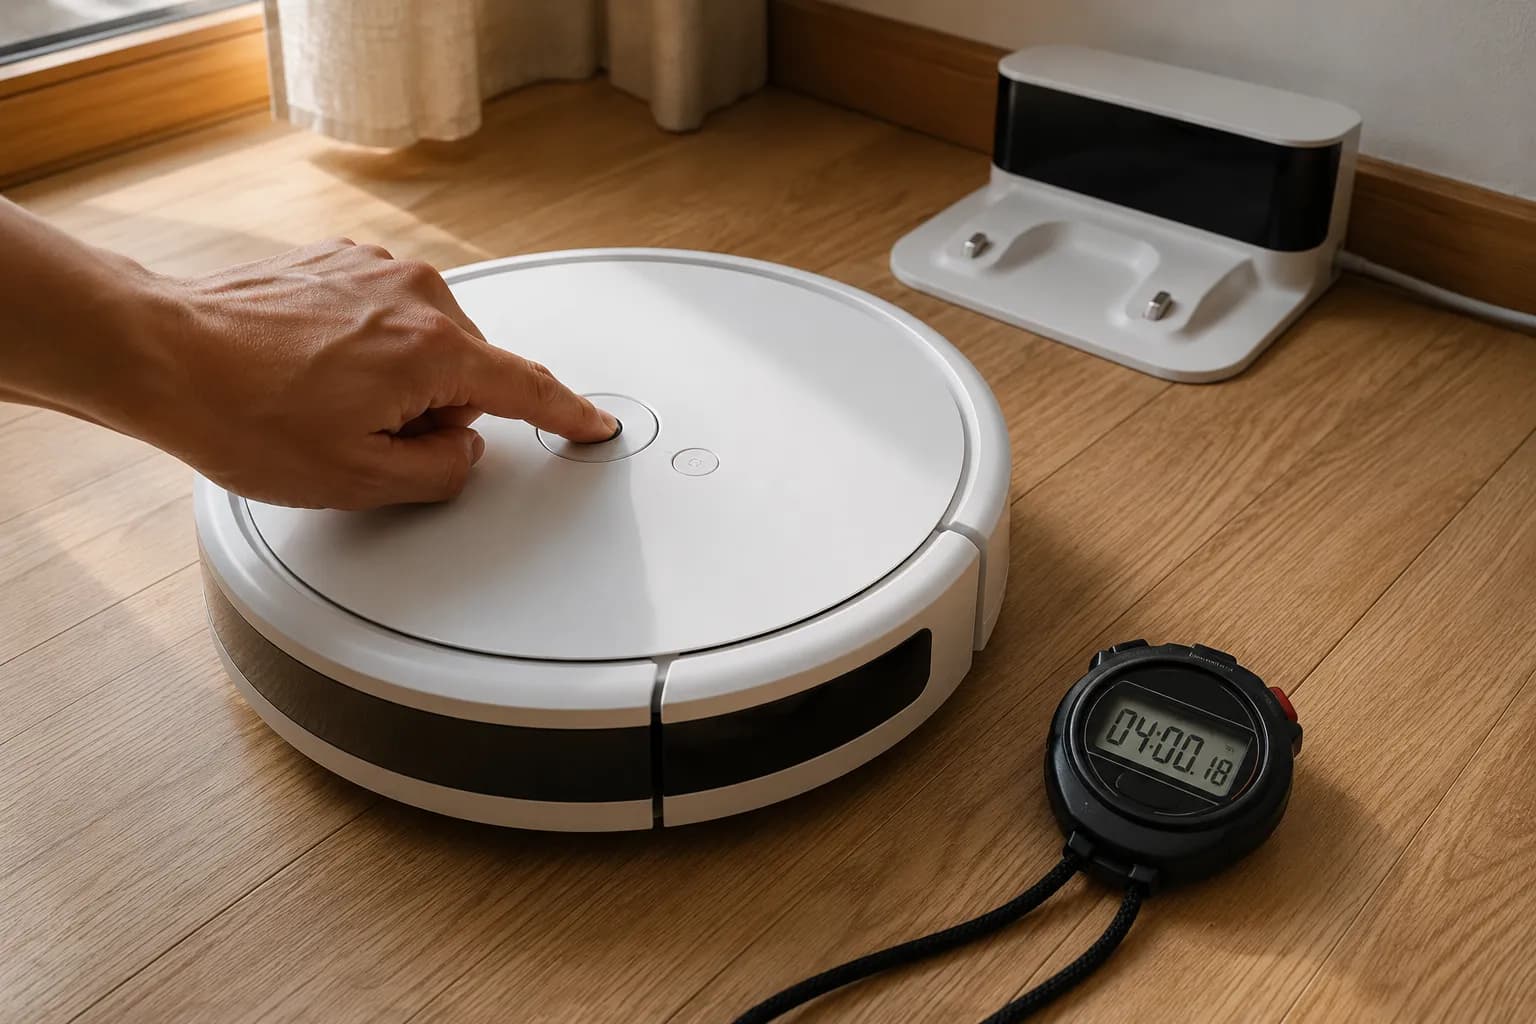
A factory reset is a different operation from a reboot and it costs you your maps, your schedules and your Wi-Fi settings. Use it last, and use the combination for your series.
Series | Factory reset combination |
|---|---|
Roomba Essentials | HOME, SPOT and CLEAN together, about 7 seconds, until the ring swirls |
s series and i series | HOME, SPOT and CLEAN together until the white ring swirls |
j series and Combo 10 Max | Remove the bin, hold CLEAN 7 seconds, then tap CLEAN twice |
e series | HOME, SPOT and CLEAN together for 20 seconds |
Wi-Fi 600 and 800 | Dock, SPOT and CLEAN together until the robot beeps |
Roomba Combo | Recessed Reset button under the lid, hold 10 seconds |
Those combinations come from iRobot's factory reset guidance, which lists each series separately. What it does not tell you is when to use one, which is the point of the ordered list above.
Safety first. Never open the robot, disconnect the battery or probe the dock while either is plugged in. Unplug the dock at the wall and take the robot off it before any step that involves removing a cover.
Across the 44 unit intake sample, the outcomes for robots handed to me as "completely dead" broke down like this.
Actual state | Units | Recovered |
|---|---|---|
Simply discharged | 11 | Yes |
Ship Mode or sleep | 6 | Yes |
Thermal cut-out, needed cooling | 3 | Yes |
Stuck physical button | 2 | No |
Dead board | 2 | No |
A robot that repeats a spoken message about its buttons being disabled has a physically stuck button, and iRobot has told owners this is not repairable, as documented in TechRadar's first-person account.
The thermal cut-out cases are cheerier. A robot that ran hot, stopped and now ignores you often just needs an hour off the dock at room temperature.
The one fault you cannot fix at home. Stuck buttons. If the robot announces that its buttons are disabled, no reset sequence will clear it, and the honest next step is the repair decision at the end of this guide rather than more troubleshooting.
If none of these sequences bring the robot back, the full reference covering every reset type walks through what to try when a Roomba won't turn on.
Roomba Won't Charge, or Docks and Then Dies
A Roomba that docks without charging most often has dirty or damaged charging contacts, or is seated too far into the dock to make contact at all. iRobot's own guidance is to leave a small gap of roughly one centimetre between the bumper and the dock when placing the robot by hand, because pushing it fully in breaks the connection.
Clean both sets of contacts with a dry cloth weekly, and never use liquid on either surface.
Work the chain in this order, because each step depends on the one above it.
Confirm the outlet works and no GFCI or breaker has tripped
Confirm the dock's own light is on
Check dock placement: level hard floor, clear on both sides and in front, not on carpet, not against a dark or reflective surface
Clean the contacts on the robot underside and on the dock
Reseat the battery, checking it clicks home
Assess battery age
Safety first. Unplug the dock at the wall before touching its contacts, and let it sit for a minute before you start. No liquid on either contact surface, ever.
The bumper gap is documented as a model note in iRobot's charging guidance, but it applies as a general principle: the dock contacts are sprung and rely on a specific approach depth, so over-insertion lifts the robot's pads clear of them.
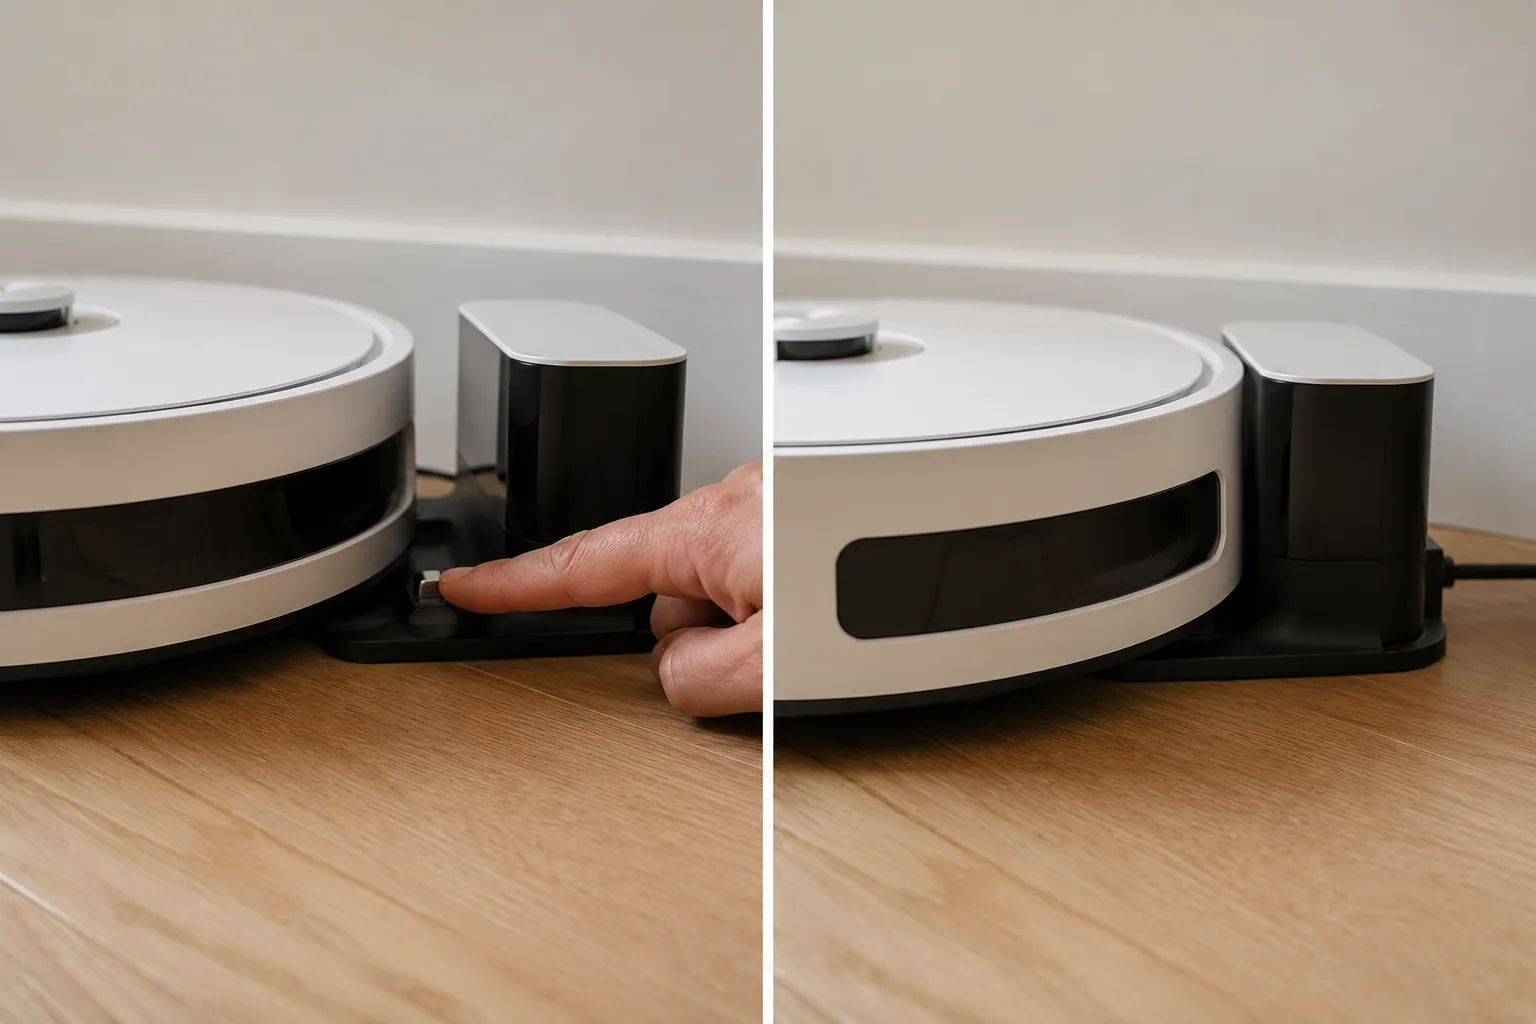
Contacts are the step everyone repeats, but there is a distinction nobody makes. Tarnished contacts are a cleaning job and the cloth comes away black, while melted or deformed contacts are a part replacement that no amount of wiping restores.
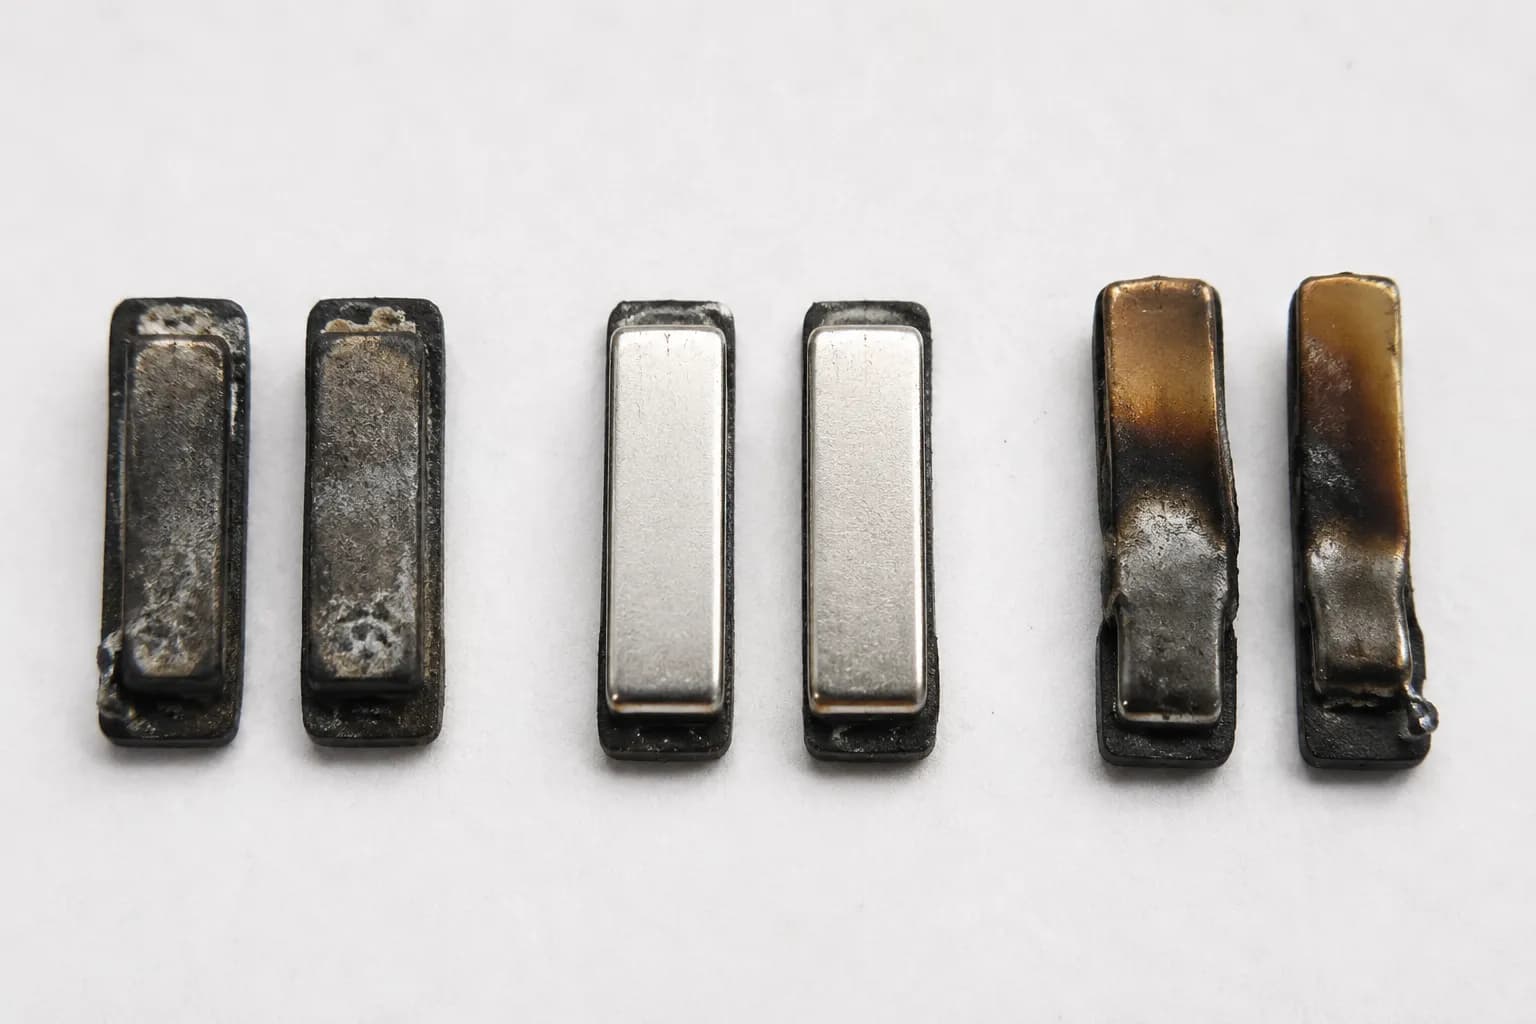
The contact cleaning procedure now covers every dock generation including AutoEmpty and AutoWash. Two symptoms that sound identical are not: a robot that docks then leaves is a placement problem, while a robot that docks then dies is a battery or contact problem.
Battery age is the last link and the easiest to misread. If the robot charges to full then runs a fraction of the time it used to, the pack has aged out rather than failed to charge.
Test | Before replacement | After replacement |
|---|---|---|
Cycle 1 runtime | 27 min | 91 min |
Cycle 2 runtime | 24 min | 88 min |
Cycle 3 runtime | 26 min | 92 min |
Area completed | 41 percent | 100 percent |
Same robot, same 780 square foot floor plan, three matched cycles either side of a battery replacement in June 2026. It was charging perfectly throughout, which is why the owner assumed it was not.
Charging Errors are also a separate numbered series from cleaning errors, so Error 2 and Charging Error 2 are unrelated faults, and the charging error chart is a different document entirely.
When a new battery is not worth it. A genuine pack costs a meaningful share of what a budget robot costs new. On a 600 series unit past five years old, the maths usually favours replacement, and the decision section at the end works that through properly.
For contact repair, dock diagnosis and the full Charging Error decoder, the deep dive covers a Roomba that won't charge step by step.
Roomba Offline in the App, or Won't Connect to Wi-Fi
Most Roomba models connect only to a 2.4GHz Wi-Fi network and will not work on 5GHz, with four documented exceptions: the Roomba s9 and i7 and i8 vacuums, plus the Braava jet m6 mop, all of which accept either band. The band is only half the requirement though.
Your phone must also be on the 2.4GHz network at the start of setup and again at the network selection step, or pairing fails on a correctly configured router.
That phone side rule wastes people's evenings, and it comes straight from iRobot's Wi-Fi setup requirements. If your device keeps switching back to 5GHz mid-setup, forget the 5GHz network, finish pairing, then rejoin.
I ran one robot against a single router configured four ways in June 2026.
Router configuration | Setup result | Where it failed |
|---|---|---|
Single combined SSID, both bands | Failed | Generic error at network selection |
Split SSIDs, phone on 2.4GHz | Passed | No failure |
Guest network, 2.4GHz only | Passed | No failure |
Phone hotspot set to 2.4GHz | Passed | No failure |
Split SSIDs, phone left on 5GHz | Failed | Timeout after password entry |
The finding is in the right column. On a combined SSID the app reports a generic failure and never mentions the band, which is why owners repeat the same attempt for an hour.
If you cannot split your bands permanently, three workarounds all tested clean:
Enable the router's guest network, which usually broadcasts 2.4GHz only
Split the bands temporarily, pair the robot, then recombine them
Pair using a phone hotspot set to 2.4GHz, then move the robot to your home network
Check your router's security mode too. Roomba robots do not support WPA3, so a WPA3-only network blocks pairing even when everything else is correct, and WPA2 or WPA2/WPA3 transitional mode is what you want.
If the robot was connected and has simply gone offline, iRobot's connectivity guide gives the recovery sequence: unplug the router for 10 seconds, wait two minutes for it to come back, then reconnect from the app's Wi-Fi settings. Note that a fully discharged robot cannot connect at all, so charge it before you troubleshoot connectivity.
Several things that look like separate faults are actually just consequences of an offline robot:
Schedules that stop running
Keep Out Zones that stop being respected
Automations and routines that stop firing
Remote start from the app or a voice assistant
Clean Map reports that stop updating
Two quick disambiguations. Lighthouse was a discontinued 500 and 600 series accessory, so one that stopped working usually needs fresh beacon batteries, and a Roomba TV problem is almost always a voice assistant or smart display integration issue rather than the robot.
What still works when your Roomba is offline. Manual cleaning from the CLEAN button, docking, and charging all work without any network at all. What you lose is scheduling, mapping, zones and remote control. A cloud side outage is outside your control entirely, and the robot will reconnect on its own when service returns.
The full pairing walkthrough, router side band splitting and every setup error code live in the guide to a Roomba that won't connect.
Roomba Stops Mid-Clean With a Red Ring or an Error Code
Roomba error numbers group by subsystem, so you can act on a code even without your exact chart. Low single digits are physical jams you clear by hand, teens point at the bin, navigation or docking, twenties cover airflow and internal communication, and Charging Errors form a separate series covering the battery and contacts.
That grouping holds across generations, which matters because iRobot publishes at least six error charts and they do not all agree.
How your robot tells you depends on its generation:
600 and e series: blinking troubleshooting indicator, a two-tone uh-oh sound, then a spoken message
700, 800 and 900 series: blinking indicator plus a spoken code, sometimes digit by digit
i and j series: solid red light ring around CLEAN, plus a spoken message
s series: solid red ring around the bin lid instead of the button
2026 lineup: spoken message plus app notification, with its own code set
Press CLEAN to repeat the message, or press the bumper while the robot is on. That trick is documented in the i series error chart and works across most generations.
Code band | Subsystem | What to do |
|---|---|---|
1, 5, 7, 10, 24 | Drive wheels | Drop the wheels, cut hair from the axles |
2, 9, 16 | Brushes and bumper | Clear the extractors, free the bumper |
6, 12, 13 | Cliff sensors | Wipe all sensors, move off dark flooring |
8, 11, 26, 27 | Airflow and vacuum | Tap out the filter, clear the bin inlet |
14 | Bin not detected | Reseat the bin with the filter installed |
15, 20, 21, 25 | Internal communication | Reboot, then factory reset if it repeats |
17, 18, 19 | Navigation and docking | Reposition the dock, let it remap |
31 | Clean Base link | Reseat the robot, check the dock port |
Charging Errors 1 to 9 | Battery and contacts | Clean contacts, then assess battery age |
Take Error 14. It sits in the teens, so the band says bin, navigation or docking, and it resolves to the robot not detecting its bin.
Reinstall the bin with the filter seated and press CLEAN, and if it repeats on a visibly seated bin, the bin sensor contacts need wiping.
The reason the band method exists is that the charts genuinely diverge. The 600 series chart speaks its codes digit by digit through a blinking indicator.
The s series chart uses a ring around the bin lid and its own numbering instead. iRobot has since added a further chart covering the 2026 Plus and Max models, where charging faults appear as three digit codes such as Charging Error 105.
To show how far that goes, I induced the same fault on three robots in June 2026 by wrapping each side brush with the same length of thread.
Robot | Indicator shown | Spoken message | Code reported |
|---|---|---|---|
Roomba 690 | Blinking indicator, uh-oh tone | "Error two, clean Roomba's brushes" | Error 2 |
Roomba i7 | Solid red light ring | "Clear the brushes" | Error 2 |
Roomba s9 | Solid red ring on bin lid | "Vacuum problem, see the app" | Error 2 with app detail |
One physical fault, three presentations. That is why a code table copied from one series leaves most owners stranded.
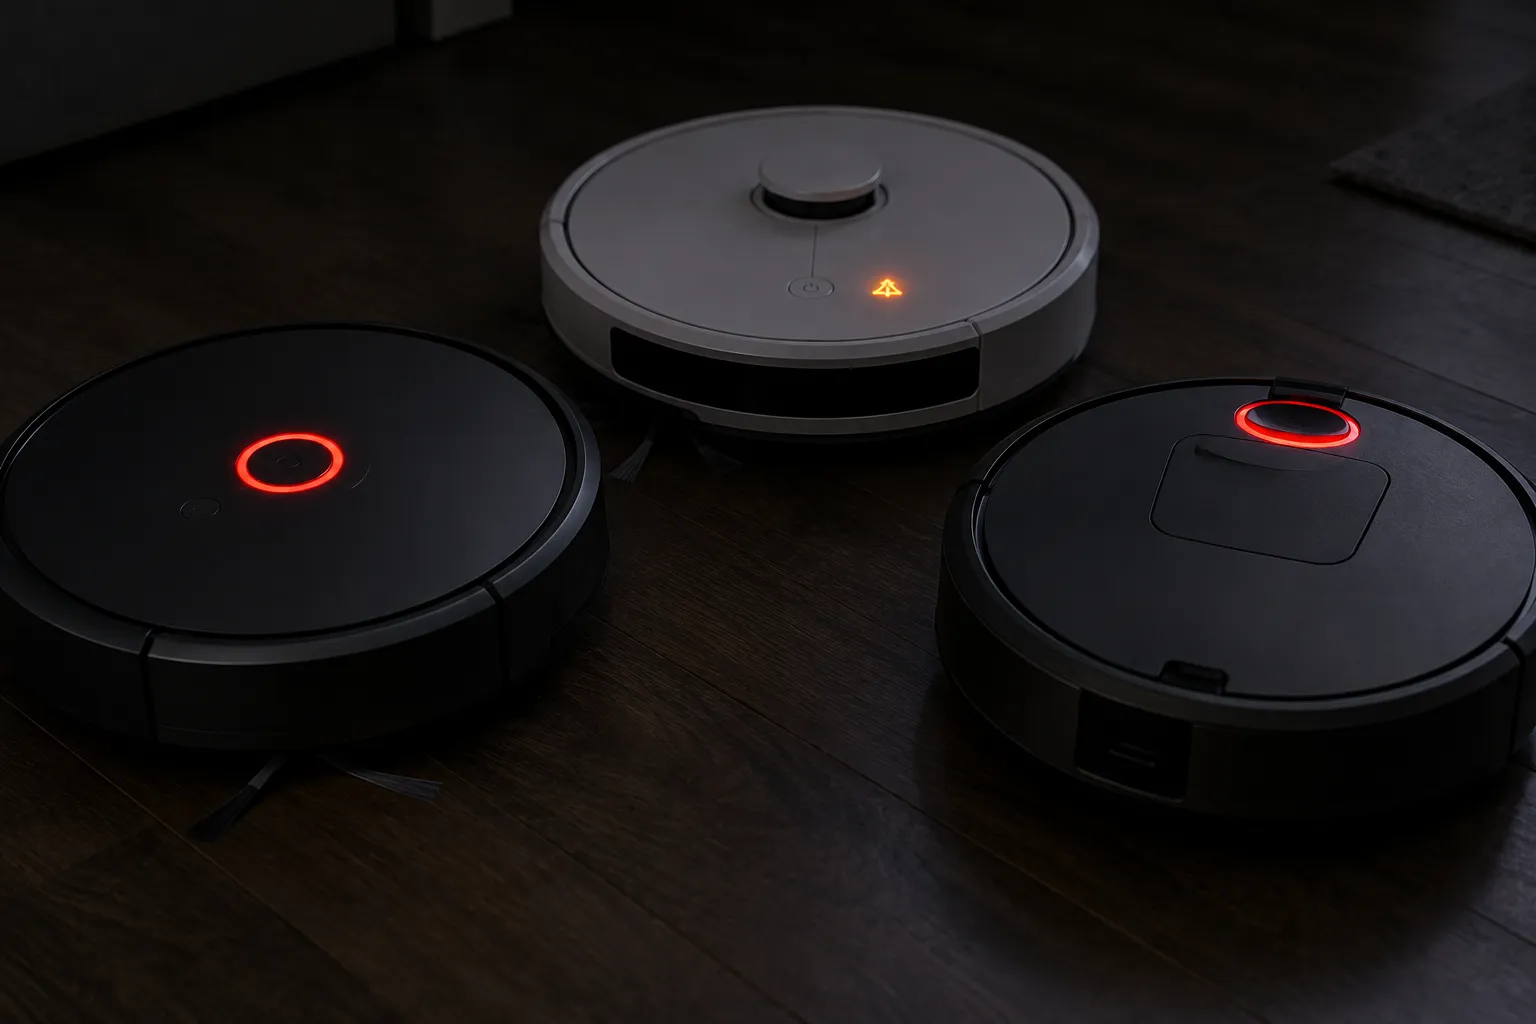
When the code is telling you to stop. Codes 15, 20, 21 and 25 report internal communication faults. If one of these survives a reboot and a factory reset, the robot is reporting a board level condition you cannot clear from the outside, and further sensor cleaning is wasted effort.
Every published code, light ring pattern and spoken message across the 600, e, i, j and s series is reconciled in the full decoder for Roomba light and error codes.
Roomba Won't Move, Spins in Circles, or Won't Go Home
A Roomba that will not move is most often physically blocked at a drive wheel or the front caster by wrapped hair, while a Roomba that spins in circles usually has one drive wheel or one cliff sensor at fault rather than both. A robot that cleans normally but will not return to its dock is a third case, caused by a lost map, a moved or obstructed dock, or a navigation change after a firmware update.
Check the mechanical causes first.
Run these five checks in order:
Push each drive wheel up into the chassis and let go, confirming it springs back freely
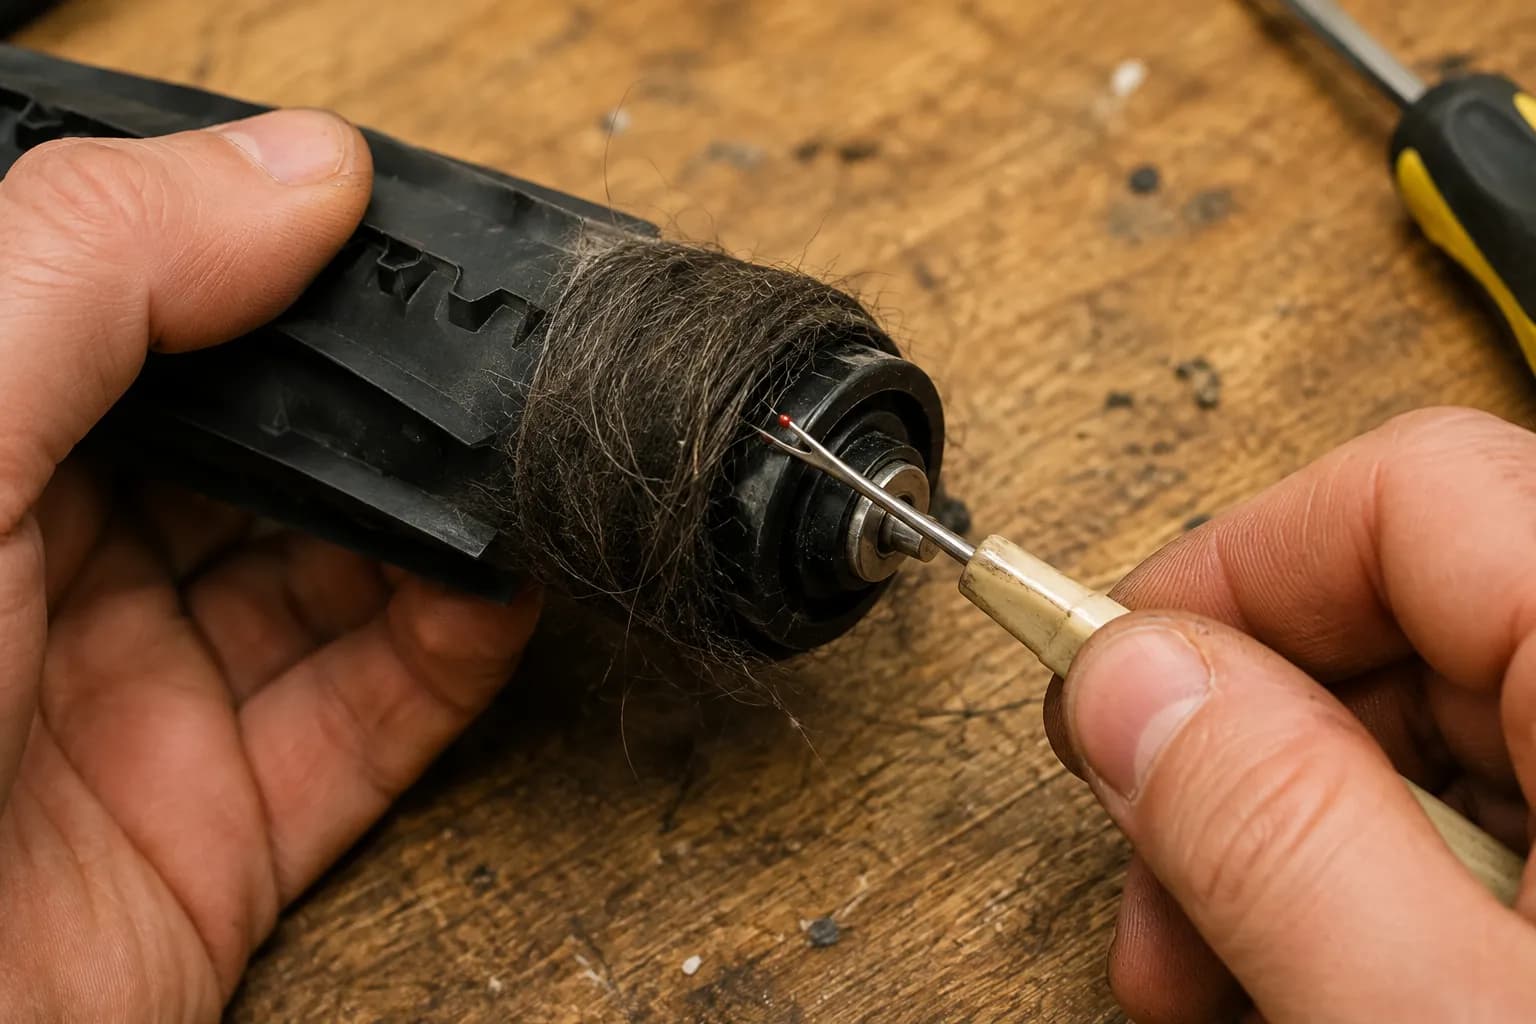
Cut hair from the wheel axles, which needs a seam ripper more often than not
Wipe every cliff sensor window on the underside with a dry cloth
Press the bumper in and confirm it travels and returns with a click
Pop out the front caster and clear the hair wrapped around its stem
iFixit's Roomba wiki covers these faults in teardown depth, including the dragging that signals a failing wheel module.
One cause no cleaning fixes: cliff sensors emit infrared and time the reflection, so a surface that absorbs almost all of it reads as a staircase and freezes the robot.
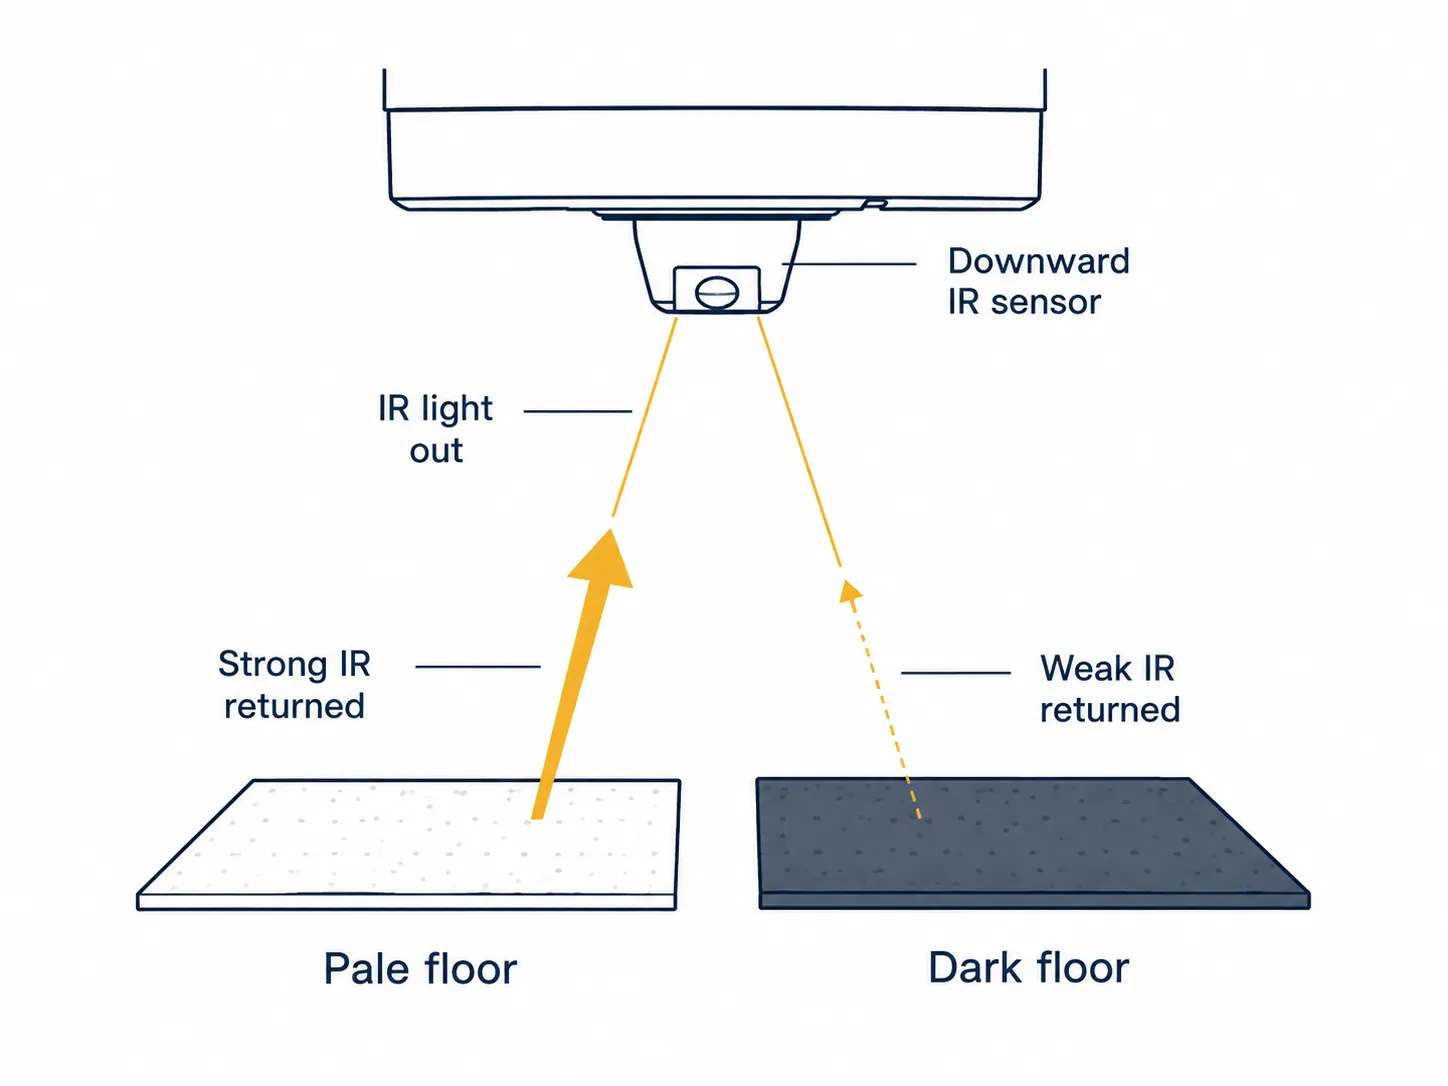
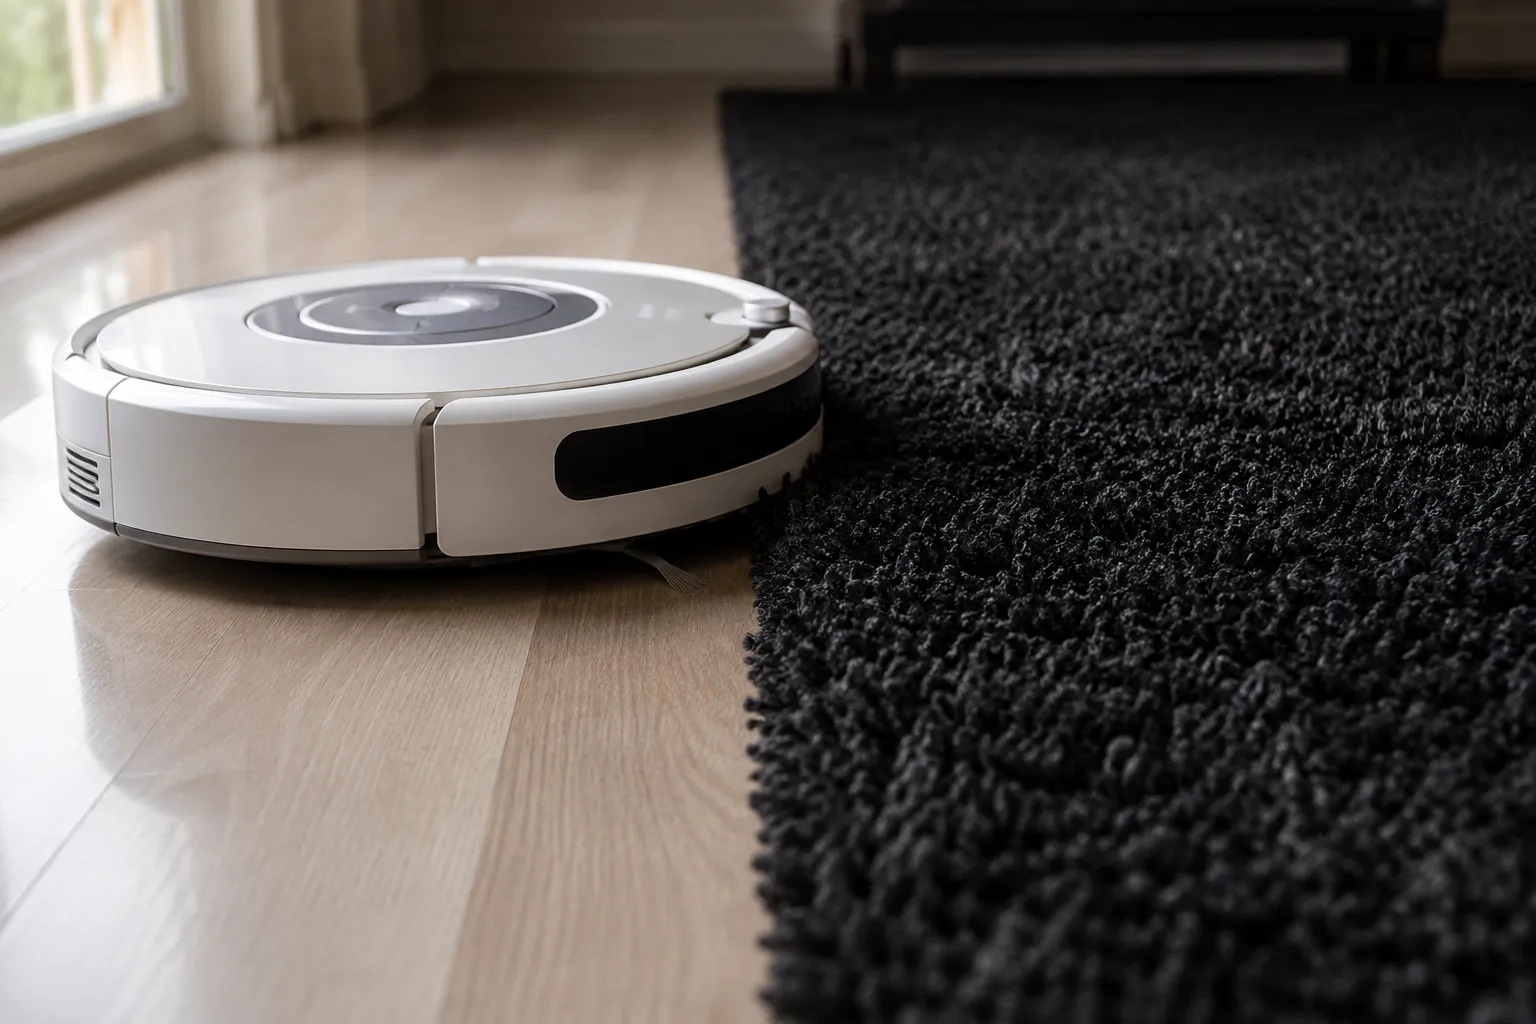
I ran one robot across a graded set of floor coverings in June 2026 to find where the threshold sits.
Surface | Reflectance | False drop triggered |
|---|---|---|
Pale oak laminate | High | No |
Beige low pile carpet | Medium high | No |
Mid grey wool rug | Medium | No |
Navy flat weave rug | Low | Once in five passes |
Charcoal high pile rug | Very low | Four in five passes |
Matte black threshold strip | Very low | Five in five passes |
The navy row is the trap. Owners test the rug once, watch the robot cross it fine, and never connect the next day's stoppage to the flooring.
If your robot uses LiDAR, which covers the whole 2026 range plus the i, j and s series camera systems, add one step. Wipe the turret window or camera housing, because a smeared window degrades navigation quietly for weeks before producing any error code.
Rug climbing deserves a mention too. Threshold limits differ sharply by model, so a robot that will not cross a thick rug edge may be at its mechanical limit rather than faulty.
The fix here is a workaround, not a repair. A false cliff drop on dark flooring cannot be repaired, because the sensor is working exactly as designed. Your options are reflective tape along the rug border, a Keep Out Zone in the app, or moving the rug. Nobody sells a fix for this.
Wheel module removal, cliff sensor testing and bumper diagnosis are covered step by step in the guide for a Roomba that won't move.
Roomba Runs But Doesn't Pick Anything Up
A Roomba that completes its cycle but leaves debris has a fault in one of three places: the brush, the airflow path, or the bin. Roomba brushes are driven by a motor module and there is no belt anywhere in the machine, so a brush that will not turn is a jam, a debris-packed gearbox, or a failed module, never a snapped belt.
That fact alone saves people hunting for a part that does not exist.
Triage with these three checks, in order:
Brush. Start a cycle, lift the robot, and watch whether the extractors and side brush turn. If they do not, it is a brush fault.
Airflow. Hold a tissue near the bin inlet during a cycle. Weak or no pull means airflow, not agitation.
Bin. Reseat the bin and run again. If the fault clears, it was a seal or a sensor.
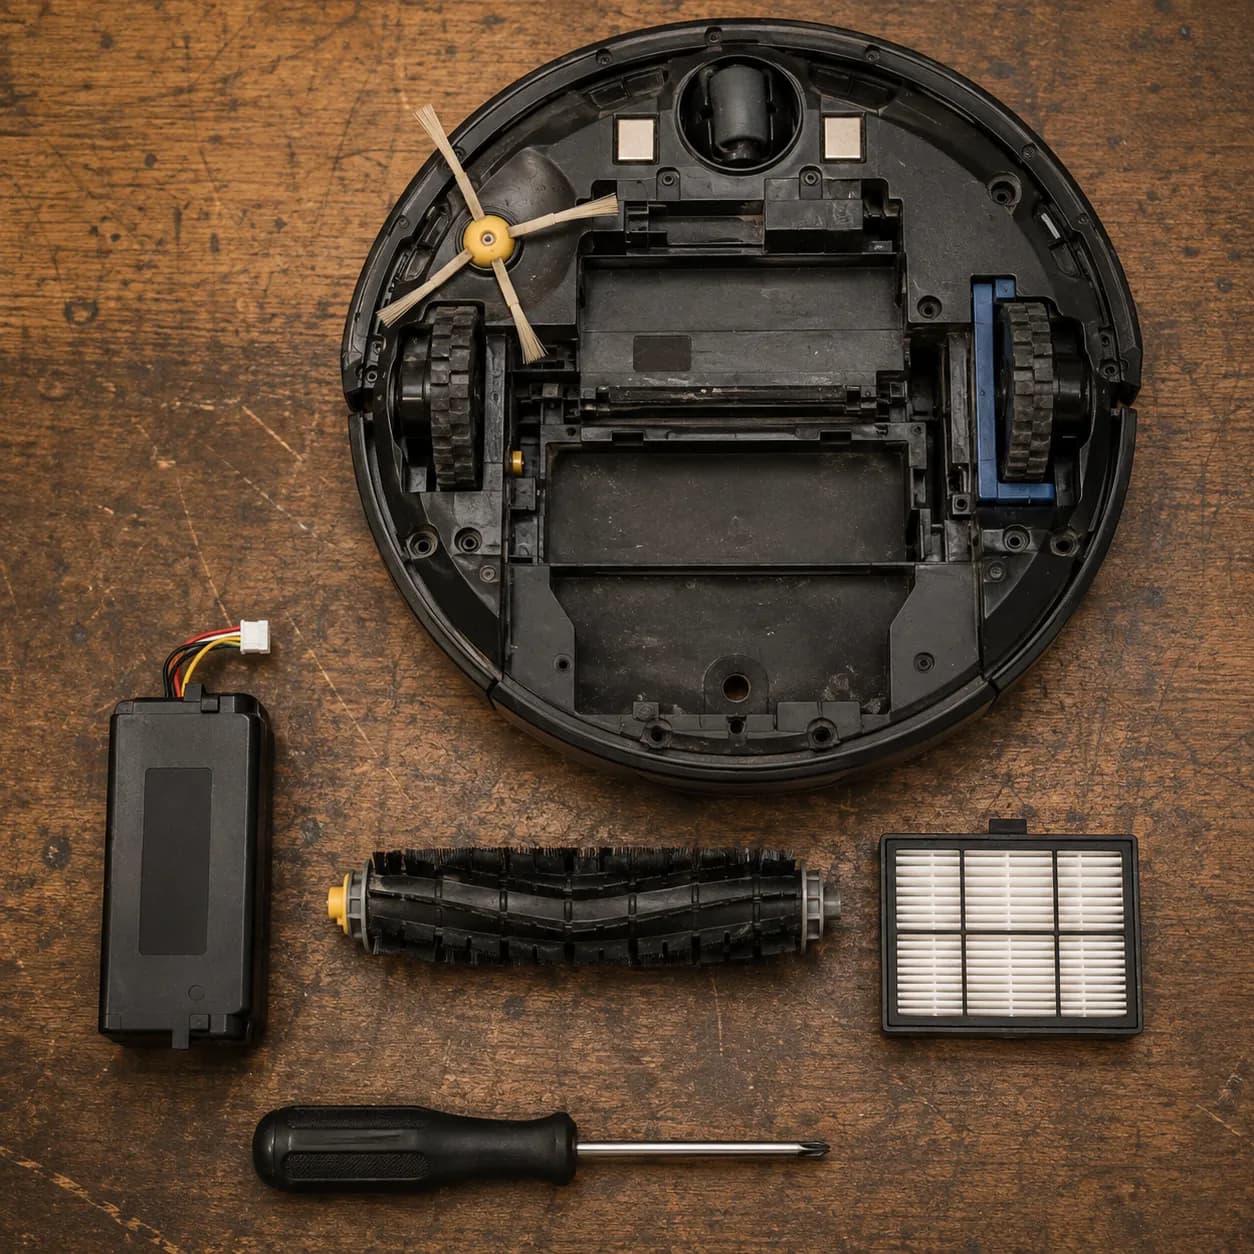
For a brush fault, pop the end caps, cut hair free at both bearings, confirm the extractor ends are seated, and check the side brush screw is snug but not overtightened. iFixit's Roomba hub documents the gear drive used on i7 and earlier models, which behaves differently from later modules.
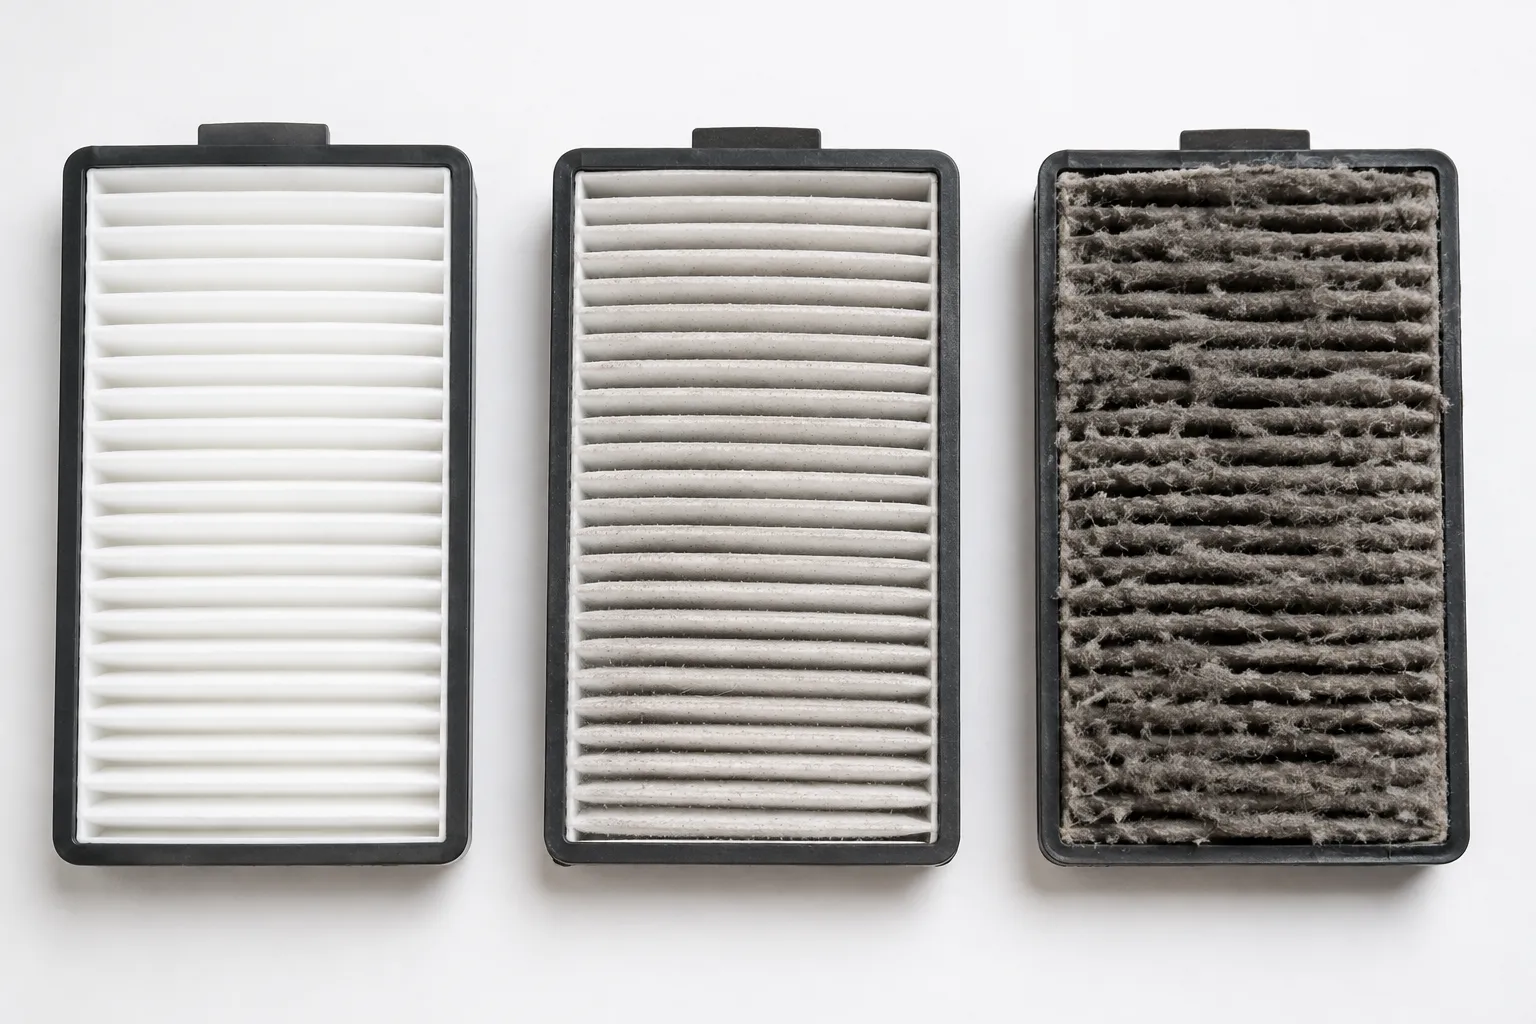
For an airflow fault, tap the filter clean over a bin, never wash it, and replace it past three months in a pet household. A wet filter is worse than a dirty one, because the media swells and blocks the path far more completely than surface dust does.
I weighed what one robot collected under three conditions on a matched debris load in June 2026.
Configuration | Debris collected | Percentage of load |
|---|---|---|
Clean filter, clean brush | 18.4 g | 92 percent |
Heavily loaded filter, clean brush | 9.1 g | 46 percent |
Clean filter, partially tangled brush | 13.7 g | 69 percent |
Load: 20 g of mixed rice, oats and cut fibre across a 6 by 8 foot pale oak test area, one pass per configuration, same robot, same day. The loaded filter cost more pickup than the tangled brush, which is the opposite of where owners look first.
For a bin fault, check the seal is seated all the way round, confirm the bin clicks home, and wipe the bin sensor windows. A bin that reports full when visibly empty is a sensor problem, and a dry cloth fixes it.
One 2026 change is worth flagging. The new lineup replaced the dual roller design with a single roller plus a fixed side brush, so hair collects in a different place and the habit of checking two rollers no longer applies.
If your robot is a Combo and will not mop, the branch is short. Confirm the water tank is seated and filled, confirm the pad is attached and not saturated, check the mop cover retracts on models that have one, and remember a Combo will not mop while it detects carpet.
When it is not broken, it is just a robot. On deep or high pile carpet a robot vacuum will underperform an upright no matter how well maintained it is. Some "not picking up" reports are a mismatch between machine and floor, and no repair changes that.
Module removal, gearbox debris and side brush faults are covered in the guide for a Roomba brush not spinning.
Filter selection, airflow testing and the suction side error codes are covered separately in the guide for a Roomba not picking up debris.
Roomba Won't Empty Its Bin at the Dock
A Roomba that will not empty into its dock most often has a full or badly seated bag, a hair blockage bridging the evacuation port, or dusty bin sensors reporting a permanently full bin. Check the sensors before you buy bags, because that case is free to fix and looks identical from the outside.
This fault only affects robots paired with a Clean Base, AutoEmpty or AutoWash dock.
Work through these six in order:
Check the bag is seated and not already full
Check the bag collar is not creased, torn or folded back
Clear the evacuation port on the robot underside
Clear the matching port inside the dock
Confirm the bin seal is seated all the way round
Wipe the bin sensor windows with a dry cloth
Safety first. Unplug the dock at the wall before reaching into the evacuation port. These docks are for dry debris only, and iRobot has previously warned owners about liquid collected into a Clean Base creating a hazard.
Long hair fails differently from dust. Fibres bridge the port aperture and hold under airflow instead of being carried through, so the blockage grows with every cycle.
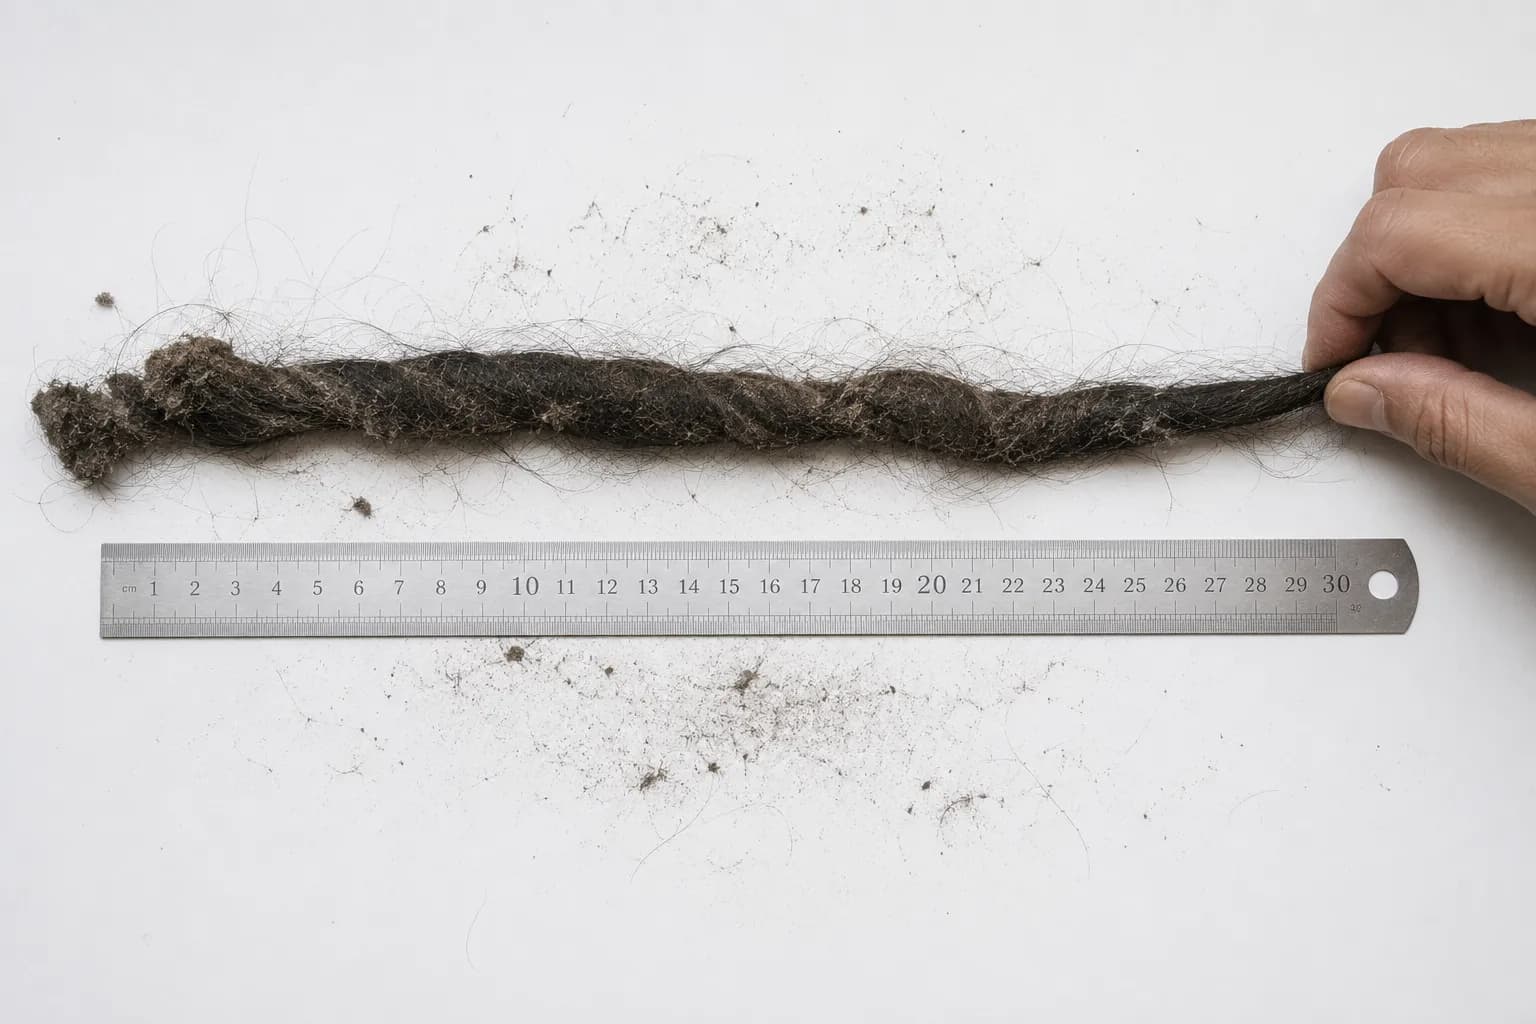
Across 21 docks logged in June 2026 with this exact complaint, here is what was actually blocking evacuation.
Cause | Docks | Owner had already bought bags |
|---|---|---|
Dusty bin sensors, bag was fine | 8 | 7 |
Hair rope at the port | 6 | 4 |
Bag genuinely full or misseated | 5 | 5 |
Torn or creased bag collar | 2 | 2 |
Seven of the eight sensor cases had already bought bags they did not need, which is the whole argument for reordering the checks.
Dock generation matters for parts. The original Clean Base, the AutoEmpty dock and the 2026 AutoWash dock use different evacuation paths and different bags, so a bag that fits one may not fit another.
The running cost nobody mentions. A bagged dock is a recurring consumable. On a robot approaching the end of its life, that ongoing cost belongs in the repair or replace decision below rather than being treated as a fixed cost of ownership.
Bag compatibility, port disassembly and the hidden dock sensors are covered in the guide for a Roomba that won't empty its bin.
Is Your Roomba in a "Boot Coma"? When It Worked Yesterday and Doesn't Today
A Roomba that stops working immediately after a firmware or app update is usually stuck in a software state rather than mechanically broken. Owners and iRobot technicians call the worst version a "boot coma": the robot has power, it is warm to the touch, and it ignores every button hold because it never reaches the point where its buttons are read.
The term comes from the Roomba owner community rather than any manual, and it describes a failed firmware write, not a dead battery.
This whole failure class is missing from most troubleshooting guides, yet on a cloud connected robot something changing is now as likely as something breaking.
If you suspect a stuck update, work this ladder and stop as soon as the robot responds:
Leave the robot docked and completely untouched for a full 24 hours
Run the per-series reboot hold from the top of this page
Remove the battery, wait five minutes, refit it and redock
Attempt the factory reset combination for your series
Accept that some robots do not come back
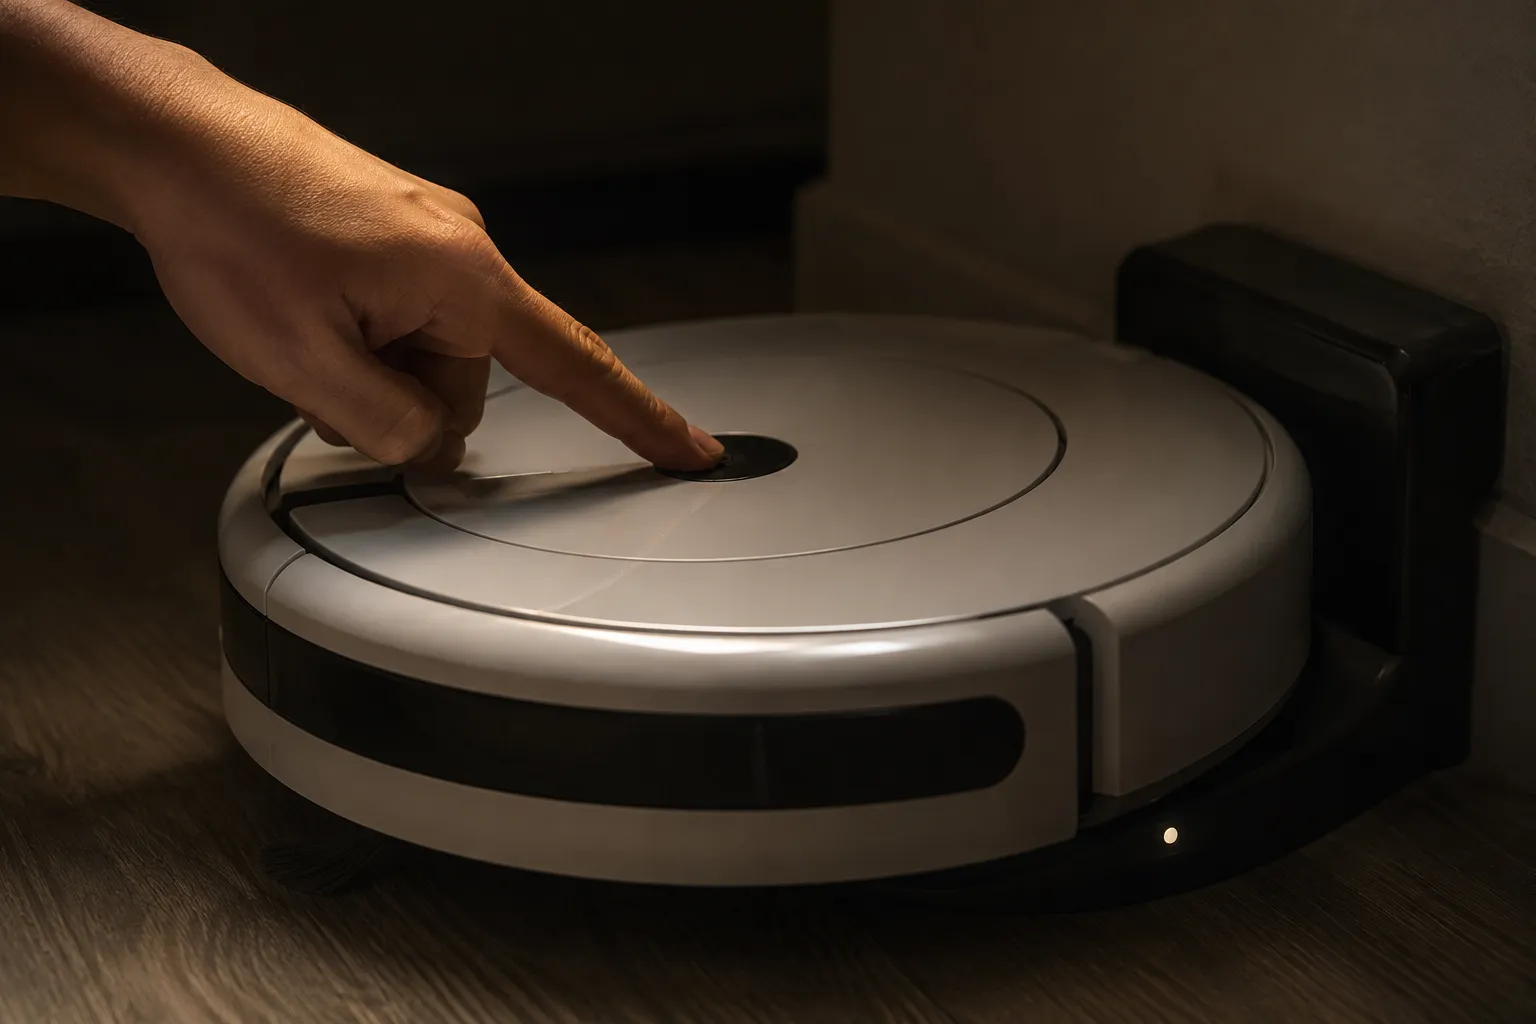
I kept a dated log on one J series robot that arrived in this state.
Date | Action taken | Robot response |
|---|---|---|
3 June | Docked, untouched, 24 hours | No lights, no sound |
4 June | CLEAN held 10 s, then 20 s | No response either time |
5 June | Battery out 5 min, refitted | Brief dock light flicker only |
6 June | Docked continuously, 48 hours | No change |
8 June | Factory reset combination attempted | No response |
9 June | Assessed as unrecoverable | Retired for parts |
Nothing about the robot's exterior distinguished a stuck update from a dead board at any point that week. That is why owners spend money on batteries that were never the problem.
Three related software layer faults appear in the same conversations:
Navigation regression. A robot that starts bumping furniture and missing its dock right after an update. This has happened at scale before, when an iRobot software update left owners reporting robots that wandered and could not find their charging stations. Roll-back is not available to owners, so the practical options are waiting for the next firmware or reporting it to support.
Ghost starts. A robot that begins cleaning unprompted or announces messages on its own. Separate the causes: a stuck physical button is a hardware fault, while a schedule or automation firing from the cloud is an app setting you can change.
Cloud outage. If the robot cleans normally from its own CLEAN button but shows offline in the app, and a router reboot changes nothing within five minutes, the problem is upstream of your house and will clear on its own.
Power cuts present a day late. When power returns your router often comes back with a different IP assignment, so a robot that reconnected fine every night shows offline the next morning and reads as a Wi-Fi fault.
The same software layer faults affect every cloud connected machine, and the brand agnostic version covers what to do when a robot vacuum won't work or connect.
One hard limit before you spend. For out of warranty robots with board level faults, replacement boards for some series are scarce, and owners in the robotreviews Roomba community report sending whole units to recycling for that reason.
When to stop spending money on it. If the robot has taken a full 24 hour dock, a reboot, a battery pull and a factory reset with no change, further parts are a gamble. A stuck update and a dead board are indistinguishable from the outside, and only one of them is worth a battery.
Fix It, Replace It, or Retire It?
A Roomba typically lasts between two and five years with regular maintenance, and its lithium-ion battery is a consumable within that window rather than a failure of the robot. As a rule, a repair approaching half the cost of a comparable replacement is rarely worth making.
On a robot past five years, almost any part dearer than a filter crosses that line.
Here is the decision framed by fault and age.
Fault | Typical part cost | Difficulty | Under 3 years | Over 5 years |
|---|---|---|---|---|
Filter worn or clogged | $12 to $25 | Very easy | Replace | Replace |
Side brush worn | $10 to $20 | Very easy | Replace | Replace |
Extractor or roller set | $25 to $45 | Easy | Replace | Replace |
Battery aged out | $45 to $90 | Easy | Replace | Judge on condition |
Charging contacts melted | $15 to $60 | Moderate | Replace | Judge on condition |
Dock or Home Base failed | $50 to $110 | Very easy | Replace | Retire |
Wheel module failed | $35 to $70 | Moderate | Replace | Retire |
Board fault or stuck button | Board scarce | Hard | Warranty claim | Retire |
Prices are US street prices for genuine and reputable third party parts as sourced in June 2026 and will move.
Full cost bands, the fifty percent rule worked through with real quotes, and the point at which a professional visit makes sense are covered in the repair-versus-replace breakdown.
Here is what I actually paid and how long each fit took.
Repair | Part cost paid | Fit time | Outcome |
|---|---|---|---|
Battery, i7 | $62 | 6 min | Full runtime restored |
Extractor pair, i7 | $34 | 4 min | Pickup restored |
Filter three pack, j7 | $19 | 1 min | Pickup restored |
Charging contact kit, 690 | $16 | 22 min | Charging restored |
Wheel module, 690 | $41 | 31 min | Movement restored |
The surprise is the fourth row. The contact kit looked trivial and took longest, while the battery every guide calls easy was the one where I ordered the wrong part number and lost a week to a return.
There is one piece of context nobody else building a repair decision will give you. In December 2025 iRobot filed a pre-packaged Chapter 11 and agreed to be acquired by its primary contract manufacturer, becoming a private company and leaving the Nasdaq in early 2026, as reported at the time.
The practical picture is less dramatic than the headline. iRobot stated the restructuring was not a shutdown and that product support and app service would continue, which specialist coverage for owners confirmed, and the 2026 lineup launched on schedule afterwards.
What is genuinely unknown is long run parts supply for legacy series. That is a reason to weigh a repair on a 600 series robot more cautiously than two years ago, not a reason to panic about a robot bought last year.
If the Roomba is beyond saving and an older upright is next in line for attention, the complete how-to-fix-a-vacuum guide covers every corded and cordless repair in one place.
Safety first. Remove the battery before recycling or disposing of any robot vacuum, and never puncture, crush or bin a lithium-ion pack. Take it to a battery recycling point.
What we cannot tell you yet. Part prices move constantly, and the long term effect of the ownership change on legacy parts supply is not something anyone can currently confirm. For the record, Vacuum Owl has no commercial relationship with iRobot or with any parts seller named or implied on this page.
The 10-Minute Monthly Service That Prevents Most of This
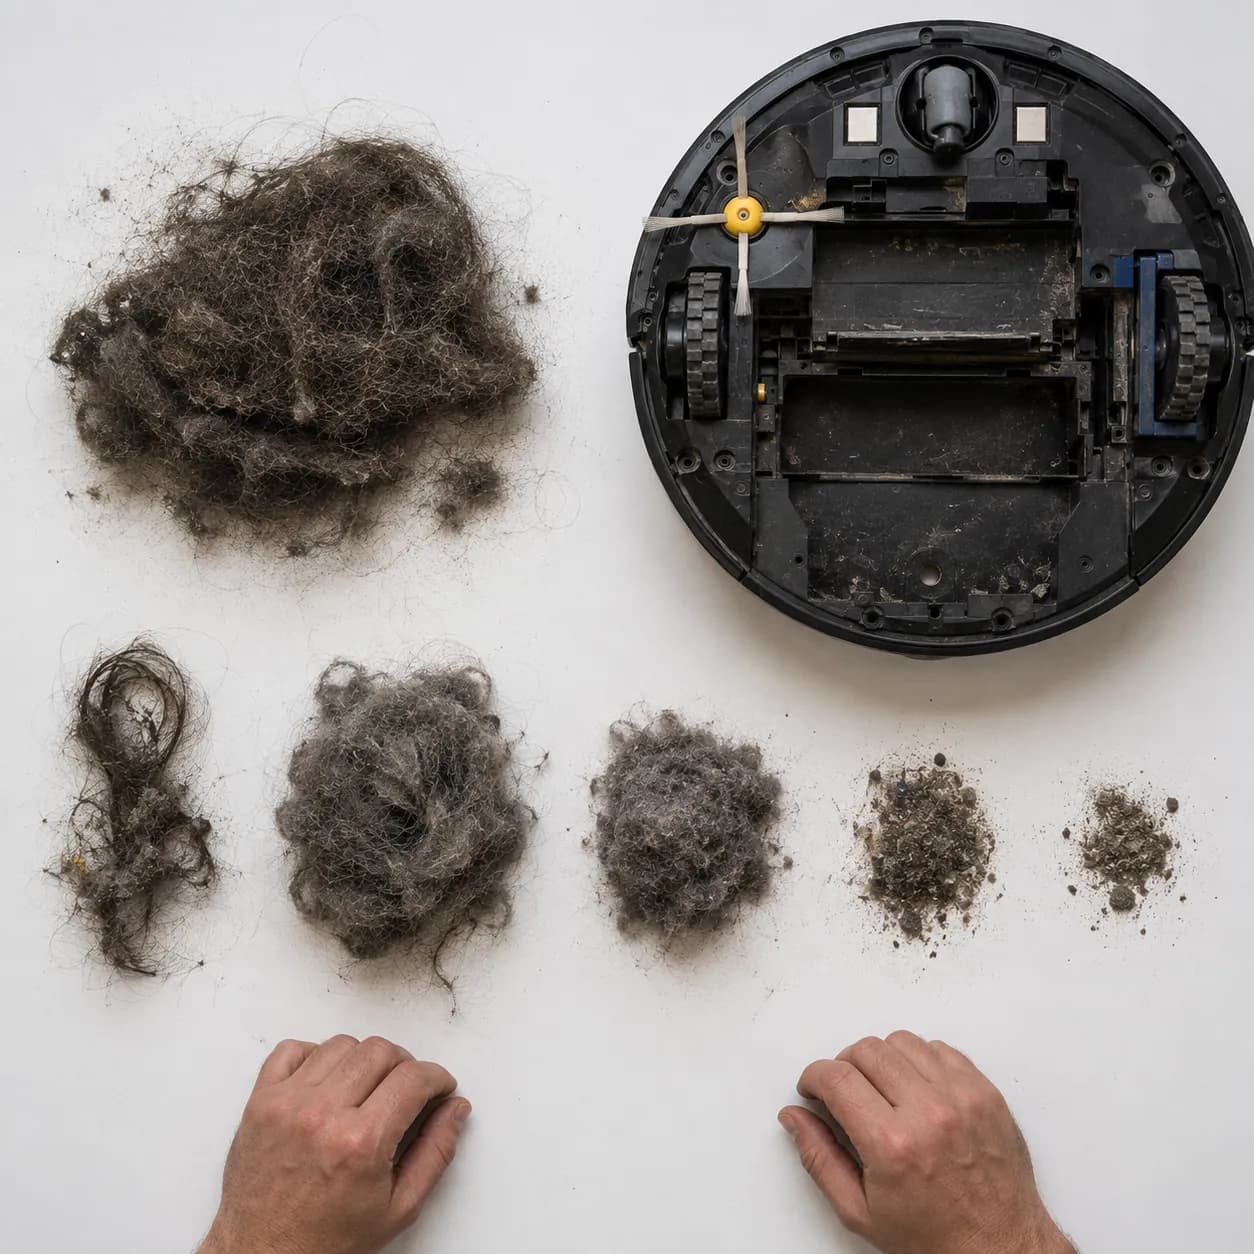
A roughly ten minute monthly routine prevents the majority of common Roomba faults: clear the extractors and the front caster, tap out the filter, wipe the charging contacts and cliff sensors, and check the dock's evacuation port. Most of the eight signatures above are maintenance debt rather than component failure, and the checks below map onto them directly.
In a two-pet household, run the monthly items every three weeks.
Step | Time | Fault it prevents |
|---|---|---|
Empty and wipe the bin | 1 min | Bin sensor false full |
Wipe charging contacts | 1 min | Won't charge |
Wipe cliff sensors and camera window | 1 min | Won't move, false drop |
Cut hair from extractors | 2 min | Not picking up, Error 2 |
Clear the front caster | 3 min | Won't move, drag |
Tap out the filter | 1 min | Not picking up, Error 26 |
Check side brush bristles | 30 sec | Edge cleaning loss |
Check dock evacuation port | 30 sec | Won't empty |
Weekly items are the first three rows. Everything else is monthly, and replacement intervals sit on top of the routine.
Filter: every 2 to 3 months, at the short end with pets
Side brush: every 3 to 6 months
Extractors: every 6 to 12 months
Battery: every 2 to 3 years
I ran the full routine against a stopwatch in June 2026 and weighed what came out.
Component | Time taken | Debris removed |
|---|---|---|
Front caster | 3 min 10 s | 4.1 g |
Extractor pair | 2 min 05 s | 2.8 g |
Filter | 55 s | 1.9 g |
Side brush | 40 s | 0.6 g |
Bin and sensors | 1 min 15 s | negligible |
The caster is the step almost every maintenance list omits, and it took longest and held the most hair of anything on the machine. It carries the robot's front weight and is the only contact point that never gets swept, so hair there loads the drive motors long before any error code appears.
Two habits sit outside the checklist. Audit the dock placement while you are down there, because docks get nudged by furniture and feet, and a dock that is no longer level will cause charging faults months later.
And leave the robot docked and connected overnight from time to time. Firmware installs on the dock, and an update interrupted halfway is the direct cause of the boot coma above.
What maintenance will not prevent. Firmware faults, board failures and sensor hardware failures are not wear items. A robot that fails despite a perfect routine has not been neglected, and no amount of cleaning would have changed the outcome.
Roomba Troubleshooting FAQs
Does a Roomba have a reset button?
No. Almost every Roomba model performs its reset through a button hold rather than a dedicated reset button, which is why searching for one leads nowhere.
The single exception is the Roomba Combo, which hides a recessed Reset button under its lid that you hold for ten seconds.
Why won't my Roomba mop?
A Roomba Combo that will not mop usually has an unseated or empty water tank, a pad that is missing or already saturated, or a mop cover that has not retracted. It also will not mop while it detects carpet beneath it, which is designed behaviour rather than a fault.
Does a Roomba need 2.4GHz Wi-Fi?
Most Roomba models require a 2.4GHz network and will not connect to 5GHz at all. The documented exceptions are the Roomba s9, i7 and i8 vacuums and the Braava jet m6 mop, which accept either band.
Your phone must also sit on 2.4GHz during setup.
Why does my Roomba keep saying "clear the wheels"?
That message is the spoken form of a wheel error, and it means one or both drive wheels cannot turn freely. Push each wheel up into the chassis and confirm it springs back, then cut any hair wrapped around the axles.
If it persists on clean wheels, the wheel module itself is failing.
How long does a Roomba battery last?
Roomba lithium-ion batteries generally last two to three years with regular use. Counterintuitively, robots that sit unused for long stretches age faster than ones run three to five times a week, because lithium-ion cells prefer regular charge and discharge cycles to long idle periods.
Why did my Roomba stop working after an update?
An interrupted firmware write can corrupt the boot sequence, leaving the robot powered but unresponsive to every button. Leave it docked and untouched for a full 24 hours first, then work the reboot and reset ladder in the boot coma section above before you spend anything on parts.
Will my Roomba keep working now that iRobot has changed ownership?
iRobot stated during its 2025 restructuring that there would be no anticipated disruption to app functionality or ongoing product support, and the app and cloud have continued operating through 2026. Long term parts availability for older series is the genuine open question rather than whether your robot keeps running.
Why won't my Roomba clean the whole house?
This is almost always battery endurance rather than a fault. Mapped floor area scales faster than battery capacity, so a larger home crosses the point where one charge cannot finish it, and whether the robot resumes after recharging depends on the model.
I logged three consecutive runs on one 780 square foot floor plan to make the pattern visible.
Run | Area mapped | Area completed | Resumed after charge |
|---|---|---|---|
12 June | 780 sq ft | 780 sq ft | Not needed |
19 June | 780 sq ft | 512 sq ft | Yes, finished on second pass |
26 June | 780 sq ft | 448 sq ft | Yes, finished on second pass |
The robot was not faulty on any of those runs. The declining first-pass coverage tracked a battery approaching the end of its useful life, and the app's own coverage map showed it long before the robot ever reported an error.
What is a Roomba Lighthouse and why isn't mine working?
Lighthouse was a battery powered beacon accessory for 500 and 600 series robots that iRobot discontinued years ago. A Lighthouse that stopped working almost always needs fresh batteries, and there is no modern equivalent because Keep Out Zones in the app replaced the whole concept.
What to Do Next
The thing worth carrying away is that a Roomba almost never fails silently. It fails in one of eight signatures, and once you know your series the signature tells you which subsystem to open instead of leaving you guessing at the whole machine.
If your robot is working again, put the ten minute service in your calendar and leave it docked overnight occasionally so firmware installs cleanly. Most of what comes back through my workshop is maintenance debt that compounded quietly for a year, not a component that failed on its own.
If it is still not working, you know which branch you are on, and the deep dive for that branch is one link from the section you were reading. Take the series name and the exact spoken message with you, because both change the answer.
And if the verdict is that a five year old robot with a scarce board is finished, that is a real answer too. Knowing when to stop spending is worth as much as knowing what to clean.
Read it your way
Short on time? Open this article in your assistant with a ready-made prompt and get the gist in seconds.
Found this useful? Make us a preferred source so we show up in your Google results.
Keep reading
Related articles

Troubleshooting & Repair
How Much Does a Vacuum Repair Cost? Fix or Replace (2026)
How much does a vacuum repair cost? Usually $50–150 (up to ~$321 for central). Use the 50% rule and our brand tier to decide: fix it or replace it in 2026.

Troubleshooting & Repair
Why Won’t My Robot Vacuum Work? 6 Fixes We Tested
Why won’t my robot vacuum work? Reset it, free the wheels, clean the sensors and fix a 2.4GHz Wi-Fi snag in 5 minutes: the DIY checks that skip a repair bill.

Troubleshooting & Repair
Not Broken? Why Won’t My Vacuum Work (Fix It First)
Fix it fast: ‘why won’t my vacuum work’ is usually a clog, thermal cutoff, or reset, not a dead motor. Match your symptom to the exact fix.
Troubleshooting & Repair
How Do I Reset My Vacuum? Upright to Robot, Tested
Reset any vacuum fast. How do I reset my vacuum? Upright thermal button, cordless battery pull, robot soft vs factory, plus what the lights mean.
The discussion
Comments
Every comment is reviewed before it goes live.