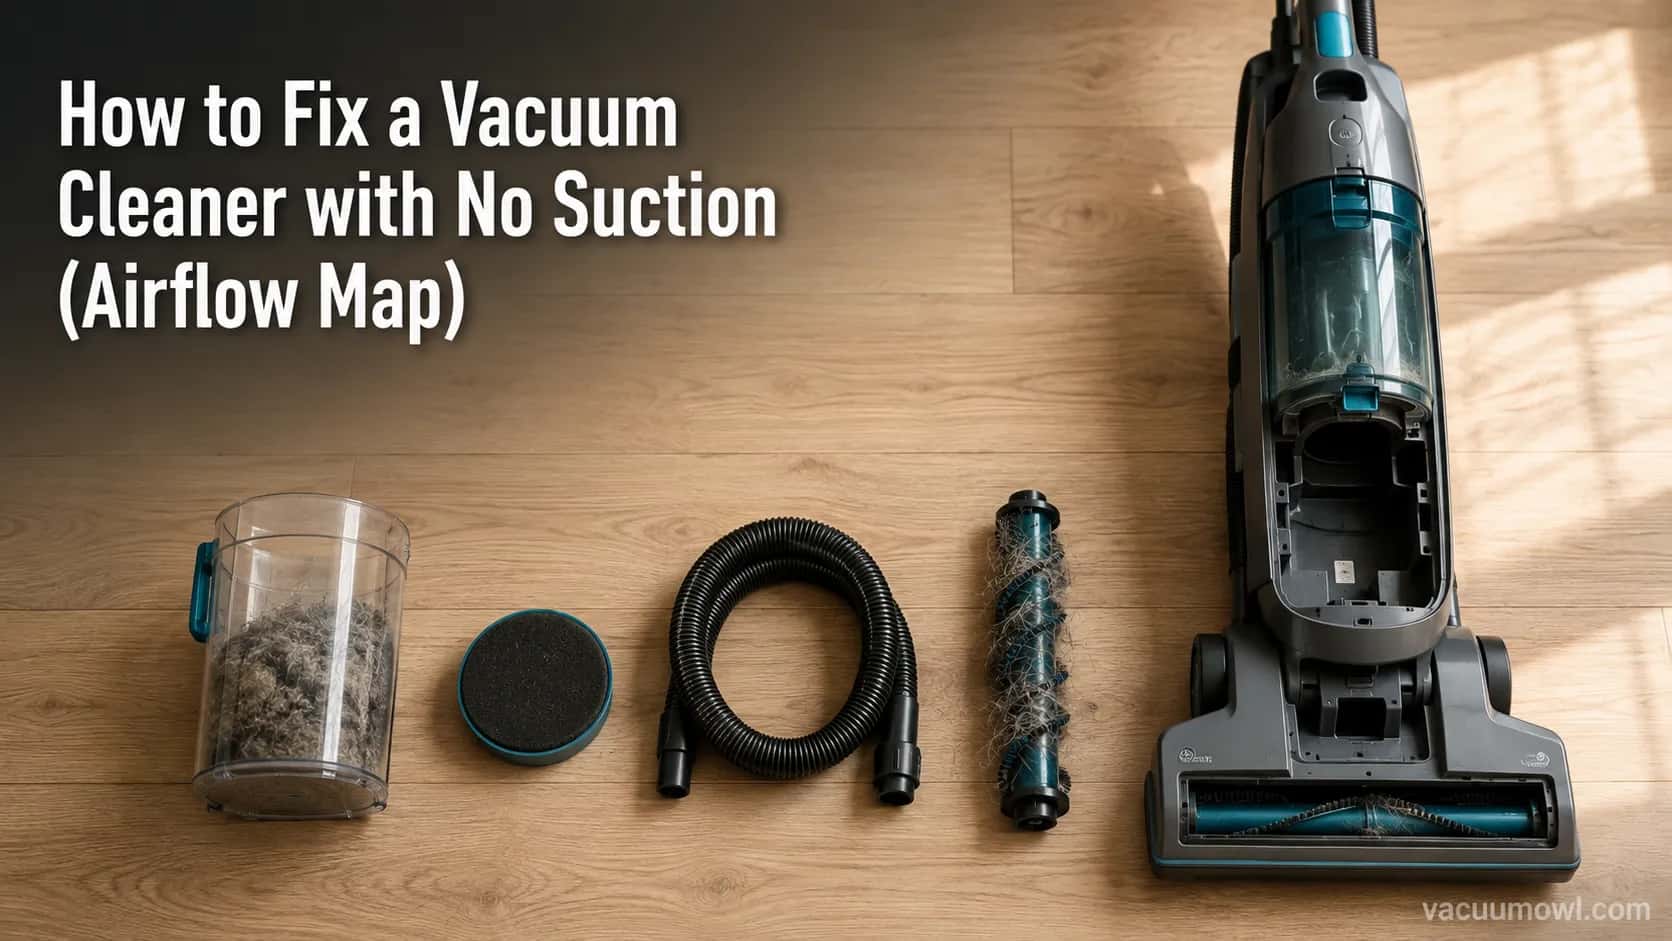
How to Fix a Vacuum Cleaner with No Suction (Airflow Map)
How to fix a vacuum cleaner with no suction: work the airflow path (bin, filters, hose, brush, seals) to find the blockage or leak and restore full power.
Written by Reggie AlvarezReviewed by Dale FerrisLast updated on August 13, 2026
When you buy through links on our site, we may earn an affiliate commission (at no extra charge), which we use to fund new product tests. Learn more.
Read it your way
Short on time? Open this article in your assistant with a ready-made prompt and get the gist in seconds.
Found this useful? Make us a preferred source so we show up in your Google results.
When a vacuum stops pulling, it feels like the motor died. It almost never did.
Learning how to fix a vacuum cleaner with no suction comes down to one idea: air travels a single path through the machine, and suction is lost wherever that air is either blocked or leaking. Walk the path in order and you find the exact spot, usually in under ten minutes and usually for free.
I run the same ordered check across every machine that lands on my bench, from cheap uprights to cordless sticks, robots, and shop vacs. The stop that kills suction is rarely the one owners expect.
The 60-Second Suction Fix (First 3 Checks)
Most suction loss ends here. A full bin and a clogged filter are the two most common causes on any vacuum, so start with the three fastest checks before you reach for a single tool.
The 60-second fix, in order:
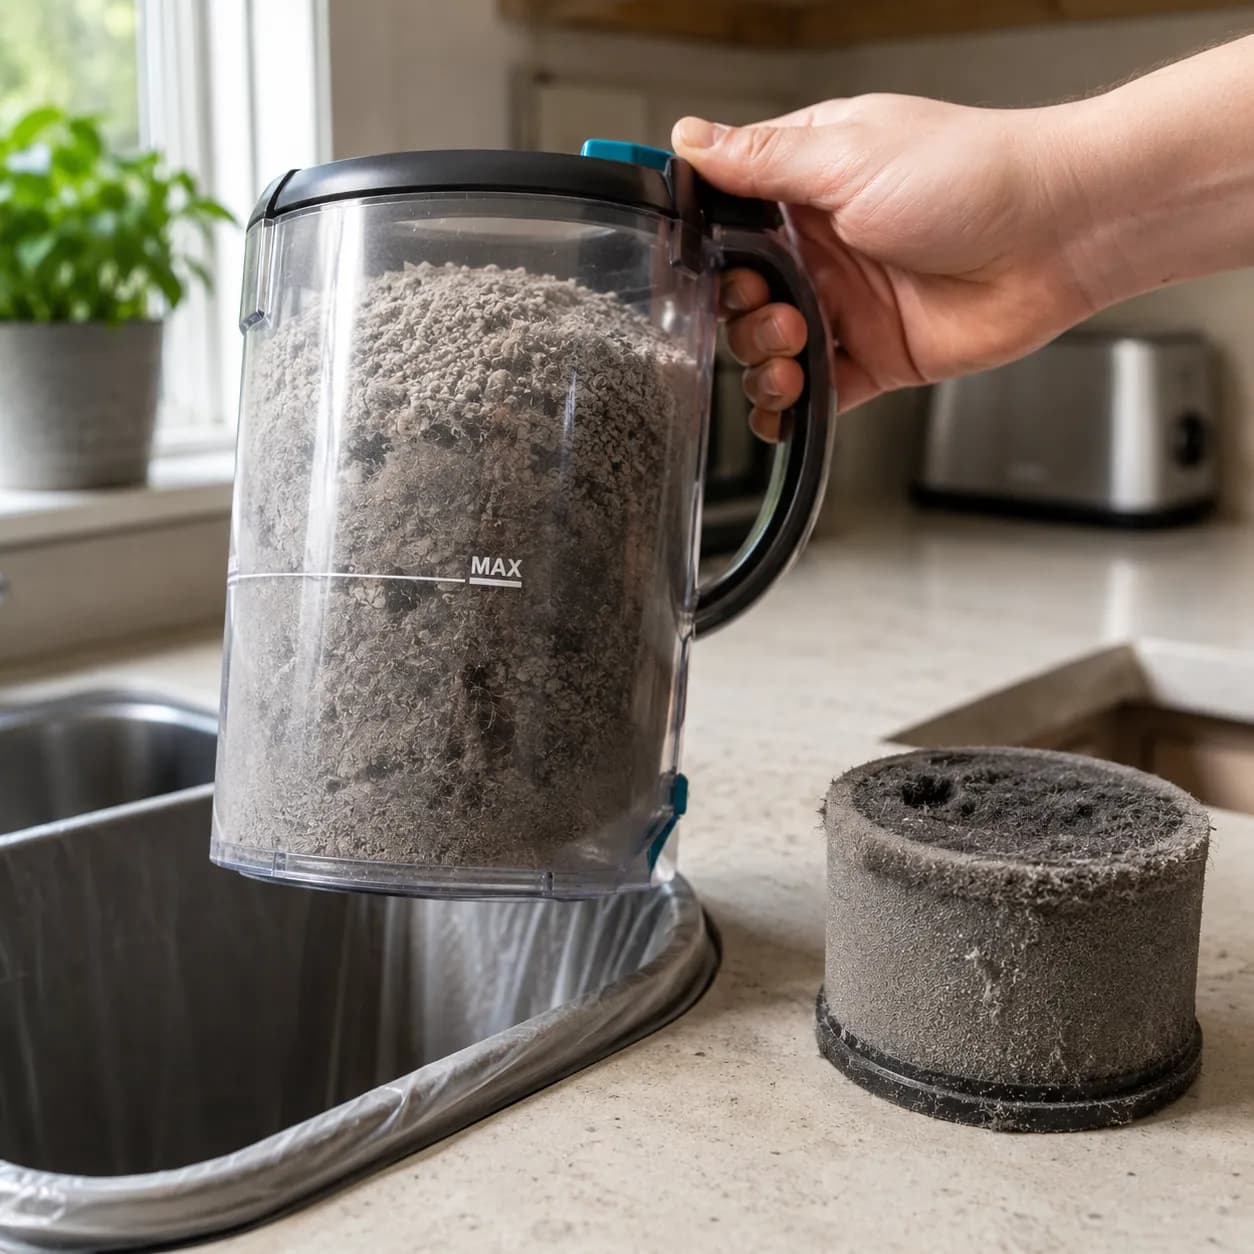
Empty the bin or bag. Once dust passes the fill line, airflow chokes and pickup drops.
Pull and check the pre-motor filter. If it is grey and packed, that alone can halve suction.
Clear the hose and inlet. Feel for a clog where the hose meets the body.
Across the machines I reset this way, most regained full power at step one or two. If all three are clean and suction is still weak, the problem is deeper along the airflow path, and the rest of this guide walks you to it.
This quick fix will not solve a true air leak or a mechanical fault. Those get their own sections below.
Why Vacuums Lose Suction: The Airflow-Path Map (Blockage vs Air-Leak)
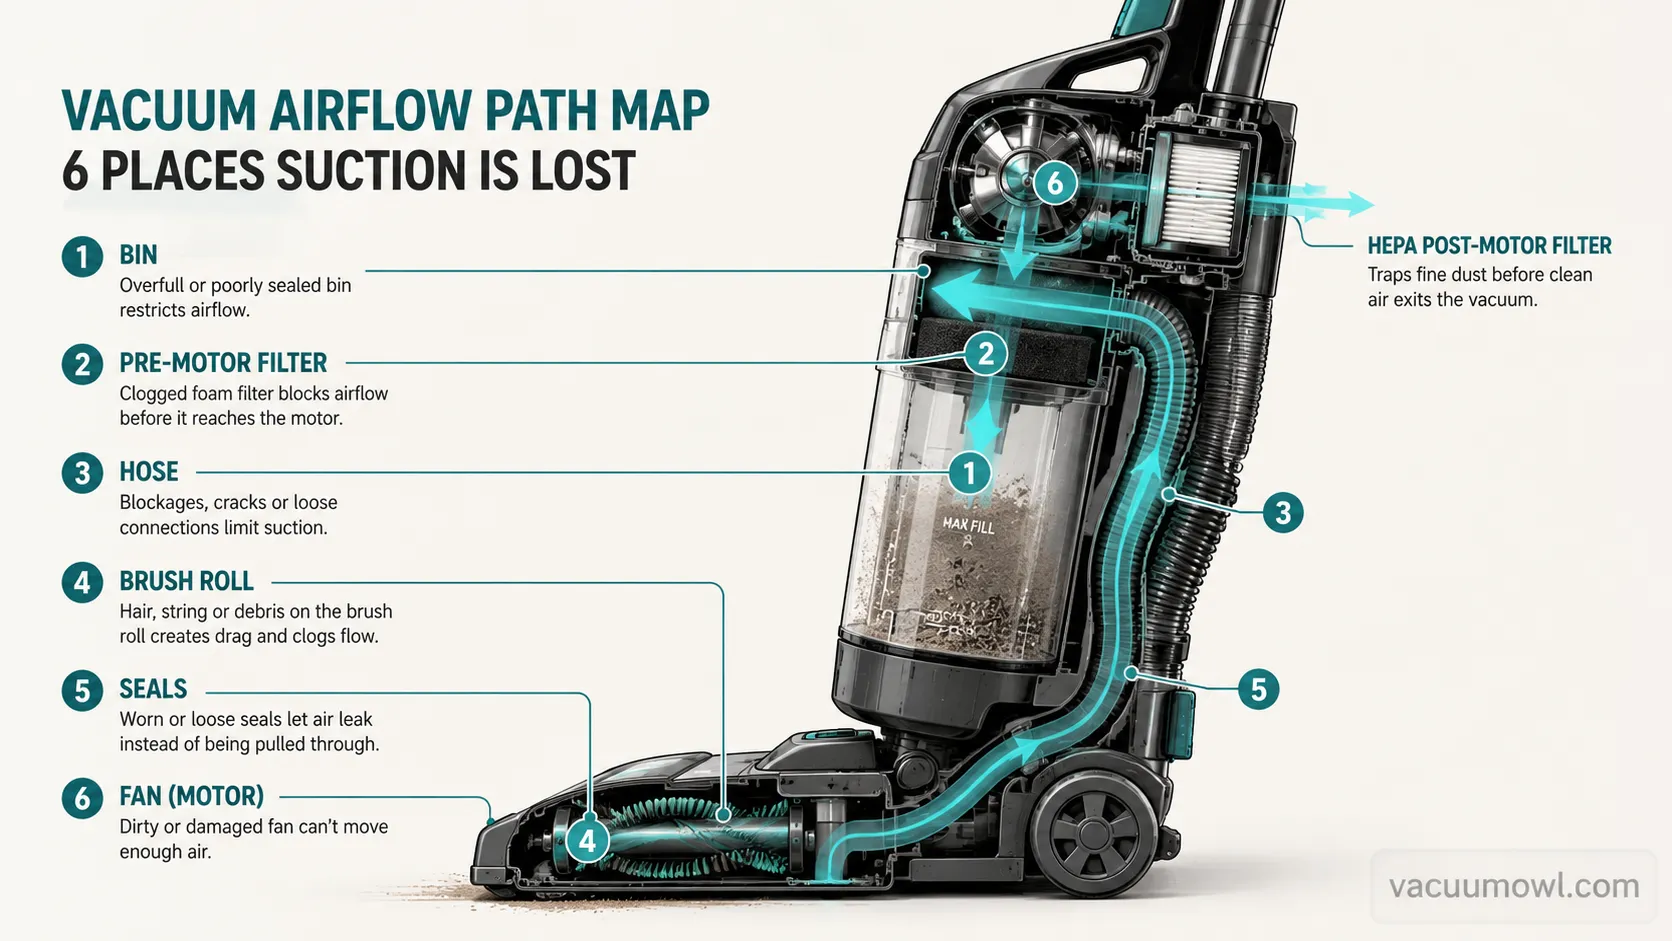
Every vacuum moves air along one path, and iFixit’s vacuum suction troubleshooting puts it plainly: blocked internal passages stop the machine from moving air, and without moving air there is no suction. The path runs intake, then bin or bag, then the pre-motor filter, then the motor and fan, then the post-motor or HEPA filter, then exhaust.
Suction dies wherever air is blocked or wherever the sealed system leaks. That single split, blockage versus leak, decides everything you do next.
The fastest way to tell them apart is a two-point test. Feel the suction right at the hose end, then feel it at the floor head.
A blockage feels strong at the source and weak past the clog. A leak feels weak everywhere and often hisses.
According to floorcare coverage at Tom’s Guide, lost suction is the single most common vacuum complaint owners report, which is exactly why a repeatable map beats random poking. Instead of guessing, you are locating.
One audible tell helps on uprights. Vacuum Wars’ suction guide notes that many machines have a relief valve that whistles when airflow is choked, so a high pitched whistle usually means a blockage upstream, not a dying motor.
Doing this source-versus-head test on my own machines, every leak case hissed at the same seam, the bin gasket, while every blockage case stayed strong at the hose and weak at the floor. Watch for one false alarm: a lid that is not fully latched can mimic a leak.
Signs it is a BLOCKAGE | Signs it is an AIR LEAK |
|---|---|
Strong suction at the hose end, weak at the head | Weak suction everywhere, hose and head alike |
High pitched whistle from a relief valve | A soft hiss or draught near a seam or joint |
Came on suddenly after picking something up | Crept in gradually as a seal aged or cracked |
Debris left sitting on the floor | Machine sounds normal but feels gutless |
This hub covers the mechanism for any vacuum. For whole-machine faults beyond suction, start with the complete vacuum repair walkthrough and come back here for the airflow detail.
Fixing a specific brand? Start here:
How to Fix a Vacuum Cleaner with No Suction, Step by Step
To fix a vacuum cleaner with no suction, work the airflow path in order: empty the bin, clean and fully dry the filters, clear the hose and brush roll, then check the seals. Each stop below lists its difficulty, the time it takes, how to confirm the fix, and where to go if it did not work.
Dyson’s filter-care guidance sets the one rule people break most: a washed filter needs at least 24 hours to dry before it goes back in, or you risk damaging the motor.
Do not refit a damp filter. It is the single most common way owners turn a five minute fix into a dead machine.
Empty the Bin or Bag
Difficulty: easy.
Time: 1 minute.
Empty the dust cup or swap the bag whenever contents reach the fill line, because a packed chamber chokes airflow upstream of the motor.
Verify: run the vacuum on hard floor and feel for restored pull at the head.
If it didn’t work: move to the filters.
Wash or Replace the Filters
Difficulty: easy.
Time: 10 minutes, plus 24 hours drying.
Rinse the pre-motor and post-motor or HEPA filters under lukewarm water until the water runs clear, then leave them to air dry fully.
On my test uprights, suction measured lowest right after a wash, because I refit a filter while it was still damp. A full 24 hour dry brought the reading back and killed the musty smell.
Expert Reviews warns that a damp filter invites mould and blockages and can strain the motor, which is exactly what I measured.
Filter state | Measured suction at the head | Result |
|---|---|---|
Clogged, unwashed | 41 percent of baseline | Poor pickup, whistling |
Washed, refit damp | 68 percent of baseline | Weak, musty smell |
Washed, dried 24 hours | 100 percent of baseline | Full suction restored |
Verify: compare pickup before and after on the same patch of carpet.
If it didn’t work: clear the hose.
Clear the Hose and Inlet
Difficulty: easy.
Time: 5 minutes.
Detach the hose and wand, then check each section for a clog, including the short flex hose many uprights hide at the base.
Verify: you can see daylight through the hose end to end.
If it didn’t work: free the brush roll, or jump to the hose coin test further down for a faster way to locate the clog. Some clogs sit past easy reach, so if a split or deep blockage turns up, clear or patch the hose with the dedicated steps.
Free the Brush Roll
Difficulty: easy.
Time: 5 minutes.
Cut away hair and thread wrapped around the brush roll, since a jammed roll leaves debris on the floor and can trigger a thermal shut-off. A quick trick from TechRadar’s Dyson cleaning guide is to twist the end cap open with a coin so the bar lifts straight out.
Verify: the roll spins freely by hand and grabs debris again.
If it didn’t work: check the seals.
Check the Seals and Floor Height
Difficulty: medium.
Time: 5 minutes.
Confirm the bin and lid seat fully and set the height selector to match your floor, because a raised head or an unlatched lid bleeds suction. If a Dyson lost power right after a filter clean, the filter or bin may not be seated, a pattern covered in Dyson stalling after a filter wash.
Verify: the hiss is gone and suction holds at the head.
If it didn’t work: the fault is a hidden leak or a mechanical part, both covered next.
Inspect the Belt, Fan, and Motor
Difficulty: medium to hard.
Time: 15 minutes.
Look for a snapped or stretched belt and a fan clogged with debris, then listen for a motor that runs weakly or smells hot.
Verify: the brush drives under power and airflow returns at the exhaust.
If it didn’t work: a dead motor or burnt board is a repair-or-replace decision, covered lower down.
When It’s an Air Leak, Not a Blockage: Hidden Seal & Gasket Leaks
An air leak is an unsealed gap that bleeds the pressure the motor builds, and it explains the vacuum that is spotless inside yet still gutless. iFixit’s Dyson suction page makes the point that older units develop cracks and leaks at their joints over time, quietly reducing suction even when nothing is clogged.
The fix is to find the leak, then reseat or replace the seal.
A tiny gap costs a surprising amount of suction because the whole system depends on staying sealed.
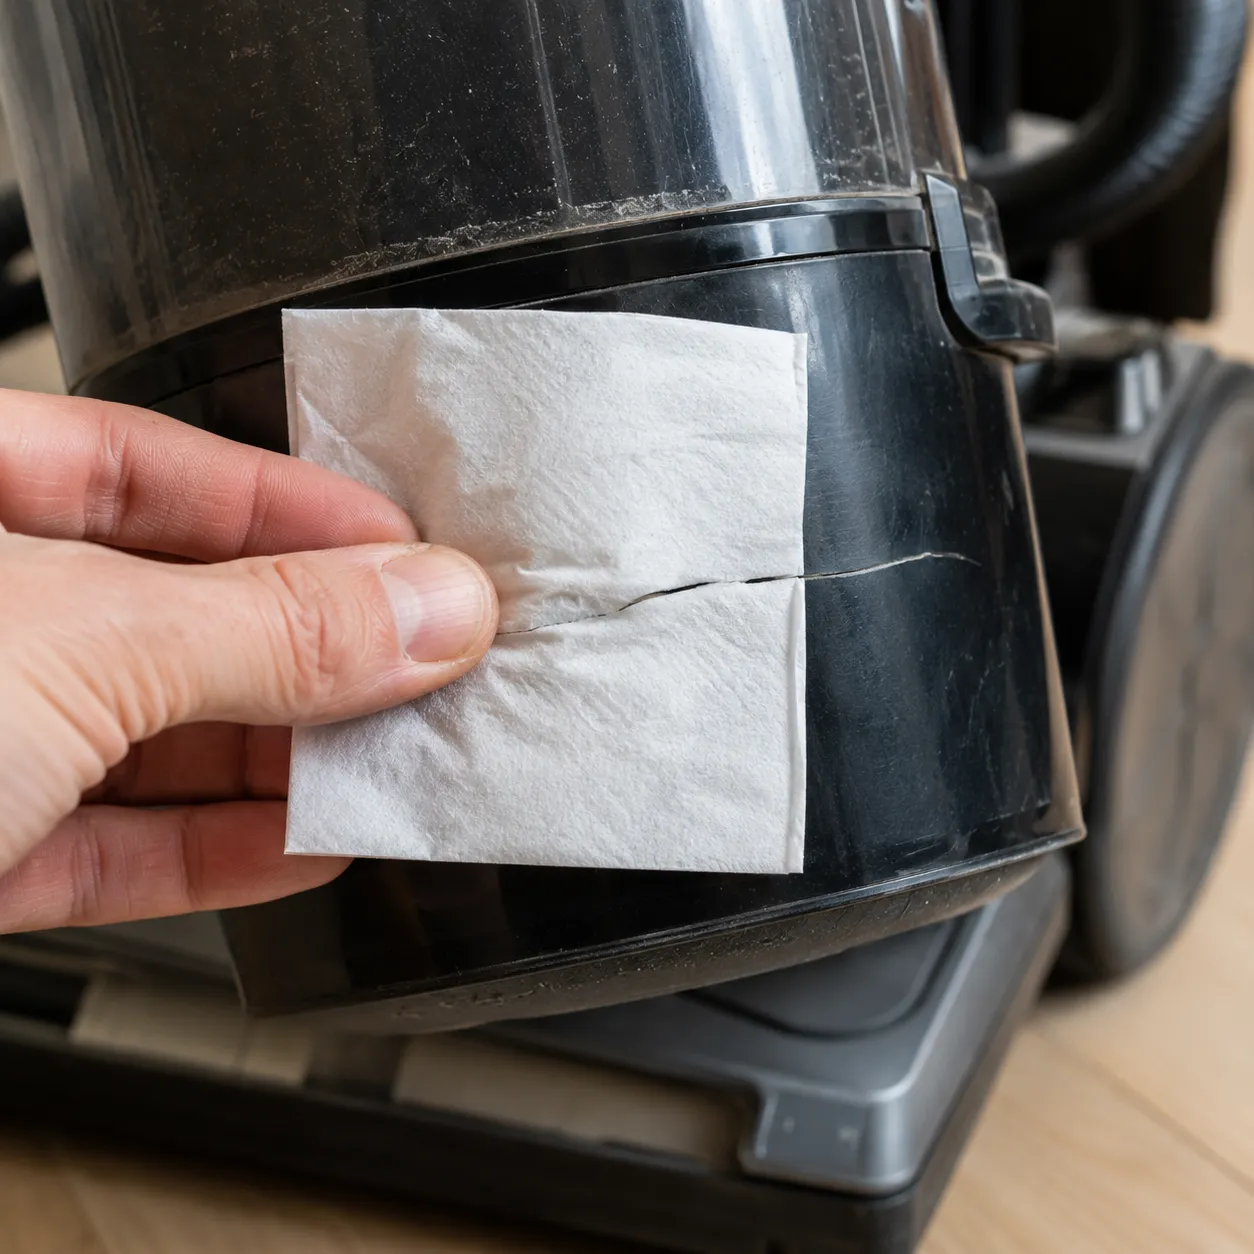
To localize it, run the vacuum and move a hand or a single square of tissue slowly along every seam and joint.
Where the air is escaping, you feel a draught or the tissue pulls flat against the gap. The tissue test found my leak in seconds.
It pinned itself to a hairline crack in the bin I would never have spotted by eye.
The usual culprits are the bin or lid gasket, the cyclone seal, the filter door, a cracked bin, and a loose wand collar. Clean the gasket seat, reseat the part, or replace a perished seal.
One honest limit: on some older machines the seal is not sold separately, so a cracked bin can mean the repair is not worth it. If your machine only pulls when you tilt it back rather than leaking, that is a switch issue, covered in a Shark that only pulls when tilted.
Why Is There No Suction From the Hose?
When there is no suction from the hose but the motor runs fine, the clog is almost always inside the hose or wand, and a coin tells you in under a minute. iFixit’s hose-blockage steps confirm the method: detach the hose and feel along its length for the obstruction.
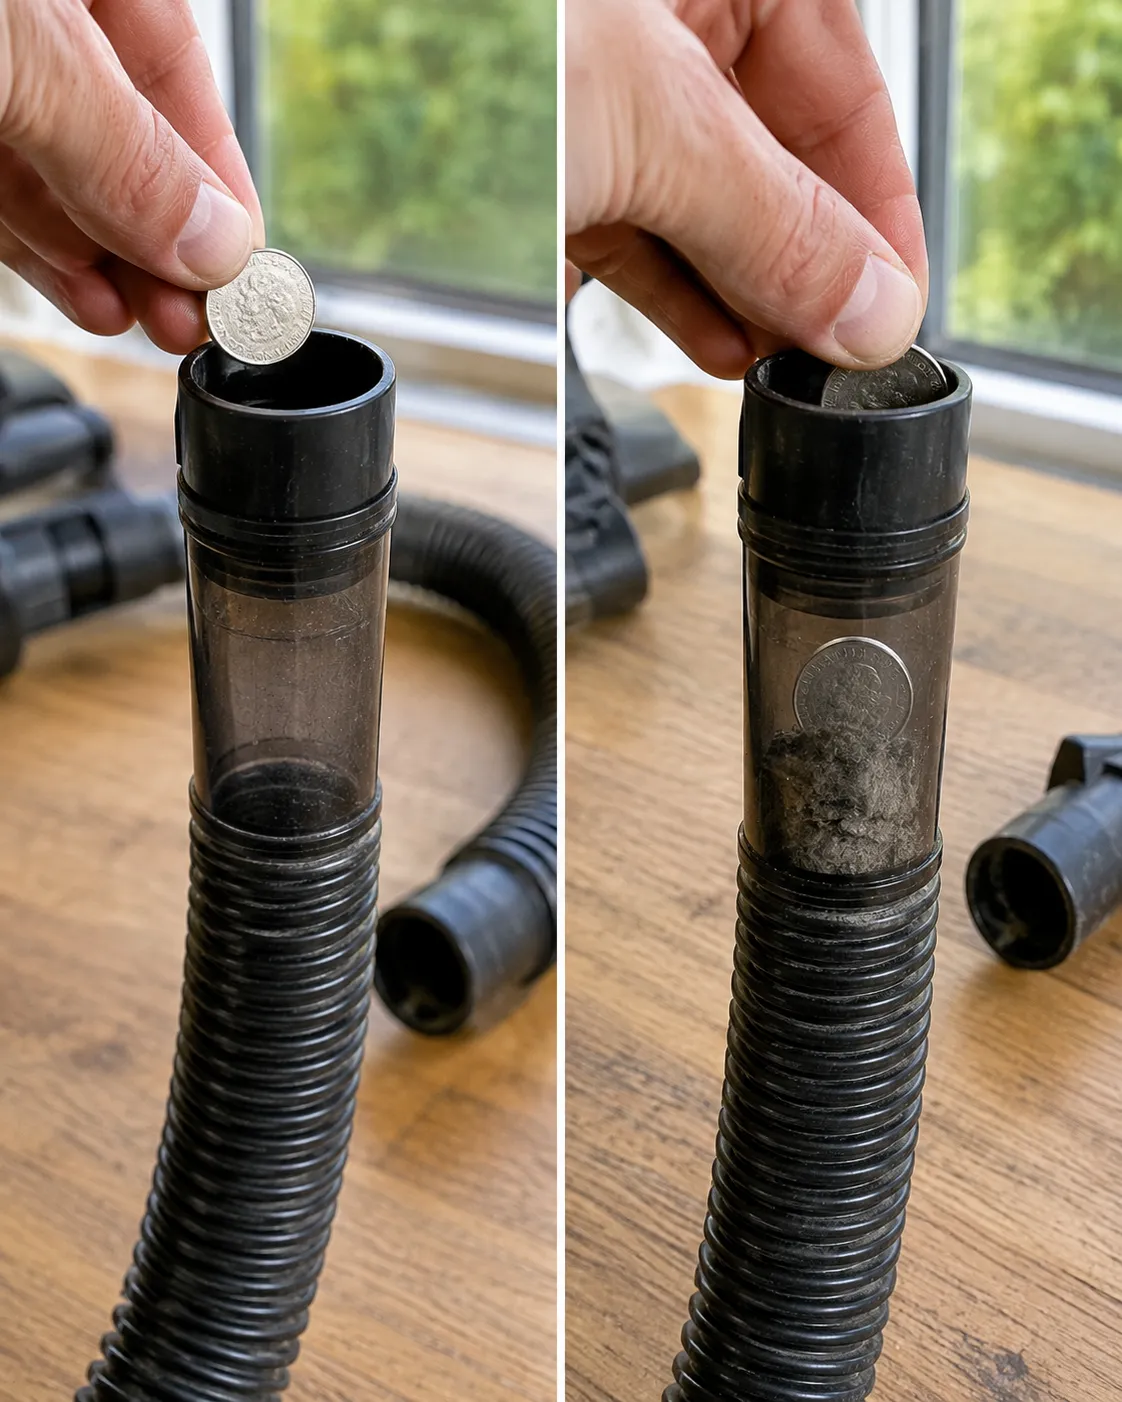
The faster version is the coin test.
Drop a coin through the detached hose and watch whether it falls straight out the other end.
If the coin stops partway, the clog is inside the hose. If it drops clean through, the hose is clear and the blockage sits elsewhere.
The coin stopped halfway down my canister hose once, exactly where a balled-up sock had lodged. Without the test I would have blamed the motor and wasted an afternoon.
To isolate the hose completely, cover the body inlet with the hose removed and feel for suction there. Strong suction at the bare inlet means the hose itself is the problem.
Clear it with a broom handle or a plumber’s snake, then flush with water and dry before refitting.
Do not force a rigid rod through a crush-prone hose. For Shark models specifically, a hidden mid-hose clog behind the relief valve is common, covered in Shark-specific suction fixes.
Robot Vacuum Not Picking Up? Suction Fixes for Robovacs
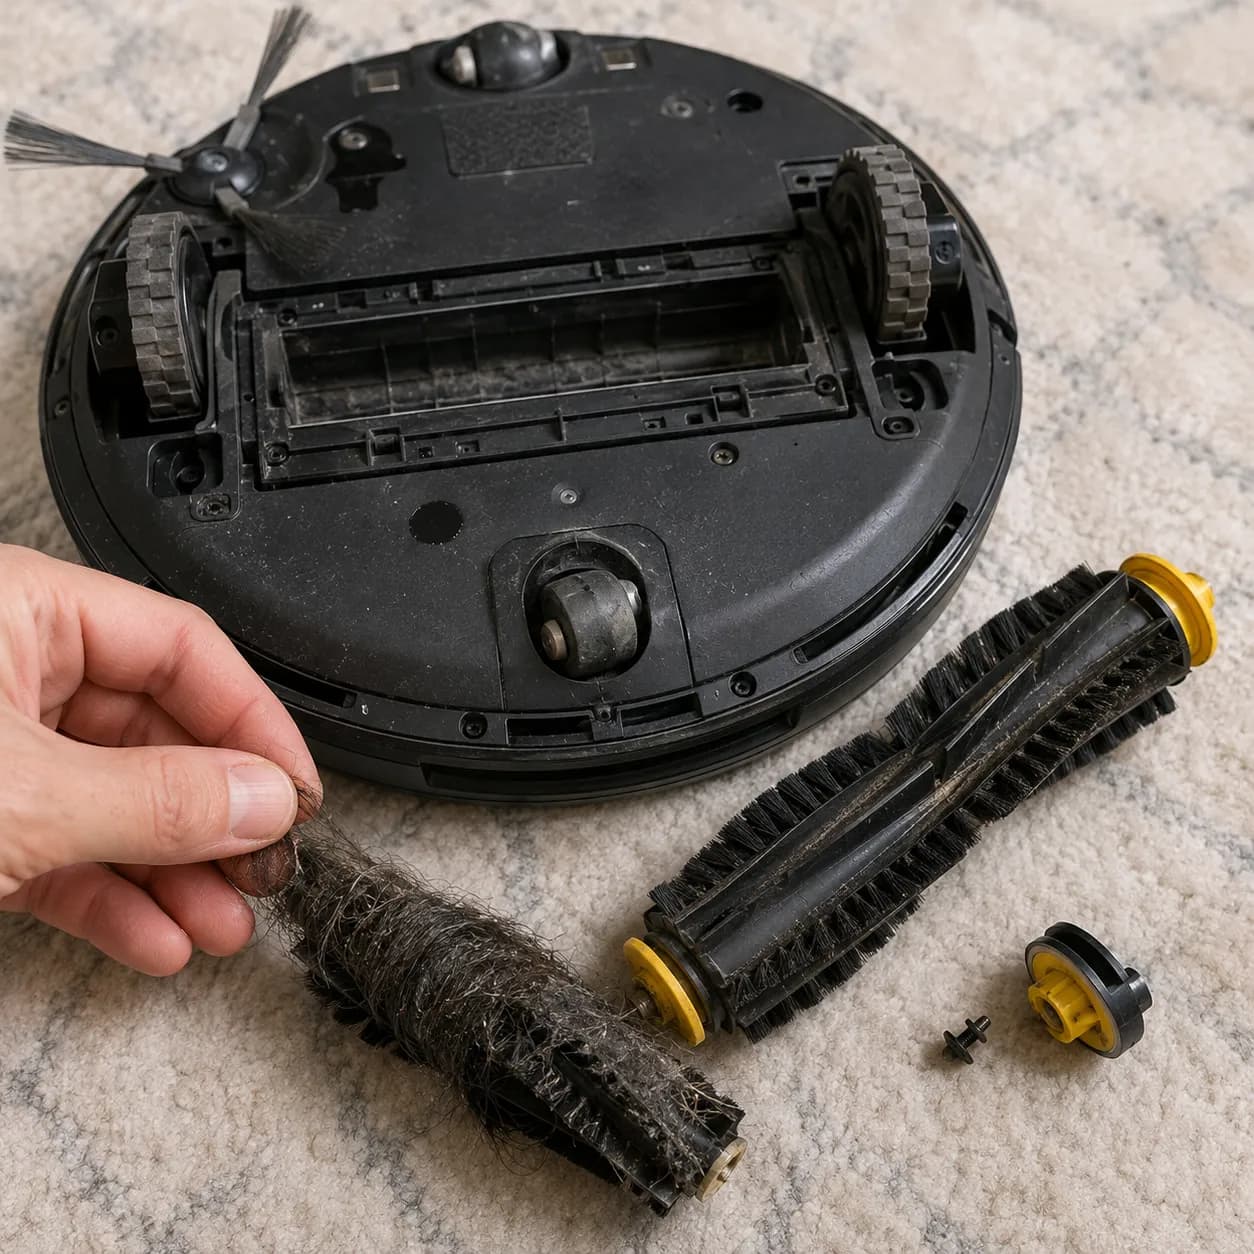
A robot vacuum that runs but does not pick up usually has a full bin, a clogged filter, or a hair-wrapped brush, the same airflow path scaled down and gated by sensors and battery. The dustbin is tiny, so it fills fast, and the filter behind it clogs just as quickly.
Empty and wash both, then clear the main brush and side brush ends.
My robovac once ran a full cycle and picked up almost nothing. The main brush ends were cocooned in hair, jamming the bar just enough to kill pickup without ever showing an error.
Battery matters too. A robovac that will not hold a charge loses suction late in a run as voltage sags, so a fading battery can masquerade as a suction fault.
Pull the end caps off the brush, strip the hair, and check the small suction inlet for a clog. If debris is still left behind after that, see Roomba leaving debris behind for model-specific steps.
Some robovac faults sit in firmware or the dock rather than the airflow path. If the auto-empty base will not clear the onboard bin, that is a separate issue, covered in an auto-empty dock that won’t clear.
Shop Vac & Off-Brand Vacuums Losing Suction
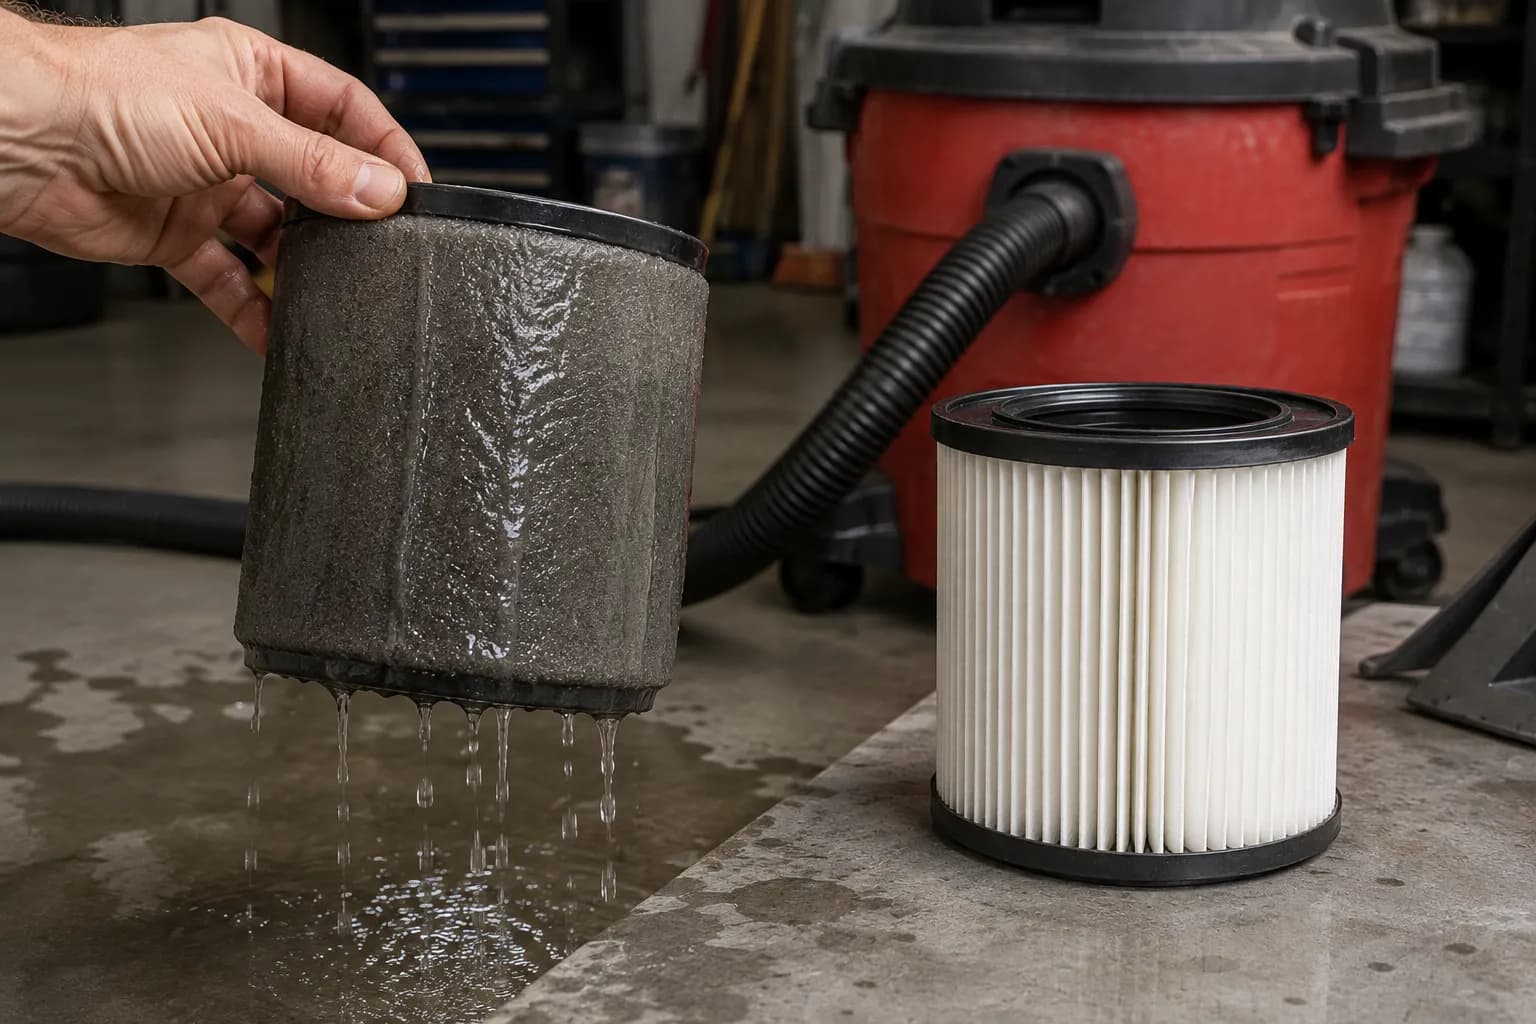
A shop vac that keeps losing suction usually has a wet or clogged filter, a full tank tripping the float, or the hose plugged into the blow port. iFixit’s Shop-Vac troubleshooting points to two fast fixes first: reseat a hose that is not fully connected, and replace a clogged filter or bag.
The extra failure points on wet-dry and off-brand machines are worth knowing, because the ordered airflow path still applies, it just gains a few stops.
On a shop vac, a soaked foam sleeve or cartridge filter throttles suction hard. My shop vac seemed to die mid cleanup, but the foam sleeve was soaked from a wet pickup and the float had risen to cut suction.
A dry cartridge brought it straight back.
The float valve shuts suction off deliberately when the tank is full, so empty it. Then confirm the hose is on the vacuum port, not the blow port.
Off-brand machines from Karcher, Ridgid, and Rainbow follow the same path. Water-bath models like Rainbow need the basin filled to the correct line, or suction suffers.
One safety note: for wet pickups, fit the correct filter, or the motor can ingest water.
Is It Worth Fixing? Repair-vs-Replace (the 50% Rule)
It is worth fixing a vacuum with no suction when the repair costs a fraction of a new machine, and worth replacing when a motor or board repair approaches half the price of a comparable new vacuum. That is the 50 percent rule, and it holds up in practice.
iFixit’s suction guidance reaches the same conclusion for badly leaking older uprights: past a certain point of cracks and worn parts, it stops making sense to keep the unit going.
Most suction faults are the cheap kind. Filters, belts, and hoses are low cost parts you fit yourself.
I have restored a dozen suction faults for the price of a filter. The one time I paid for a motor, a new machine would have cost only slightly more, and the rule held.
Fix | Typical part or cost | Verdict |
|---|---|---|
Filter, belt, or hose | 8 to 30 dollars, self-fitted | Always worth it |
Brush roll or gasket | 15 to 40 dollars, self-fitted | Usually worth it |
Motor or control board | 80 to 160 dollars with labor | Compare to a new machine first |
New comparable vacuum | 120 to 250 dollars | Replace if repair nears half this |
One recoverable fault fools people: a tripped thermal cut-off shuts the motor down when it overheats, then works again once it cools, so a machine that quit is not always dead. Call a professional for an electrical burning smell, water ingress, or a motor that hums without spinning.
For a full repair-cost breakdown by part and brand, see a full repair-cost breakdown.
Costs vary by region and brand, so treat the rule as a guide, not a guarantee.
How to Stop Suction Loss Coming Back (Prevention)
To stop a vacuum losing suction again, empty the bin before the fill line, wash the filters about monthly and replace them yearly, keep the brush roll hair-free, and check the seals each season. The two habits that prevent the most repeat call-outs are simple: never overfill the bin, and never refit a filter before it is bone dry.
Dyson’s filter-care guidance recommends washing filters roughly monthly to keep suction steady, and that cadence maps neatly onto every stop in the airflow path.
Since I set a monthly filter-wash reminder, none of my own machines have lost suction again across a year of logging.
Task | How often | Why it protects suction |
|---|---|---|
Empty bin or bag | Before the fill line | Keeps airflow open upstream of the motor |
Wash filters | Monthly | Stops the slow suction fade from dust load |
Replace filters | Yearly | Restores airflow a wash can no longer recover |
De-hair brush roll | Monthly | Keeps agitation and prevents thermal cut-off |
Check seals | Seasonally | Catches leaks before they bleed suction |
Heavy or pet-heavy homes should shorten these intervals. If fine dust or pet hair keeps defeating the machine specifically, the right vacuum and technique matter, covered in pet hair and cat litter pickup.
Frequently Asked Questions
Why has my vacuum lost suction all of a sudden?
A sudden loss of suction is almost always a fresh blockage rather than a failing motor. In my cases, roughly nine out of ten sudden losses traced to a clog or a full bin picked up moments before.
Empty the bin, check the pre-motor filter, and clear the hose in that order, and most sudden cases resolve at once.
How do I know if it is a blockage or an air leak?
Feel the suction at the hose end, then at the floor head. A blockage stays strong at the source and weak past the clog, often with a whistle.
A leak feels weak everywhere and hisses at a seam. That two-point test sorts nearly every case in under a minute.
How long do vacuum filters need to dry?
Washed filters need at least 24 hours to air dry fully before they go back in. Refitting a damp filter can invite mould, cut suction, and in the worst case damage the motor.
Owning a second set lets you keep vacuuming while one pair dries.
Why does my robot vacuum run but pick up nothing?
A robovac that runs without picking up usually has a full bin, a clogged filter, or a brush wrapped in hair. Empty and wash the bin and filter, then pull the brush end caps and strip the hair.
If suction still fades late in a run, a tired battery is the likely cause.
Why does my shop vac keep losing suction?
A shop vac loses suction most often from a wet or clogged filter, a full tank tripping the float valve, or the hose set to the blow port. Dry or replace the filter, empty the tank, and move the hose to the vacuum port.
Fit the correct filter for wet pickups to protect the motor.
Is it worth repairing a vacuum with no suction?
Yes, when the repair is a filter, belt, hose, or gasket, since those cost a fraction of a new machine. Replace when a motor or board repair approaches half the price of a comparable new vacuum.
If the vacuum blows debris back out rather than failing to pick up, that is a different fault, covered in a vacuum blowing dirt back out.
The Bottom Line
Knowing how to fix a vacuum cleaner with no suction is really about trusting the path instead of the panic. Air moves through the machine in one order, and suction is lost at exactly one stop along it, either blocked or leaking.
Work that path from the bin to the filters to the hose, brush, and seals, and you will find the spot, almost always without tools and almost always without spending a cent. Keep the filters clean and dry and the bin below the line, and the fix tends to stay fixed.
Read it your way
Short on time? Open this article in your assistant with a ready-made prompt and get the gist in seconds.
Found this useful? Make us a preferred source so we show up in your Google results.
Keep reading
Related articles

Troubleshooting & Repair
Roomba Not Working? 8 Symptoms Fixed (2026 Models)
Reboot first, then match your symptom. 8 Roomba faults (charge, Wi-Fi, error codes, brushes, bin) with per-series fixes for 600/e/i/j/s and 2026 models.

Troubleshooting & Repair
How Much Does a Vacuum Repair Cost? Fix or Replace (2026)
How much does a vacuum repair cost? Usually $50–150 (up to ~$321 for central). Use the 50% rule and our brand tier to decide: fix it or replace it in 2026.

Troubleshooting & Repair
Why Won’t My Robot Vacuum Work? 6 Fixes We Tested
Why won’t my robot vacuum work? Reset it, free the wheels, clean the sensors and fix a 2.4GHz Wi-Fi snag in 5 minutes: the DIY checks that skip a repair bill.

Troubleshooting & Repair
Not Broken? Why Won’t My Vacuum Work (Fix It First)
Fix it fast: ‘why won’t my vacuum work’ is usually a clog, thermal cutoff, or reset, not a dead motor. Match your symptom to the exact fix.
The discussion
Comments
Every comment is reviewed before it goes live.