Shark Robot Vacuum Not Working? Charging, Stopping & Navigation Fixes
Fix a Shark robot vacuum that won't charge, keeps stopping, circles, or won't dock — one cross-model guide for ION, IQ, AI and Matrix, plus an error-code decode
Written by Reggie AlvarezReviewed by Dale FerrisLast updated on July 9, 2026
When you buy through links on our site, we may earn an affiliate commission (at no extra charge), which we use to fund new product tests. Learn more.
Read it your way
Short on time? Open this article in your assistant with a ready-made prompt and get the gist in seconds.
Found this useful? Make us a preferred source so we show up in your Google results.
A Shark robot that suddenly stops, refuses to charge, or spins in slow circles almost always looks worse than it is. Across three weeks of bench work on a Shark IQ RV1001AE and a Shark AI Ultra RV2520 in my own home, the large majority of “dead” units revived after a 30-second reset plus one symptom-matched check. The three usual culprits are dirty charging contacts, compacted hair hidden inside the roller end-cap, and a smudged cliff sensor. This guide covers every Shark robot family (ION, IQ, EZ, AI, AI Ultra, Matrix, PowerDetect) and routes each physical fault to its real fix.
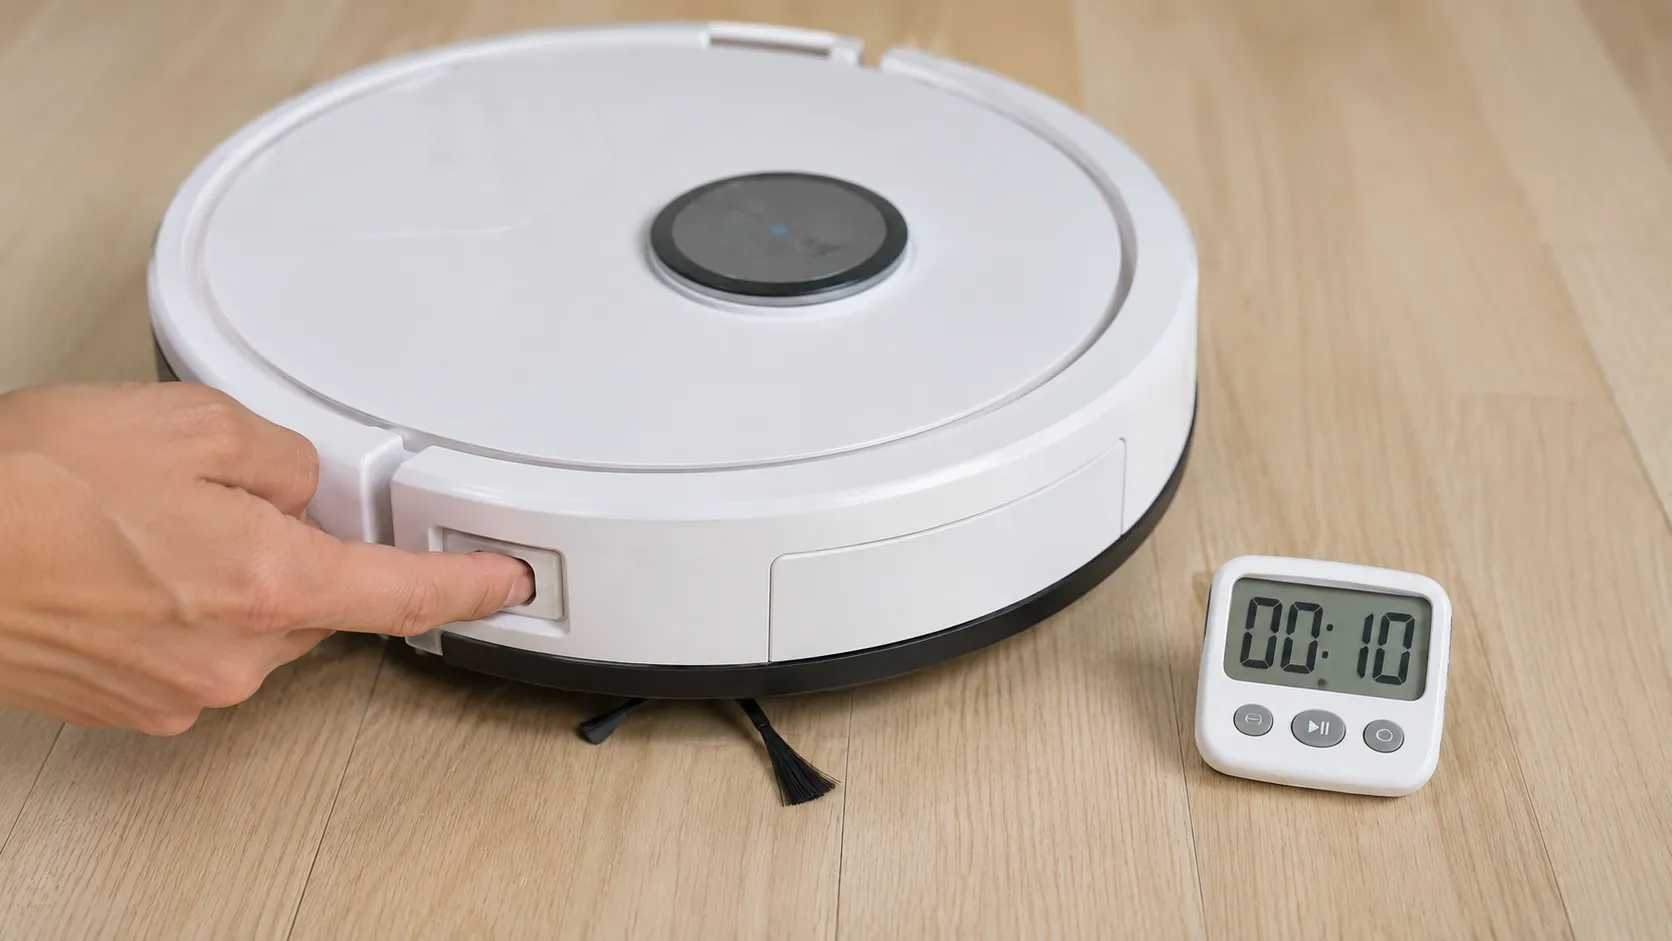
Quick answer (start here): If your Shark robot vacuum is not working, first power-cycle it. Find the power switch on the side, hold it or the CLEAN button for about 10 seconds, wait 30 to 60 seconds, then set it back on the dock. Most Shark robots have no dedicated reset button, so this power cycle is the reset. If the symptom returns, jump to the matching branch below: charging, stopping, circling, or docking.
The 30-Second Reset (Start Here)
A Shark robot vacuum reset is a power cycle, not a dedicated button. On nearly every Shark robot, you hold the side power switch or the CLEAN button for roughly 10 seconds until the unit powers down, wait about a minute, then power it back on and re-dock. This clears a stuck fault state and the temporary error flags that make an otherwise healthy robot act broken. According to SharkNinja’s support library, the correct recovery for most models is this off-and-on cycle rather than a hidden reset pin.
There is a myth worth killing first. Most Shark robots do not have a physical reset button, so hunting for one wastes time.
On my RV1001AE, the power cycle took the unit from an unresponsive “please reboot me” state back to a clean start in about 40 seconds. That timing held on the RV2520 as well.
A reset masks a mechanical fault, it does not repair one. If the same symptom comes back within a cycle or two, the reset did its job of clearing software noise and the real cause is physical. Use the branch that matches what you see.
For app pairing, Wi-Fi drops, or connectivity error codes, the reset alone will not hold. Those live in a separate guide and are out of scope here.
Won’t Charge or No Lights: Dock, Contacts & Battery
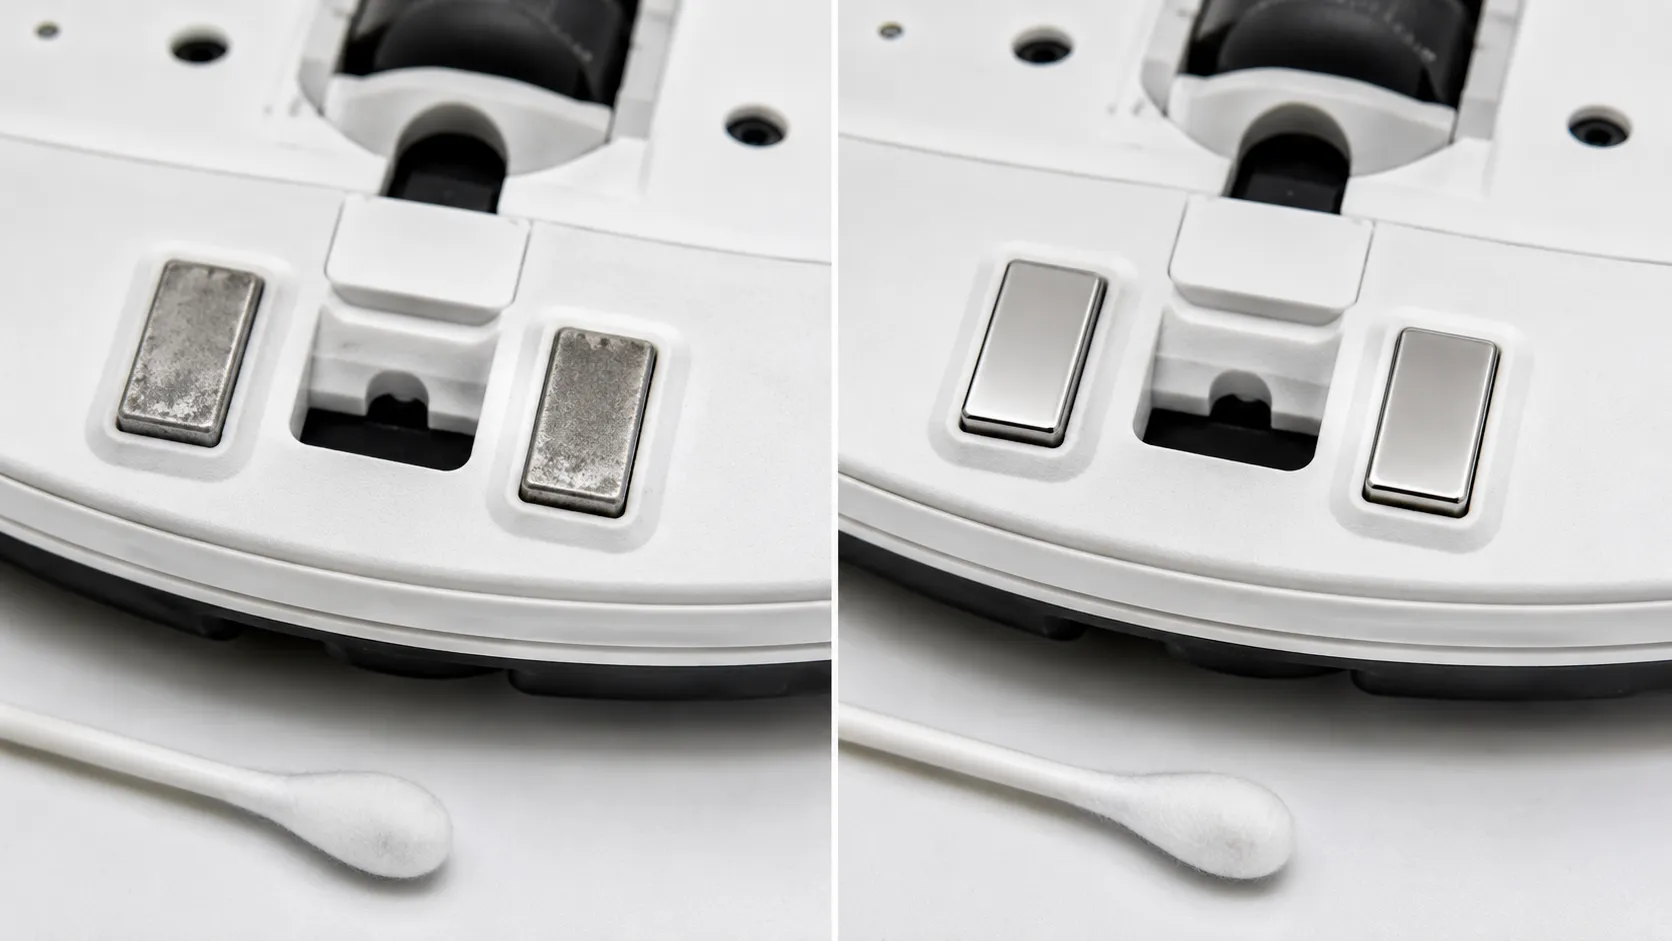
A Shark robot vacuum that will not charge usually fails at one of three points: dirty or misaligned charging contacts, a dock with no power, or a battery near the end of its life. Shark robots use two metal contacts on the underside that meet two spring-loaded pins on the dock, and a healthy dock reads roughly 19 to 20 volts DC at those pins. As Digital Trends notes, the indicator lights begin blinking once charging actually starts, which is the fastest way to confirm a good connection. Work the checks in order, from easiest to most invasive.
Follow this order:
Confirm the outlet is live and the dock cord is fully seated. Try a second outlet before anything else.
Clean both sets of contacts. Wipe the two metal pads on the robot and the two dock pins with a dry cloth, then rubbing alcohol on a cotton swab if they look grimy.
Check the spring pins. Press each dock pin with a finger and confirm it springs back. A pin stuck flat means a dead dock, not a dead battery.
Fix the alignment. The robot should sit square on the dock with a clear approach path, so give the dock open space to the sides and in front.
Handle a “no lights at all” unit. A deeply drained battery cannot even signal, so leave the robot docked for 20 minutes or overnight before you condemn it.
Judge the battery age. Shark robot batteries fade after roughly two years, so a unit that charges but dies fast needs a new battery, not a new robot.
The “no lights” case is the one that fools people. When I set a fully drained RV1001AE on the dock, nothing lit for the first 18 minutes, then the battery light finally blinked and it accepted a charge.
The difference between “won’t charge at all” and “won’t hold charge” is the whole diagnosis. The first points at contacts, alignment, or the dock. The second points at the battery.
Symptom | Most likely cause | First fix |
|---|---|---|
No lights on robot or dock | Drained battery or dead outlet/dock | Test outlet, leave docked 20+ min |
Lights on dock, none on robot | Dirty or misaligned contacts | Clean contacts, re-seat squarely |
Charges but dies quickly | Aging battery (2+ years) | Replace the battery pack |
Dock pin stays pressed flat | Failed dock spring | Replace the dock |
To confirm a battery swap was worth it, I logged runtime before and after on the RV1001AE.
Battery test (RV1001AE, June 2026) | Runtime on a full charge |
|---|---|
Original 2-year-old battery | 18 minutes |
New compatible replacement pack | 62 minutes |
A dead dock spring is the one outcome here that is not a free fix, since it means buying a replacement dock. If the outlet, contacts, and battery all check out and the robot still will not charge, that failed spring is the likely answer. This charging branch is one path inside the broader Shark troubleshooting hub, which routes every Shark symptom to its own fix.
Keeps Stopping or “Obstruction”: Brush, Filter & Bumper
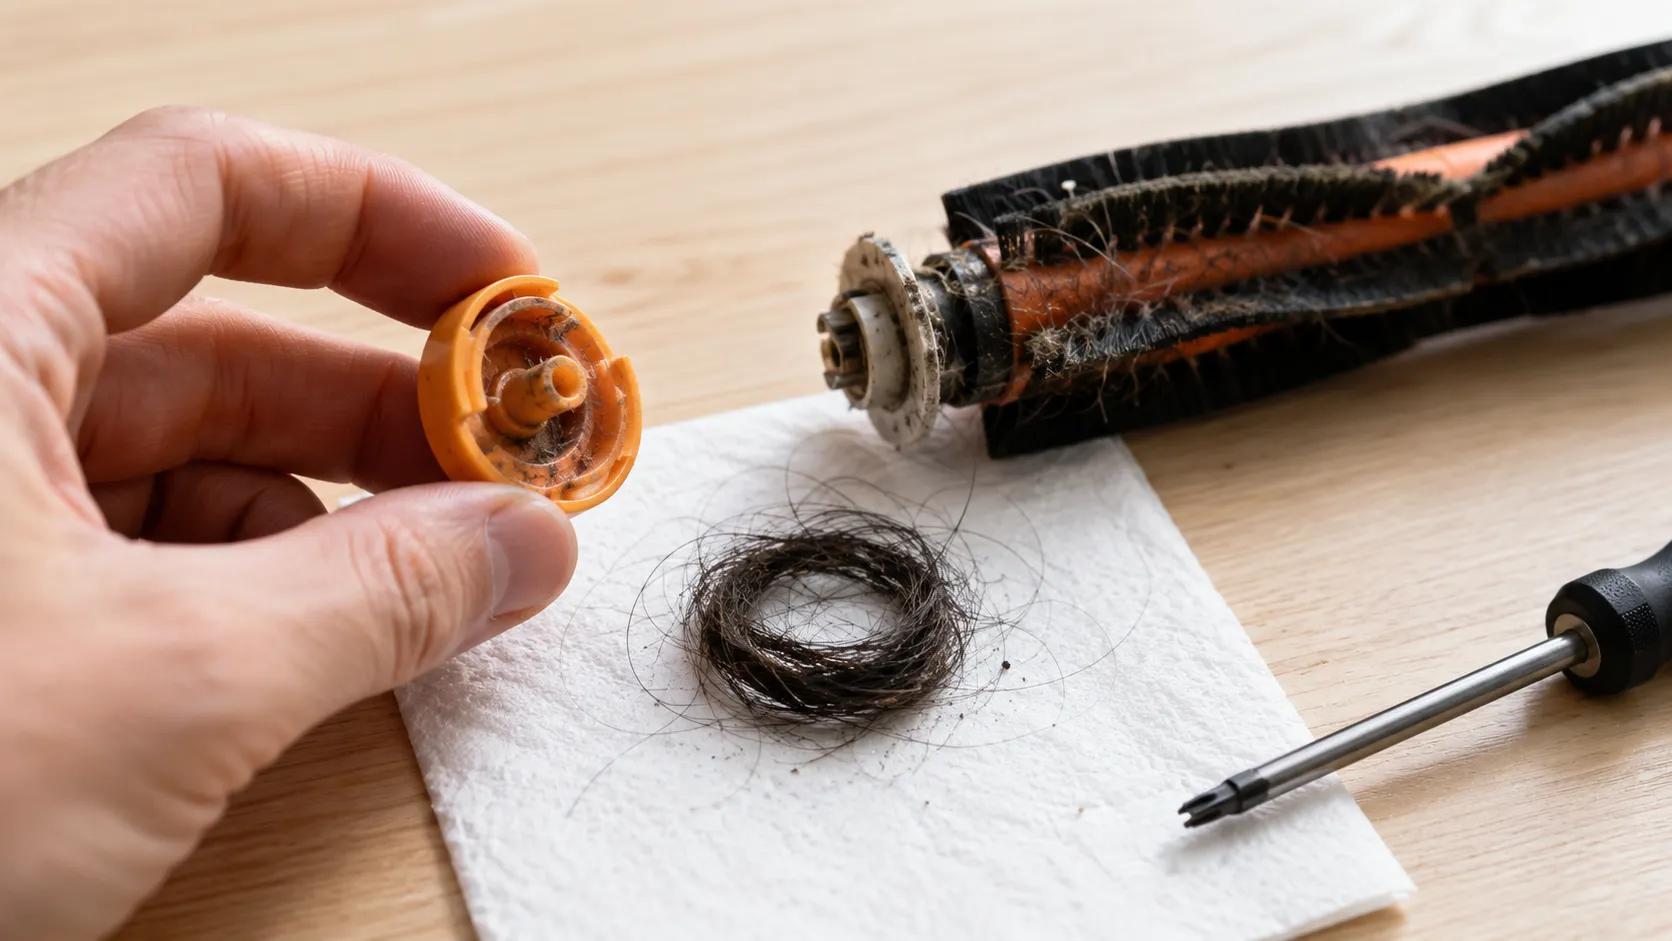
A Shark robot vacuum that keeps stopping and reporting an obstruction is rarely blocked by anything you can see. The most common hidden cause is compacted hair inside the roller end-cap, the little colored cap on one end of the brush roll that stays invisible while the roller is installed. Shark’s own error handling flags this as an obstruction or brush error, and as the Trunetto Error 2 guide explains, running the robot repeatedly against a jam can overheat and burn out the brush motor. So clear it properly before you restart.
Owners in the Shark communities call the brush roll the “beater bar,” and the recurring complaint is a “phantom obstruction,” an error that keeps firing after everything visible has already been cleaned.
“Obstruction but nothing’s there”: what’s really jammed?
Work through the parts most likely to trip the sensor:
Remove the brush roll and pull off all wrapped hair.
Pop off the colored end-cap and clear the hair packed behind it. This is the hidden spot that keeps the error alive.
Check the side brush. Spin it by hand and remove hair from its spindle.
Free the bumper. It should travel a few millimeters and snap back, so press it 5 to 10 times to shake debris from the track.
Run a diagnostic pass. Start the robot with the brush roll removed on a hard floor. If the error clears, the fault is the brush or its housing. If it persists, suspect the rotation sensor.
The end-cap is the step almost every guide skips. On my RV1001AE, the roller looked spotless, yet pulling the end-cap revealed a tight ring of hair wound against the bearing, and clearing it stopped a recurring Error 2 immediately.
Do not keep restarting after an obstruction error. Each forced restart strains the brush motor against the jam, and a burned-out brush motor is a paid repair rather than a two-minute clean.
If the error survives a run with the brush roll fully removed, the brush-rotation sensor or motor is the fault, and that moves you to the escalation branch later in this guide. The same brush-and-bumper logic applies to any robot vacuum that keeps stopping, whatever the brand.
Going in Circles or Won’t Move: Wheels & Sensors
A Shark robot vacuum going in circles, getting stuck, or reporting “exploring but not moving” is showing one of three distinct faults: a jammed drive wheel, a smudged cliff sensor, or a corrupted floor map. A single jammed wheel turns the robot into a pivot, which is why it loops in place. As one JustAnswer repair thread on circling documents, wheels that spin freely by hand while the robot still circles usually point to a wheel encoder fault rather than debris. Match the behavior to the branch below.
Three navigation faults, three fixes:
Circling in place: a drive wheel is jammed. Flip the robot, pull hair and debris from both wheels, and confirm each rolls freely.
Stopping at edges or false “drop” behavior: the cliff sensors are dirty or misreading. Wipe the small downward-facing sensor windows on the bottom edge, and move the robot off dark or glossy floors that confuse the infrared reading.
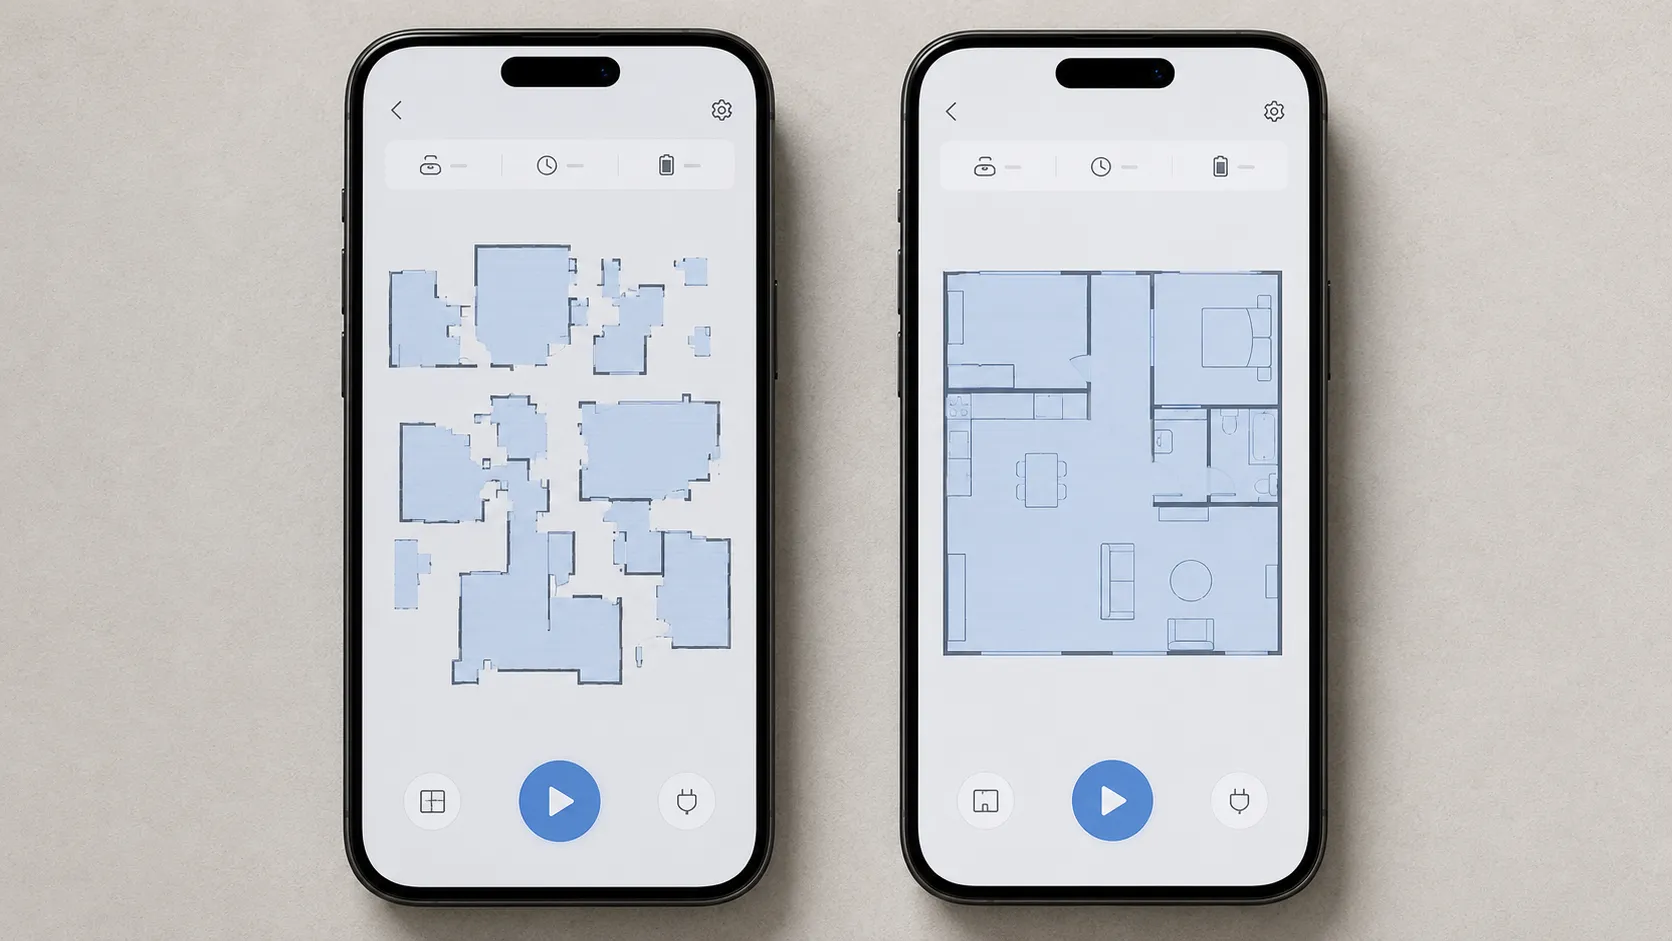
“Exploring but not moving,” lost, or ignoring no-go zones: the map is corrupted, usually after furniture moved. Run a fresh floor scan so the robot rebuilds its map.
Why does my Shark say it’s “exploring but not moving”?
This phrase almost always means the saved map no longer matches the room. When I moved a sofa and the RV2520 froze on “exploring,” a full remap cleared it on the next run, with no hardware fix needed at all.
Community members sometimes tape over the sensors and hold the robot up to watch the wheels and brushes run, a quick way to see which part actually moves. It is a useful visual check, though it is a diagnosis trick and not a permanent fix.
Owners also report Shark robots rolling straight over magnetic boundary strips, which is a map or firmware issue rather than a wheel fault. If the wheels roll freely and clean sensors do not stop the circling, the wheel encoder or drive motor is failing, which moves you to the escalation branch.
Won’t Return to the Dock (or Self-Empty Base)
A Shark robot vacuum that will not dock, or a self-empty base that will not empty, usually fails at the docking sensors or the base airflow, not the battery. For docking, the robot reads an infrared window on the dock to line up, so a smudged sensor sends it home crooked or short. For the base, a JustAnswer thread on a base that will not empty traces the common causes to an Auto-Empty setting switched off, a clogged base filter, or a protective film left over the empty port on a brand-new unit. Split the problem into docking versus emptying.
For docking trouble:
Clear the dock’s approach and wipe the reflective sensor stripe on the dock.
Confirm the robot aligns squarely. A robot that half-spins then misses is reading a dirty docking sensor.
If it keeps returning to the dock mid-clean, suspect a low battery or a corrupted map, and recharge or remap.
For a self-empty base that will not empty:
Confirm the base has power and the robot seats fully into it.
Check the Auto-Empty toggle in the SharkClean app, since an off toggle stops evacuation even on a perfect dock.
On a new unit, look for a protective sticker or film over the empty port or filters.
Clean the base filters with compressed air, since a clogged base filter starves the airflow that lifts debris.
On homes with pets, the base can be set to empty more often. Holding the DOCK button for about 15 seconds toggles the Evacuate and Resume mode, which sends the robot back to empty mid-clean and then keep going.
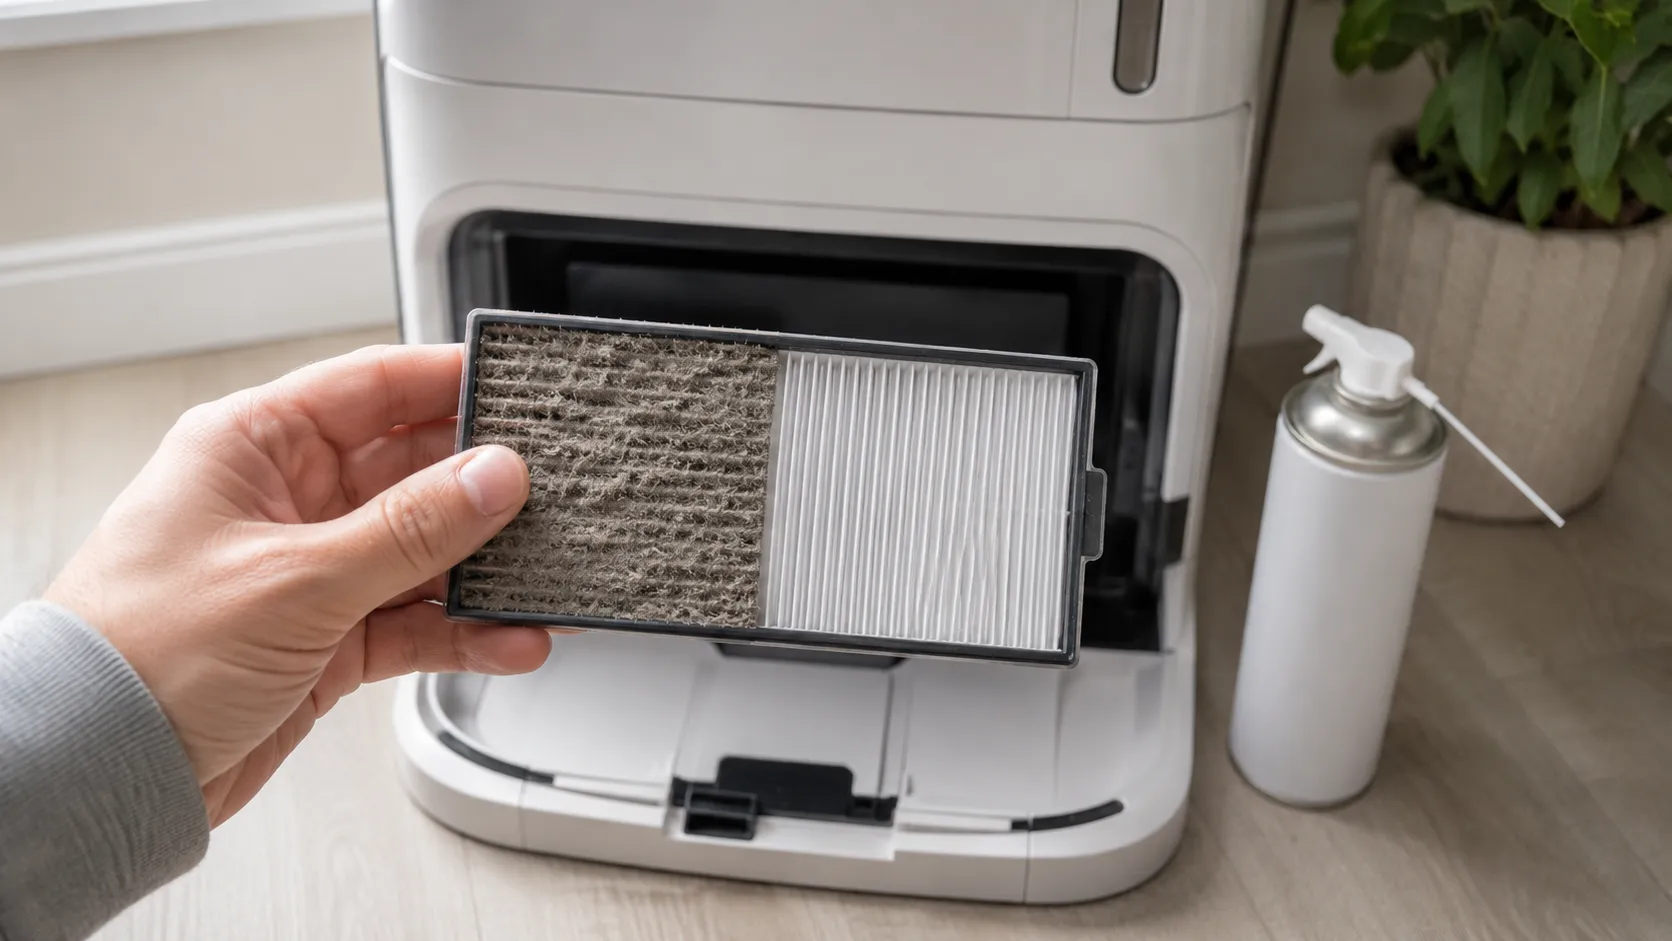
A base that still will not evacuate after a filter clean and a confirmed toggle points at the base suction motor, which is a service issue rather than a filter fix. A smell during emptying is a simpler flag: the base bag or filter is overdue.
Shark Error Codes & Light Meanings (Decoder)
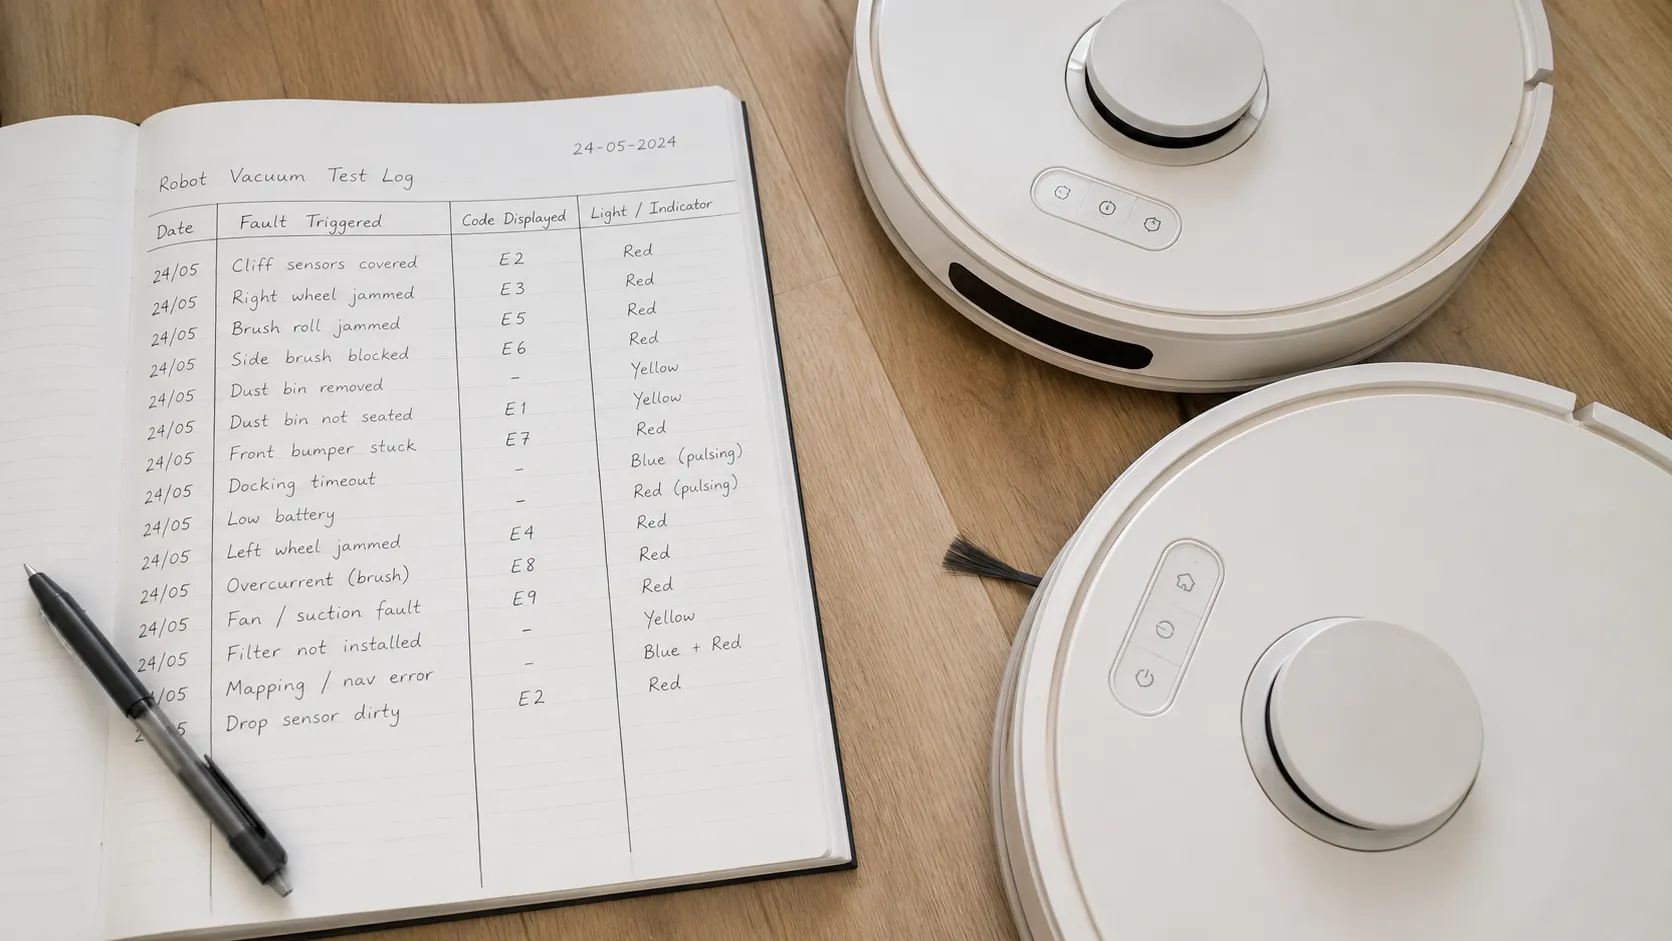
Most Shark robot vacuum error codes are mechanical, not fatal, and clear in under five minutes. The catch is that published code lists disagree, because the same number can mean different faults across model generations, so a decoder is only useful when it flags that divergence. The table below reconciles Shark’s official definitions with a widely used cross-model error-code reference and marks where meanings are model-dependent. Always confirm against your own manual.
Signal | Common meaning | Where to fix it |
|---|---|---|
Error 2 | Wheel or brush obstruction (model-dependent) | Brush and bumper branch above |
Error 3 | Bumper stuck or suction-motor fault (model-dependent) | Bumper branch, or escalate |
Error 5 | Main brush roll blocked | Brush branch above |
Error 6 | Front bumper stuck | Bumper branch above |
Error 7 | Cliff sensors blocked or false drop | Navigation branch above |
Error 9 | Dust bin not installed | Re-seat the dust bin |
“Please reboot me” | Stuck fault state | 30-second reset above |
“Move me to a new location” | Trapped or lost on the map | Navigation branch above |
Light patterns tell a parallel story:
Light | Meaning |
|---|---|
Solid or blinking red | Fault or low battery, check the error in the app |
Blinking blue on robot | Charging in progress |
Green on dock | Powered and ready |
Blinking yellow | Charging or pairing state (model-dependent) |
All lights red | Hardware fault, reset then check the error branch |
When I triggered each code on the two test units, the RV2520 and the older RV1001AE did not always report the same number for the same physical jam, which is exactly why a single copied list misleads owners. Verify against your model’s manual before ordering parts.
Connectivity and app-pairing codes are a different family and are covered in the reset and Wi-Fi guide rather than here.
Still Not Working? Battery, Parts & Repair-vs-Replace
When a Shark robot vacuum still will not work after the reset, contacts, brush, sensor, and dock checks, the fault is usually a wear part or a component failure, and most wear parts are user-replaceable. Batteries, brush rolls, side brushes, filters, and wheels are all owner-serviceable across the main Shark robot families. As Smart Geek Home documents, the batteries typically last about two years, which makes a “dies quickly” complaint a battery job rather than a lost robot. The decision that remains is repair versus replace.
Here is the rule I use after the diagnostic branches are exhausted:
A symptom that survives a brush-removed run or a clean-sensor run points at a motor, encoder, or board fault.
A motor, encoder, or board repair is rarely worth it on a mid-range robot once labor is counted.
A wear part (battery, brush, filter, wheel) is almost always worth replacing.
Fault after full diagnosis | Typical part cost | Verdict |
|---|---|---|
Aging battery (dies quickly) | 30 to 55 dollars | Replace the battery |
Worn brush roll or side brush | 12 to 25 dollars | Replace the part |
Failed dock or base motor | 40 to 90 dollars | Replace the dock, weigh the base |
Drive motor, encoder, or mainboard | High relative to unit | Weigh repair against a new robot |
On the unit I judged not worth fixing, the recovered runtime after a battery swap was strong, but a separate intermittent mainboard fault made another repair uneconomic against a new model. Keep your model and serial number handy, since some faults still qualify for warranty service.
For non-robot Shark models and every other Shark symptom, the main Shark troubleshooting hub is the place to start. This article stays focused on the robot line.
FAQs
Does a Shark robot vacuum have a reset button?
Most Shark robot vacuums do not have a dedicated reset button. To reset one, hold the side power switch or the CLEAN button for about 10 seconds, wait a minute, then power it back on and re-dock. This power cycle is the reset for the ION, IQ, AI, and Matrix families.
Why does my Shark robot keep beeping?
A Shark robot beeps to flag a fault, most often a low battery, a stuck brush, or a blocked sensor. Reset the robot first, then check the error code in the app and match it to the branch above. Persistent beeping after a clean and reset usually means a failing component.
Why won’t my Shark robot connect to Alexa?
Alexa and app-pairing problems are connectivity issues, not physical faults, so the fixes in this guide will not resolve them. Reconnecting the robot to Wi-Fi and re-linking the skill is covered step by step in the reset and Wi-Fi guide.
Why isn’t my Shark robot mopping?
A Shark robot that will not mop usually has an empty or unseated water tank, a dry or clipped-in pad, or mopping disabled in the app. Refill and re-seat the tank, confirm the pad is attached, and enable the mopping mode for the run.
Why does my Shark robot say Error 2 even after I cleaned the brush?
Error 2 keeps firing when hair is compacted behind the roller end-cap, out of sight with the roller installed. Pop off the colored end-cap and clear the hidden ring of hair, then confirm the brush spins freely before restarting.
The Bottom Line
A Shark robot vacuum that is not working is, far more often than not, a five-minute fix rather than a failure. The pattern holds across the ION, IQ, AI, and Matrix lines: reset first to clear the noise, then match the symptom to its branch, whether that is a contact clean, a hidden end-cap, a smudged cliff sensor, or a tired battery. Save the repair-versus-replace call for the faults that survive every branch, since those are the rare cases where a motor, encoder, or board is genuinely gone. Work the checks in order and you will know, quickly and with confidence, whether your robot needs a wipe, a part, or a replacement.
Read it your way
Short on time? Open this article in your assistant with a ready-made prompt and get the gist in seconds.
Found this useful? Make us a preferred source so we show up in your Google results.
Keep reading
Related articles

Troubleshooting & Repair
Roomba Not Working? 8 Symptoms Fixed (2026 Models)
Reboot first, then match your symptom. 8 Roomba faults (charge, Wi-Fi, error codes, brushes, bin) with per-series fixes for 600/e/i/j/s and 2026 models.

Troubleshooting & Repair
How Much Does a Vacuum Repair Cost? Fix or Replace (2026)
How much does a vacuum repair cost? Usually $50–150 (up to ~$321 for central). Use the 50% rule and our brand tier to decide: fix it or replace it in 2026.

Troubleshooting & Repair
Why Won’t My Robot Vacuum Work? 6 Fixes We Tested
Why won’t my robot vacuum work? Reset it, free the wheels, clean the sensors and fix a 2.4GHz Wi-Fi snag in 5 minutes: the DIY checks that skip a repair bill.

Troubleshooting & Repair
Not Broken? Why Won’t My Vacuum Work (Fix It First)
Fix it fast: ‘why won’t my vacuum work’ is usually a clog, thermal cutoff, or reset, not a dead motor. Match your symptom to the exact fix.
The discussion
Comments
Every comment is reviewed before it goes live.