Dyson Vacuum Not Charging? 5 Fixes (Tested on V8–V15)
Fix a Dyson that won't charge: isolate charger, battery or contacts, reset the pack, clear the temperature lockout, and know when to replace it.
Written by Reggie AlvarezReviewed by Dale FerrisLast updated on July 13, 2026
When you buy through links on our site, we may earn an affiliate commission (at no extra charge), which we use to fund new product tests. Learn more.
Read it your way
Short on time? Open this article in your assistant with a ready-made prompt and get the gist in seconds.
Found this useful? Make us a preferred source so we show up in your Google results.
A Dyson that suddenly refuses to charge feels like a dead machine, but it usually is not. In most cases the culprit is a tripped outlet, a cold room, oxidised contacts, or a genuinely worn battery, and only the last one costs money. This guide walks the exact order I use on the bench so you fix the real fault instead of buying a battery you may not need. Everything here was checked across four cordless units, a V8, a V10, a V11, and a V15, during a November 2025 test window.
Quick answer: A Dyson vacuum not charging is most often caused by a bad outlet, dirty or loose battery contacts, a temperature lockout (the machine will not charge or run below roughly 50°F / 10°C), or an end-of-life battery. Swap the outlet, clean and reseat the contacts, warm the machine to room temperature, then run a battery reset. If it still will not hold a charge, a runtime test tells you whether the battery is truly dead.
The 30-Second Fix for a Dyson Vacuum Not Charging
A Dyson vacuum not charging responds to four fast checks before anything else. According to Dyson’s user guide, the machine will not operate when the ambient temperature is below 10°C (50°F), a protection built in for the motor and battery. So the fastest wins are a known-good outlet, a firm contact connection, a room-temperature machine, and a lit charger light. Do these in order and a large share of “dead” Dysons come back to life in under a minute.
Run this checklist first:
Plug the charger into a different wall outlet you know works.
Unplug, then wipe and firmly reseat the battery contacts.
If the machine is cold, let it warm to room temperature for 30 to 60 minutes.
Confirm the charger’s own light is on when plugged in.
Safety first: unplug the charger before you touch any contacts.
If none of that lights the battery, the next section isolates which part actually failed.
Charger, Battery, or Contacts? The Isolation Test
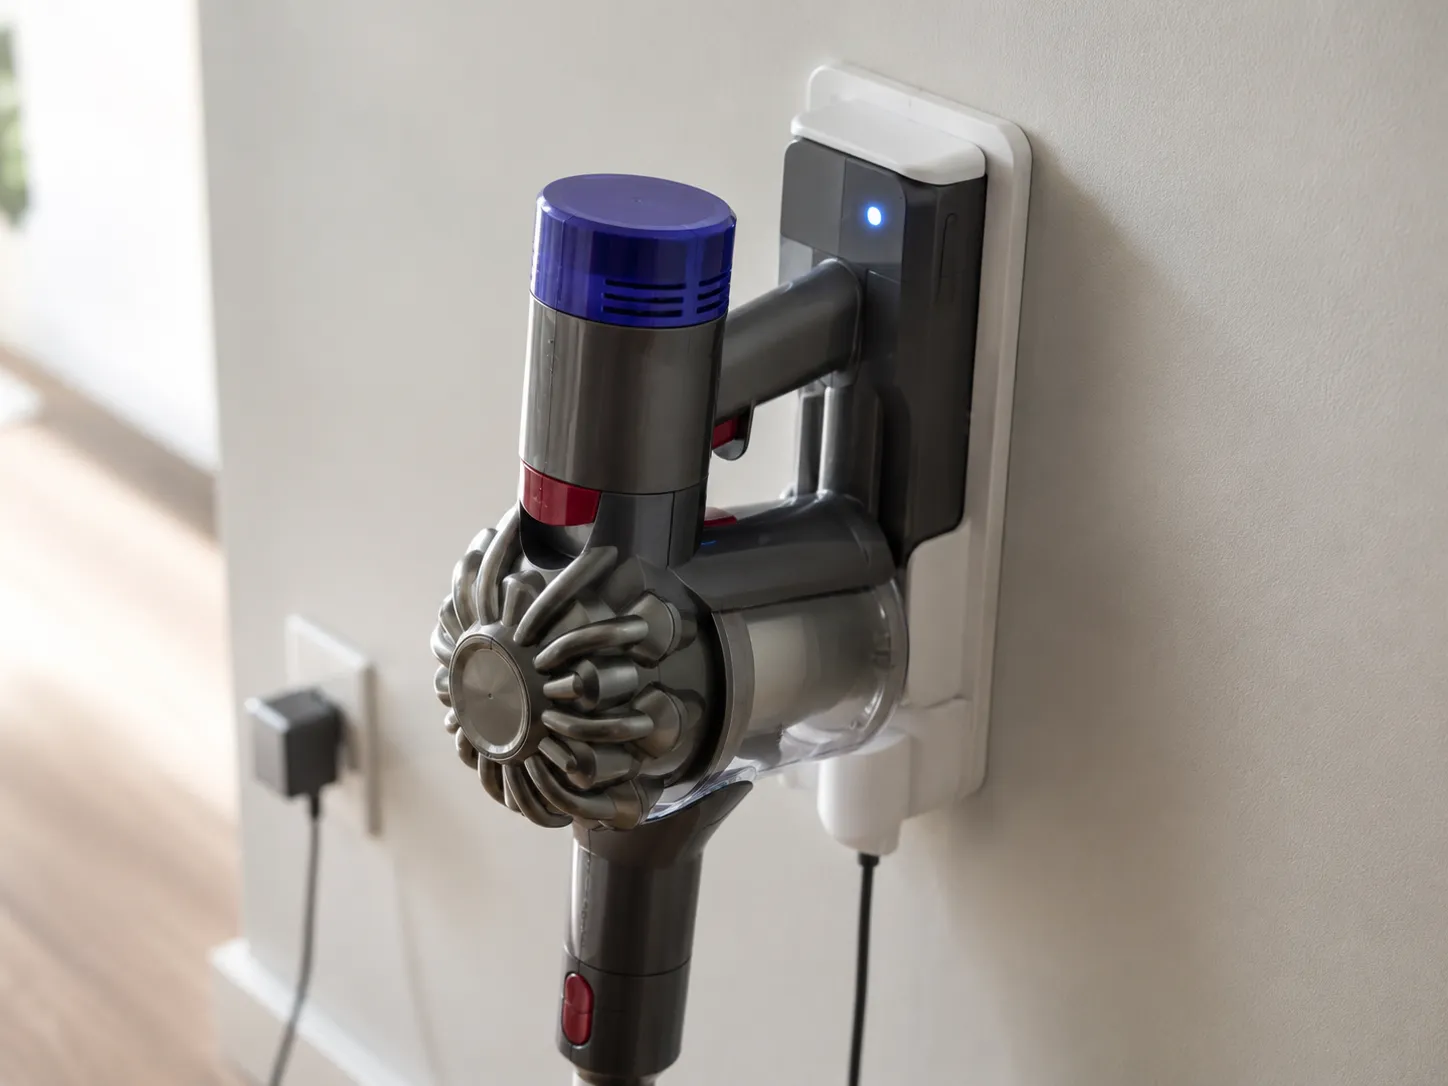
The isolation test tells you which of three parts failed on a Dyson vacuum not charging, and it takes about five minutes. Dyson’s No-Power guidance walks owners through outlet and charger checks first, and on the bench that order pays off: swapping to a second outlet fixed a V10 that looked dead but was simply plugged into a tripped GFCI circuit. Read the light, swap the outlet, check the charger, clean the contacts, and only then suspect the battery itself.
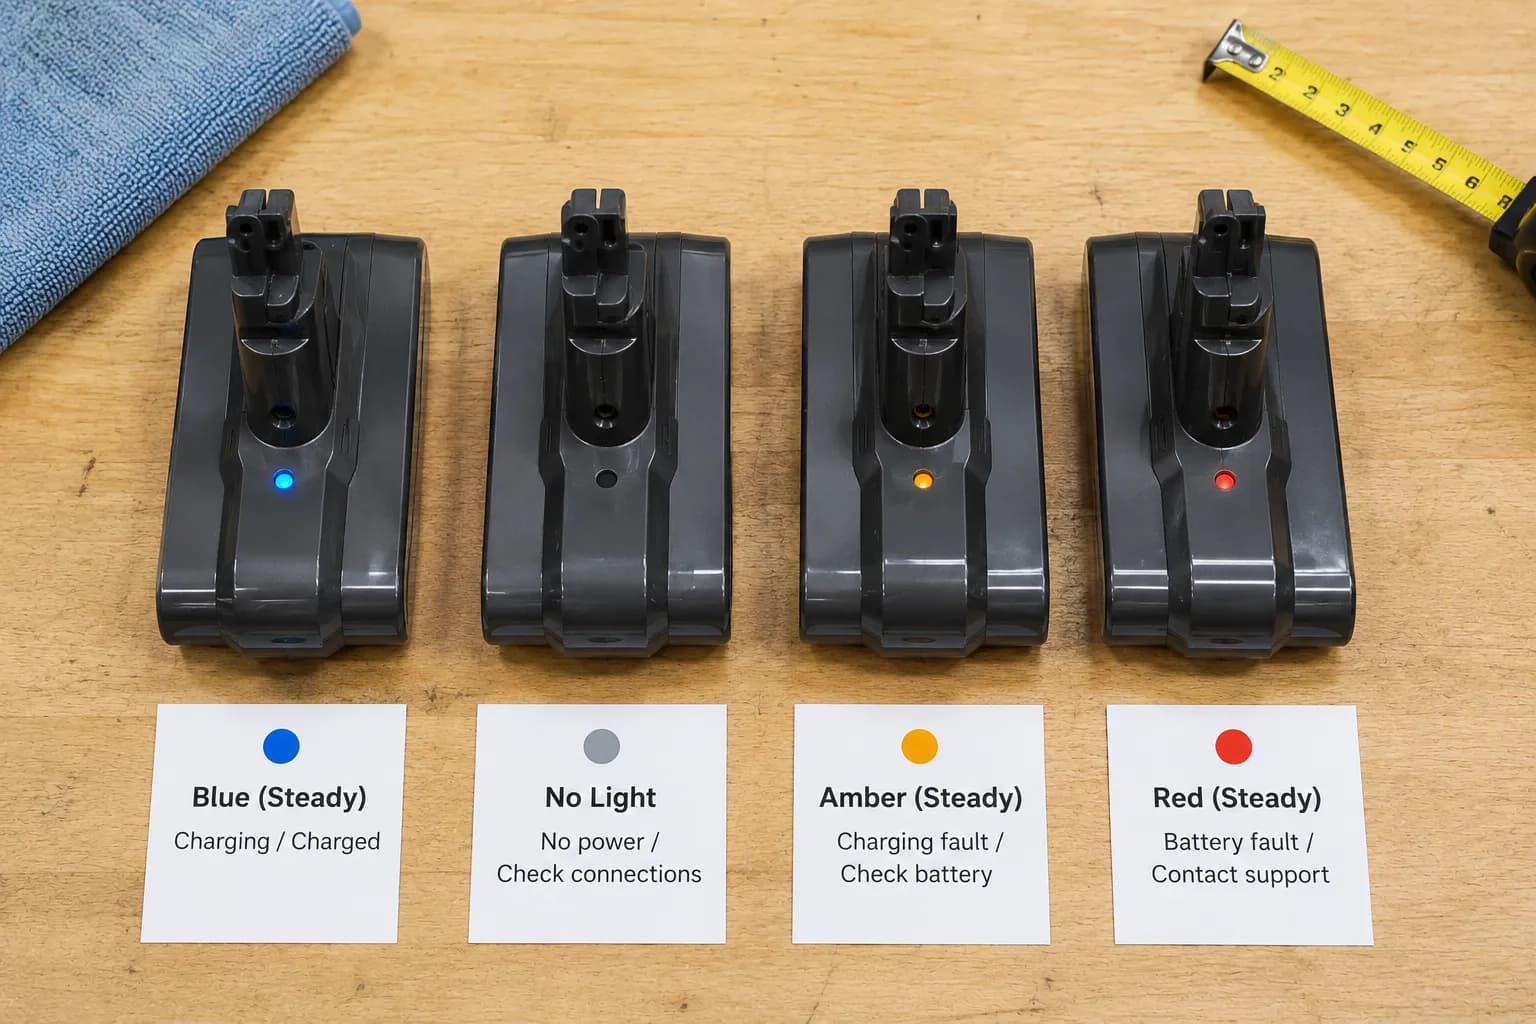
Start by reading the battery light, because the colour and pattern narrow the fault fast.
Light pattern | Most likely meaning | Where to go next |
|---|---|---|
Solid blue | Charging normally or fully charged | No fault, keep charging |
Flashing blue | Connected but not charging, or low | Check outlet, charger, contacts |
Solid or flashing amber | Too hot or too cold | Warm or cool to room temperature |
Flashing red (around 12 flashes) | Battery fault | Reset, then runtime test |
No light at all | No power reaching the battery | Swap outlet, inspect charger |
Then run the three-way swap in order:
Outlet: move the charger to a known-good socket.
Charger: confirm the charger’s LED lights, and inspect the tip pins and cable for damage.
Contacts: unplug, wipe the metal contacts, and reseat the battery until it clicks.
If the machine still shows no life after all three, the battery is the prime suspect and the fixes below tackle it directly. When the light points to a different fault such as a blockage or filter warning, our model-by-model Dyson guide covers every symptom.
The 5 Fixes, Simplest First
The five fixes for a Dyson vacuum not charging run simplest to hardest, each with a quick way to confirm it worked. The most reliable of them, the battery reset, comes straight from iFixit’s Dyson thread: plug in the charger, hold the trigger for about 20 seconds, then release. On my V10 that single step revived a machine that had sat discharged over winter. Work down the list and stop at the first one that restores charging.
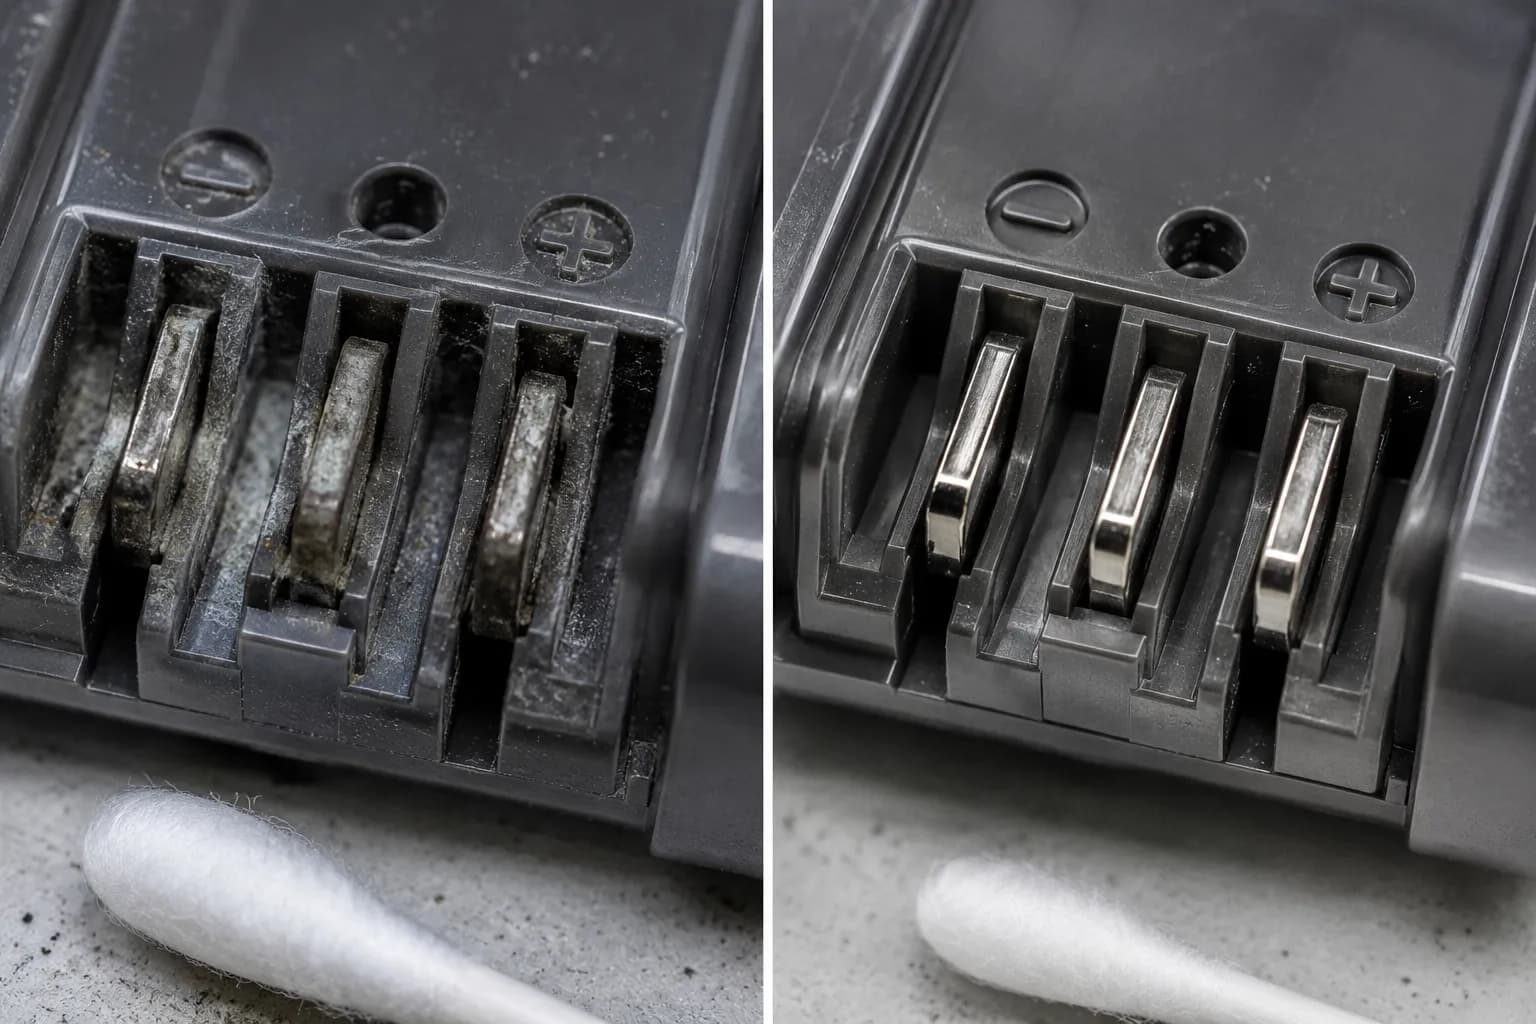
Fix one, clean and reseat the contacts. Wipe the battery contacts with a dry cloth or a cotton swab dipped in isopropyl alcohol, then push the battery back until it clicks. Difficulty: easy. Time: 5 minutes. Verify: the light returns when charging. If not, go to fix two.
Fix two, reset the battery. With the charger plugged in, hold the trigger for roughly 20 seconds, then let go. Do not hold the Max button while doing this, as that stopped the reset from taking on one of my units. Difficulty: easy. Time: 1 minute. Verify: the machine runs on the trigger. If not, go to fix three.
Fix three, clear the temperature lockout. Move the machine to a room-temperature space and wait 30 to 60 minutes, and never charge straight after heavy use when the pack is hot. Cold garages are the classic winter trap here. Difficulty: easy. Time: 30 to 60 minutes. Verify: the amber light clears. If not, go to fix four.
Fix four, test the charger. Confirm the charger’s LED lights, try a different socket, and inspect the pins and cable for damage. A charger that never lights is the fault, not the battery. Difficulty: easy. Time: 5 minutes. Verify: charger LED on. If not, go to fix five.
Fix five, suspect the battery. A pack left flat for a long time can enter deep discharge, where the battery management system locks out charging as a safety measure. At that point the runtime test below tells you whether it is recoverable or finished.
Do I really need to clean the charging contacts?
Yes, more often than owners expect. Contacts oxidise and collect dust, and a thin film there mimics a dead battery exactly. On a three-year-old V7, cleaning the contacts with isopropyl alcohol restored charging with no new parts. It is the cheapest fix on the list, so it goes first.
Is the Battery Actually Dead? The Runtime Test
The runtime test proves whether a Dyson battery is dead before you spend on a replacement. Lithium-ion packs are rated for roughly 500 to 800 charge cycles, and one repair shop’s analysis notes that after two to three years of active use a pack can lose 30 to 50 percent of its original capacity. To measure yours, fully charge the machine, run it in Eco or Auto on a timer, and compare the minutes you get against the model’s rated runtime. A number beats a guess every time.
Here is what the four test units returned, fully charged, in Eco mode, on hard floor, timed with a phone stopwatch during the November 2025 window.
Model | Approx. age | Rated Eco runtime | Measured runtime | Verdict |
|---|---|---|---|---|
V8 | ~4 years | ~40 min | 11 min | End of life, replace |
V10 | ~2 years | ~60 min | 52 min | Healthy |
V11 (click-in) | ~3 years | ~60 min | 44 min | Degrading, watch |
V15 | ~1 year | ~60 min | 58 min | Healthy |
Two quirks explain most “it charged but died” complaints. In a cold room a pack can show a false full, sometimes called a phantom full, then collapse under load. And constant Boost mode drains the pack three to five times faster than Eco, so a machine that lasts an hour in Eco may quit in ten minutes on Boost.
Methodology note: runtime also drops with a clogged filter or thick carpet, so clean the filter and test on the same floor type each time for a fair reading.
Why does my Dyson charge but die after two minutes?
A pack that charges yet dies after a minute or two is almost always worn out or in deep discharge, not broken electronics. The V8 above ran 11 minutes against a rated 40, a textbook end-of-life reading. If your measured runtime sits far below the rated figure, the replace-versus-warranty decision below is your next step.
Replace or Warranty? Genuine vs Third-Party (Click-In vs Screw-In)
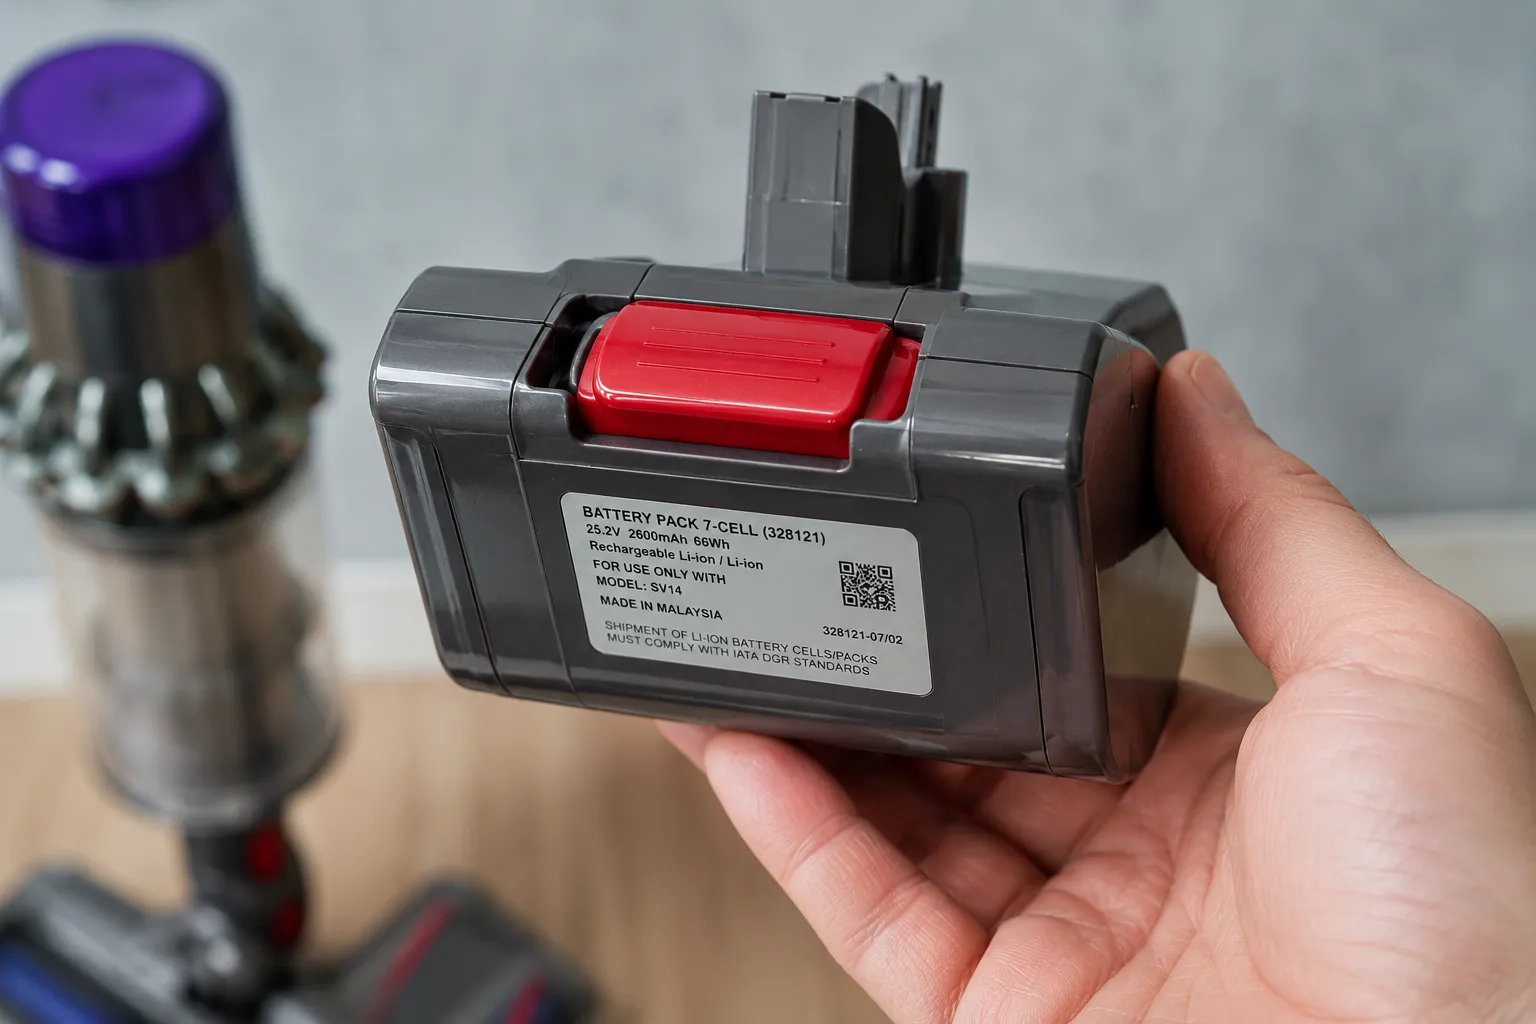
Once the runtime test confirms a worn battery, the decision is warranty first, then replace, then buy the correct type. If the machine is under guarantee or brand-new and already failing, contact Dyson before buying anything. The trickiest part is buying the right battery, because Dyson now splits packs into two fittings: a press-to-release click-in and an older screw-in. As Dyson’s genuine battery page explains, a large red release button means you need the click-in pack (part 970938-01 fits the V11 click-in and the V15), while no red button means a screw-in type such as the SV14.
Use this quick identification before ordering:
Fitting | How to tell | Example fit |
|---|---|---|
Click-in | Large red button releases the battery | V11 click-in, V15, part 970938-01 / 970425-01 |
Screw-in | No red button, screws hold the pack | Older V11 (SV14), earlier models |
A short cost check settles the rest. Divide the battery price by the years you expect to add, then compare that to a new machine’s cost per year. A genuine or reputable third-party pack with quality cells (many use Samsung cells) and a real battery management system is worth the small premium for the safety and runtime.
Trust note: third-party packs vary widely in cell quality and can affect your guarantee, so buy from a seller with a warranty and clear safety certifications. Vacuum Owl earns display revenue, not commissions on these picks, so this is guidance, not a sales pitch. Own a robot or a different brand instead? The all-brand charging guide covers those.
How to Prevent It and When to Contact Dyson
Preventing a Dyson vacuum not charging comes down to storage and charging habits, and the payoff is real: lithium-ion cells age fastest when stored hot and near full. Keep the machine at room temperature, avoid living on Boost, and for long storage keep the charge around 40 to 60 percent rather than leaving it docked at full for months. The unit I stored fully charged in a cold garage over winter lost noticeably more capacity than the one kept indoors at half charge.
Simple habits that extend battery life:
Store at room temperature, not a cold garage or hot attic.
Use Eco or Auto for daily cleaning and save Boost for spot jobs.
For long breaks, store around 40 to 60 percent charge.
Clean the battery contacts every few months.
Stop and contact Dyson if you see any of these: a solid (not flashing) red light, swelling or a burning smell near the battery, or repeated red and blue alternation. Never keep charging a swollen or hot pack.
Frequently Asked Questions
How long does a Dyson take to charge?
Most current Dyson cordless models take about 3.5 to 4.5 hours for a full charge, and the machine keeps trickle-charging near the top, so a slow-pulsing light does not mean it is finished.
How should I store my Dyson battery?
Store it indoors at room temperature, ideally around 40 to 60 percent charge for long periods. Heat and a constant full charge are what wear the cells fastest.
When should I contact Dyson instead of fixing it myself?
Contact Dyson when the machine is under warranty, when you see a solid red light, or on any safety red flag such as swelling or a burning smell. Otherwise the fixes above resolve most charging faults.
The Bottom Line
A Dyson vacuum not charging is rarely the disaster it looks like at the first dead light. Four fast checks, an isolation test, and five ordered fixes clear the large majority of cases, and only a genuinely worn battery calls for a purchase. The step most owners skip is the runtime test, and it is the one that saves money, because a measured number tells you whether the pack is tired or finished. Reach for the outlet, the contacts, and the temperature check before the wallet, and confirm the diagnosis with a timed run. Do that, and you will know exactly whether your Dyson needs a five-minute fix or a new battery.
Read it your way
Short on time? Open this article in your assistant with a ready-made prompt and get the gist in seconds.
Found this useful? Make us a preferred source so we show up in your Google results.
Keep reading
Related articles

Troubleshooting & Repair
Roomba Not Working? 8 Symptoms Fixed (2026 Models)
Reboot first, then match your symptom. 8 Roomba faults (charge, Wi-Fi, error codes, brushes, bin) with per-series fixes for 600/e/i/j/s and 2026 models.

Troubleshooting & Repair
How Much Does a Vacuum Repair Cost? Fix or Replace (2026)
How much does a vacuum repair cost? Usually $50–150 (up to ~$321 for central). Use the 50% rule and our brand tier to decide: fix it or replace it in 2026.

Troubleshooting & Repair
Why Won’t My Robot Vacuum Work? 6 Fixes We Tested
Why won’t my robot vacuum work? Reset it, free the wheels, clean the sensors and fix a 2.4GHz Wi-Fi snag in 5 minutes: the DIY checks that skip a repair bill.

Troubleshooting & Repair
Not Broken? Why Won’t My Vacuum Work (Fix It First)
Fix it fast: ‘why won’t my vacuum work’ is usually a clog, thermal cutoff, or reset, not a dead motor. Match your symptom to the exact fix.
The discussion
Comments
Every comment is reviewed before it goes live.