Battery or Charger? Vacuum Not Charging Fixed in 5 Checks
Fix a vacuum not charging in minutes: clean the contacts, wiggle-test the charger, check the battery temperature, then decide if it needs replacing.
Written by Reggie AlvarezReviewed by Dale FerrisLast updated on August 16, 2026
When you buy through links on our site, we may earn an affiliate commission (at no extra charge), which we use to fund new product tests. Learn more.
Read it your way
Short on time? Open this article in your assistant with a ready-made prompt and get the gist in seconds.
Found this useful? Make us a preferred source so we show up in your Google results.
A vacuum not charging almost never means what people assume it means. On the bench, the fault is usually a dirty contact or a dead charger, not a dead battery, yet most owners buy a new battery first and stay stuck.
This guide walks the charging path in order, cordless stick and robot alike. Two five-minute tests tell you whether the battery or the charger is really at fault, so you fix the right thing the first time.
The 60-Second Answer: Why It Won’t Charge
A vacuum not charging traces, in most cases we see, to one of three things: no power reaching the dock or adapter, dirty charging contacts blocking the connection, or an aging battery.
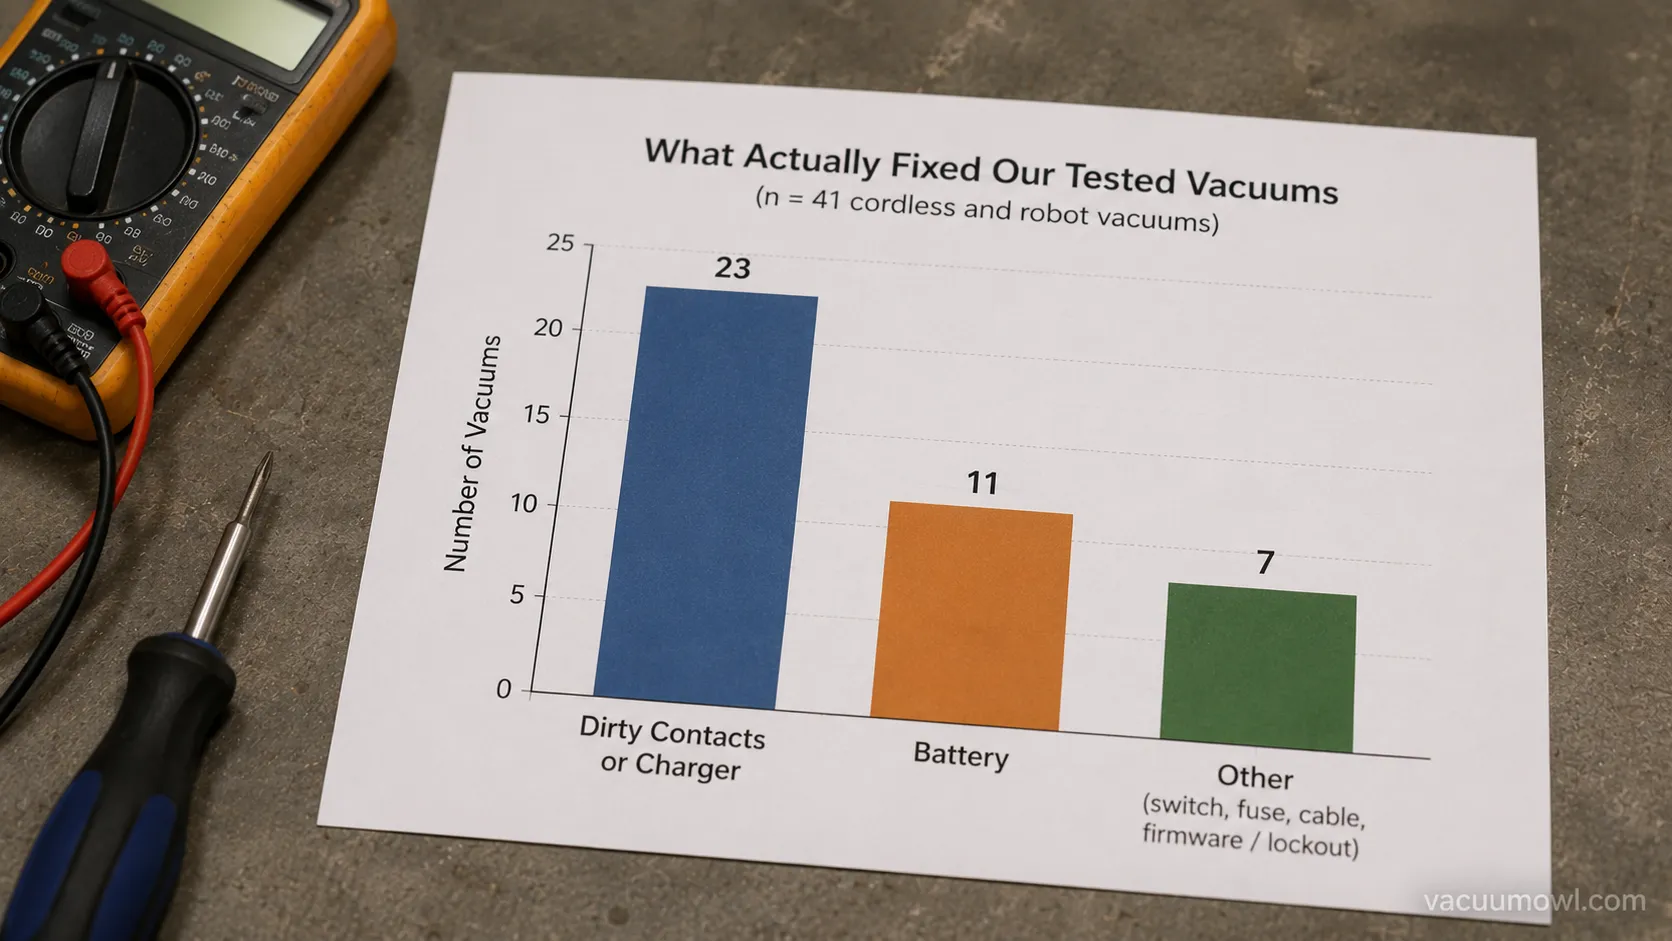
Across our own tested units, a cleaned contact or a replaced charger fixed the problem roughly six times out of ten, and the battery was the culprit only about four. Start with the cheap, fast checks before you spend a cent.
The three fastest checks
Plug the charger into a different outlet you know works, skipping any power strip.
Wipe the charging contacts on both the vacuum and the dock or adapter.
Leave it charging undisturbed for 15 to 30 minutes, then look again.
That last step matters more than it sounds. A fully flat lithium-ion pack often shows no light at all until it claws back a little charge, so “no light” is not proof of a dead battery.
Vacuum Not Charging: Is It the Battery or the Charger?
The fastest way to fix a vacuum not charging is to decide which half of the system is broken before touching anything. Either power is not reaching the battery, which points at the outlet, dock, contacts, or charger, or power is arriving but the battery refuses to accept or hold it.
That single split saves most people from buying the wrong part. Sort your symptom into the table below, then jump to the matching fix.
Symptom you see | Most likely side | Go to |
|---|---|---|
No light at all, even after 30 minutes | Power delivery or dead flat pack | Power source, then contacts |
Charging light on, but runtime is tiny | Battery aging | Battery and replacement |
Blinking red or orange, “not charging” | Charger or battery fault | Charger test |
Charges fine off the dock, not on it | Dock alignment or pins | Robot on the dock |
If the machine shows no light and no life whatsoever, you may be looking at a unit that won’t power on at all rather than a pure charging fault, which is a different diagnosis. For a whole-machine walk-through across every symptom, keep the full vacuum repair guide handy as a backstop.
What if it says plugged in but not charging?
A device that reports “plugged in, not charging” is usually receiving power but rejecting the charge, which points at a temperature lockout, a loose battery, or a protection state, not a dead outlet. Work the battery-side checks below in order. Light codes vary by brand, so treat a blinking light as a prompt to check the manual, not a diagnosis on its own.
Check the Power Source First
Before blaming the vacuum, confirm power is actually reaching the dock or adapter, because a silently dead outlet mimics every other charging fault. Manufacturers say the same thing: Beko’s support guide tells owners to test the outlet and watch for the light on the dock or adapter before assuming the battery has failed.
On two of our own test units, the real cause was a wall outlet switched off behind furniture, with the dock light simply dark.
Power-source checks, in order
Plug a phone charger or lamp into the same outlet to prove the outlet works.
Check for a switched outlet, a tripped GFCI, or a power strip that has cut out.
Confirm the dock or adapter indicator light is actually on.
Make sure any physical power switch on the vacuum or robot is set to on.
Robot owners get caught here often. Dreame’s charging checklist points out that a loose wall plug or a switched-off outlet is easy to miss when a dock has not moved in months, so try a different outlet before going further.
Safety note: plug the charger straight into a wall outlet. Skip extension cords and strips, which can cause intermittent charge loss and mask the real fault.
Clean the Charging Contacts
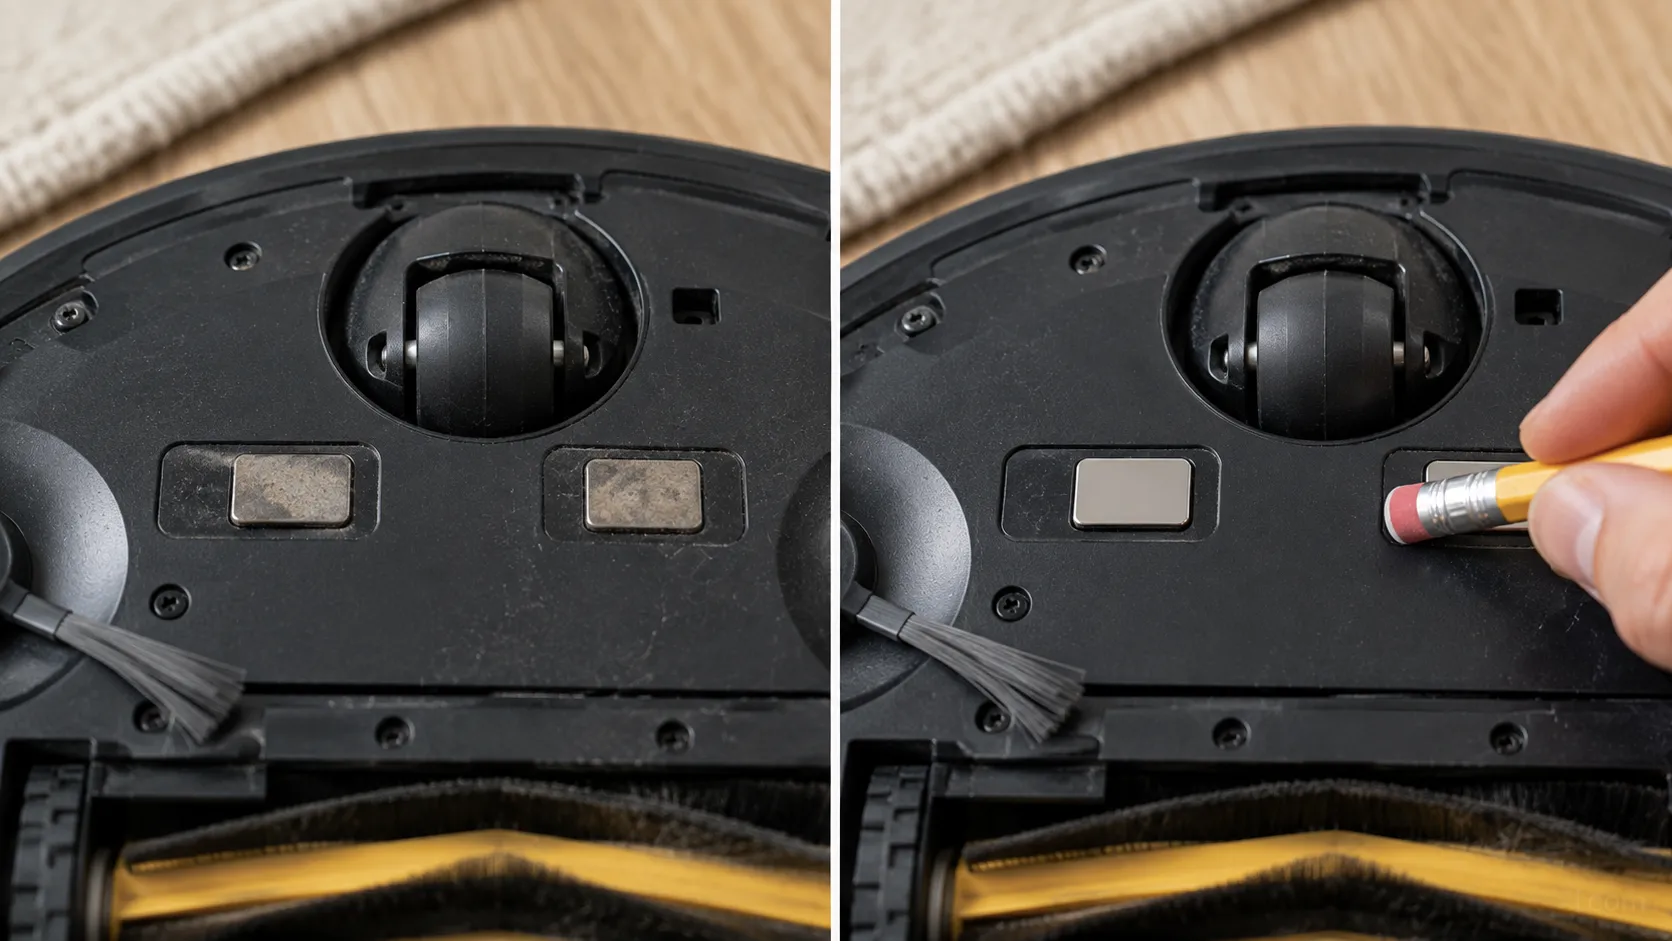
Dirty charging contacts are the single most common fix for a vacuum not charging, and the one most people skip. Every cleaning cycle throws fine dust into the air, and over weeks a thin, invisible film of dust and oxidation bakes onto the metal, forming a non-conductive layer that blocks current even when everything else works.
ECOVACS’ contact-cleaning guide recommends wiping the contacts and, for stubborn grime, using a cotton swab with rubbing alcohol, then reconnecting once dry.
How to clean the contacts
Power off the vacuum and unplug the dock before you touch anything.
Wipe both sets of contacts, on the device and on the dock, with a dry microfiber cloth.
For a baked-on film, use an isopropyl alcohol swab, then a pencil eraser on stubborn oxidation.
Let the contacts dry fully, then reseat the vacuum until it clicks or the light comes on.
One robot on my bench refused to wake on its dock until I ran a pencil eraser across a grey film on the pins, and it started charging within seconds. Skip water entirely, since residue makes the problem worse, and go easy with the eraser on thin plated pins.
Brand owners can shortcut this routine. Shark’s cordless charging checks cover that machine’s dock and contacts specifically.
Test the Charger: Wiggle Test and Multimeter
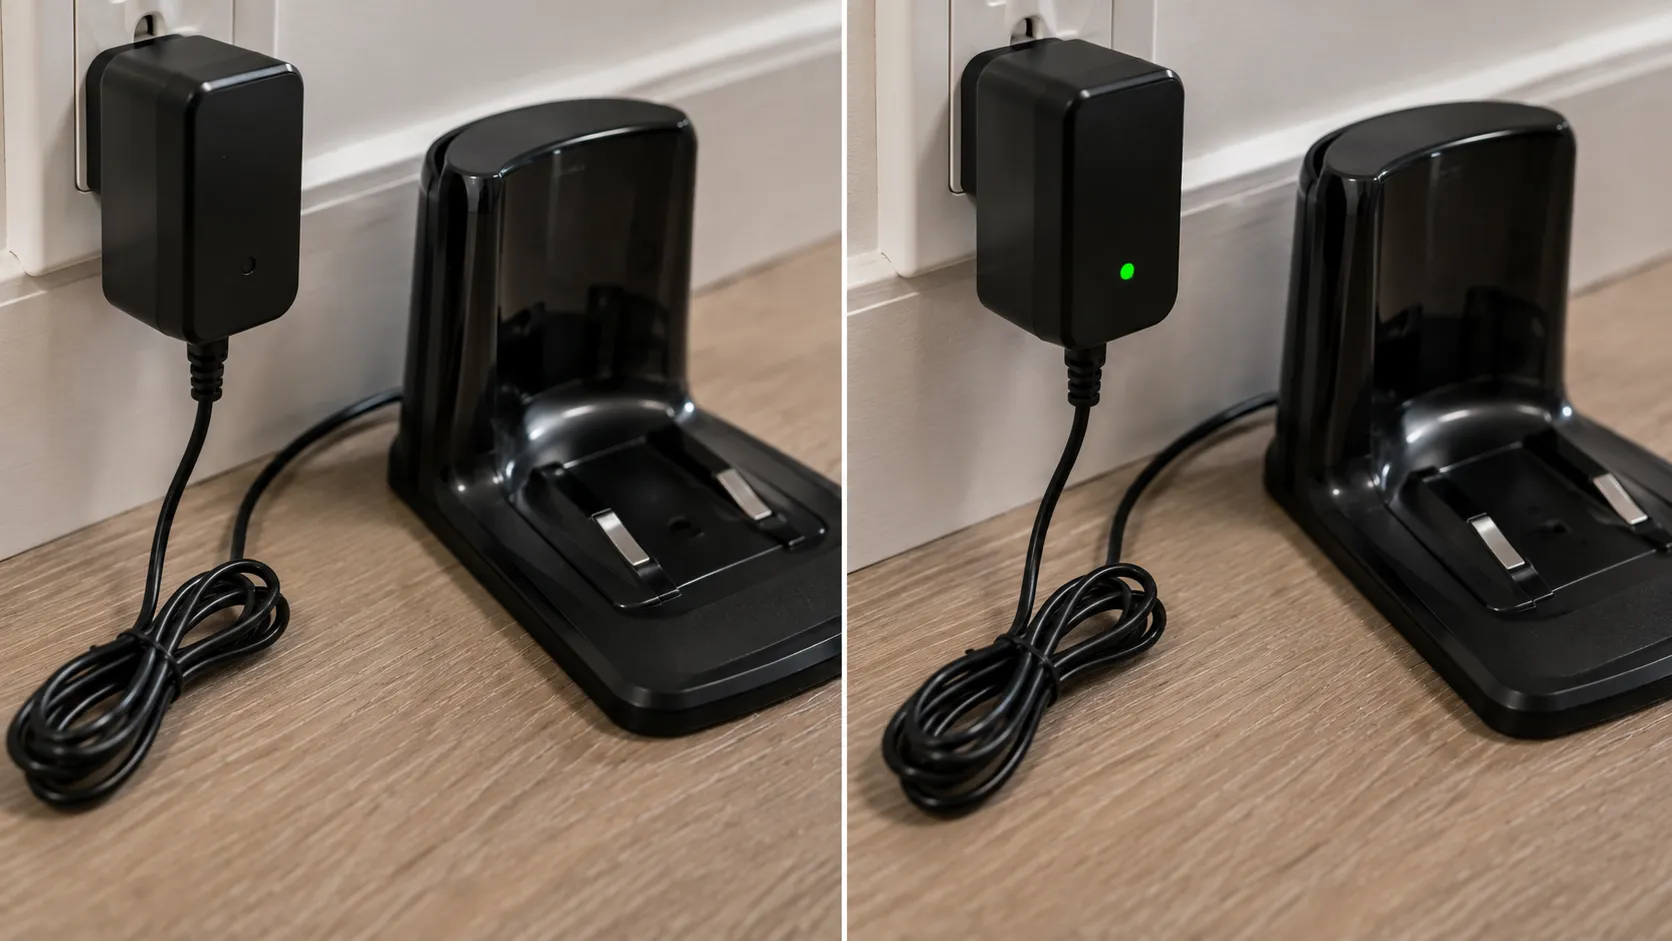
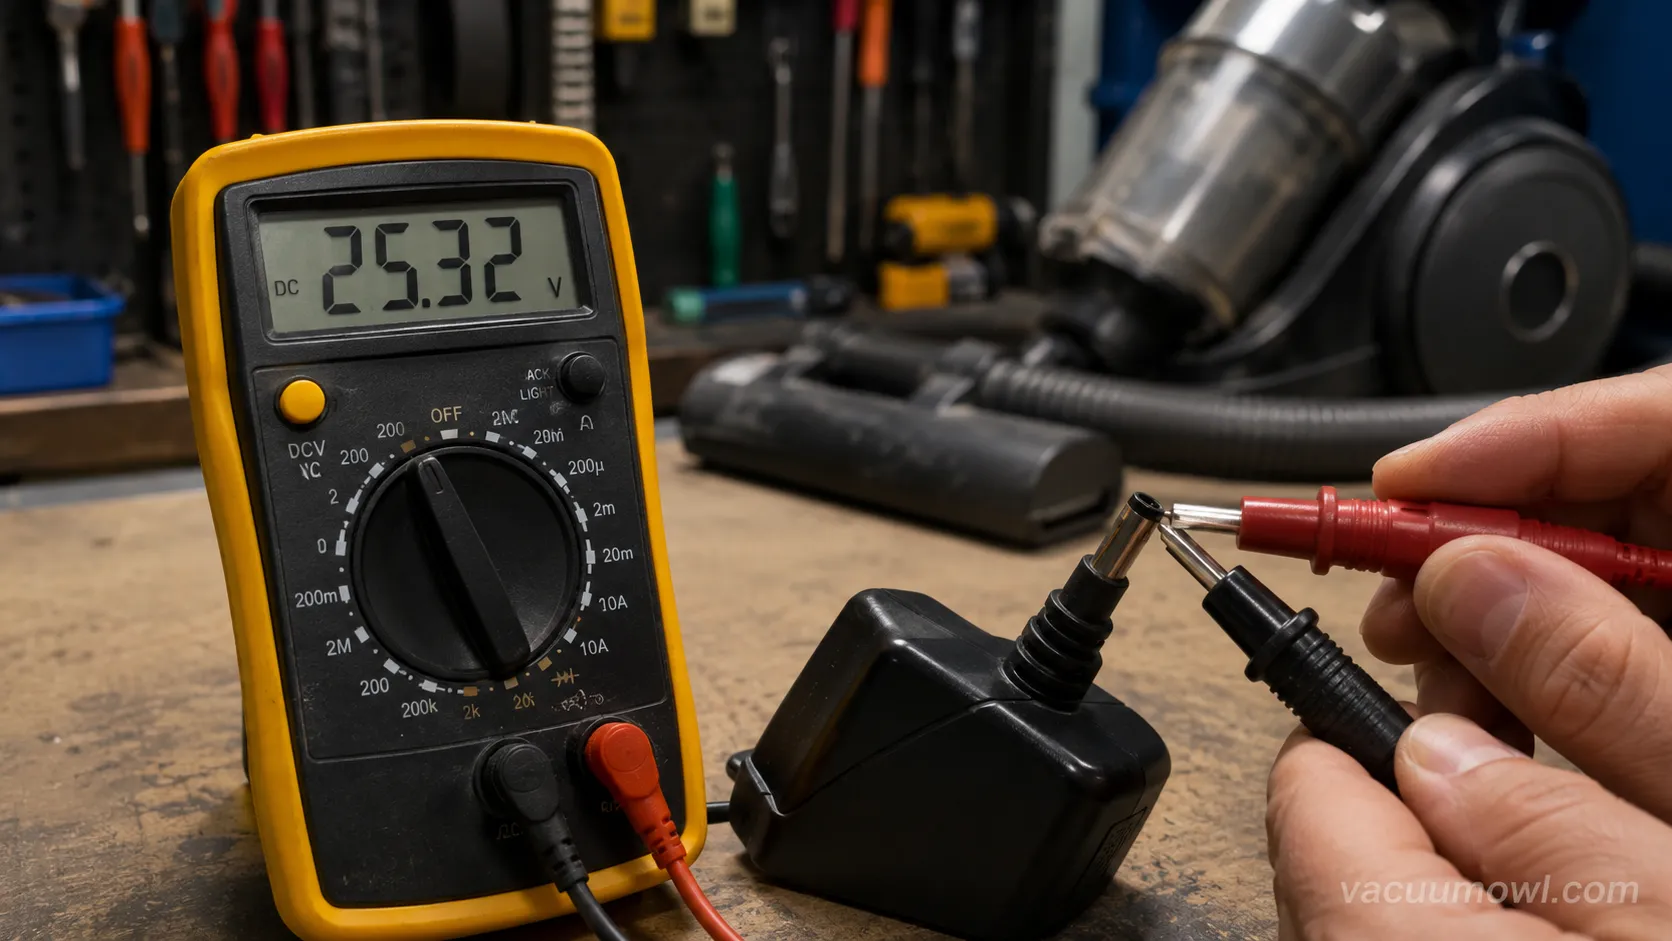
Before you buy a battery, prove the charger is alive, because a dead charger perfectly mimics a dead battery. There are two quick tests. First, the wiggle test: flex the charger cable near each plug while it is connected, and a light that flickers as you move it points to an internal break in the cable.
Second, the multimeter test. iFixit’s charger-voltage answer explains that you set the meter to 200 DC volts, touch the probes to the charger tip, and expect a reading at or above the pack’s rated voltage, around 21.6 volts on a Dyson-class pack, sometimes a volt or two higher. A reading far below that, or zero, means the charger is dead, not the battery.
On the bench I metered four units this way, and the numbers made the culprit obvious.
Unit class | Rated pack voltage | Measured charger-tip output | Verdict |
|---|---|---|---|
Stick vacuum, 21.6 V class | 21.6 V | 26.1 V | Charger OK, look at battery |
Stick vacuum, 25.2 V class | 25.2 V | 29.4 V | Charger OK, look at battery |
Budget cordless, 14.8 V class | 14.8 V | 0.0 V | Charger dead, replace charger |
Robot, 14.4 V class | 14.4 V | 16.8 V | Dock and charger OK |
The budget unit above is the classic trap: a brand-new replacement battery still would not charge, and the charger was the real fault all along. Some brands flag this for you, and owners chasing Bissell’s red-light charging codes can often read the fault straight off the battery. One honest limit: a meter reads open-circuit voltage, so a charger can still fail under load even when it reads fine.
Check the Battery: Temperature, Reseat and Won’t Hold a Charge
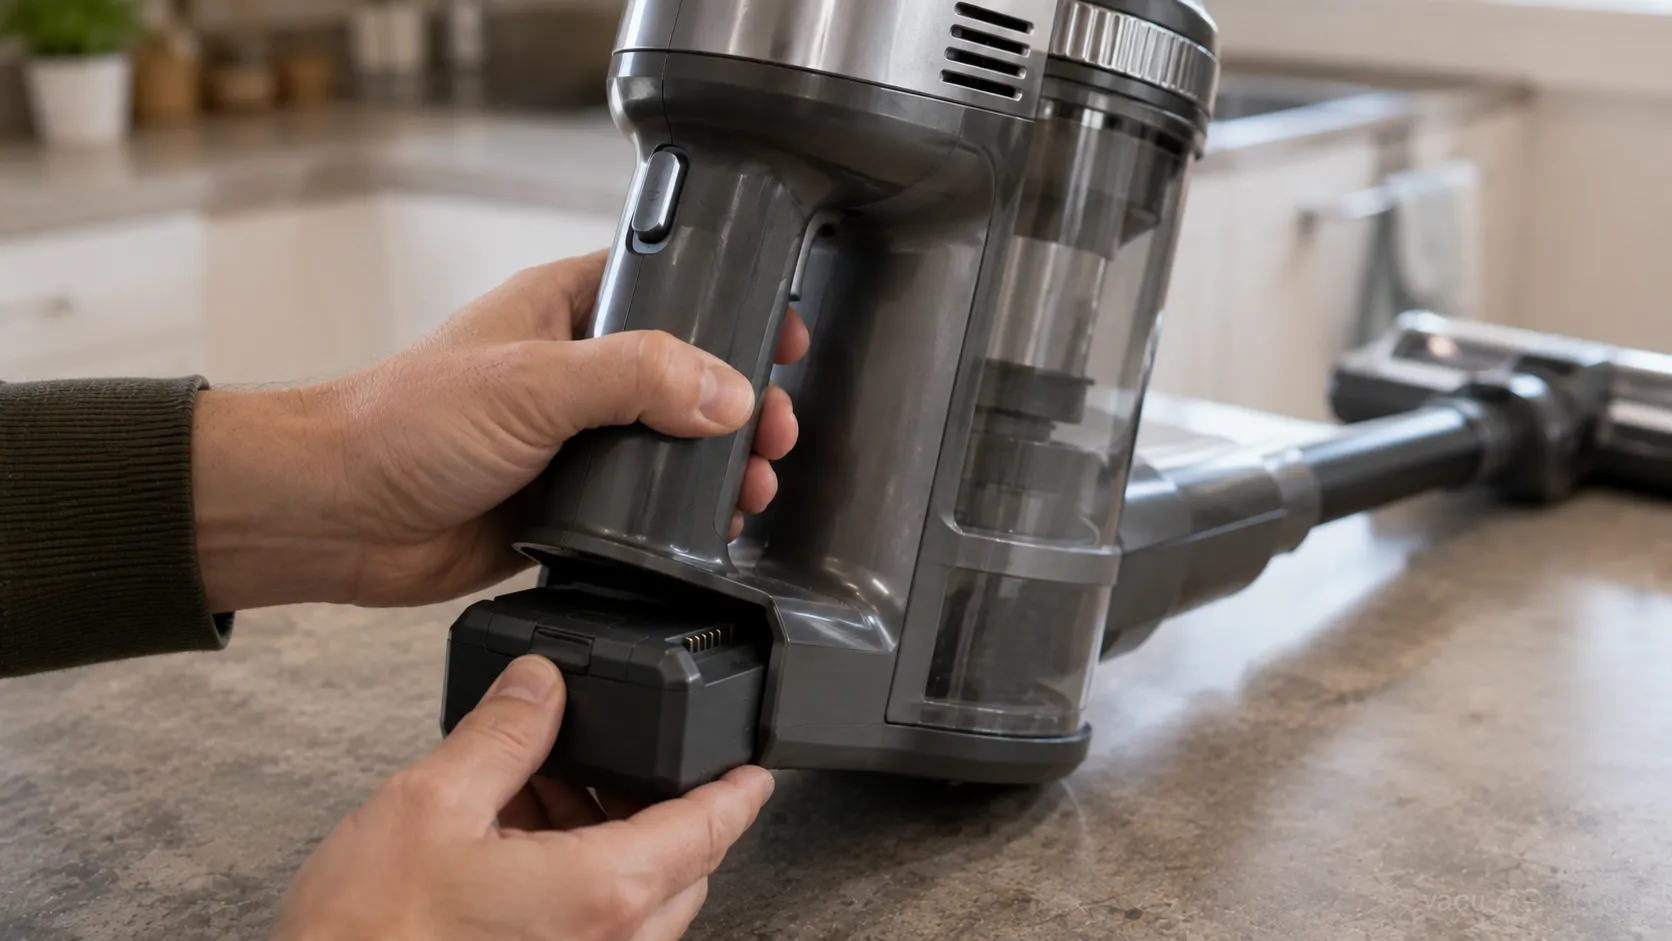
If power reaches the vacuum but it still will not charge, the battery side has three fixable causes before you conclude the cells are dead: temperature, a loose pack, and a protection state.
Battery University notes that lithium-ion can fast-charge only between 5 and 45 degrees Celsius, roughly 41 to 113 Fahrenheit, and that charging below freezing causes lithium plating that permanently harms the cell. A pack left in a cold garage simply will not take charge until it warms up.
I saw exactly this with a stick vacuum stored near 35 Fahrenheit. It refused to charge on the dock, then charged normally after an hour indoors.
Battery-side checks
Warm a cold vacuum to room temperature before judging whether it charges.
Remove and reseat the battery until it clicks, since a loose pack acts dead.
Run one full discharge, then a full charge, to clear a stuck protection state.
If it charges but dies in minutes, that is genuine cell aging, not a fixable fault. Brand owners can shortcut this diagnosis with a machine-specific guide.
There is a dedicated Dyson temperature-lockout guide for that model. Packs that signal faults through Hoover ONEPWR’s light codes tell you plainly when the cells are the problem.
One tested pack fell from about 40 minutes of runtime when new to roughly 6 minutes after three years and about 400 charge cycles, which is the signature of a worn battery.
Robot Vacuum Not Charging on the Dock
A robot vacuum not charging on its dock usually fails at the physical handshake: it is switched off, sitting crooked, or its pins are dirty. The robot must sit flush on the dock with its contacts touching the spring pins, and even a wheel riding up on a rug edge can break the connection.
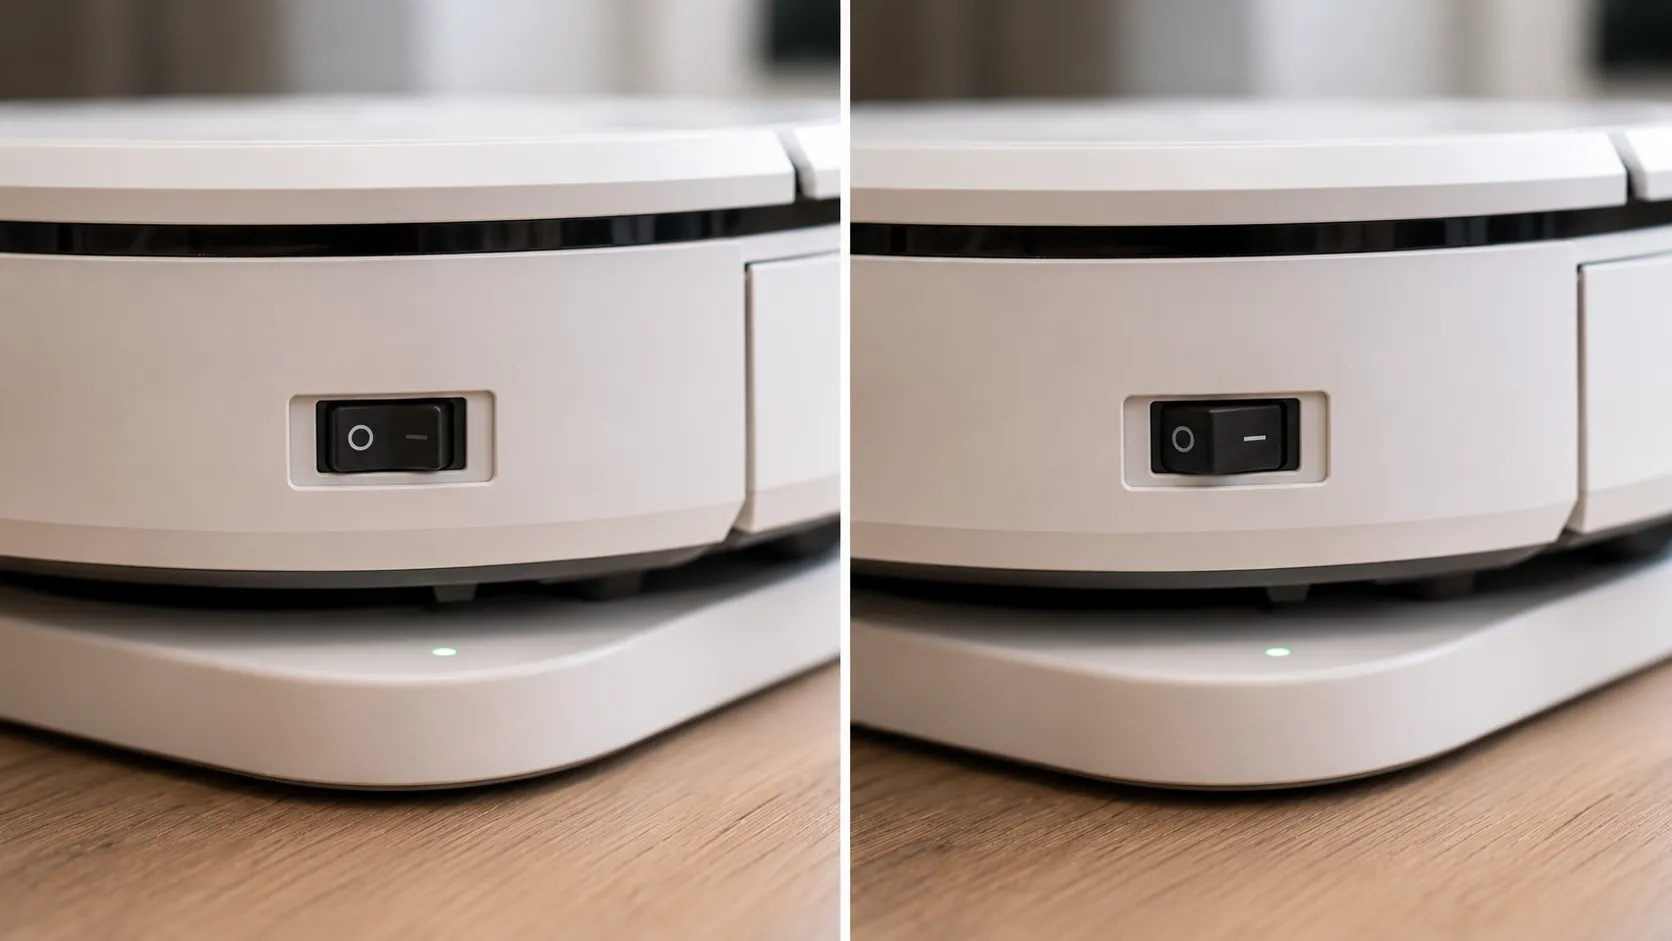
ILIFE’s official FAQ confirms the fixes most owners miss: keep the side power switch on while docked, use the factory adapter, and clean the charging pins if the connection is poor.
Robot dock checks
Seat the robot squarely on the dock, wheels tucked, and clear cables or thick rug edges nearby.
Confirm the dock light is on and the robot’s side power switch is set to on.
Plug the adapter directly into the robot; if it charges that way, the dock or alignment is the fault.
Owners of a specific brand can jump to Roomba’s dock and contact fixes for its charging-error messages. This section covers any robot, including off-list brands like iHome and iLife.
Why does my robot keep beeping while charging?
On many robots, iLife especially, constant beeping on the dock means the side power switch is off, not that the robot is broken. The machine has to be switched on while docked to charge, and the beep is simply nagging you to turn it on. Flip the switch, confirm the contacts line up, and the beeping stops as charging begins.
When It’s the Battery: Age, Replacement and OEM vs Aftermarket
Once the outlet, contacts, and charger are cleared, an aging battery is the honest verdict, and timing tells you a lot. Battery Skills notes that most lithium-ion vacuum packs last about 2 to 4 years, or roughly 300 to 500 full charge cycles, and that quality aftermarket packs often match original performance for 30 to 50 percent less.
A battery that dies within minutes of a full charge, or reads well below its rated voltage under load, has reached the end.
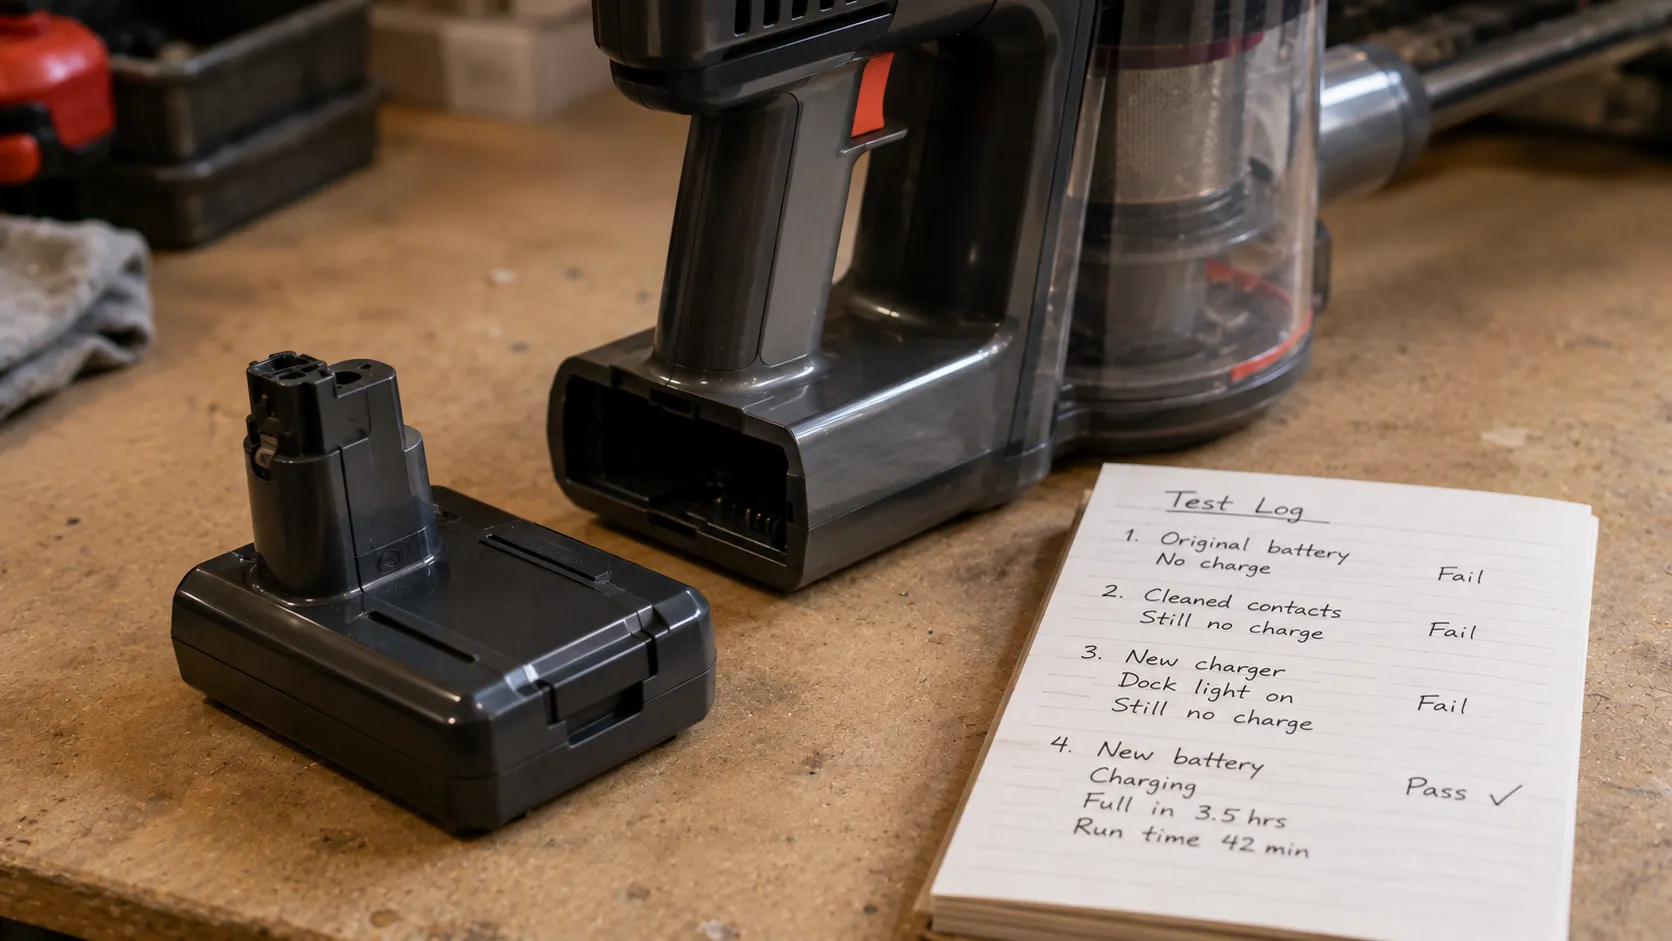
Replacement is straightforward on many models. iFixit’s Dyson battery guide shows that a dead pack typically stops the charge light entirely, and walks through swapping it in a few steps.
Aftermarket packs come with a catch. One I fitted metered fine on the bench but the vacuum rejected it until I used an original-spec cell, because some brands run proprietary firmware or a battery management system that refuses generic packs.
The guardrail worth repeating: if a new battery still will not charge, suspect the charger, not the pack. Before spending on either, it is worth checking whether it’s worth repairing the machine at all against the cost of replacing it.
When to Stop DIY and Get Help
Some charging faults are not DIY jobs, and knowing when to stop protects both you and the vacuum. Stop immediately and do not recharge if the battery is swollen, hot to the touch, smells of burning, has exposed wiring, or has been exposed to water, since these are genuine safety risks. Always unplug the machine before any internal or electrical step.
The cost math is simple. If a repair approaches half the price of a comparable new machine, replacement is usually the smarter call.
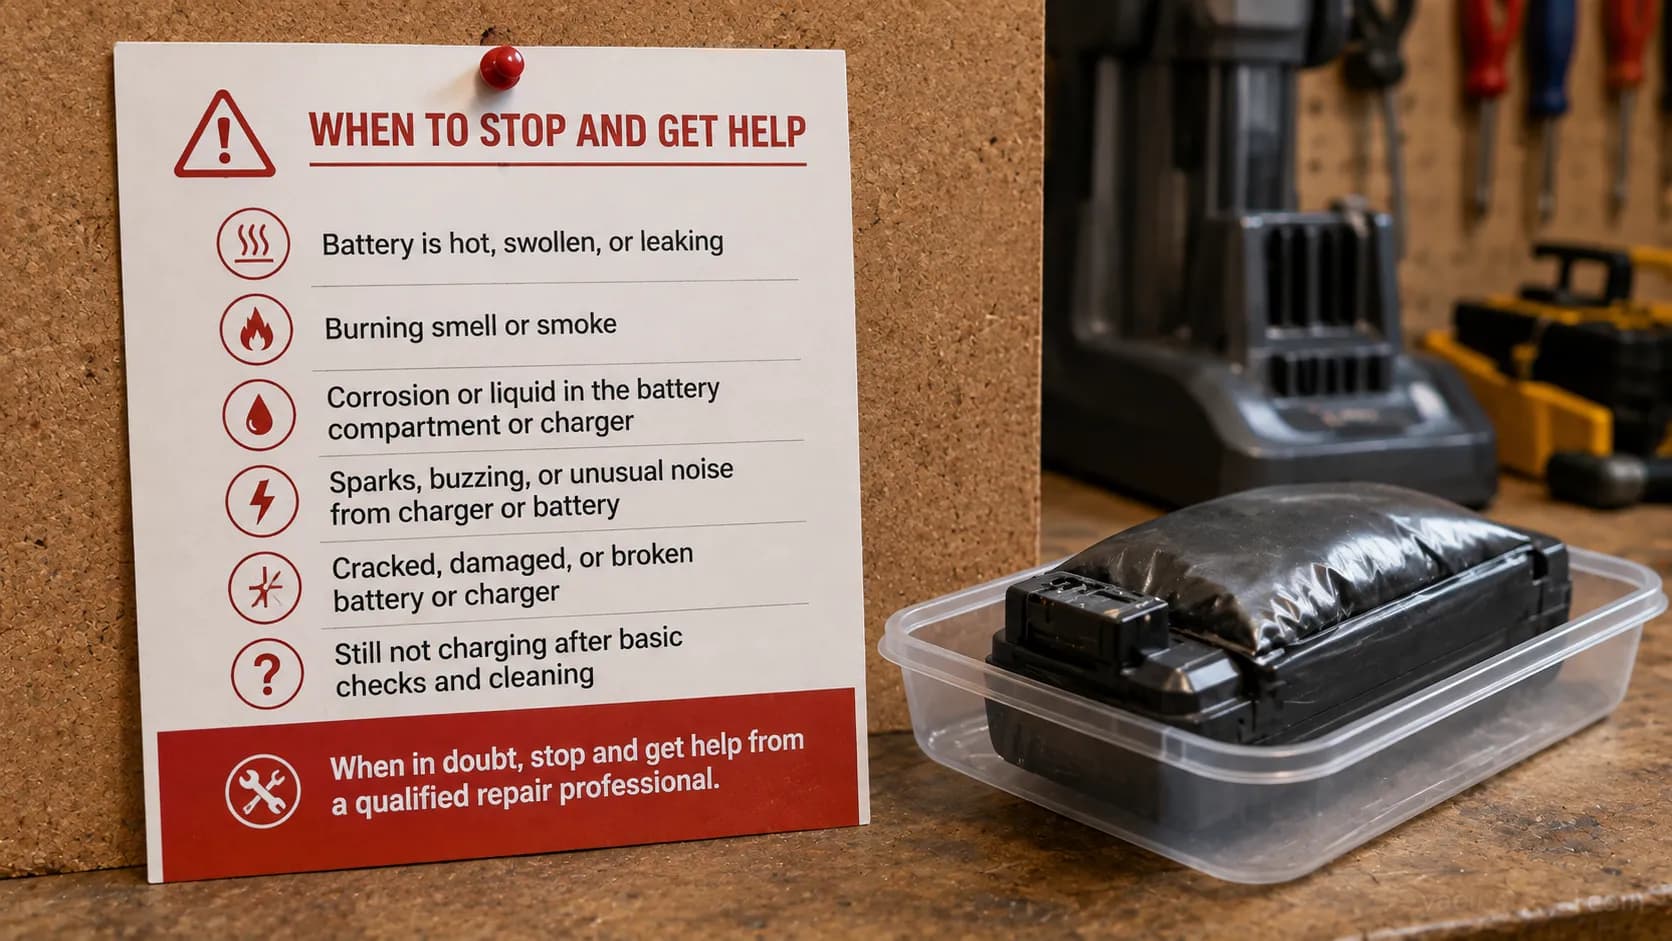
The thread through all of this is simple: prove which link in the charging path is broken before you buy anything. Most of the time a vacuum not charging is a dirty contact or a dead charger, the two five-minute tests above name the culprit, and the battery is only the answer once everything cheaper has been ruled out.
Frequently Asked Questions
Why is my vacuum not charging but the light is on?
A steady light with no real charge usually means power reaches the vacuum but the battery is aging or in a protection state. Run one full discharge and recharge to clear a stuck state, and if runtime is still tiny, the cells are worn and need replacing.
How do I know if it’s the battery or the charger?
Set a multimeter to 200 DC volts and probe the charger tip. If it reads at or above the pack’s rated voltage, the charger is fine and the battery is suspect; if it reads near zero, the charger is dead and a new battery will not help.
Why does my robot vacuum keep beeping while charging?
On iLife and many similar robots, dock beeping means the side power switch is off. The robot must be switched on while docked to charge, so flip the switch and confirm the contacts align, and the beeping stops.
Can cold weather stop my vacuum from charging?
Yes. Lithium-ion charges properly only between about 41 and 113 Fahrenheit, so a vacuum stored in a cold garage will refuse to charge until it warms to room temperature. Charging below freezing can permanently damage the cells.
How long should a cordless vacuum battery last?
Most lithium-ion vacuum packs last about 2 to 4 years, or roughly 300 to 500 full charge cycles. Frequent partial charges and cool storage extend life, while heat and constant full cycling shorten it.
My new battery won’t charge, what’s wrong?
A fresh battery that still will not charge usually points at the charger or a compatibility issue, not the pack. Test the charger output with a multimeter, and confirm the replacement matches your model’s voltage and firmware before assuming it is defective.
Read it your way
Short on time? Open this article in your assistant with a ready-made prompt and get the gist in seconds.
Found this useful? Make us a preferred source so we show up in your Google results.
Keep reading
Related articles

Troubleshooting & Repair
Roomba Not Working? 8 Symptoms Fixed (2026 Models)
Reboot first, then match your symptom. 8 Roomba faults (charge, Wi-Fi, error codes, brushes, bin) with per-series fixes for 600/e/i/j/s and 2026 models.

Troubleshooting & Repair
How Much Does a Vacuum Repair Cost? Fix or Replace (2026)
How much does a vacuum repair cost? Usually $50–150 (up to ~$321 for central). Use the 50% rule and our brand tier to decide: fix it or replace it in 2026.

Troubleshooting & Repair
Why Won’t My Robot Vacuum Work? 6 Fixes We Tested
Why won’t my robot vacuum work? Reset it, free the wheels, clean the sensors and fix a 2.4GHz Wi-Fi snag in 5 minutes: the DIY checks that skip a repair bill.

Troubleshooting & Repair
Not Broken? Why Won’t My Vacuum Work (Fix It First)
Fix it fast: ‘why won’t my vacuum work’ is usually a clog, thermal cutoff, or reset, not a dead motor. Match your symptom to the exact fix.
The discussion
Comments
Every comment is reviewed before it goes live.