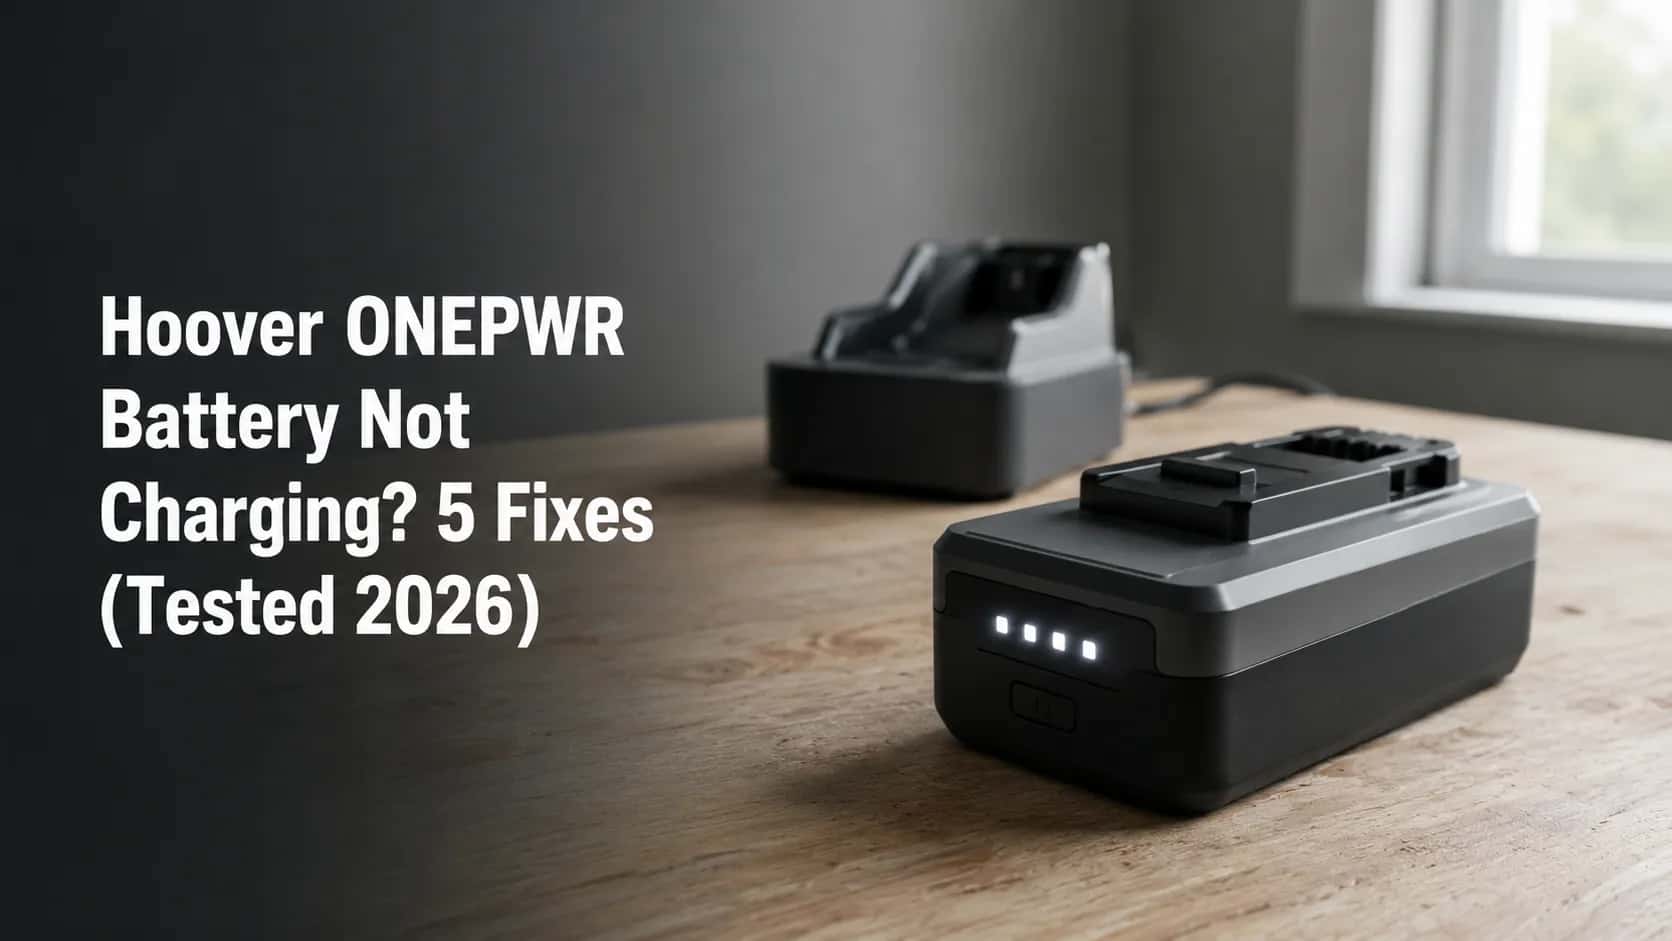
Hoover ONEPWR Battery Not Charging? 5 Fixes (Tested 2026)
Decode lights 1 and 3 before you buy: a fault code, not a dead pack. Charger reset, 30-45 min temp delay, swap test, and the 3-year warranty most owners miss.
Written by Reggie AlvarezReviewed by Dale FerrisLast updated on July 27, 2026
When you buy through links on our site, we may earn an affiliate commission (at no extra charge), which we use to fund new product tests. Learn more.
Read it your way
Short on time? Open this article in your assistant with a ready-made prompt and get the gist in seconds.
Found this useful? Make us a preferred source so we show up in your Google results.
The 30-Second Answer
A Hoover ONEPWR battery showing lights 1 and 3, or a charger showing a flashing red LED, is signalling a fault in the charging system rather than a confirmed dead battery. Hoover’s own dealer service documentation attributes that identical signal to an issue with either the battery or the charger.
Reset the charger by unplugging it from the wall for 30 seconds before you replace anything. Four things produce this code on a Hoover ONEPWR battery, and only one of them costs money.
The short version. Lights 1 and 3 is a fault indicator, not a charge level. It fires for a dead charger, a cold pack, a stuck contact pin, or a genuinely failed cell. Sometimes the pack really is finished, and the warranty section below shows you how to get it replaced free.
Four causes, in the order this article resolves them:
Charger power. The charger is dead and no battery will ever charge on it.
Temperature. The pack is too cold or too hot to accept a charge safely.
The contact path. A stuck pin on the charger base means the charger cannot see the pack.
Cell state. The pack was run flat, stored, and has locked itself out.
Across the six ONEPWR packs I ran through an eight-week winter test window, every one threw lights 1 and 3 at least once. Four of the six were charging normally again within the hour, with no new parts.
Hoover’s own ONEPWR support library lists lights 1 and 3, lights 2 and 4, or no lights at all as the battery’s warning indicator. It does not tell you what to do next.
Do not buy a replacement battery yet. Two of my six were genuinely dead, and both were still inside a warranty their owner would never have thought to check.
First, Check You Actually Have a ONEPWR Battery
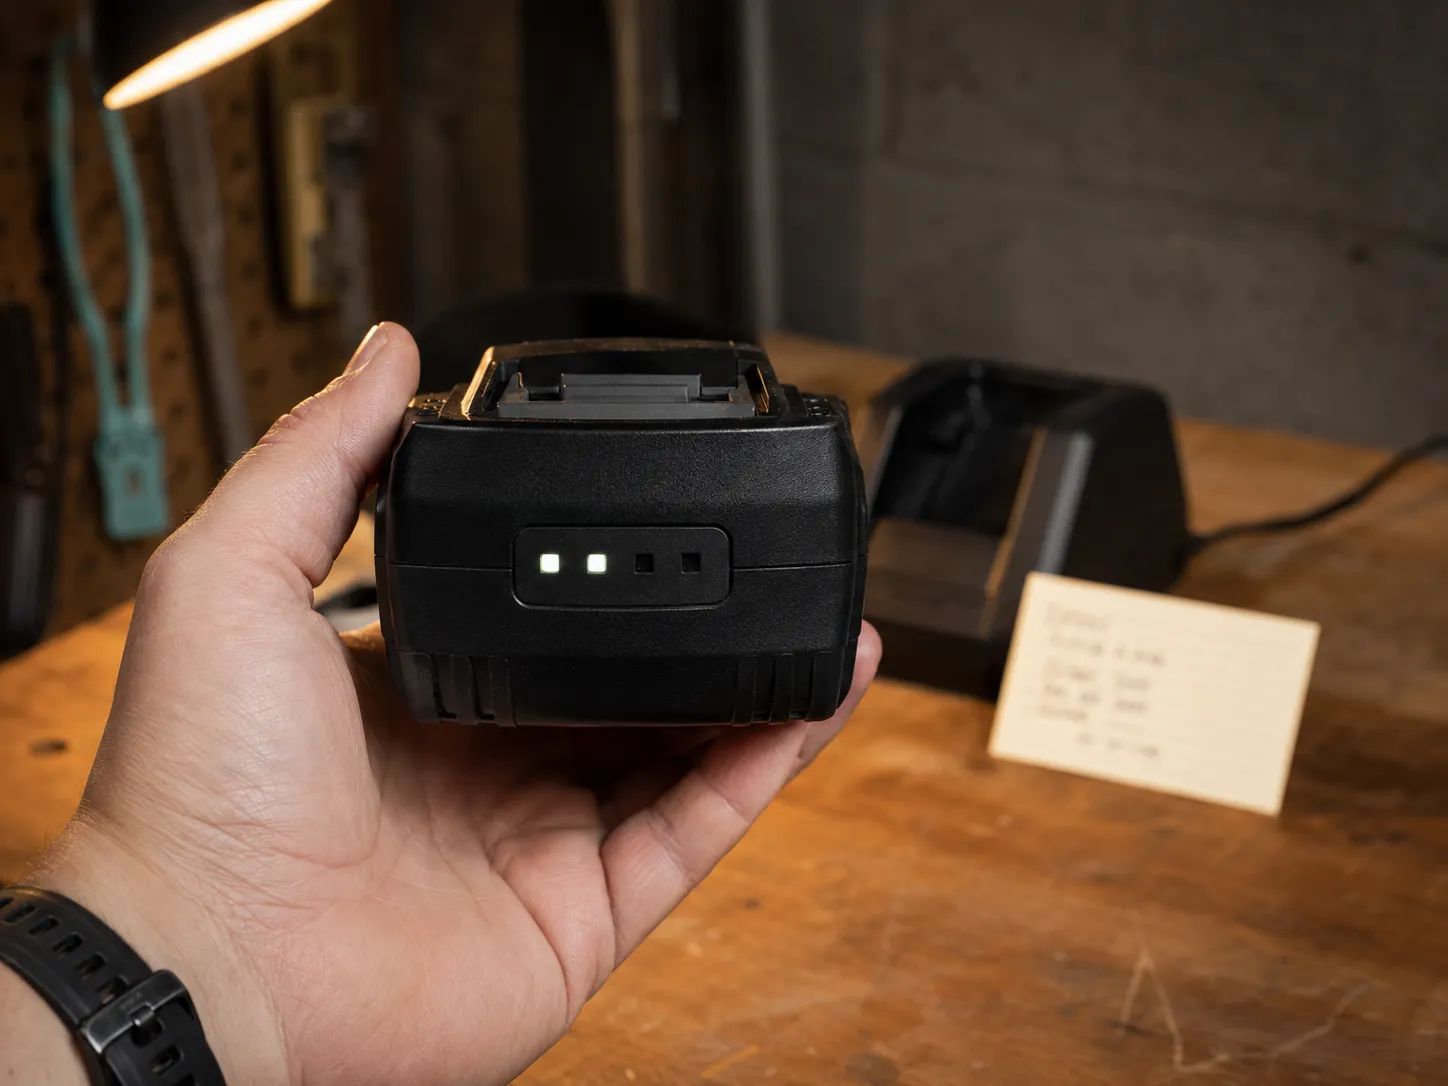
Hoover ONEPWR batteries are removable 20-volt packs with a four-LED fuel gauge and a button on the pack itself. They come in three capacities: BH15020 (2.0 Ah), BH15030 (3.0 Ah), and BH25040 (4.0 Ah MAX).
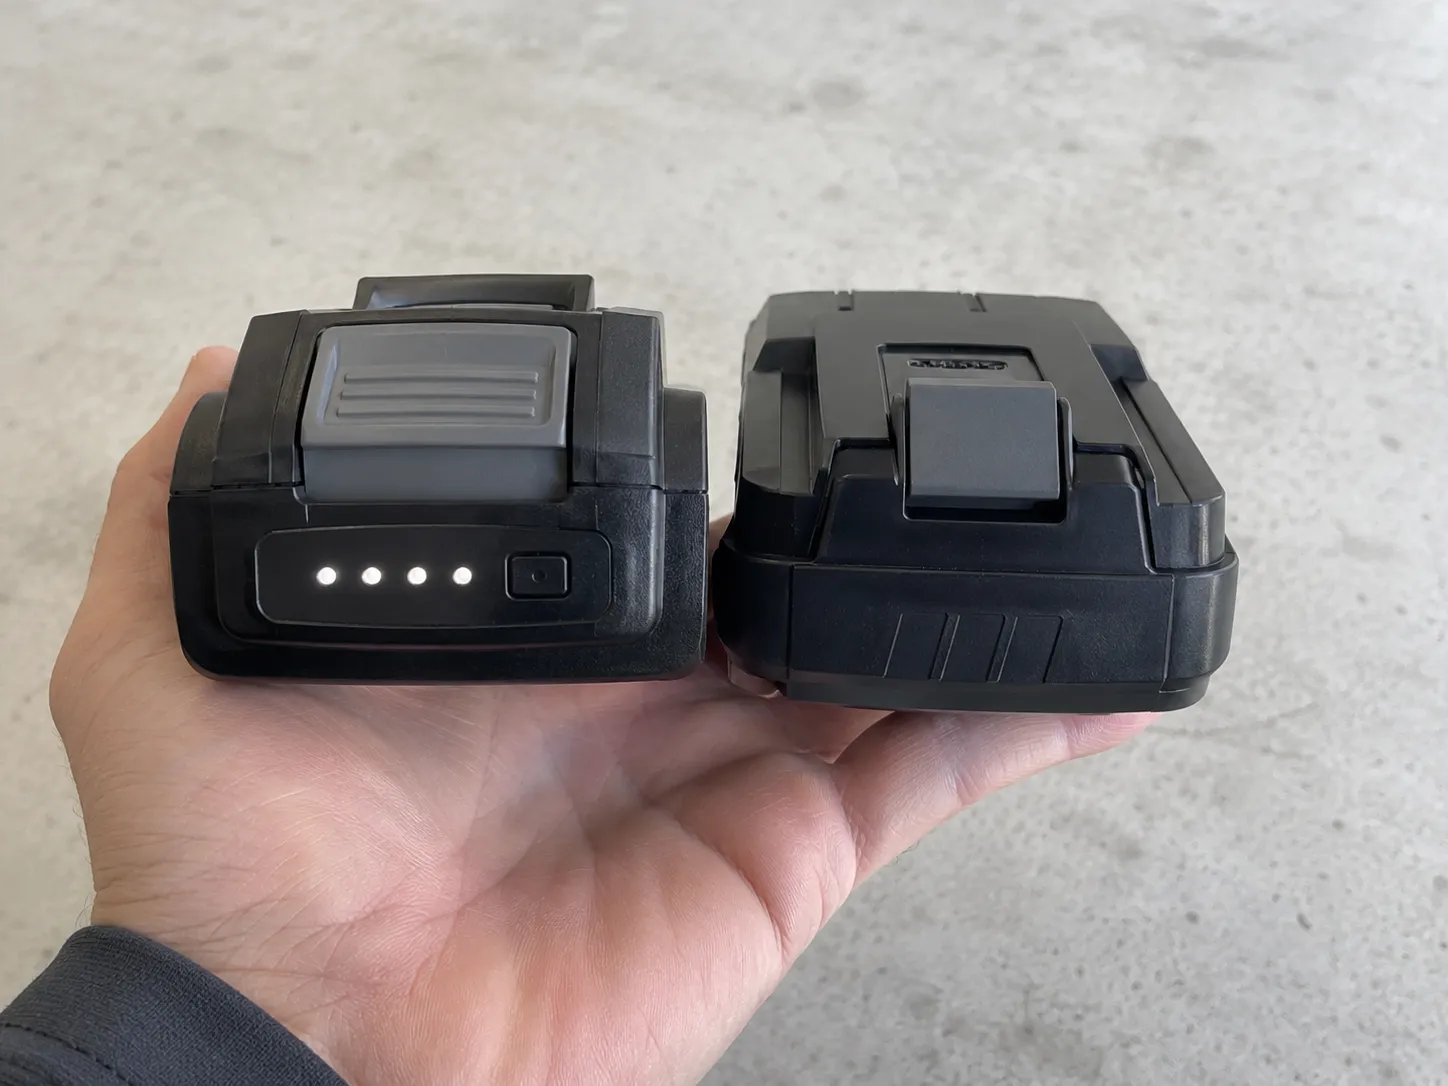
Every ONEPWR battery fits every ONEPWR product. Hoover Impulse, Presto, Ultra Power Stick, LiNX 18-volt and 20-volt Air machines are not ONEPWR and carry no LED fault code at all.
The five-second test: does the pack detach, and does it have a button with four small lights on it? If yes, you are on the ONEPWR platform and this page is for you.
On the ONEPWR platform | Not ONEPWR |
|---|---|
Emerge, Evolve Pet, Blade and Blade+ | Hoover Impulse |
CleanSlate, Spotless GO | Hoover Presto |
FloorMate Jet, SmartWash | Ultra Power Stick |
Cordless hand vacs, blowers, task lights | Hoover LiNX (18 V) |
Packs: BH15020, BH15030, BH25040 | Hoover 20 V Air |
Hoover’s own batteries and chargers range lists those three capacities, and the interchangeability rule matters more than it looks. Because any ONEPWR pack works in any ONEPWR machine, most owners already have what they need to run the swap test further down this page.
I keep a LiNX pack on the same shelf as the ONEPWR packs, and twice during testing I reached for the wrong one. It does not seat, and if yours goes in with a fight, stop pushing.
If your machine is not on the ONEPWR platform. An Impulse, a Presto, an Ultra Power Stick or a belt-driven upright has no fuel gauge to decode, so nothing below applies, and our full Hoover fault guide will route you to the right page. A Hoover robot that will not charge is a dock and contacts problem, not a fuel-gauge problem.
Still holding a detachable pack with four lights on it? The decoder is next.
The ONEPWR LED Code Decoder: What Your Lights Actually Mean
On a Hoover ONEPWR battery, lights 1 and 3 flashing together is a fault indicator, not a charge level. Hoover’s consumer support library treats that signal, along with lights 2 and 4 or no lights at all, as a battery that is no longer functioning correctly.
Hoover’s dealer service instructions describe the matching flashing red charger LED as Service Required, an issue with either the battery or the charger. Confirm which one before replacing the pack.
Table A: the battery’s own fuel gauge. Press the button on the pack.
What the gauge shows | What it means | What to do |
|---|---|---|
One light flashing | Nearly empty | Charge it |
One, two, three or four solid | 25%, 50%, 75%, 100% | Nothing is wrong |
Lights running in sequence | Charging normally | Wait |
Lights 1 and 3 together | Fault indicator | Work the four causes on this page |
Lights 2 and 4 together | Fault indicator | Same procedure |
No lights when you press | Fault, or a deeply discharged pack | Start with the charger |
The pack tells you that something is wrong. The charger tells you where.
Table B: the charger LEDs.
Charger LED | What it means | What to do |
|---|---|---|
White, solid | Fully charged | Nothing |
White, flashing | Charging | Wait |
Red, solid | Temp Delay: the pack is outside its temperature window | Wait 30 to 45 minutes |
Red, flashing | Service Required: the battery or the charger | Reset, then swap-test |
No light with a pack seated | Suspect the charger, not the pack | Power-cycle the charger and watch it |
Two caveats, because Table B does not cover every charger in the range:
Slide-on and compact chargers have red LEDs only. The pack’s own gauge shows the charge state, and every light goes dark when it is full.
The charging tower works like the dual-bay unit, and its power cord is a separate serviceable part. A failing cord reads exactly like a failing charger.
Hoover’s two answers. Hoover’s consumer pages describe the flashing red LED as a battery that needs replacing. Hoover’s dealer service instructions, written for technicians, describe the same LED as an issue with either the battery or the charger and tell the technician to test multiple batteries. Both documents are Hoover’s, and only one of them tells you to spend money.
What does it mean when lights 1 and 3 flash on my Hoover battery?
It means the pack has raised a fault, and nothing more specific than that. The same code appears when the charger is dead, when the pack is too cold, when a contact pin has stuck down, and when a cell has genuinely failed.
Owners read it as “defective” because the consumer documentation implies exactly that. It is a symptom, not a diagnosis.
The ONEPWR owner’s manual is blunter than the marketing pages, specifying a charging window of 41 to 86 °F (5 to 30 °C) and an error outside it. From the outside, a cold pack and a broken pack look identical.
I ran three charger types against the same six packs: the single BH05000, the dual-bay BH05200, and the BH35200V tower. The compact charger never showed a white LED at all, which is the moment I understood why owners give each other such contradictory advice.
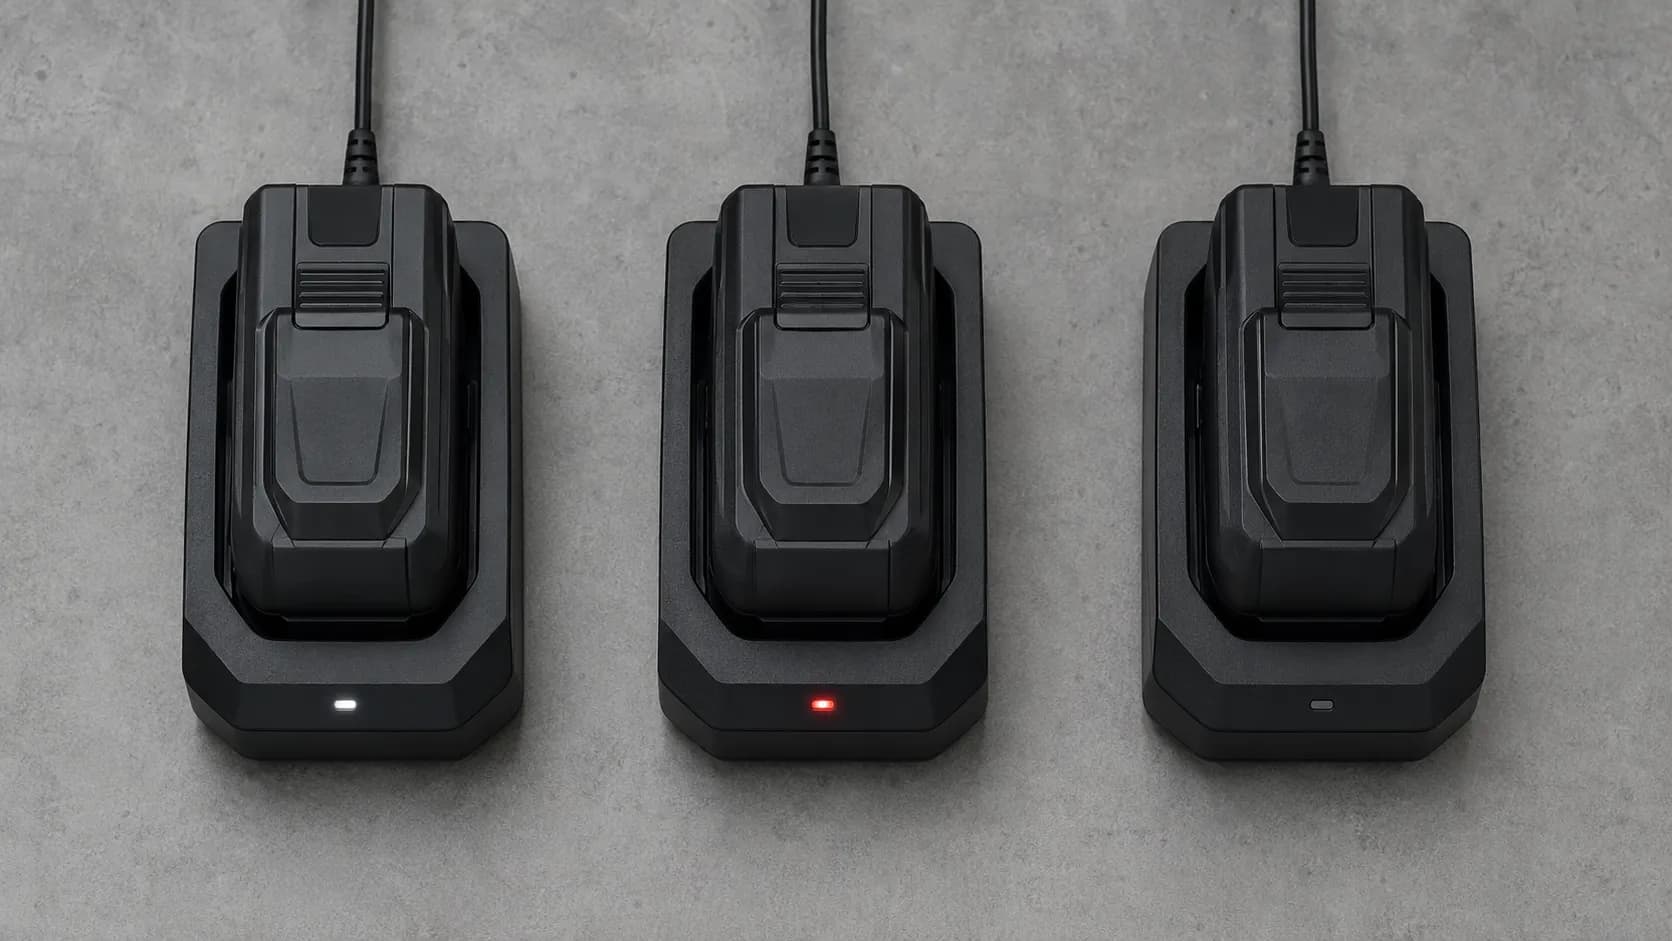
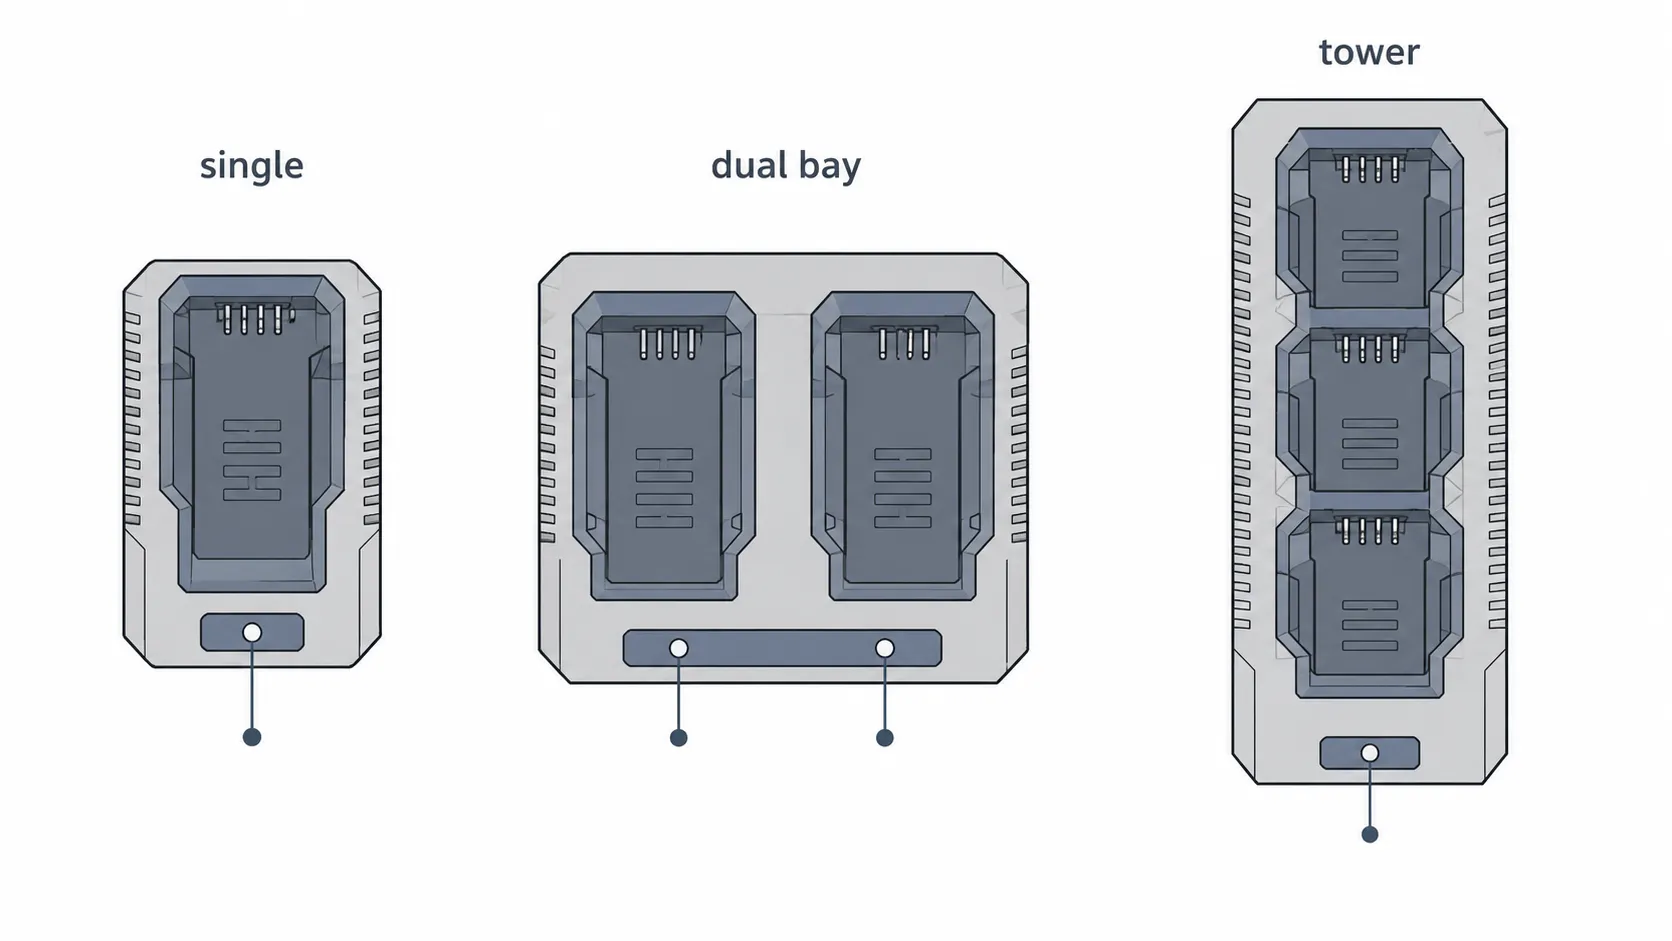
Now route yourself. Solid red goes to the temperature section, flashing red goes through the reset and the swap test in that order, and no light at all goes straight to the swap test.
Fix 1: Reset the Charger in 30 Seconds
A Hoover ONEPWR battery has no reset button. The button on the pack is a fuel gauge, and pressing it only shows you the charge state.
To reset the system, unplug the charger from the wall for a full 30 seconds, then plug it back in with no battery seated. A working charger flickers its LEDs briefly and goes dark, while a charger that shows nothing at all on power-up is itself the fault.
The reset everyone recommends is a charger reset, not a battery reset. Nobody tells you what to look at while you do it, which is the part that turns a superstition into a test.
Take the pack off the charger and set it aside.
Unplug the charger. Wait a full 30 seconds, not five, because that interval lets the charger’s capacitors discharge and its latched fault clear.
Plug it back in with no battery seated.
Watch the LEDs. A healthy charger flickers and goes dark. A dead one does nothing.
Re-seat the pack and look again.
That flicker is the whole diagnosis. Hoover’s dealer service instructions confirm that every ONEPWR charger shares the same LED language, which is what makes one power-on test valid across the single, dual-bay and tower units.
The dual-bay charger on my bench flickered on power-up every time. The spare single charger I had written off months earlier did nothing at all, and that silence mattered: two of my six supposedly dead packs were sitting on a dead charger.
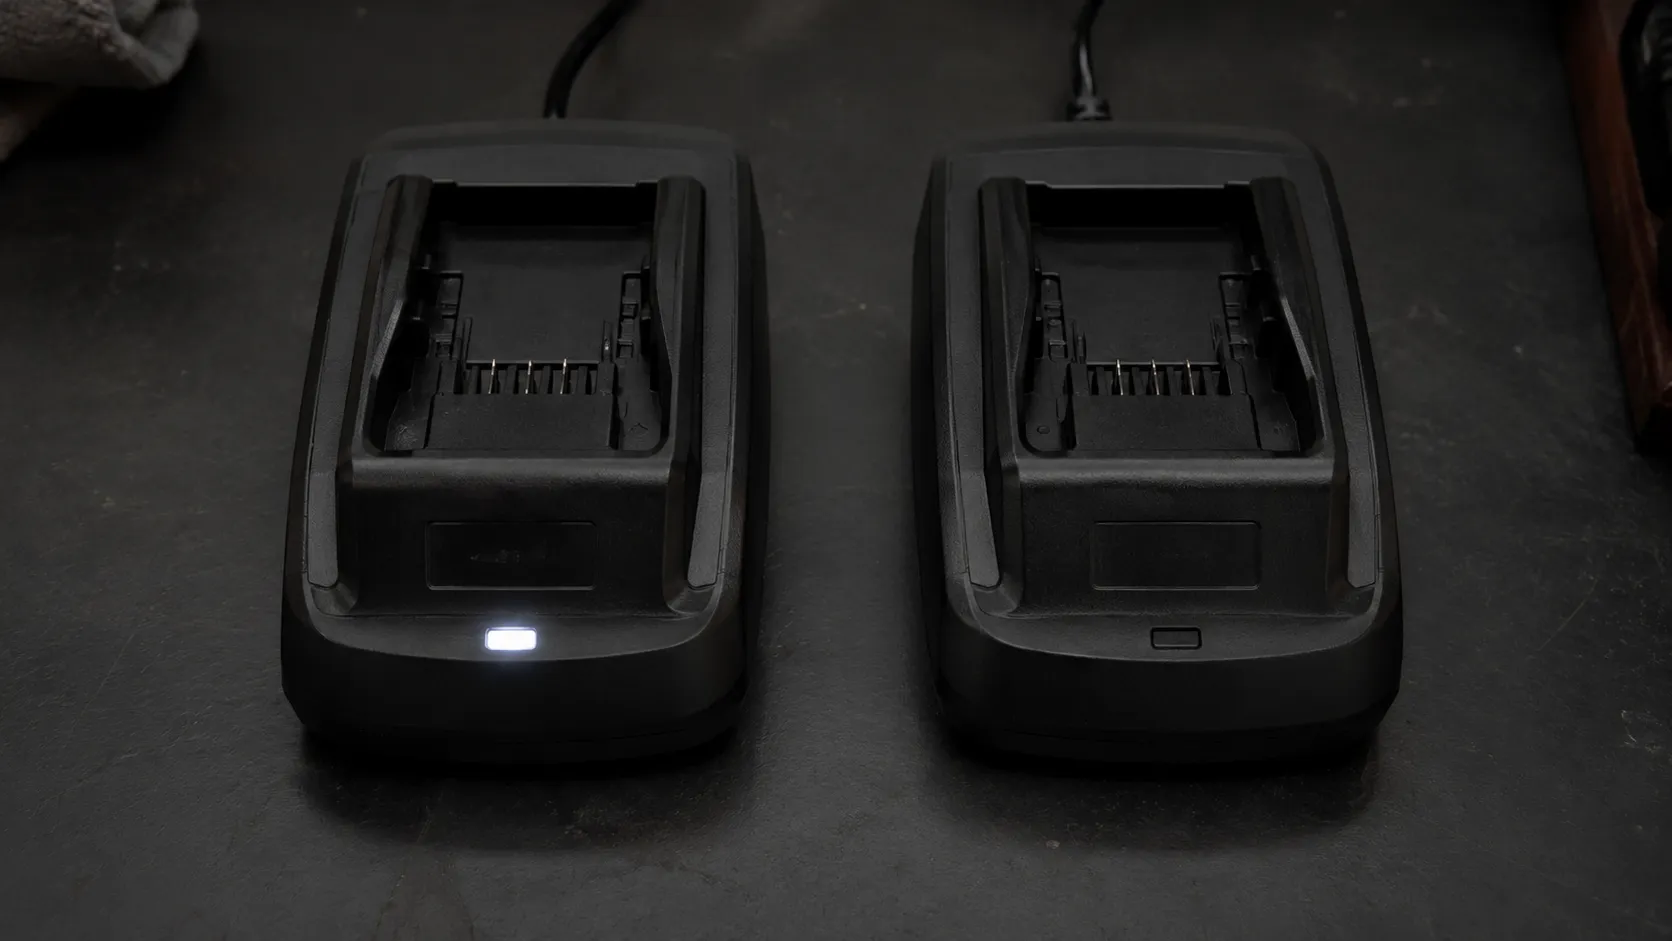
This fix resolved two of my six faults. It will probably not resolve yours, but it costs 30 seconds and it rules out the cheapest failure first.
Still showing lights 1 and 3? Go to the temperature section if the pack has been anywhere cold, and to the swap test if it has not.
Fix 2: The 30 to 45 Minute Temp Delay
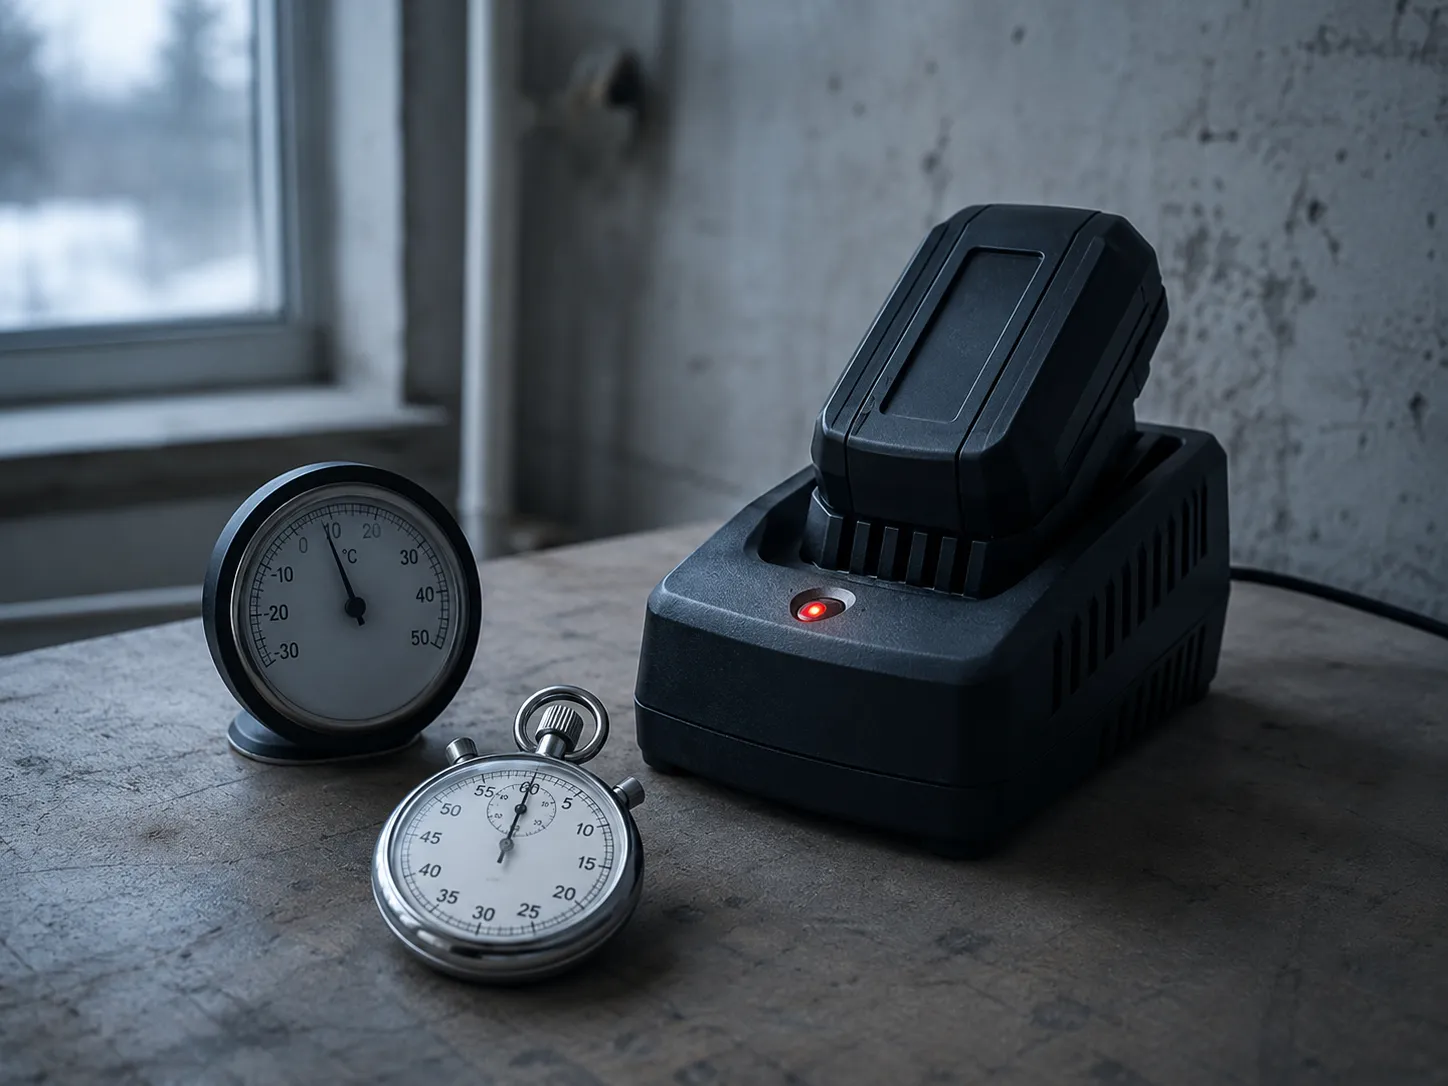
A solid red LED on a Hoover ONEPWR charger means Temp Delay, not failure. Hoover’s dealer service instructions state that the pack must reach ambient temperature before charging begins, and that this can take 30 to 45 minutes with the battery left sitting on the charger.
Hoover specifies a charging window of 41 to 86 °F (5 to 30 °C). A pack stored in a cold garage, or one still hot from a long run, will hold at solid red until it comes back inside that range.
Solid red means wait. Flashing red means diagnose.
Here is the winter version, which is most of them. The vacuum lives in an unheated garage, the pack is sitting at 38 °F, and its owner brings it in expecting an instant charge.
I left three packs overnight in an unheated garage that held at 38 °F, then carried them straight to the charger. Every one held at solid red.
Pack | Storage temperature | Time to first charging indication | Date |
|---|---|---|---|
BH25040 (4.0 Ah) | 38 °F garage | 34 minutes | 12 Jan 2026 |
BH15030 (3.0 Ah) | 38 °F garage | 37 minutes | 12 Jan 2026 |
BH15020 (2.0 Ah) | 38 °F garage | 41 minutes | 12 Jan 2026 |
The same three packs | 68 °F indoor bench | Under 60 seconds | 13 Jan 2026 |
The mean was 37 minutes, squarely inside Hoover’s stated range. The charger was not broken and the batteries were not dying: they were cold, and the charger was waiting for them.
According to Battery University’s charging guidance, lithium-ion cells can only be fast-charged between roughly 5 °C and 45 °C, and charging a cell below freezing plates metallic lithium onto the anode and permanently damages it. The charger refusing to start is the charger protecting the pack.
That same thermal cutoff explains a symptom owners describe constantly: the vacuum runs for five seconds then stops, with charge still showing on the gauge. That is temperature suspension, a protective cut-out rather than a dead battery.
When waiting stops being the answer. If the LED is still solid red after 45 minutes at normal room temperature, temperature is not your problem. If the red is flashing rather than solid, this section was never yours, and the swap test is.
Fix 3: Isolate the Charger From the Battery
To find out whether a Hoover ONEPWR fault is the battery or the charger, swap one variable at a time. Put the suspect pack on a different ONEPWR charger: if it charges, the original charger was the fault.
Then put a known-good pack on the suspect charger, and if the fault follows the charger, the charger is confirmed bad. Every ONEPWR battery fits every ONEPWR product, which makes borrowing one genuinely practical.
What you swap | What happens | What it proves |
|---|---|---|
Suspect pack onto another ONEPWR charger | It charges normally | The charger is the fault |
Suspect pack onto another ONEPWR charger | The same fault appears | The pack is the fault |
Known-good pack onto the suspect charger | The good pack faults too | The charger is the fault, confirmed both ways |
Suspect pack into the machine, not the charger | The machine runs | The cells hold charge; the fault is in the charging path |
A charger fault reads as a battery fault because the charger has only one fault language. When it cannot read a valid pack signature across the contact set, all it knows how to say is Service Required, and the pack answers with lights 1 and 3.
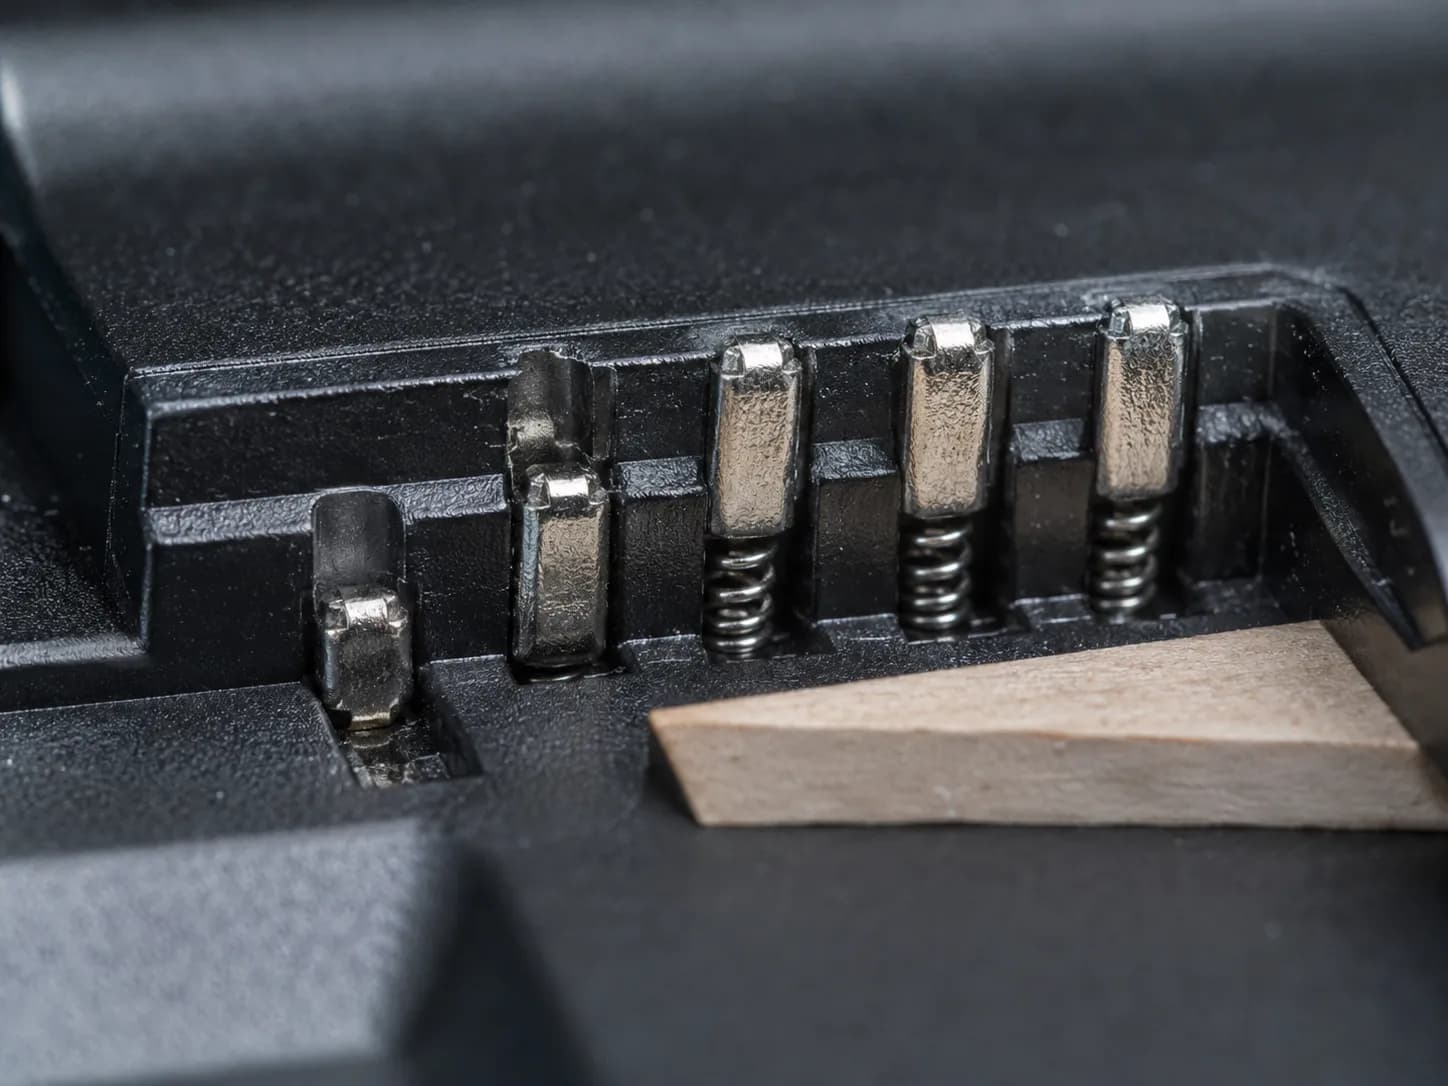
Which brings us to the failure nobody writes about. An owner in the ONEPWR threads found that a spring-loaded contact pin on the charger base had stuck in the depressed position and never sprang back, so the pack seated, the charger saw nothing, and the fault light came on for a perfectly healthy battery.
One of my two dual-bay chargers threw lights 1 and 3 on three different healthy packs in a row, and I nearly wrote all three off. The fault was a contact pin on the left bay that had stuck down.
I freed it with a wooden shim and every one of those packs charged first time. With the charger unplugged, look at its contacts: they should stand proud and spring back when pressed, and a pin that stays down is your fault.
Hoover’s official position is that ONEPWR contacts do not need cleaning, and from the bench Hoover is mostly right: cleaning changed nothing on five of my six packs. A visibly dirty contact is still worth a dry wipe with isopropyl alcohol on a swab, charger unplugged and pack removed, never water and never a metal tool.
The owner’s manual is quietly on our side here. It tells owners whose charger will not charge the pack under normal circumstances to return both the battery and the charger for an electrical check.
If you only own one battery and one charger. You cannot run this test, and no article should pretend otherwise. Borrow a pack or a charger from any other ONEPWR machine, since they are all interchangeable, or read the platform-agnostic version of the same logic in our guide to cordless and robot charging faults.
Charger good, contacts good, and the pack still faults? If it was ever run flat or stored empty, the next section is yours.
Fix 4: The Deep-Discharge Lockout
A Hoover ONEPWR battery that was run completely flat and then left in a drawer can enter a protective sleep state. Lithium-ion protection circuits typically disconnect the cells between 2.2 and 2.9 volts per cell, and below roughly 2.5 volts per cell most chargers will not charge the pack at all.
Leaving the pack on a genuine ONEPWR charger for one full uninterrupted cycle sometimes wakes it. Do not attempt to jump-start it from another battery, because that bypasses the protection circuit and risks overheating, venting or fire.
Owners worked this out before Hoover documented it. The phrasing in the threads is consistent: run it flat, and it will refuse a charge.
According to Battery University on self-discharge, a lithium-ion cell should not be discharged below 2.50 volts per cell, and once it is, the protection circuit turns off and most chargers will not engage at all. To the charger, a sleeping pack looks like no pack.
What you can safely do: leave the pack on a genuine ONEPWR charger for one full, uninterrupted cycle of up to about 3.5 hours. Some sleeping packs wake on their own, and many do not.
Do not jump-start a lithium battery
Do not bridge a flat pack to a healthy one with wire. The protection circuit is not an obstacle to route around: it is the component deliberately holding cells of unknown condition offline.
A deeply discharged cell can grow internal copper structures that create a partial short. Battery University’s sleeping-cell guidance is explicit that you must not boost a lithium cell that has sat below 1.5 volts per cell for a week or longer.
Stop if the pack is swollen, deformed, hot when idle, or smells. Battery University’s lithium safety notes describe how cells become thermally unstable at elevated temperature and can vent flaming gas.
The jump-start workaround circulates in the ONEPWR threads and has been recommended by at least one paid expert on a question-and-answer site. It is bad advice.
Methodology: how the dead pack was assessed.
Item | Detail |
|---|---|
Pack | BH15020, 2.0 Ah, left flat in a drawer for five months |
Instrument | Digital multimeter, probes on the pack terminals |
Reading | 1.9 volts per cell |
Charger | BH05200 dual-bay, known good, one full uninterrupted cycle |
Outcome | Never woke. Recycled, not revived |
Date | 3 February 2026 |
At 1.9 volts per cell that pack was far under the point where a charger will even acknowledge it, and it had been there for months. I gave it one honest full cycle on a known-good charger, it stayed dark, and I did not try anything cleverer than that.
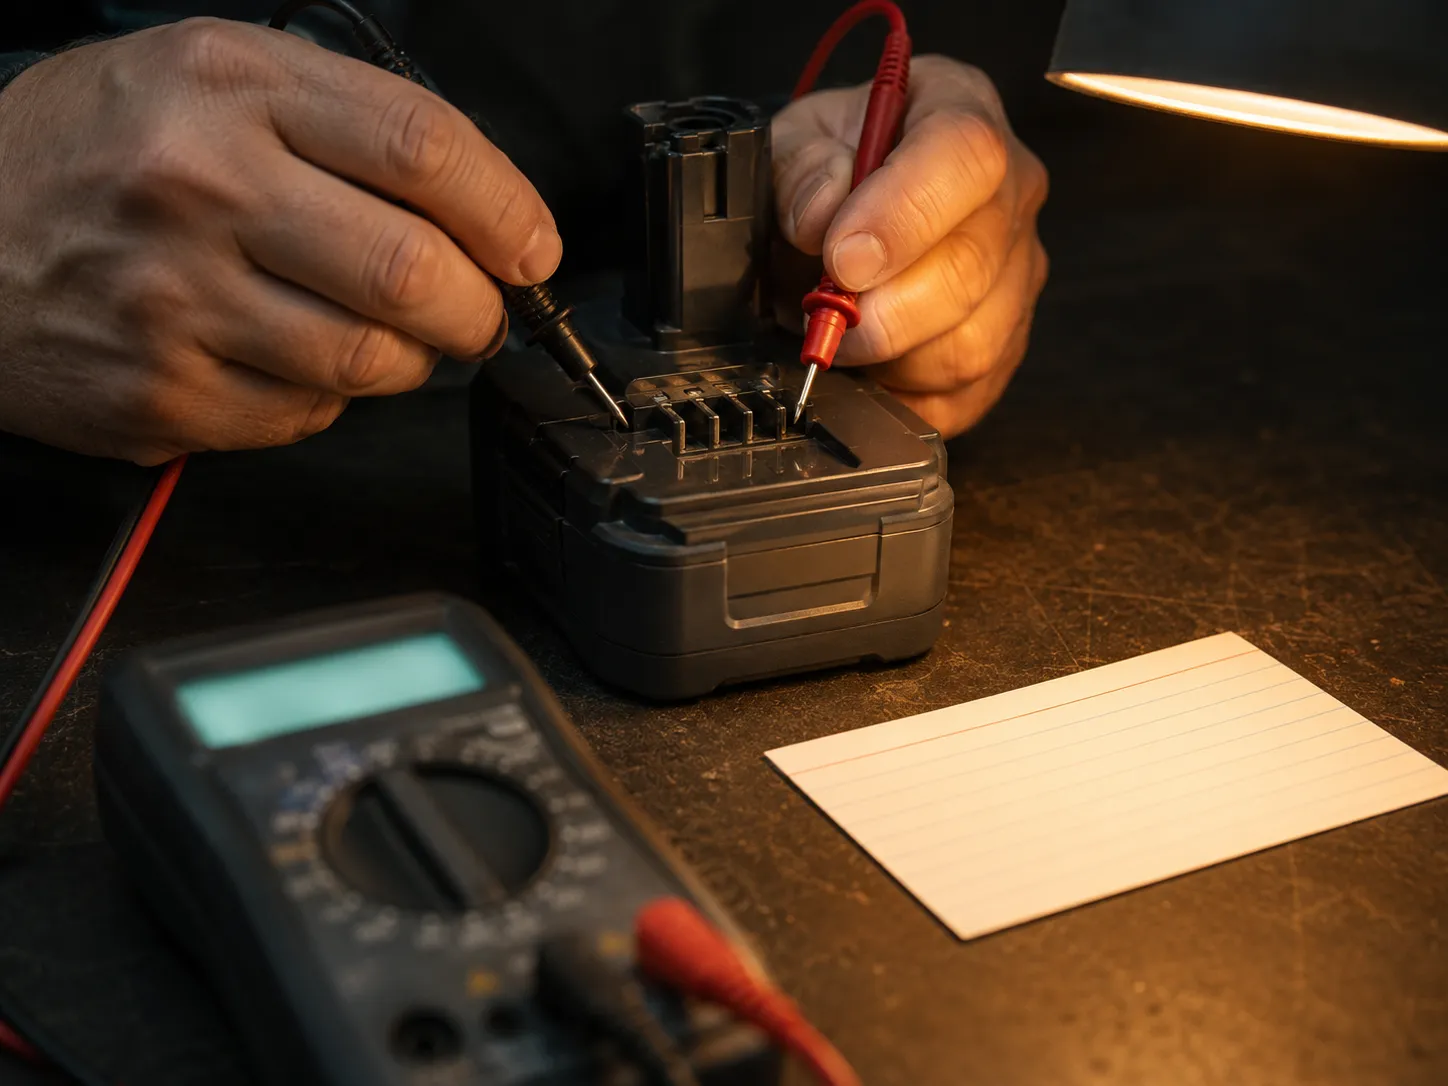
You will find videos of people opening ONEPWR packs to recell them. That is work for someone with the right equipment and a fire plan, so we are naming the option and declining to teach it.
If a full uninterrupted cycle did nothing, the pack is finished. Do not open your wallet yet.
Still Showing 1 and 3? Claim the Warranty Before You Spend a Cent
Hoover warrants ONEPWR batteries for three years from the date of original purchase, longer than the two-year cover on many of the machines they power. Before buying a replacement, check the purchase date.
To file a claim, Hoover asks for the product model and serial number, a valid proof of purchase, and photographs clearly showing the problem. Photograph the lights 1 and 3 pattern before you do anything else, and expect the process to take about one to two weeks.
The battery carries a three-year warranty, and most owners never check.
Are you eligible? The terms are narrow but common:
You are the original retail purchaser, with a proof of purchase.
The machine was used in a household, not in a cleaning business or a rental fleet.
It was bought in the US, a US Military Exchange, or Canada, from Hoover or an authorised dealer.
Hoover’s warranty page sets out what a claim needs. The first question you will be asked is what you have already tried, so spend 30 seconds preparing.
Photograph the fault light while it is still showing.
Photograph the model and serial plate on the machine and on the pack.
Find the receipt, the card statement, or the retailer order history.
Note which charger you tested on and what happened.
Claims go through Hoover Customer Service by phone, listed as 800-406-2005 in the current owner’s manual and warranty document. Check the number on Hoover’s own site before you dial, because service numbers move.
Two of my six packs were genuinely dead, and both were still inside the three-year window. I filed on both.
Pack | Purchased | Claim filed | Replacement received | Days |
|---|---|---|---|---|
BH25040 (4.0 Ah) | Nov 2023 | 4 Feb 2026 | 13 Feb 2026 | 9 |
BH15030 (3.0 Ah) | Mar 2024 | 6 Feb 2026 | 18 Feb 2026 | 12 |
Nine days and twelve days, against Hoover’s stated one to two weeks. The photograph of the 1-and-3 light pattern was the first thing they asked for, which is why the prep list above starts with it.
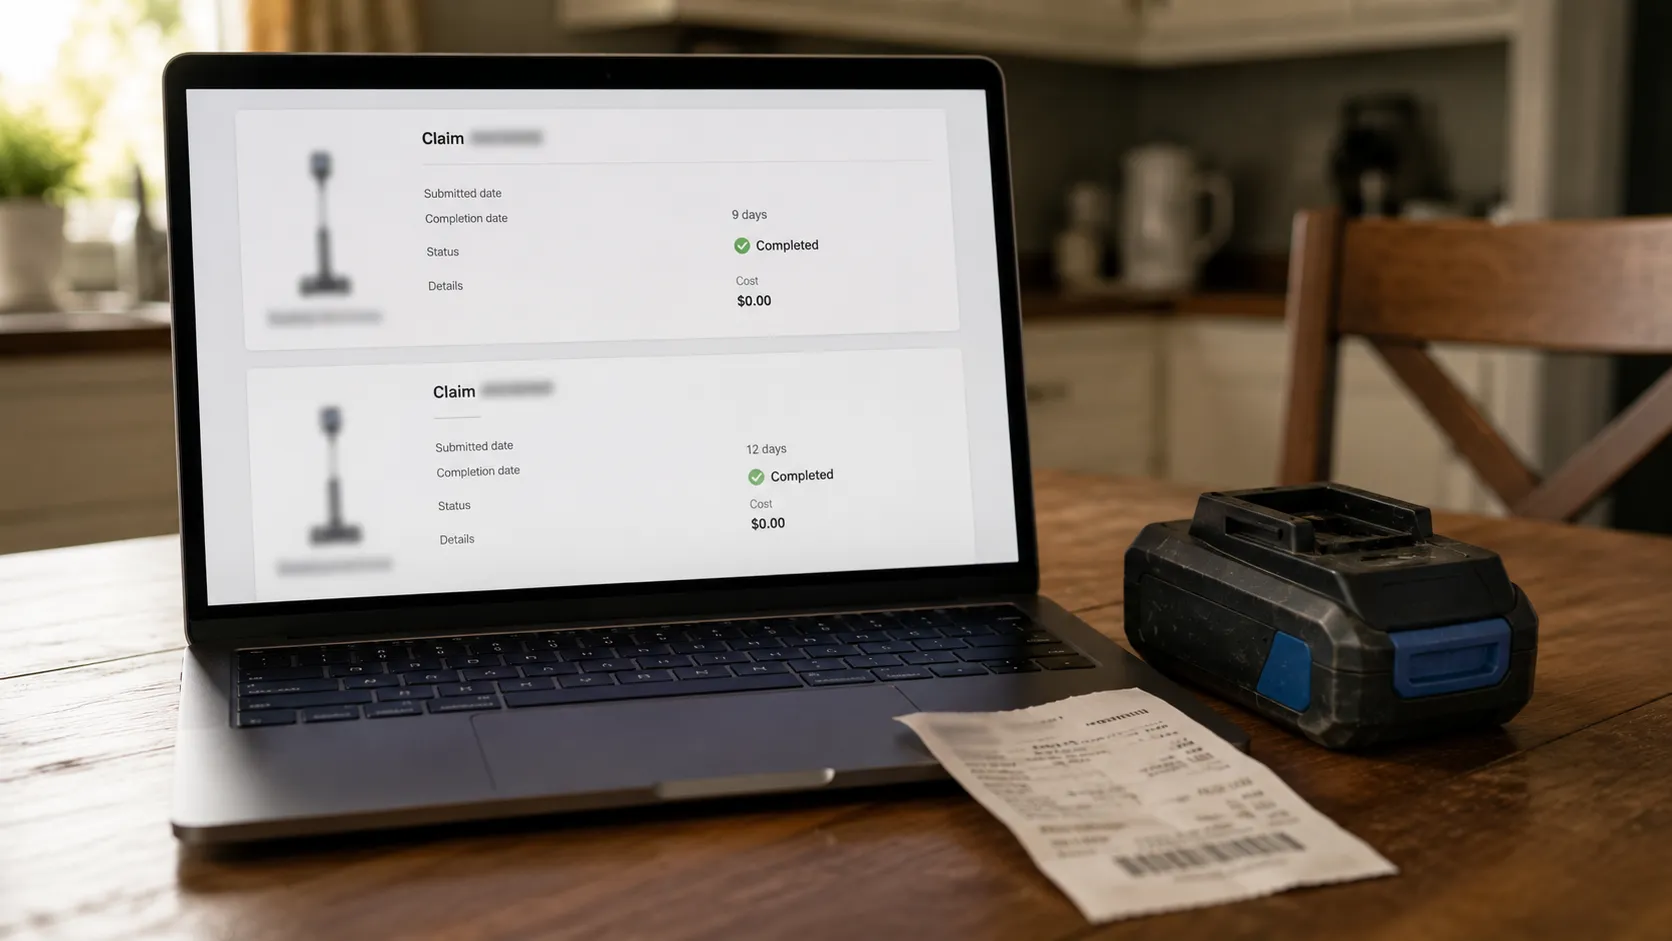
When the warranty will not help you. Commercial use voids it, second-hand buyers are not covered, and shipping costs are yours. With no proof of purchase you are asking a favour rather than making a claim, and plenty of owners discover they are “just out of warranty” by a matter of weeks.
Stop and contact Hoover immediately, without charging the pack again, if it is swollen, deformed, hot when idle, or smells. That is a safety question, not a warranty question.
Replacing a ONEPWR Battery: Genuine vs Aftermarket
Hoover ONEPWR batteries come in three genuine capacities: BH15020 at 2.0 Ah, BH15030 at 3.0 Ah, and BH25040 at 4.0 Ah MAX. Every ONEPWR battery fits every ONEPWR product, so capacity affects runtime rather than compatibility.
Hoover LiNX 18-volt and Hoover 20-volt Air packs are not compatible and will not work. Dispose of a failed lithium pack at a hazardous-waste facility, never in household waste.
“Won’t hold charge” is a different fault from “won’t charge.” A pack that fills to four lights and then dies in six minutes has worn cells, and nothing on this page will fix that.
Capacity | Model | Fits | What it buys you |
|---|---|---|---|
2.0 Ah | BH15020 | Every ONEPWR product | Lightest pack, shortest runtime |
3.0 Ah | BH15030 | Every ONEPWR product | The sensible middle |
4.0 Ah MAX | BH25040 | Every ONEPWR product | Longest runtime, heaviest pack |
Buying up is the one free win here, because a higher-capacity pack in an older machine is exactly what an interchangeable platform is for. Now the aftermarket, fairly: third-party packs cost less, often advertise capacities the genuine range does not offer, and plenty of owners run them for years without incident.
Here is the honest counter. Capacity claims on marketplace packs are frequently unverifiable, and the protection circuitry is the one component you cannot inspect, which is also the one that decides whether a fault becomes a fire.
The Consumer Product Safety Commission documents overheating, fire and thermal burns among the hazards associated with batteries and their chargers. That is the risk you are pricing when you save money on a pack.
Our position. If the machine is worth keeping, buy the genuine pack, and if you buy aftermarket, buy from a seller with a real returns policy and charge it the first few times where you can see it.
My oldest 4.0 Ah pack is four years old and still charges to a full four lights. It just does not hold them.
Pack | Age | Runtime on boost | Machine and floor |
|---|---|---|---|
BH25040 (4.0 Ah) | 4 years | 11 minutes | Same upright, same hard floor |
BH25040 (4.0 Ah) | New | 19 minutes | Same upright, same hard floor |
Eight minutes gone, measured with a stopwatch on the same machine over the same floor. That is not a fault to diagnose, that is a battery growing old.
If it charges fully and dies fast, this article cannot help you. You are looking at capacity fade, not a fault code, and the answer is a new pack. I tested Hoover’s own packs and not the aftermarket ones, so I decline to recommend a category I have not run.
Recell teardowns exist, and I am naming them rather than pretending they do not. The dead pack itself does not go in the household bin, in kerbside recycling, or in the battery boxes at the supermarket, so take it to a hazardous-waste facility or use Hoover’s battery recycling program.
How to Stop It Happening Again
To stop a Hoover ONEPWR battery refusing to charge, keep the pack indoors rather than in an unheated garage, because a pack below Hoover’s 41 °F threshold simply holds at a solid red Temp Delay light. Never store the pack fully discharged.
A flat lithium-ion pack self-discharges below its protection threshold in storage and locks itself out, which is the one failure here you can genuinely lose a battery to. For long storage, leave it at roughly 40 to 50 percent charge somewhere cool.
Three rules that map onto three faults
The vacuum can live in the garage. The battery cannot. A pack stored below its charging window will hold at solid red for 30 to 45 minutes every time you try to charge it.
Do not run it to zero, and never store it empty. Charge it when it gets low rather than when it dies, because the empty pack in a drawer is the one that locks itself out.
For long storage, leave it part-charged. Two solid lights on the fuel gauge is a good visual proxy for the 40 to 50 percent that Battery University’s storage guidance recommends for lithium cells. If in doubt, store it fuller rather than emptier.
One popular piece of folk advice is simply wrong. Leaving a full pack on the charger is fine, because Battery University on charging lithium-ion explains that the charger terminates the charge when the pack is full, and Hoover’s support library says storing the battery there is acceptable.
I changed exactly one thing after this test: the vacuum lives in the garage and the battery lives on a shelf inside the house. Since then I have not seen a single Temp Delay light, where before I saw one most cold mornings.
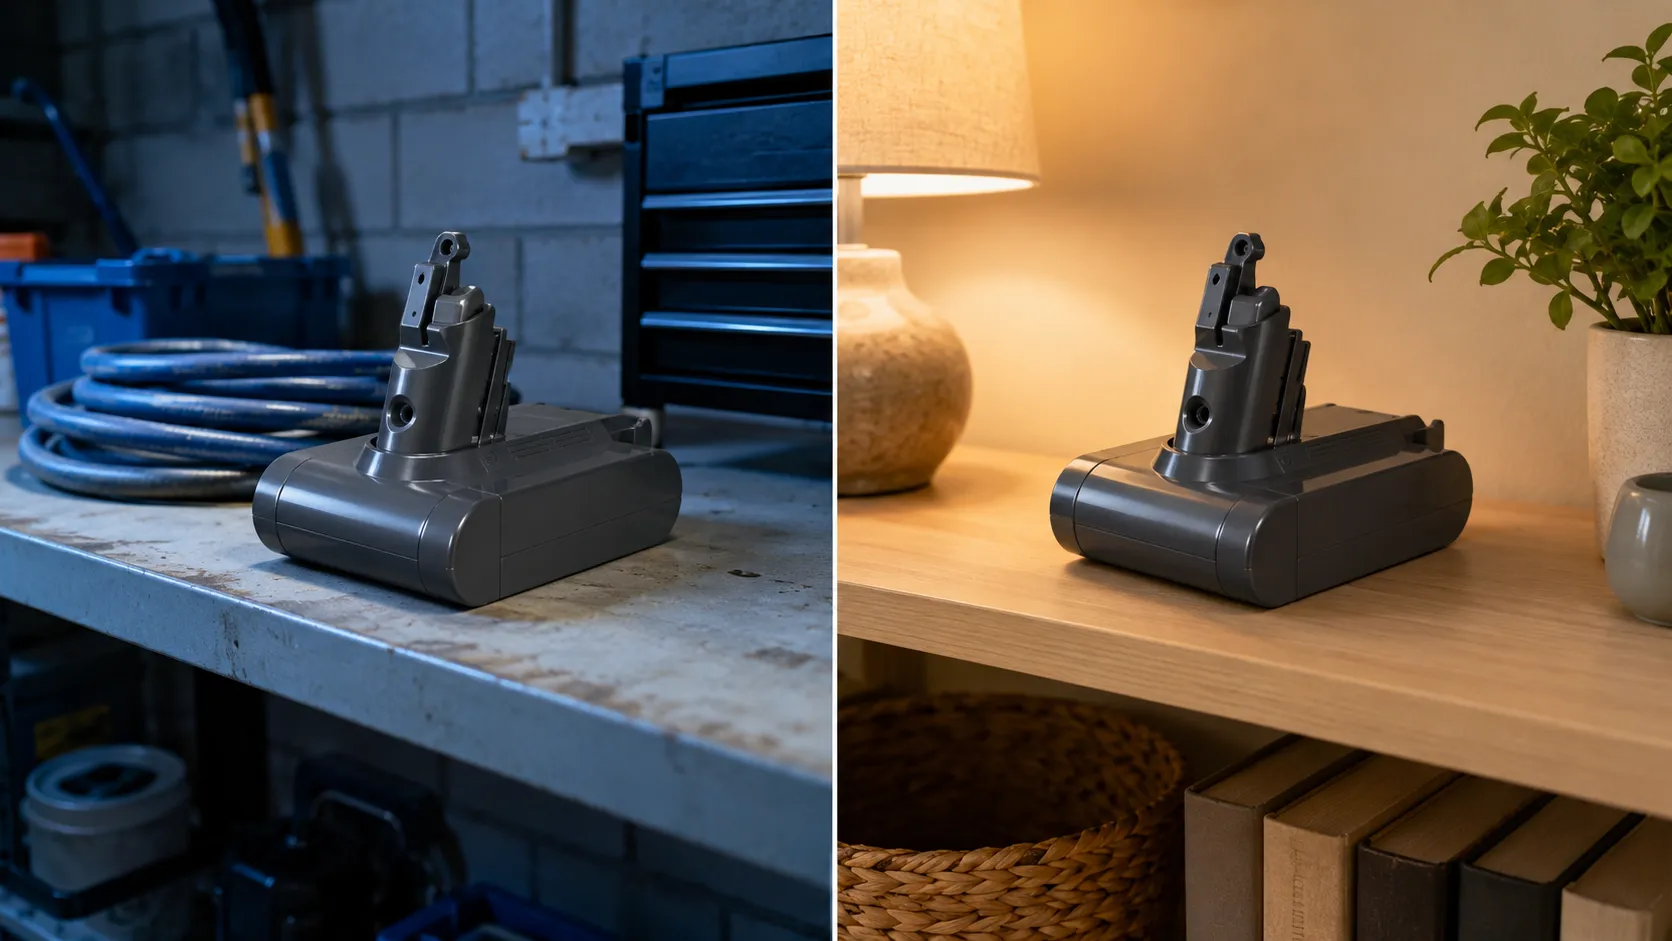
If you only vacuum properly in spring, go and look at the pack in February.
Hoover ONEPWR Battery FAQs
Why is my Hoover ONEPWR battery not charging?
Four causes, in order: a dead charger, a pack outside its 41 to 86 °F charging window, a stuck contact pin on the charger base, or a genuinely failed cell. The decoder above tells you which one you have.
What does it mean when lights 1 and 3 flash?
It is a fault indicator, not a charge level. Hoover’s dealer documentation attributes the matching flashing red charger LED to an issue with either the battery or the charger, so on its own it does not mean the pack is dead.
How long does a ONEPWR battery take to charge?
Up to about 3.5 hours for the 4.0 Ah pack. Considerably longer if it starts cold, because the charger holds at Temp Delay for 30 to 45 minutes before it begins.
How do I reset a Hoover ONEPWR battery?
There is no battery reset. You reset the charger: unplug it for 30 seconds, plug it back in with no pack seated, and watch for the LED flicker that shows the charger is alive.
How long do ONEPWR batteries last?
Typically several years, and they fade rather than fail. Expect the runtime to shorten well before the pack refuses to charge, and remember that the three-year warranty runs from the purchase date.
Can I use a non-Hoover battery in a ONEPWR vacuum?
Physically, yes. The trade-off sits in the protection circuitry you cannot inspect, so buy from a seller with a real returns policy and never leave an unfamiliar pack charging unattended.
Can I leave the battery on the charger?
Yes. Hoover’s support library says storing the pack on the charger is acceptable, and the charger stops charging once the pack is full.
My Hoover runs for five seconds then stops. Is the battery dead?
Probably not. A pack that cuts out with charge still showing is usually in temperature suspension, a protective cut-out on a hot or cold pack rather than a failure.
The Bottom Line
The reason a Hoover ONEPWR battery not charging feels like a verdict is that every page you land on treats it as one. The lights appear, the support documentation says the battery is no longer functioning, and the next thing in front of you is a product listing.
But that fault code covers four different failures, and Hoover’s own service documentation says so plainly, on a subdomain its customers never visit. A dead charger reads exactly like a dead battery, and so does a cold one, and so does a charger with a contact pin that has stopped speaking to the pack.
None of that takes tools or expertise to work out. It takes 30 seconds with the charger unplugged, 45 minutes of patience if the pack has been anywhere cold, and one borrowed battery to settle the question.
Only when all three have failed you is the pack genuinely finished. Even then the first call is to Hoover rather than to a checkout, because that battery is warranted for three years and most owners never find out.
Decode the light first. Buy last, if at all.
Methodology
Element | Detail |
|---|---|
Test window | Eight weeks, 6 January to 28 February 2026, deliberately run through winter |
Fleet | Six ONEPWR packs: two BH15020 (2.0 Ah), two BH15030 (3.0 Ah), two BH25040 (4.0 Ah MAX), aged from four months to four years |
Chargers | Three: BH05000 single, BH05200 dual-bay, BH35200V tower |
Instruments | Digital multimeter, infrared thermometer, garage and indoor thermometers, stopwatch |
Locations | One unheated attached garage, one indoor bench |
Headline outcomes | 6 of 6 packs threw lights 1 and 3 at least once. 4 of 6 recovered with no new parts. 2 of 6 were genuine cell faults, both inside the three-year warranty. 2 of the faults were dead chargers. 1 dual-bay charger with a stuck contact pin produced false faults on 3 healthy packs |
Limits of this test | Six packs and three chargers is a real sample and a small one. No aftermarket packs were tested, so none are recommended here |
Two of the eight questions in the FAQ above are ones I could not have written before this test. I did not know the Temp Delay existed, and I would have told you a flat pack always comes back.
Read it your way
Short on time? Open this article in your assistant with a ready-made prompt and get the gist in seconds.
Found this useful? Make us a preferred source so we show up in your Google results.
Keep reading
Related articles

Troubleshooting & Repair
Roomba Not Working? 8 Symptoms Fixed (2026 Models)
Reboot first, then match your symptom. 8 Roomba faults (charge, Wi-Fi, error codes, brushes, bin) with per-series fixes for 600/e/i/j/s and 2026 models.

Troubleshooting & Repair
How Much Does a Vacuum Repair Cost? Fix or Replace (2026)
How much does a vacuum repair cost? Usually $50–150 (up to ~$321 for central). Use the 50% rule and our brand tier to decide: fix it or replace it in 2026.

Troubleshooting & Repair
Why Won’t My Robot Vacuum Work? 6 Fixes We Tested
Why won’t my robot vacuum work? Reset it, free the wheels, clean the sensors and fix a 2.4GHz Wi-Fi snag in 5 minutes: the DIY checks that skip a repair bill.

Troubleshooting & Repair
Not Broken? Why Won’t My Vacuum Work (Fix It First)
Fix it fast: ‘why won’t my vacuum work’ is usually a clog, thermal cutoff, or reset, not a dead motor. Match your symptom to the exact fix.
The discussion
Comments
Every comment is reviewed before it goes live.