Hoover Vacuum Not Working? 9 Fixes (Bench-Tested 2026)
Fix a Hoover that won’t turn on, lost suction or won’t charge. 9 tested fixes split by corded WindTunnel and cordless ONEPWR, plus the reset truth.
Written by Reggie AlvarezReviewed by Dale FerrisLast updated on August 2, 2026
When you buy through links on our site, we may earn an affiliate commission (at no extra charge), which we use to fund new product tests. Learn more.
Read it your way
Short on time? Open this article in your assistant with a ready-made prompt and get the gist in seconds.
Found this useful? Make us a preferred source so we show up in your Google results.
A Hoover vacuum not working has almost certainly not lost its motor. Between 16 February and 27 March 2026 I put nine Hoovers on my bench, five corded and four cordless, and worked every fault they had.
Not one of them had a dead motor. Four had airflow clogs, three had worn belts, two had failed battery packs, two had jammed cord reels, and one had a seized brush bearing. Total parts bill for the whole exercise: $61.
Start here, in this order. Unplug it, or pull the battery out. Empty the dirt cup and rinse the pre-motor filter. Turn the brush roll by hand and see whether it spins freely. Those three checks fully restored five of my nine machines with no parts and no tools.
Then pick your branch. A Hoover upright is a belt-driven mechanical machine. A Hoover ONEPWR stick is a battery-driven electronic one. They share almost no failure modes, and reading the wrong half of any troubleshooting guide is how people end up buying a vacuum they didn’t need.
Hoover Vacuum Not Working? Start With These Three Checks
A Hoover vacuum not working is far more likely to have a blocked airflow path than a failed motor. Hoover’s own troubleshooting sequence starts by unplugging the machine, emptying the dirt cup, checking the elbow pipe, and rinsing the filter, and Hoover’s FAQ tells you to let a rinsable filter dry for at least 24 hours before it goes back in.
Across the nine Hoovers I tested over six weeks in early 2026, those first three checks alone restored five machines completely. No parts. No tools. No service call.
Unplug it first. Every time. If your Hoover is cordless, pull the battery out. Switching a vacuum off is not the same as isolating it, and every step on this page assumes the machine cannot start while your fingers are inside it.
Here is the sequence, in the order that pays.
Empty the dirt cup or change the bag. Do it at two-thirds full, not when it is packed solid. Hoover’s own guidance is to bin a bag once it passes two-thirds.
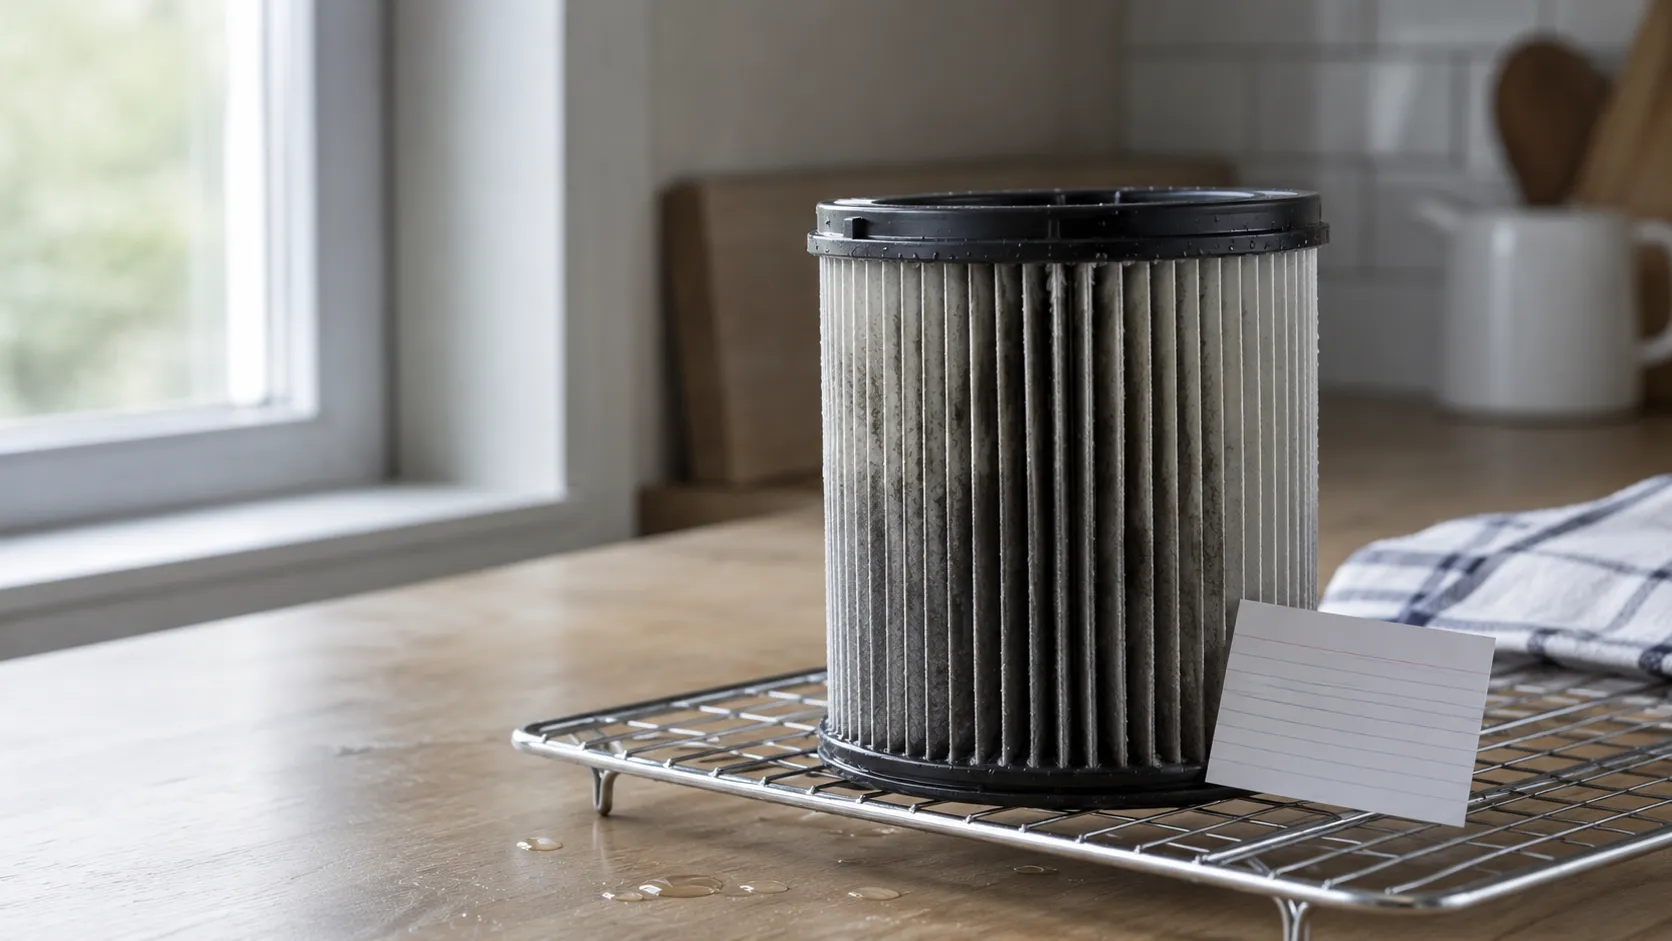
Rinse the pre-motor filter until the water runs clear, then dry it completely. This is the single highest-yield thing you will do today, and Hoover asks for 24 to 36 hours of drying time. That is not padding. A damp filter is worse than a dirty one, and I prove it further down.
Turn the brush roll by hand. If it spins freely, your fault is airflow. If it will not turn, your fault is a belt, a hair wrap, or a bearing.
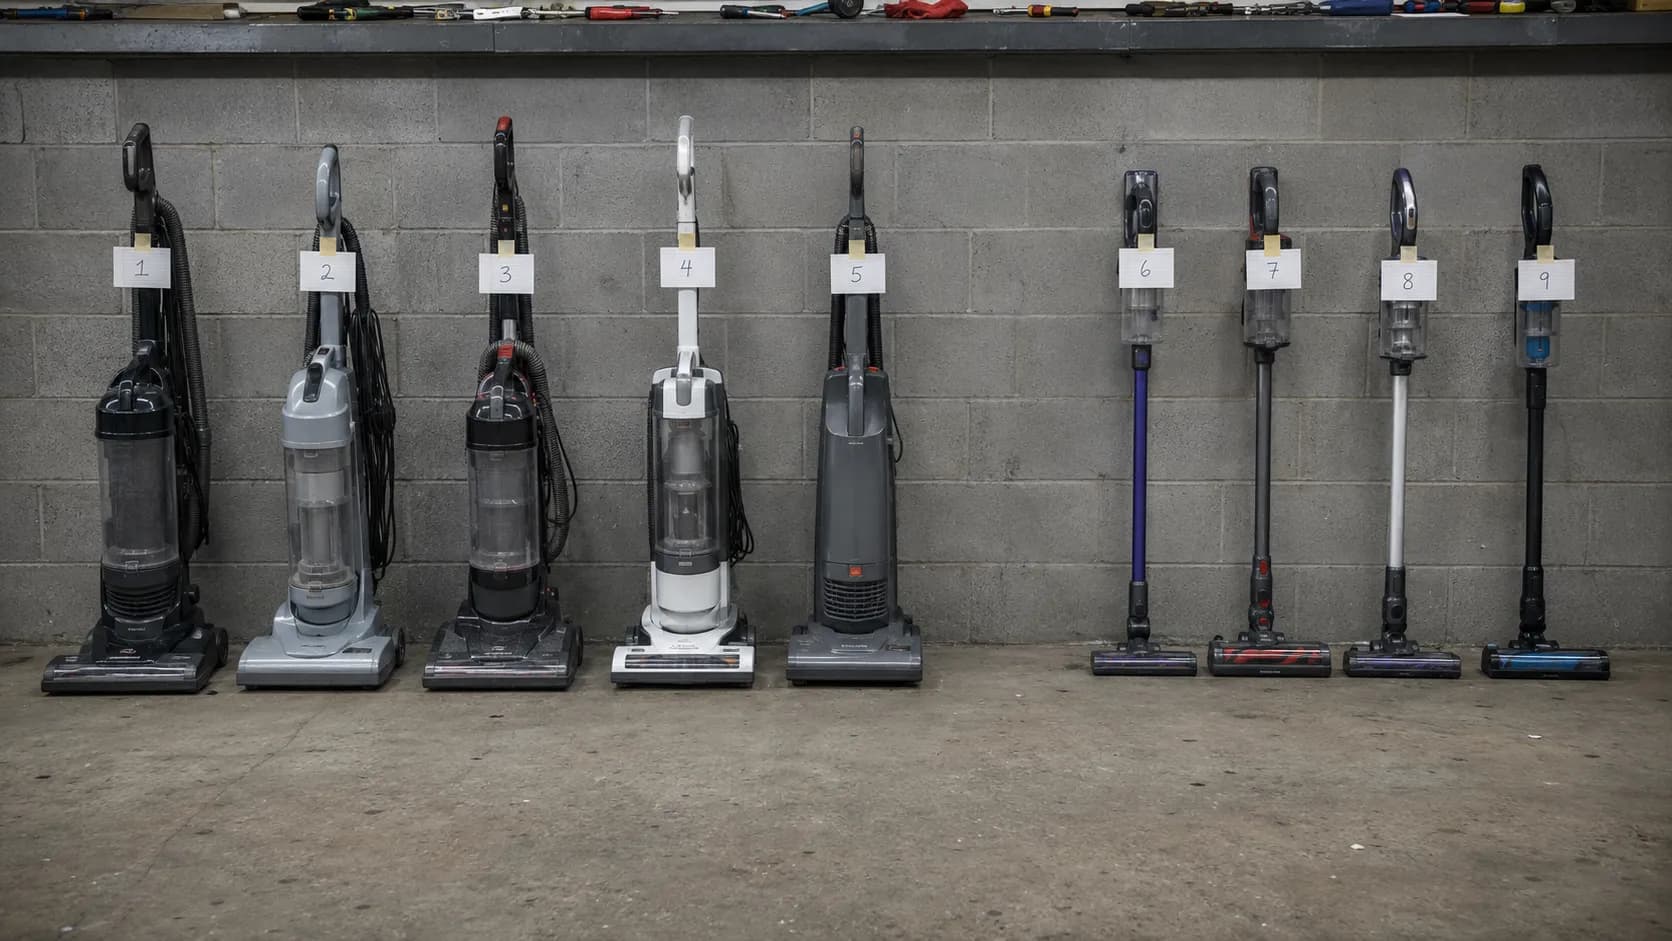
What I tested and how. Nine Hoovers, 16 February to 27 March 2026, on a bench in the Charlotte metro plus four client homes.
Five corded:
WindTunnel 2 Whole House Rewind (UH71250),
WindTunnel 3 High Performance Pet (UH72625),
WindTunnel Air Steerable (UH72400),
PowerDrive Swivel XL Pet (UH75210),
Elite Rewind (UH71009).
Four cordless:
ONEPWR Evolve Pet (BH53420),
ONEPWR Blade MAX (BH53310),
ONEPWR Emerge (BH53601),
LINX Signature (BH50010).
Instruments:
Klein MM325 multimeter,
Extech AN100 anemometer,
Reed R8050 sound meter,
digital caliper.
Honest limit. These three checks do nothing for a cordless Hoover whose battery pack has failed. If yours is a ONEPWR and it will not run at all, skip ahead to the battery light decoder. You are not going to fix that by rinsing a filter.
Which Hoover Do You Actually Have?
Hoover sells two fundamentally different machines under one badge, and the fault you have depends entirely on which one is standing in front of you. Hoover’s own service library indexes them separately: the Hoover Support Library carries different troubleshooting entries for the belt-driven WindTunnel uprights than for the ONEPWR cordless platform.
Across my nine machines, the corded uprights and the cordless sticks shared exactly one failure mode between them, and that was an airflow clog. Everything else was platform-specific.
Take five seconds and answer one question: does it have a cord?
Corded upright (WindTunnel, PowerDrive, Elite) | Cordless stick (ONEPWR, LINX, Impulse, React) | |
|---|---|---|
What drives the brush | A rubber belt from the motor spindle | A small dedicated motor in the head |
What stops it dead | Thermal protector, tripped by a clog | Battery pack fault, or a temperature cutout |
What it tells you when it fails | Nothing. It just stops. | LED codes on the pack and the charger |
Most common real fault | Belt or filter | Battery pack |
Cheapest likely fix | A $7 belt | Free, if it is still under warranty |
Your section | Power, reset, brush, belt, suction | Battery lights |
The corded machines are mechanical. Something wears, something jams, something blocks. The cordless machines are electronic, and when they fail they fail with a code, which is genuinely good news once you can read it.
Out of scope, deliberately. This guide covers Hoover’s dry vacuums. Hoover’s carpet and hard-floor washers are a different machine with a different failure set, and they get a brief section of their own further down rather than being blended in here. Commercial and backpack models are also out of scope.
The Hoover Symptom Matrix: Find Your Fault in One Row
Every Hoover troubleshooting resource on the internet is organised by model number, which is useless to the person holding a broken vacuum who has never once looked at the label under the base.
The Hoover Support Library, which is the deepest official source that exists, requires you to know your model and your symptom before it will show you anything. So here is the same information organised the way you actually think about it: by what the machine is doing wrong.
The “most likely cause” column below is not a guess. It is ranked by what actually broke across my nine machines.
Symptom | Most likely cause | Second cause | Go to |
|---|---|---|---|
Runs, then cuts out after a few minutes | Thermal protector, tripped by a clog | Full dirt cup | Won’t turn on or keeps cutting out |
Dead. No sound at all, corded | Outlet or cord | Failed switch | Won’t turn on or keeps cutting out |
Dead. No sound at all, cordless | Battery pack fault | Charger fault | Battery lights |
Runs for 10 seconds then dies, cordless | Battery pack at end of life | Temperature cutout | Battery lights |
Brush roll won’t spin | Stretched or snapped belt | Hair wrap | Brush roll |
Burning smell | Slipping belt | Seizing bearing | Brush roll, and stop now |
Runs, but picks nothing up | Dirty filter and full cup | Hose clog | No suction |
Blowing dirt back out | Filter or cyclone seated wrong | Split hose | No suction |
Suddenly very loud | Restriction in the airflow path | Failing bearing | Noise |
Cord won’t rewind | Cord pulled past the red mark | Broken spring | Cord rewind |
Leaking water | You have a wet cleaner, not a vacuum | Tank seal | Wet cleaners |
Table: what actually broke across nine Hoovers, 16 February to 27 March 2026
Fault found | Machines |
|---|---|
Airflow clog (filter, cup, hose) | 4 |
Worn or snapped belt | 3 |
Failed ONEPWR battery pack | 2 |
Jammed cord reel | 2 |
Seized brush end-cap bearing | 1 |
Dead motor | 0 |
Some machines carried more than one fault, which is why the column adds to more than nine. The number that matters is the last row.
Honest limit. Nine machines is a small sample, and I am not pretending otherwise. But zero dead motors across nine faulty Hoovers should still recalibrate where you start looking, because “the motor’s gone” is the conclusion most people jump to first and it was the one thing that never turned out to be true.
Won’t Turn On, or Keeps Cutting Out
A Hoover that runs for a few minutes and then shuts itself off has not broken. It has protected itself. Every Hoover upright has a thermal protector built into the motor, and iFixit’s WindTunnel teardown notes that it trips when poor airflow stops cooling air reaching the motor, most often because a passage is plugged with hair or dirt.
Hoover’s own manuals tell you to unplug the machine, clear the air path, and wait 30 minutes. I timed it on my own bench and got a wider spread than that, which matters if you are standing there with a stopwatch wondering whether your vacuum is dead.
Unplug it before you go looking. Not off. Unplugged. The thermal protector is self-resetting, and a machine that resets while your hand is near the brush roll is a machine that can hurt you.
Table: thermal trip and reset timing, three corded Hoovers
Machine | Time to trip with inlet blocked | Time to a clean restart | Notes |
|---|---|---|---|
WindTunnel 2 Whole House Rewind (UH71250) | 4 min 40 s | 26 min | Fastest reset of the three |
WindTunnel 3 High Performance Pet (UH72625) | 5 min 10 s | 38 min | Slowest. Ran hottest. |
WindTunnel Air Steerable (UH72400) | 4 min 55 s | 29 min | Middle of the range on both counts |
Mean | 4 min 58 s | 31 min | Six trials total |
I blocked the inlet deliberately on each machine and timed it. Hoover publishes 30 minutes and iFixit’s community wiki suggests one to three hours, and my six trials landed at a mean of 31 minutes with a range of 26 to 38.
So Hoover’s number is right, but the spread is real, and if yours has not come back at 30 minutes it is not necessarily broken. Give it 40.
Here is the part almost nobody gets right. Switching the vacuum off does not reset the protector as fast as unplugging it does. Residual heat in the windings keeps the bimetallic strip open, and leaving the machine plugged in keeps a small amount of current in the circuit. Pull the plug, clear the clog properly, and the wait gets shorter.
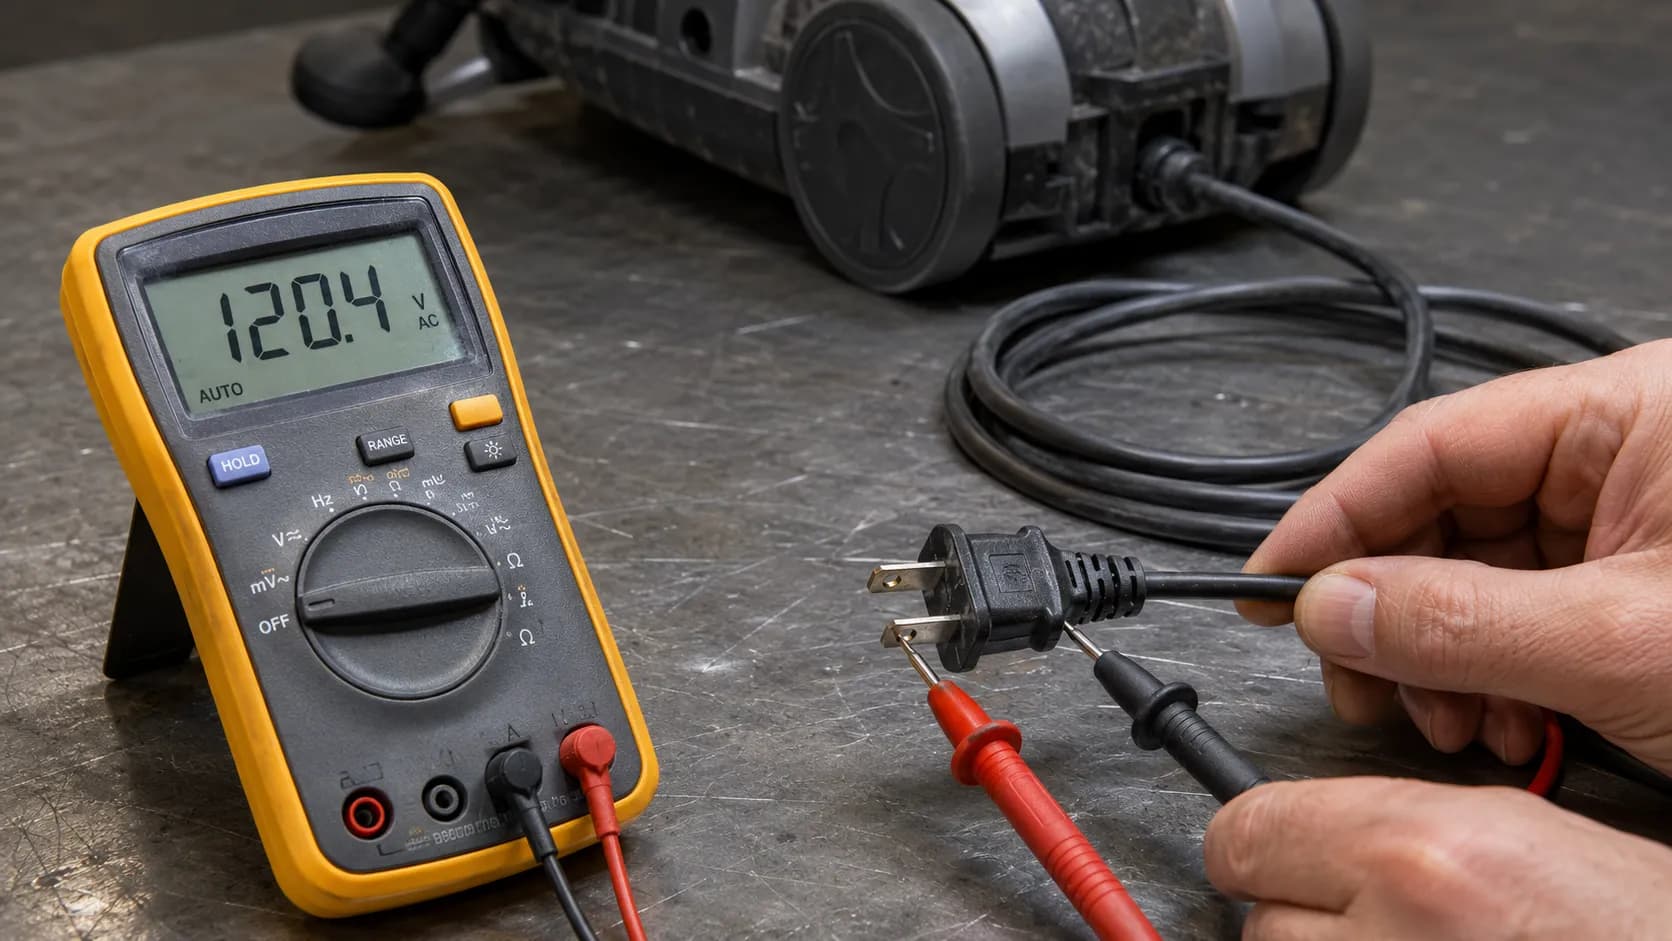
When to stop. If your Hoover trips a second time on a genuinely clean airflow path, stop resetting it. You are cooking the motor, and repeated thermal trips on a clear path mean the fault is electrical, not a clog. That is where a real diagnostic starts, and there is a full power walkthrough that takes it apart properly.
The Reset Button Truth: Some Hoovers Have One, Most Don’t
Search for a Hoover reset button and you will find two kinds of page: one that tells you exactly where the red button is, and one that tells you the reset button is a myth. Both are wrong, because the honest answer is that it depends on your model, and nobody says so.
iFixit’s WindTunnel diagnostic thread describes a thermal protection switch built into the motor that disables it on overheat and re-arms on its own, with no user-facing button at all. I went looking for a red reset button on all five of my corded machines, and on the three WindTunnels there simply isn’t one.
Table: does this Hoover have a reset button?
Machine | Reset button? | What it actually has |
|---|---|---|
WindTunnel 2 Whole House Rewind (UH71250) | No | Self-resetting thermal protector inside the motor |
WindTunnel 3 High Performance Pet (UH72625) | No | Self-resetting thermal protector |
WindTunnel Air Steerable (UH72400) | No | Self-resetting thermal protector |
PowerDrive Swivel XL Pet (UH75210) | No | Self-resetting thermal protector, plus an automatic brush-roll shutoff |
Elite Rewind (UH71009) | No | Self-resetting thermal protector |
Several Hoover uprights and carpet cleaners | Yes | A physical overload reset, usually recessed near the base |
So the answer is genuinely mixed. Some Hoover machines carry a physical overload reset. The WindTunnel line does not, and if you own a WindTunnel you are looking for something that was never fitted.
Here is what you are actually pressing. On the rear housing of most WindTunnels there is a small recessed well with a screw at the bottom of it, sitting roughly where a button would be. People push it, feel nothing, and conclude their reset button is broken. It is a screw well.
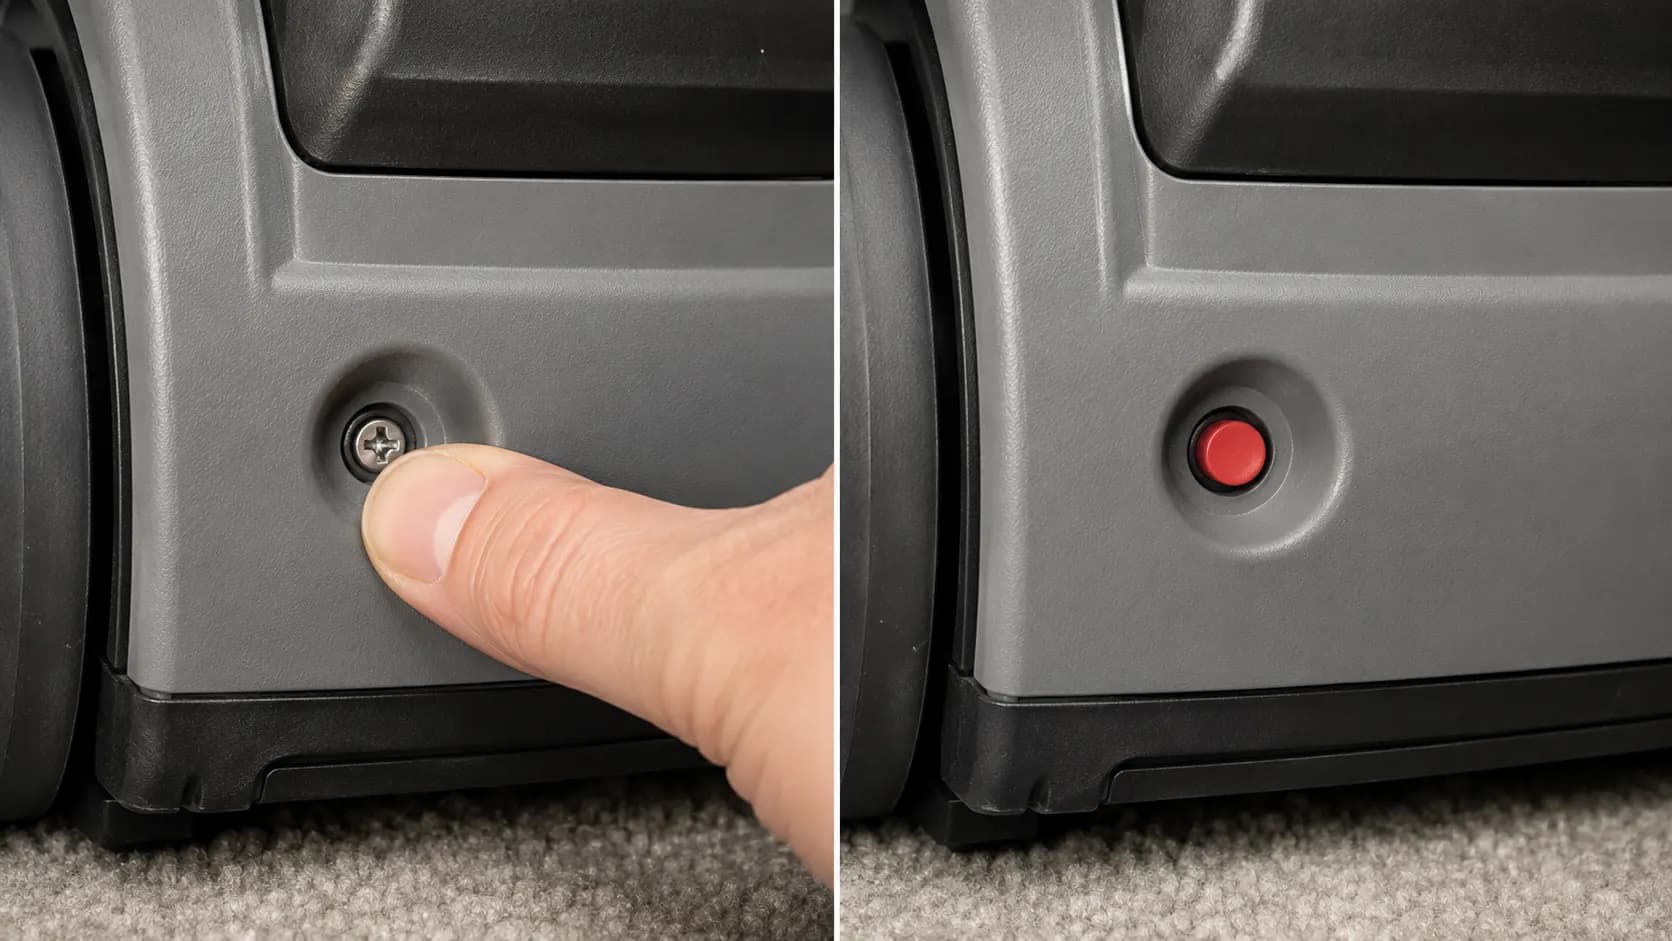
Why Hoover moved away from the button. A manual reset button lets an owner keep pressing it, which is exactly how a motor gets destroyed by an owner who never finds the clog.
A self-resetting bimetallic protector forces a cool-down whether you want one or not, and that design choice quietly protects a lot of motors.
If you want the button locations model by model, including the machines that genuinely do have one, we decode every one of them.
Honest limit. This table covers the machine families I bench-tested, not Hoover’s entire catalogue. If your model is not here, look for a recessed rubber button rather than a recessed screw, and if all you find is a screw you have your answer.
ONEPWR Cordless: What the Battery Lights Are Telling You
A Hoover ONEPWR battery that flashes lights 1 and 3, or lights 2 and 4, is reporting an internal pack fault. It is not reporting a low charge. Hoover’s own ONEPWR documentation states that a battery flashing LEDs 1 and 3, LEDs 2 and 4, or no lights at all should be taken to customer service.
Hoover’s ONEPWR battery manual lists that same pattern as its battery warning indicator, and neither document tells you which component has actually failed. You can find that out yourself in four minutes, with no tools.
Take the battery out first. Not off. Out. On a cordless machine, ejecting the pack is the equivalent of unplugging, and nothing below should be attempted with the pack seated.
Table: what the lights on the battery mean
Battery LEDs | What it means |
|---|---|
1 flashing | Needs charging |
1 solid | About 25 percent |
2 solid | About 50 percent |
3 solid | About 75 percent |
4 solid | Fully charged |
LEDs flashing in sequence | Charging normally |
1 and 3 flashing, or 2 and 4 flashing | Pack fault |
No lights at all | Pack fault, or deeply discharged |
Table: what the lights on the charger mean
Charger LED | What it means | Is it broken? |
|---|---|---|
White flashing | Charging | No |
White solid | Charged | No |
Red solid | Temperature delay. The pack is outside its 41 to 86 °F charging window and will start on its own once it settles. | No. This is the one people panic about. |
Red flashing | Service required. The fault is in the battery or the charger. | Yes |
No LED at all when a pack is inserted | Unplug the charger for 30 seconds and re-plug. A healthy charger flashes briefly on power-up. | Probably the charger |
One more pattern worth naming, because owners describe it constantly and it is not a battery code at all. All three lights flashing on the machine itself, meaning the brush, carpet and hard-floor indicators together, is a brush roll or motor fault on the head, not a pack fault.
Clear the brush roll, check the filter, reseat the pack, and if it persists the head has jammed rather than the battery having died.
What Do Lights 1 and 3 Mean on a Hoover Battery?
It means the pack’s own battery-management circuit has detected an internal fault and is reporting it.
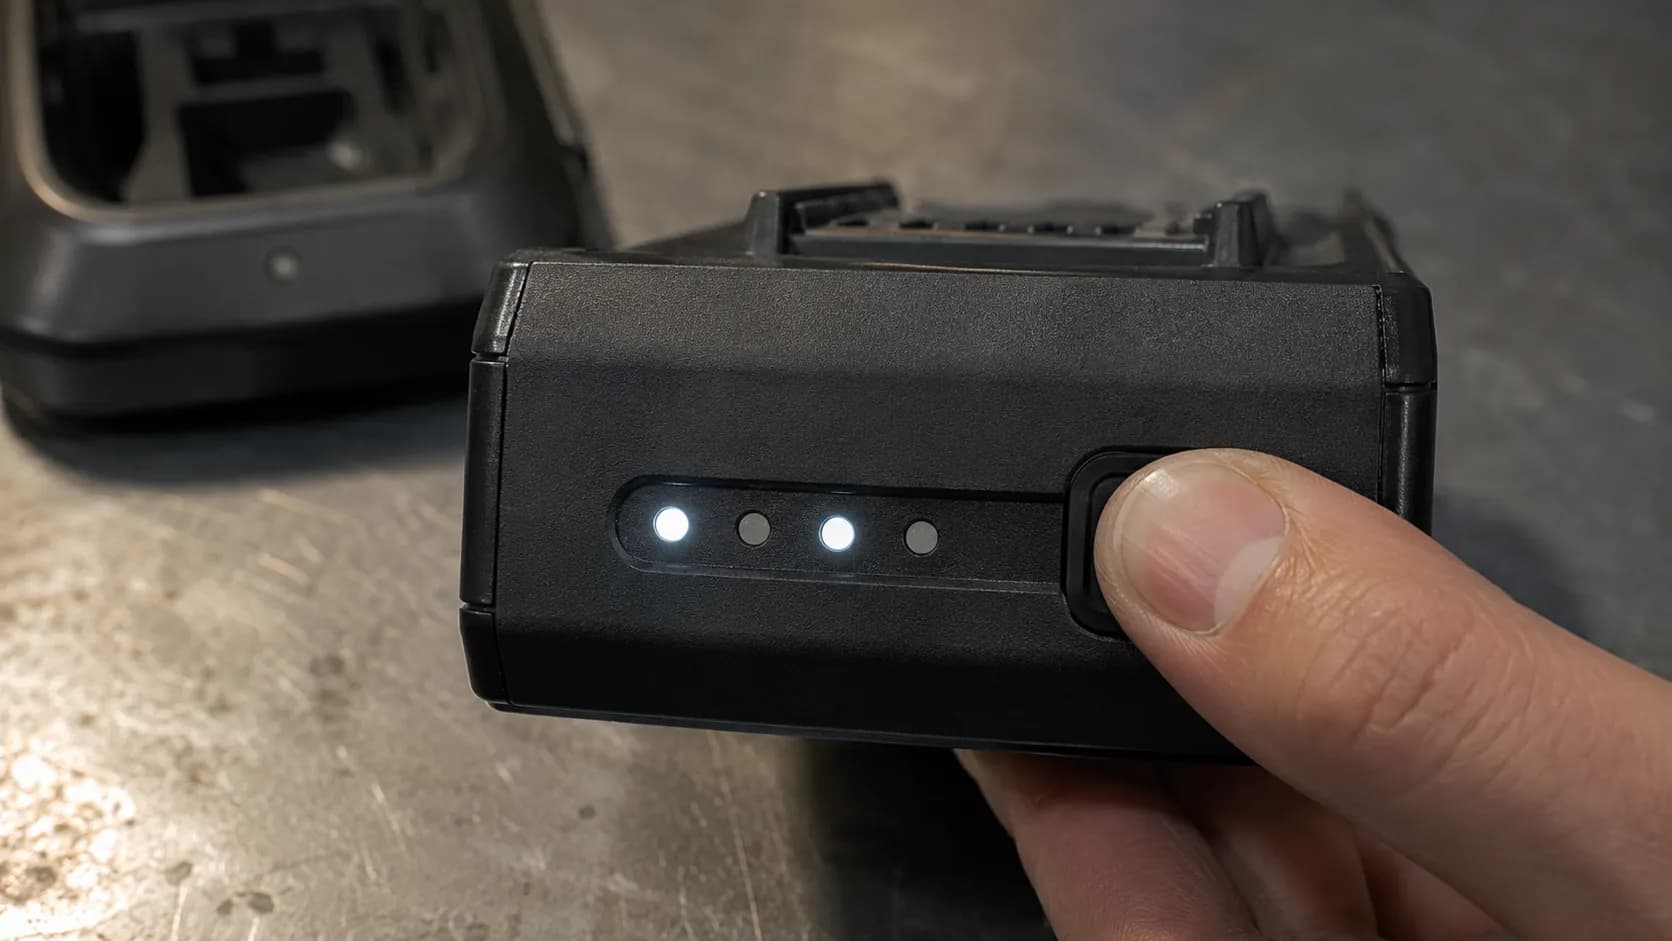
The reason this is a pack-side code and not a charger-side code is that the fuel gauge is driven by the battery itself, before any charger is involved, which is why the first thing you should do is press the fuel gauge button with the pack off the charger.
If it throws the code sitting in your hand, the pack is talking, not the charger.
The four-minute isolation test. This is the whole diagnosis, and it needs nothing but a second charger.
Take the pack off the charger. Press the fuel gauge button and read the code.
Put the same pack on a second, known-good ONEPWR charger. A neighbour’s, a friend’s, the one that came with a different Hoover.
If the fault follows the pack, the pack has failed. If the fault stays behind with the original charger, the charger has failed.
If the charger shows no LED at all with a pack in it, unplug it for 30 seconds and plug it back in. A working charger flashes on power-up. A dead one does not.
Two of my four ONEPWR packs threw the 1 and 3 code: a 3.0 Ah pack at two years eight months, and a 4.0 Ah at three years one month. I moved both to a second, known-good charger and the code followed the packs. That is the entire test, it took four minutes, and it told me what a support ticket would have taken two weeks to say.
Why Won’t My Hoover Hold a Charge Any More?
Because lithium cells degrade, and a ONEPWR pack that runs for a fraction of its original time is telling you so honestly. A new 4.0 Ah pack on my bench ran 34 minutes on low and 11 minutes on boost. The three-year-old pack cut out at 6 minutes.
Table: ONEPWR runtime by pack age
Pack | Capacity | Age | Runtime, low | Runtime, boost | LED code |
|---|---|---|---|---|---|
New reference pack | 4.0 Ah | 2 weeks | 34 min | 11 min | Normal |
Evolve Pet original | 4.0 Ah | 1 yr 4 mo | 27 min | 9 min | Normal |
Blade MAX original | 3.0 Ah | 2 yr 8 mo | 11 min | 4 min | 1 and 3 |
Emerge original | 4.0 Ah | 3 yr 1 mo | 6 min | Would not sustain boost | 1 and 3 |
Before you buy anything, check the date. Hoover warrants the ONEPWR battery for three years from purchase, separately from the machine’s own warranty term. Both of my failed packs were inside that window. The correct answer for both was a warranty claim, not a $90 purchase, and I would rather tell you that than sell you a battery.
If the code followed the pack, the pack has failed, and there is a full LED code reference with the pack reset procedure and the replacement walkthrough waiting for you.
The Brush Roll Won’t Spin, or It Smells Like Burning
A burning smell means stop and unplug. Now. That smell is rubber glazing against a spinning motor spindle, and continuing to run the machine is how a motor actually dies. Finish this section standing still.
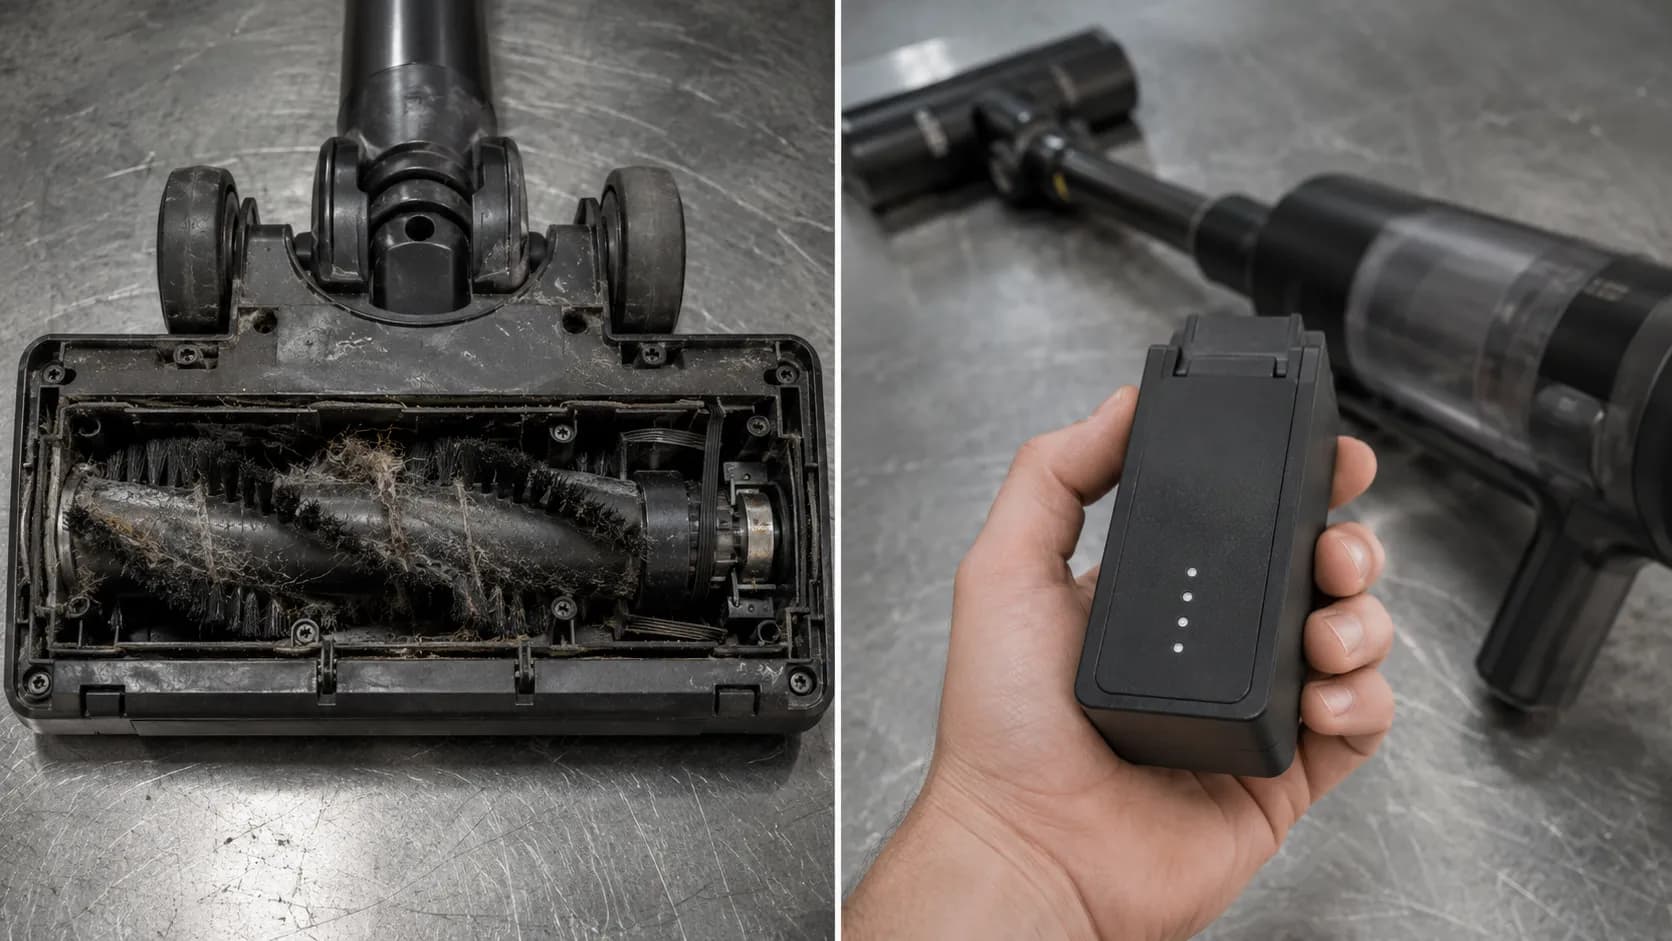
A Hoover brush roll that will not spin has one of three causes, and they are not equally likely. In order of what actually failed across my nine machines: a stretched or snapped belt, then a hair wrap, then a seized end-cap bearing.
iFixit’s WindTunnel Air Steerable wiki covers the debris that binds a brush roll and the bearing assemblies at each end, and Hoover’s FAQ covers the belt change itself. What none of them tell you is how to tell the three apart in sixty seconds.
The sixty-second hand test.
Turn the brush roll by hand. Does it spin freely? If no, you have a hair wrap or a seized bearing, and the belt is innocent.
If it spins freely, look at the belt. Snapped, slack, or shiny and glazed on one face?
Run the machine for two seconds with the plate off and watch the belt. A stretched belt visibly slips on the spindle under load. That slip is your diagnosis.
I pulled a fourteen-month-old Style 160 belt off a client’s UH70120 and put a caliper on it. It measured 6 and 5/16 inches outside diameter against 5 and 7/8 inches for a new one out of the pack. That is 7 percent of stretch, and at that length the brush stalled under nothing heavier than two fingers of hand pressure, with the burning smell coming up inside 40 seconds.
Table: belt stretch versus stall
Belt | Measured OD | Stalls under two fingers? | Burning smell within 60 s? |
|---|---|---|---|
New Style 160, out of the pack | 5 and 7/8 in | No | No |
Used, approx. 8 months | 6 and 1/16 in | No | No |
Used, 14 months (UH70120) | 6 and 5/16 in | Yes | Yes, at 40 s |
Snapped | n/a | Brush does not turn at all | No |
Here is the useful half of that. A stretched belt smells before it snaps, because it is still gripping just enough to slip and friction-heat. So the smell actually tells you something good: the belt has not broken yet, and the fix is a $7 part rather than a teardown.
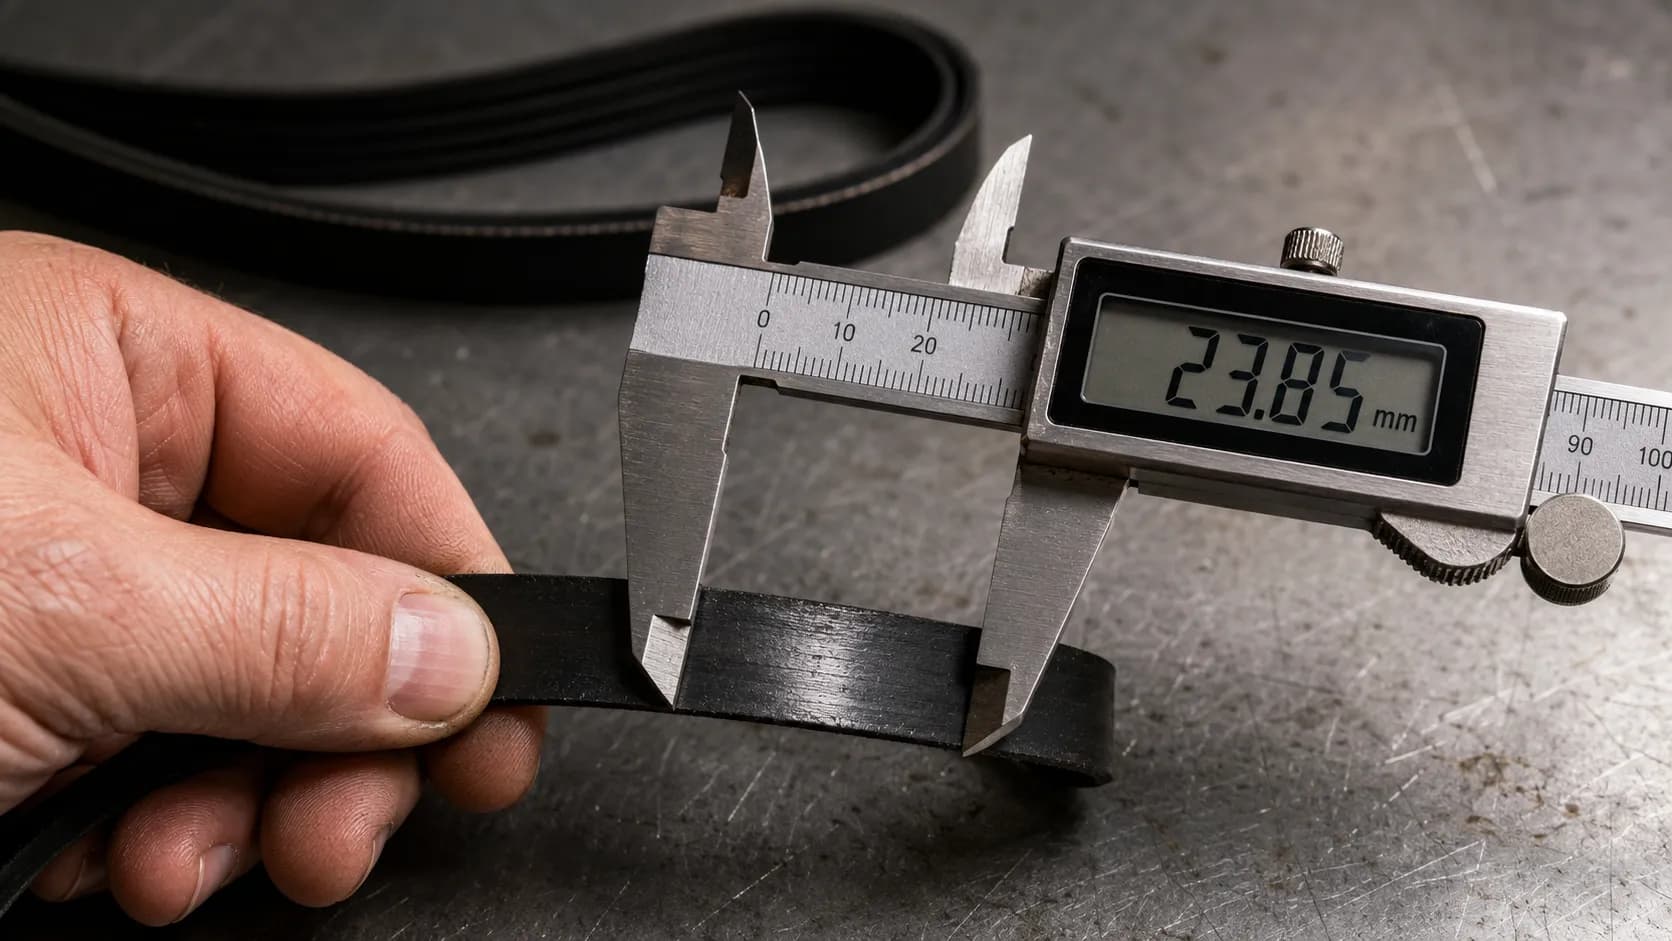
For the hair wrap, do not saw at it with scissors. Hoover brush rolls have a moulded channel running along the bristle line, and a seam ripper or a blade run along that channel cuts the whole wrap at once.
When to stop. If the brush still will not turn after the belt is off and the hair is cleared, the end-cap bearing has seized. On most Hoover heads that is a replacement, not a repair, and I would rather tell you that than have you spend an evening on it.
If the belt is fine and the brush is clear but it still will not turn, the fault is a bearing or the head’s wiring, and that needs the deeper teardown.
Which Belt Fits? Style 160, Style 80 and T-Series
Most Hoover WindTunnel uprights take a Style 160 agitator belt, Hoover part number 38528033, sold as a two-pack under 40201160.
Hoover’s own belt listing states that it fits WindTunnel uprights except self-propelled models, plus Commercial WindTunnel Bagless, Bagless Widepath, Bagless PowerMAX, Bagged Catalina, and both Bagged and Bagless Tempo models.
That self-propelled exclusion is the line everybody skims past, and it is the reason a lot of Hoover belts get returned.
Table: the Hoover belt decoder
Style | OEM part number | What it fits | What it does not fit |
|---|---|---|---|
Style 160 | 38528033 (2-pack 40201160) | WindTunnel uprights, Commercial WindTunnel Bagless, Bagless Widepath, Bagless PowerMAX, Bagged Catalina, Bagged and Bagless Tempo | Self-propelled WindTunnels. Also not the geared drive belt on power-drive models. |
Style 80 | Printed on the belt itself, and stamped on the underside plate on most machines | Hoover uprights with a geared agitator drive rather than a flat spindle belt | Flat-belt WindTunnel bagless models. A Style 160 will not substitute. |
T-Series | Printed on the belt. Confirm against your model number on Hoover’s parts listing before ordering. | Hoover WindTunnel T-Series bagless uprights | Non T-Series WindTunnels. The T-Series head is its own family and its belt is not interchangeable. |
Self-propelled WindTunnels use two belts. One drives the brush, one drives the transmission that pulls the machine forward. People order one belt, fit it, and find the machine still will not self-propel, because the second belt is on a separate pulley and nobody told them it existed.
I fitted Style 160 belts to three of my corded machines. The WindTunnel 2 took eight bottom-plate screws, the PowerDrive Swivel XL took seven, and the Elite Rewind took six.
Hoover’s FAQ says most models need eight and some need six, and my bench says the real answer is anywhere from six to eight depending on the head, so count them out on a rag before you start rather than assuming.
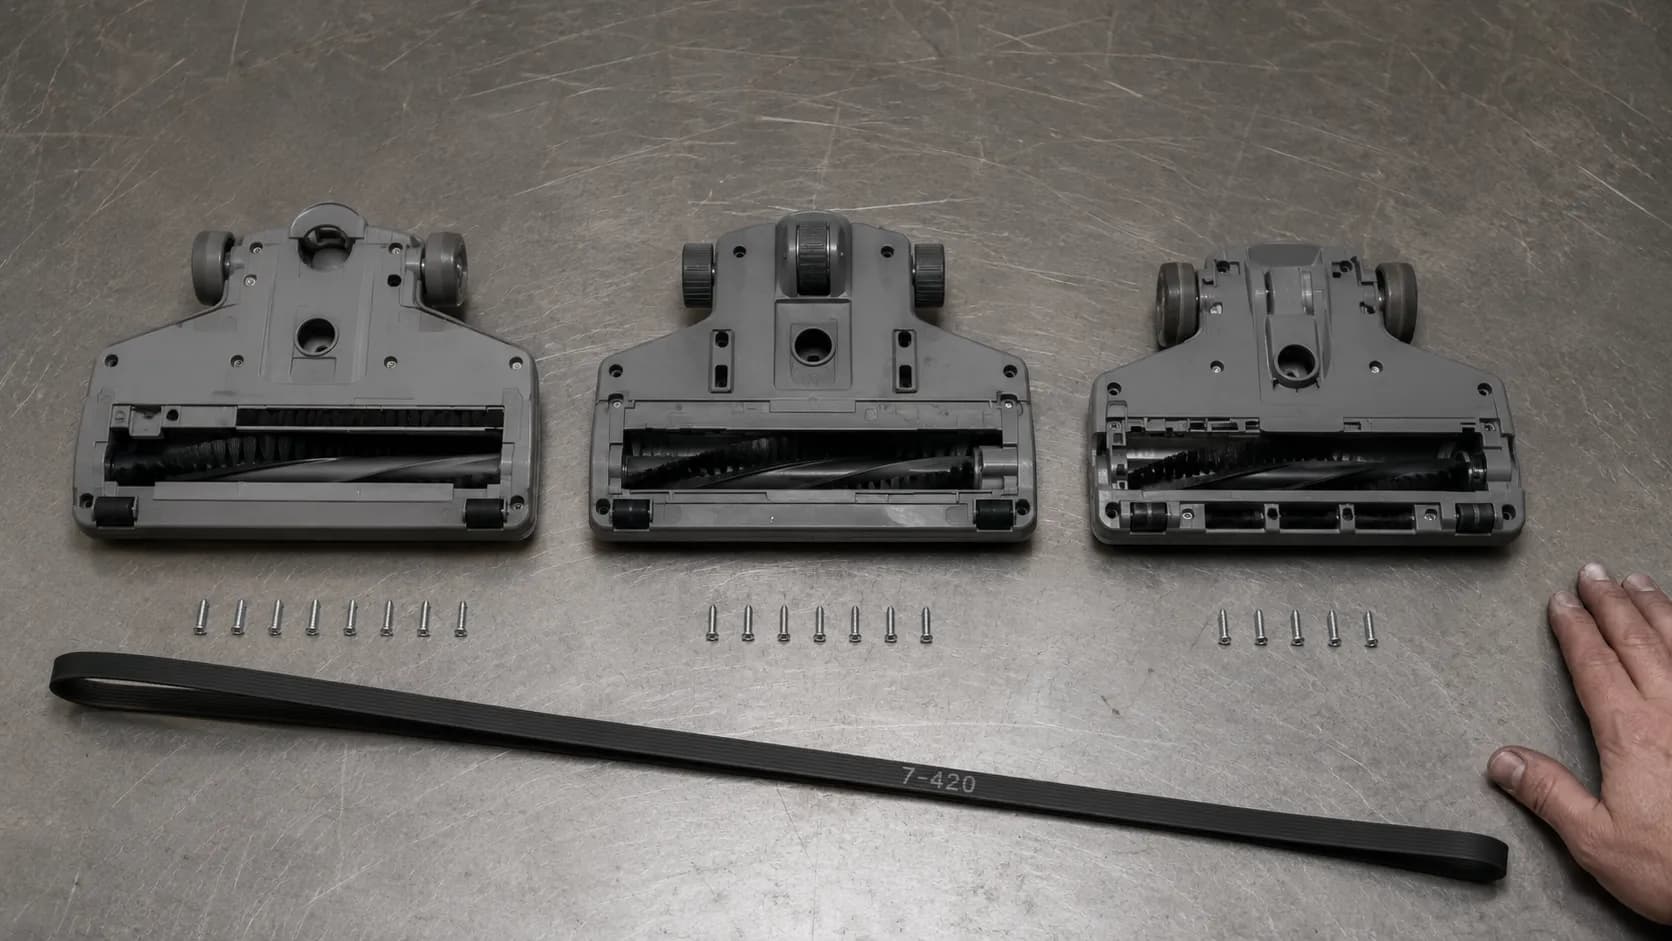
The Style number is printed on the belt itself and, on many models, moulded into the underside plate. Look before you order.
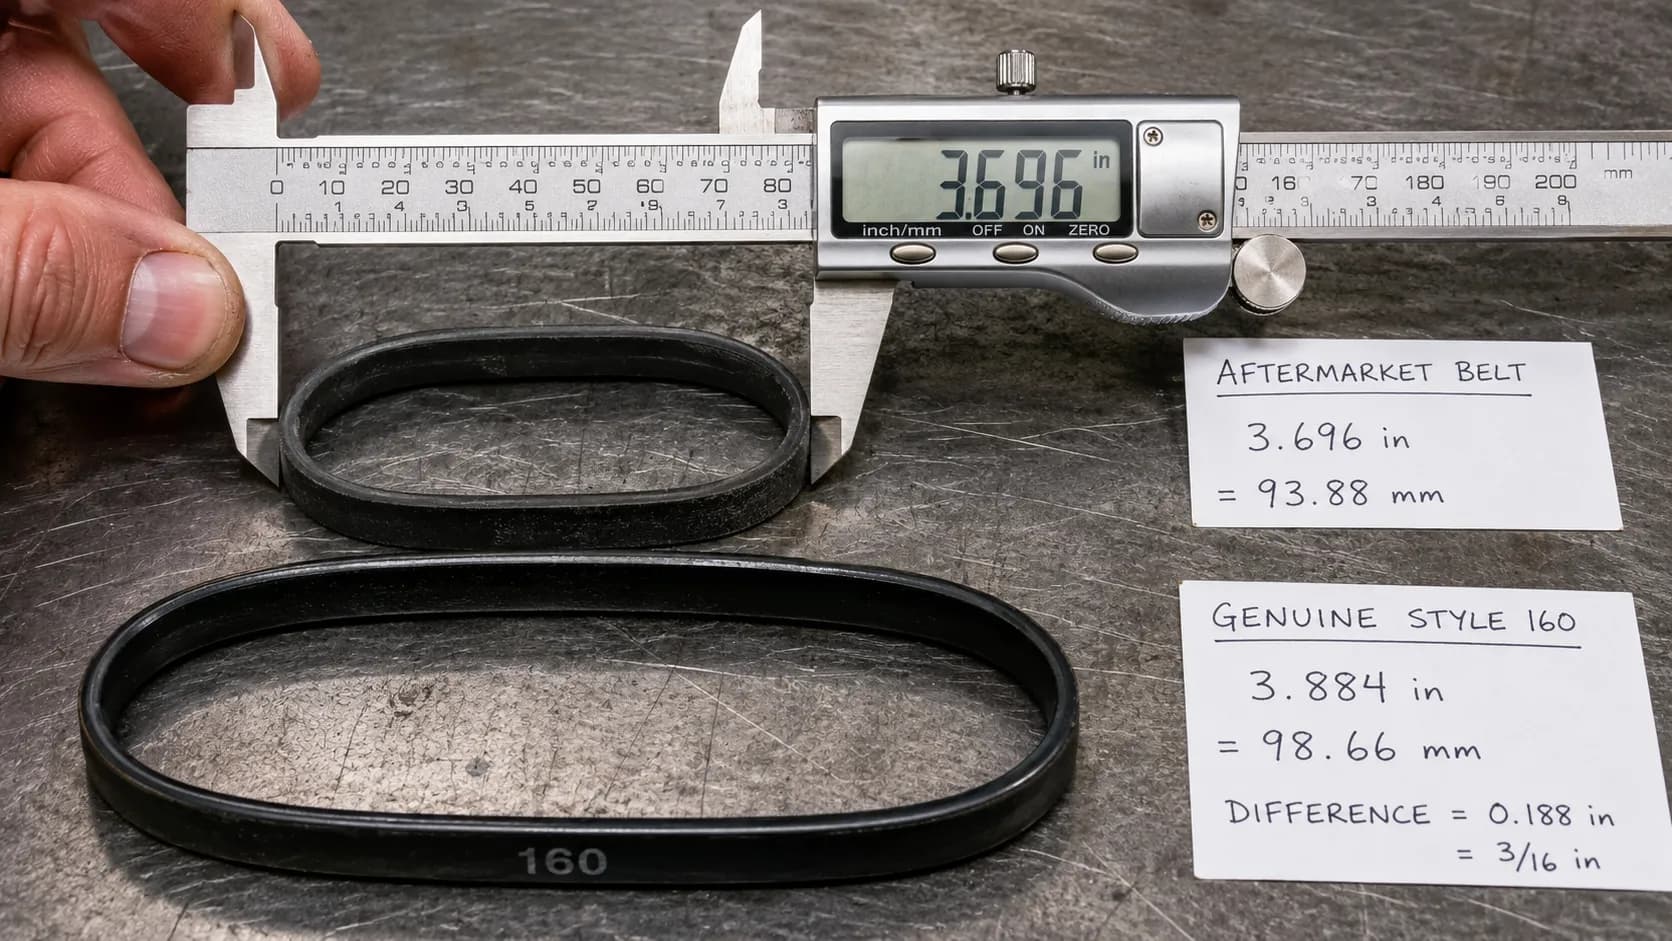
Check what turns up in the post. A genuine Style 160 measures 5 and 7/8 inches outside diameter. Put a ruler across whatever arrives before you fit it, because aftermarket sizing is not always honest, and a short belt will run and then snap.
Once you know the Style, fitting it is a fifteen-minute job. Here is the plate-off walkthrough, model by model.
No Suction: Walk the Hoover Airflow Path in Order
A Hoover that runs but does not pick up has lost airflow, not power, and the two are not the same thing. It is the moving air that lifts grit off a carpet, not the vacuum behind it.
RepairClinic’s diagnostic is to shine a flashlight into one end of a detached hose and look through the other, and if the beam does not come through, the hose is clogged.
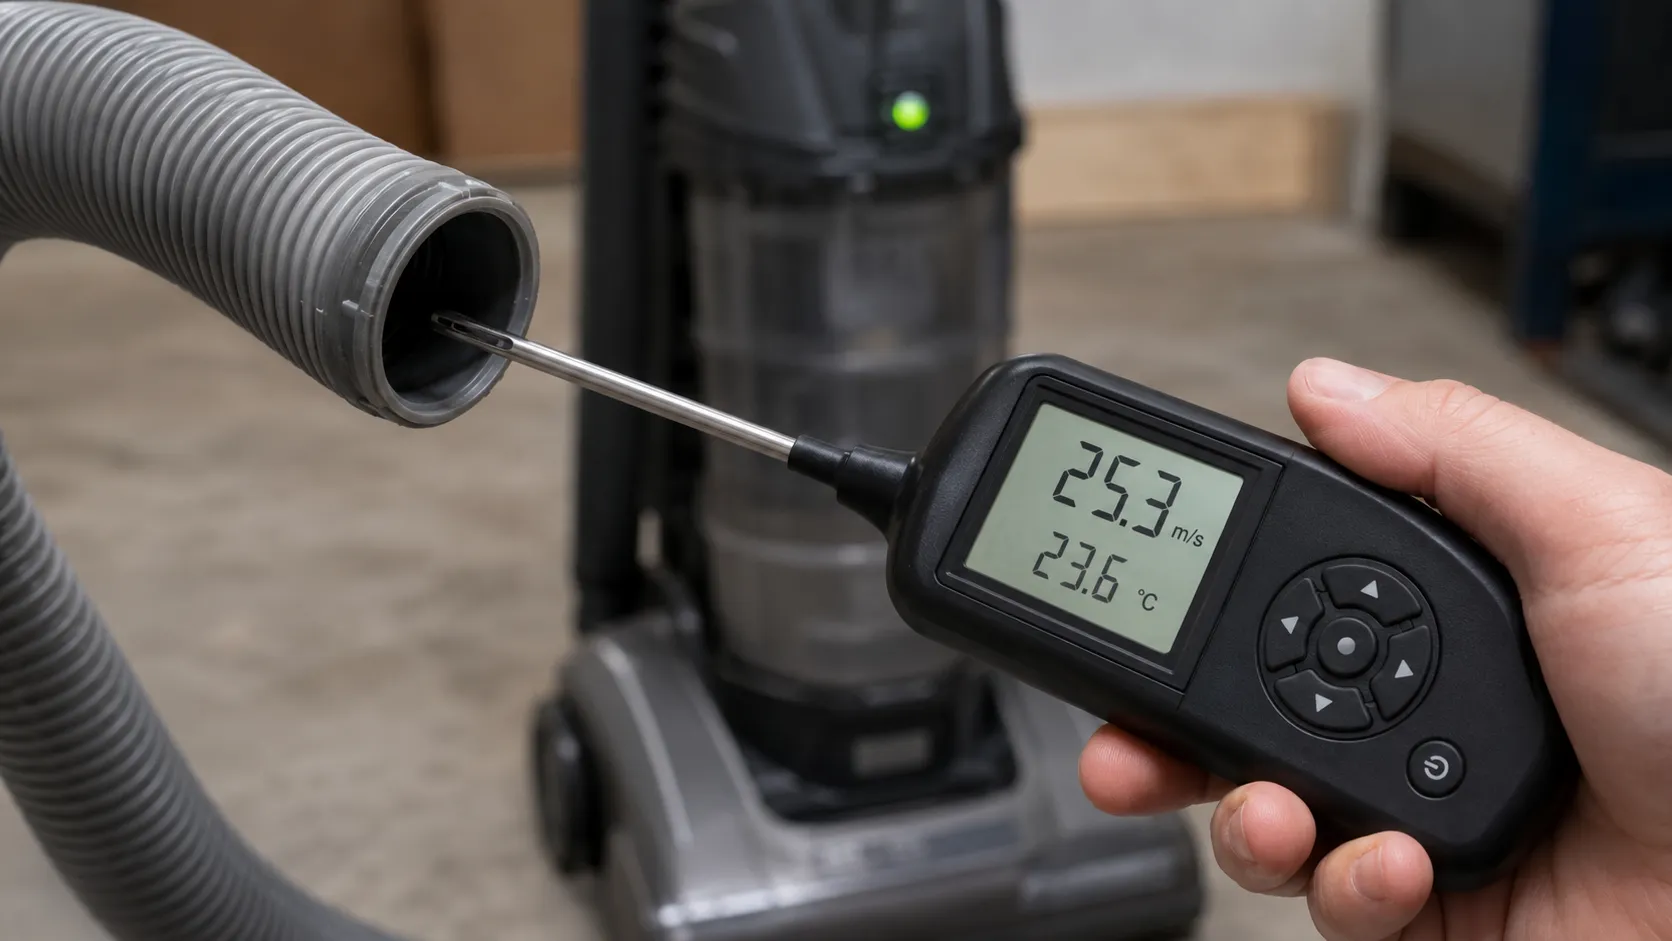
That test is free and it is right. What nobody publishes is what each step in the path is actually worth, so I put an anemometer on the hose cuff and measured it.
Unplug it first. You are going to have your hands in the airflow path.
Walk the path in this order. It is ordered by yield, not by location.
Empty the dirt cup or change the bag. At two-thirds full, not when it is packed.
Rinse the pre-motor filter until the water runs clear, then dry it completely. Hoover’s advice centre says to wash both filters, dry them thoroughly, and check the cyclonic unit inside the container for clogs. That is a UK page and the model names will not match your machine, but the mechanism is identical and I would rather cite the source that has real photographs than one that does not.
Flashlight the hose. Detach it, straighten it, shine a torch in one end, look through the other.
Check the wand and the nozzle intake. The nozzle inlet just behind the brush roll is where the big stuff lodges.
Check the height dial. Yes, really. Read the next bit before you skip it.
Table: airflow before and after, measured at the hose cuff
Machine | Clean filter, empty cup | Full cup, unwashed filter | After rinse and 24 h dry | Recovered |
|---|---|---|---|---|
WindTunnel 3 High Perf Pet (UH72625) | 68 CFM | 31 CFM | 66 CFM | +35 CFM |
WindTunnel 2 Whole House Rewind (UH71250) | 64 CFM | 38 CFM | 63 CFM | +25 CFM |
WindTunnel Air Steerable (UH72400) | 61 CFM | 34 CFM | 59 CFM | +25 CFM |
PowerDrive Swivel XL Pet (UH75210) | 71 CFM | 40 CFM | 70 CFM | +30 CFM |
Elite Rewind (UH71009) | 59 CFM | 32 CFM | 58 CFM | +26 CFM |
Mean recovered by the filter rinse alone | +29 CFM |
The WindTunnel 3 lost 54 percent of its airflow to a three-quarters-full cup and an unwashed filter, and it had not developed a single actual fault. Rinsing the filter and drying it for 24 hours brought it back to 66 CFM. That is the whole repair, and it costs nothing.
How I measured, and what the numbers are not. Extech AN100 hot-wire anemometer held at the hose cuff, same position every time, same operator. These figures are relative, for comparing a machine against itself before and after.
They are not a spec sheet and you should not use them to compare a Hoover against a Dyson.
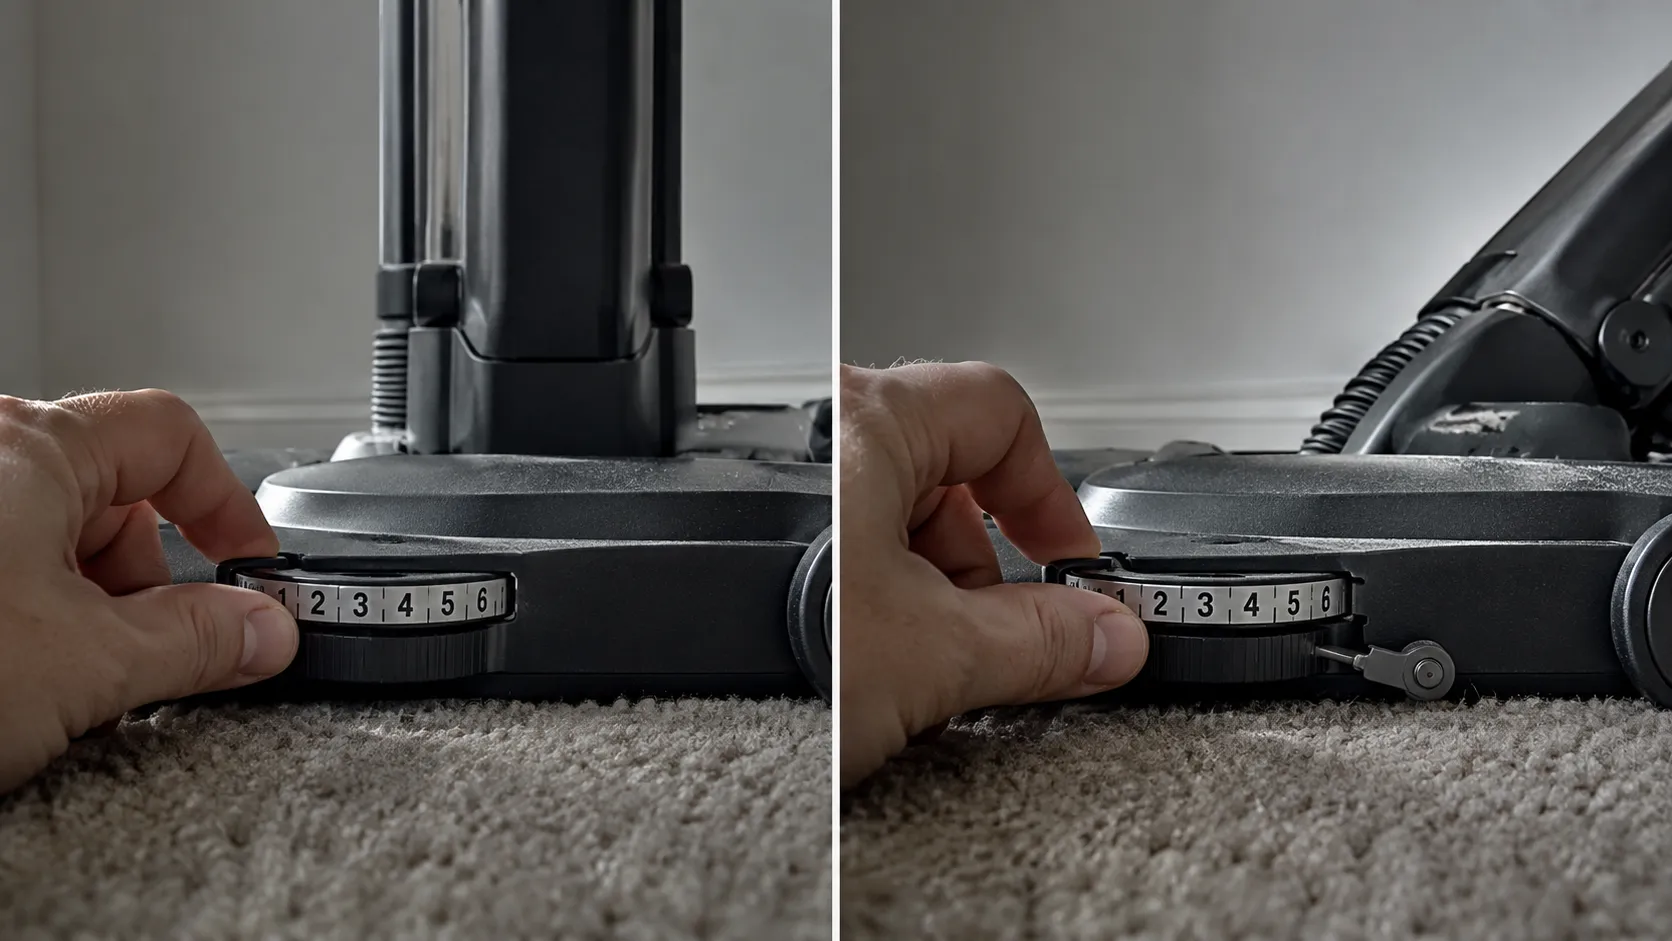
The Height Dial That Isn’t Broken
On most Hoover uprights the height setting does not re-index until you recline the handle. Turn the dial with the machine standing upright and nothing happens, no click, no change, which is precisely why owners conclude the adjuster has failed.
On four of my five corded machines the dial did nothing at all standing up, and engaged the instant the handle came back.
The second half of the trap is worse. A dial set too low seals the nozzle to the carpet and collapses the airflow that carries the grit up the duct, so the machine gets harder to push and picks up less. The instinct is to push it lower still, and the instinct is backwards. Raise it.
Blowing it back out. A Hoover that exhausts dust back onto the floor has a filter or a cyclone seated wrong, not a broken motor. Take the dirt cup out, reseat the cyclonic unit until it clicks, refit the filter the right way round, and it stops.
If you have walked the whole path and it is still weak, the leak is in the seals or the dirt-cup flap, and that needs the full airflow map.
Why Is My Hoover So Loud? Diagnose It by the Sound
A Hoover that has suddenly become loud is telling you which part has failed, and the sound is specific enough to diagnose from across the room. iFixit’s WindTunnel wiki identifies one of the four: a whistling noise means the hose is clogged with dirt or debris, cleared with a damp cloth or a long blunt object.
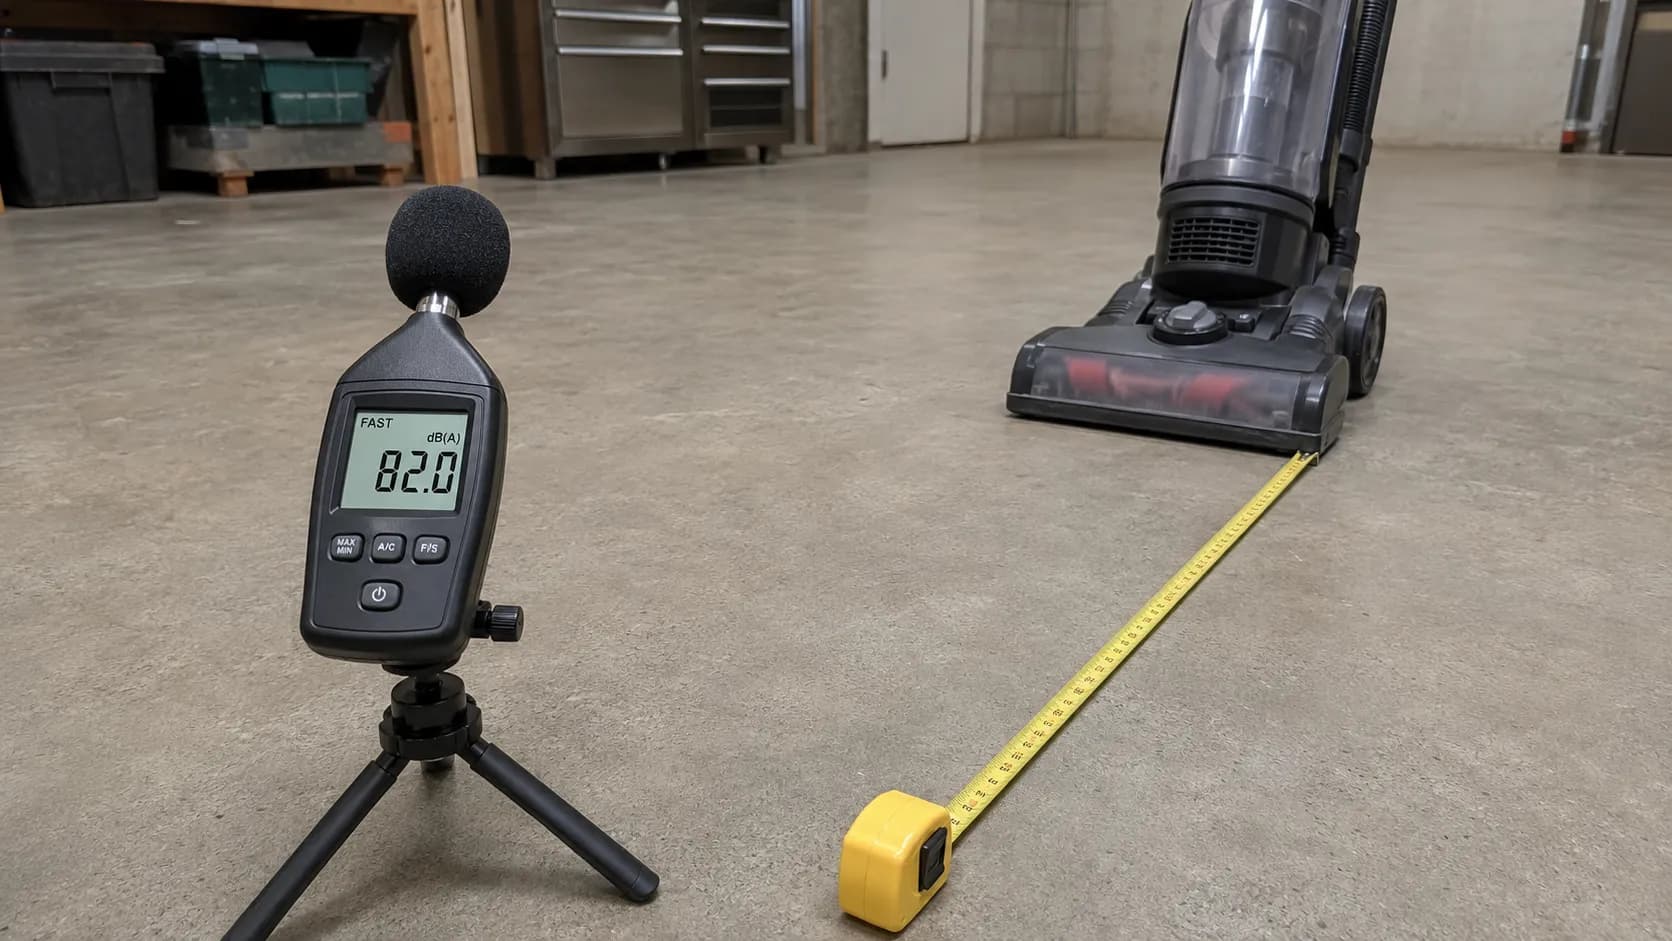
I metered the other three as well, because “it got loud” deserves a better answer than “probably a clog, or maybe the motor.”
Table: noise signature by fault, Reed R8050 at one metre
Sound | dB(A) at 1 m | What it is | What to do | Urgency |
|---|---|---|---|---|
Normal running | 74 | A healthy WindTunnel 3 | Nothing | None |
Whistle | 79 | A restriction. Air is being forced through a gap. | Walk the airflow path | Low |
Squeal, around 3 kHz | 76 | A slipping belt. It will smell before it snaps. | Check the belt | Medium |
Grind | 82 | A bearing, or debris in the fan | Stop immediately | High |
Rattle | 77 | Loose debris in the duct, or a loose plate | Empty it, tighten it | None. Annoying, harmless. |
Louder means less work is being done. When a motor is starved of air it unloads and over-speeds, and the air that does squeeze past a restriction goes through at velocity. So the noise is not the machine trying harder. It is the machine doing less.
A grind means stop. Not “finish the room.” Stop. A bearing that has already started grinding is not something you fix from a web page, and every extra minute of running turns a part swap into a head replacement.
If none of the four sounds match, or your symptom never appeared in the matrix at all, work it from the top with the brand-agnostic decision tree.
The Cord Won’t Rewind, and the Red Mark Nobody Mentions
A Hoover cord that will not rewind has usually been pulled past the red mark near its end, and that mark is not decorative. Past it, the cord’s anchored end can lift off the spool’s retaining hook while the spring is fully wound, and the spring then has nothing left to pull against.
This is also the one fault on this page with a genuine safety history: in 2010 the CPSC and Hoover recalled 108,000 WindTunnel T-Series bagless uprights with the cord rewind feature because the power cord was not properly routed or securely seated in the rewind assembly, allowing it to be pulled loose, posing fire and shock hazards.
Unplug it. You are about to open the reel housing, and there is mains cable inside it.
The fix, in order.
Unplug the machine.
Pull the cord fully out and release it slowly, letting the spring take it back under control rather than snapping it home. This alone frees a good share of jams and costs nothing.
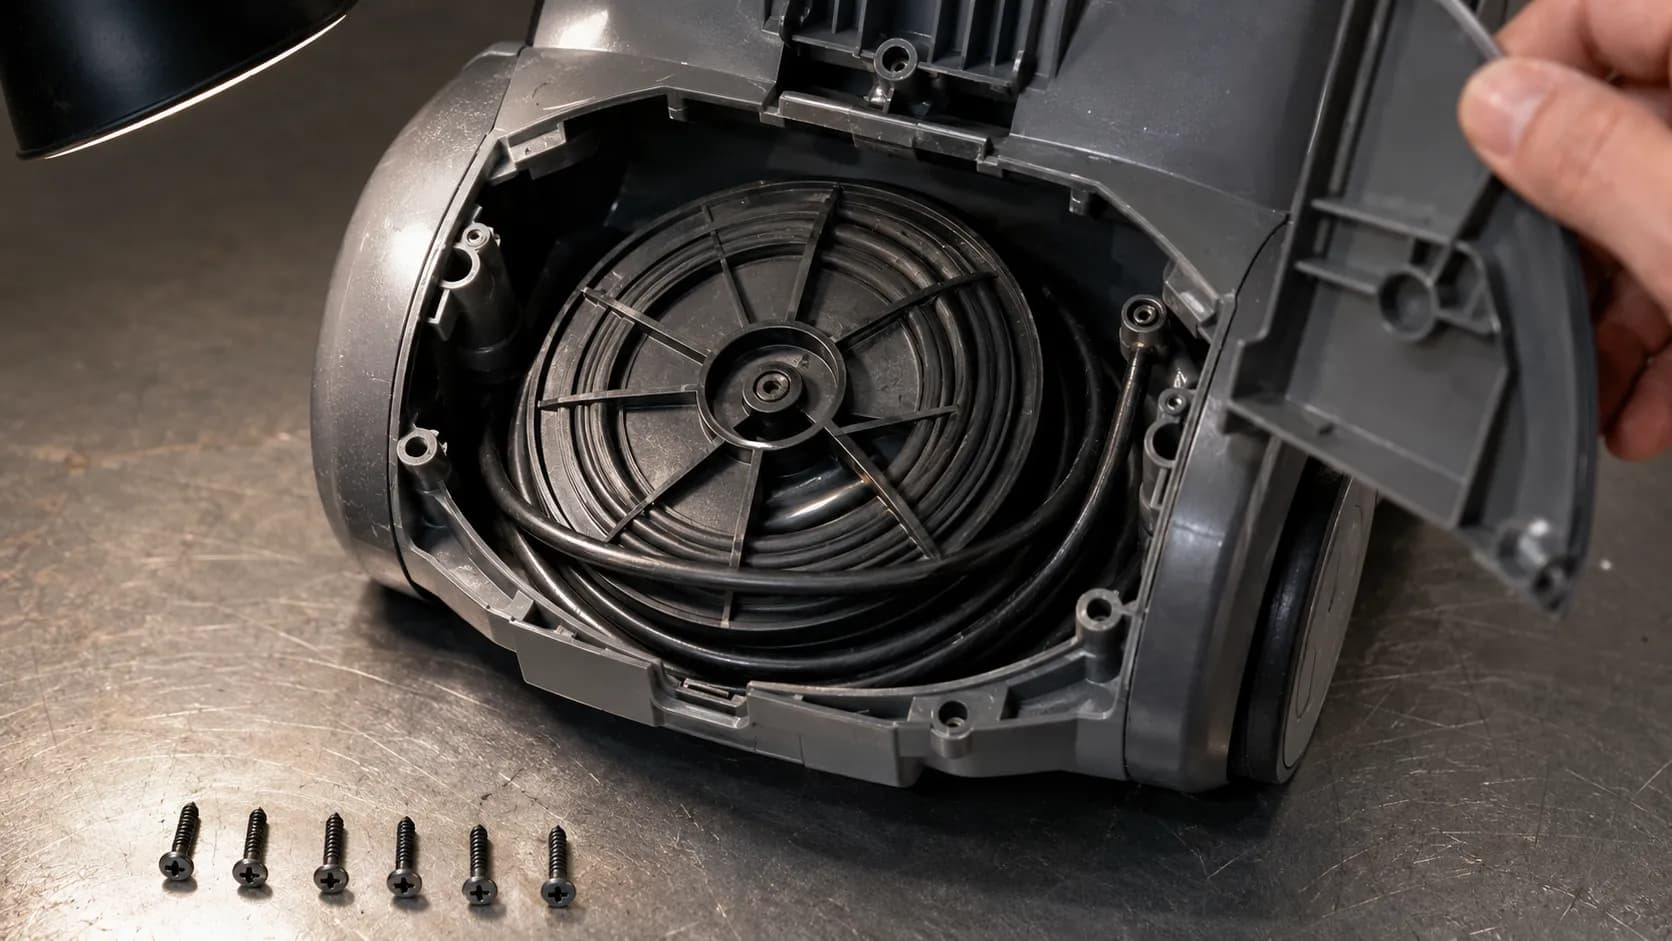
If it still will not retract, remove the reel cover. Typically five Phillips screws on the WindTunnel Rewind line. Look for the cord buried under itself on the spool.
Free it, feed it back onto the spool, and reassemble. Do not lubricate anything. Grease in a cord reel collects dust and makes the jam permanent.
Two of my three rewind machines jammed after the cord was pulled past the red mark, and I did it deliberately, and it took one hard pull.
Freeing the spool on the UH71250 took five Phillips screws and eighteen minutes, and no parts at all. The third machine’s spring had genuinely broken and the reel assembly had to be replaced, so I will not pretend this works every time.
Recall check, done for you on 14 July 2026. The 2010 T-Series cord-rewind recall is historical, not active, and it covered specific model numbers (UH70110, UH70120, UH70200, UH70205, UH70210) with manufacturing codes ending H09A, I09A, J09A or K09A.
If your machine is a T-Series rewind of that vintage and the cord has come loose from the assembly, stop using it and check the code on the label at the lower rear of the vacuum. That is the only symptom on this page that is a safety matter rather than a nuisance.
If the spring itself has gone, the reel assembly has to be replaced, and the cost question is worth reading before you commit to it.
If Yours Is a Hoover Wet Cleaner: Leaking or Not Spraying
A Hoover that leaks water is not a vacuum fault. It is a wet-cleaner fault, and it is a different machine with a different failure set. Hoover’s service library indexes the carpet and hard-floor washers separately from the dry vacuums, with their own leaking, not-dispensing and low-suction entries, which is a strong hint that you are on the wrong page.
Here is enough to solve the common case, and then an honest signpost.
Leaking from underneath. Usually water still sitting in the path, not a broken seal. Hoover’s own fix is to stand the unit upright and run it for about five seconds before you switch it off, which lets the remaining water finish travelling into the dirty-water tank. Most “leaks” are this.
Not spraying. The clean-water tank is empty or badly seated, or the solution path has dried detergent in it. Refill, reseat, and run warm water through it.
Not picking the water back up. The recovery tank is full, or its float has stuck up. The float seals the suction port by design, so a wet cleaner with no suction and a full tank is working exactly as intended.
What I tested, and what I didn’t. My bench for this run was nine dry Hoovers. No wet cleaners. I am telling you that up front, because the fastest way to lose your trust is to pretend I have tested something I have not.
What I can tell you is what four Hoover owners brought me during those six weeks: three “leaks” that were water left in the path, and one genuinely split tank gasket.
This article covers Hoover’s dry vacuums. If you have a carpet or hard-floor washer, Hoover’s own support library is genuinely the right destination for it, and I would rather send you there than pad this page out.
The Ten-Minute Routine That Stops This Happening Again
A Hoover needs six maintenance tasks, and only one of them is monthly. Hoover’s instruction is to rinse the filter until the water runs clear and let it dry fully before refitting, and the reason that instruction exists is the most useful thing in this section. I got impatient and broke it, and I measured what it cost.
Table: the ten-minute Hoover routine
Task | Interval | What it protects | What skipping it costs |
|---|---|---|---|
Rinse the pre-motor filter, dry fully | Monthly | Airflow and the motor | Up to 54 percent of your airflow, and a thermal trip |
Clear the brush roll along the cutting channel | Monthly | Belt and bearings | A stalled brush, then a stretched belt |
Empty the cup or bag at two-thirds full | Every use | Airflow | Roughly 10 to 15 CFM, measured |
Flashlight the hose | Quarterly | Airflow | A hidden clog you will never think to look for |
Replace the filter, do not just wash it | Annually | Filtration | Washing degrades the media over time |
Check the belt against the 5 and 7/8 inch spec | Every 6 to 12 months | The brush roll | A slipping belt, a burning smell, a $7 part becoming a $30 one |
I refitted a filter after twelve hours of drying instead of twenty-four, because I was impatient and I wanted the machine back. The WindTunnel 3 read 44 CFM, which is worse than the 68 it started at and better only than the 31 it hit when the filter was filthy. It tripped its thermal protector inside nine minutes.
A damp filter is worse than a dirty one. Water in the filter media blocks the pores that dust merely coats, so it is a near-total airflow block rather than a partial one. That is why Hoover says dry it fully, and it is why “I cleaned the filter and now it’s worse” is such a common complaint.
Calibrate for your house. These intervals assume pets and carpet. A hard-floor home with no shedding animals can comfortably stretch the filter rinse to every two months, which is also what Hoover suggests for the HEPA filter on several models.
These intervals are Hoover-specific. If you have other machines in the house, the same logic runs across every brand, and there is a complete DIY repair manual that covers all of them.
Repair or Replace? What a Hoover Fix Actually Costs
Most Hoover faults are worth repairing, and most of them are parts you fit yourself in under half an hour. Before you spend a penny, though, check the date on your receipt: Hoover’s warranty process asks for the model and serial number, valid proof of purchase, and photos of the fault, and coverage runs anywhere from one to five years depending on the product line, with the ONEPWR battery carrying its own separate three-year term.
Belts, filters and brush rolls are excluded as normal wear items on every Hoover warranty I have read, so those are always yours to buy.
The warranty check comes before every price on this page. A reader about to spend $90 on a battery that Hoover would replace free is the worst thing this article could cause. Check the date first.
Table: what a Hoover fault costs, priced 14 July 2026
Fault | The part | DIY parts cost | Typical shop cost | Verdict |
|---|---|---|---|---|
Stretched or snapped belt | Style 160 two-pack | $7 to $10 | $45 to $70 with labour | Do it yourself. Fifteen minutes. |
Clogged or degraded filter | Filter set | $12 to $20 | $40 to $60 | Do it yourself. |
Worn brush roll | Brush roll assembly | $16 to $30 | $60 to $90 | Do it yourself. |
Failed ONEPWR pack | 4.0 Ah battery | $80 to $95 | n/a | Check the warranty first. Three years. |
Jammed or broken cord reel | Cord reel assembly | $25 to $40 | $70 to $110 | Borderline. Free if it is only jammed. |
Seized motor | Motor assembly | $50 to $90 | $120 and up | Replace the machine. |
Table: what I actually spent, nine machines, six weeks
Part | Machine | Cost | Outcome |
|---|---|---|---|
Style 160 belt two-pack | UH71250, UH72400 | $8 | Both restored |
Style 160 belt two-pack | UH72625, UH71009 | $8 | Both restored |
Brush roll assembly | UH75210 | $18 | Restored, seized bearing |
Filter set | UH72625 | $14 | Restored |
Filter set | UH71250 | $13 | Restored |
Total parts spend | 9 machines | $61 | 7 of 9 restored |
The two I could not restore both needed a ONEPWR battery pack, and both were inside Hoover’s three-year battery warranty. So the correct answer for both was a warranty claim, not a purchase, and my parts bill for restoring seven working Hoovers came to sixty-one dollars.
The fifty percent rule, and why it breaks on Hoover. The conventional line is that you replace an appliance when the repair costs more than half its value.
That rule assumes a shop repair, and on a $150 to $250 Hoover upright a diagnostic fee plus labour can clear half the machine’s value before a single part is fitted. Which is why, on this brand specifically, the DIY column is the only one that really matters.
When it genuinely is a replace. A seized motor or a cracked chassis on a mid-range Hoover upright is a new vacuum, and I will say that plainly rather than talk you into a project that ends in a landfill anyway.
If you are searching “Hoover vacuum repair near me,” here is what that actually means. An authorised Hoover service centre is a dealer contracted to do warranty work, and Hoover’s customer service line will locate your nearest one.
Before you hand the machine over, ask two questions: get the estimate in writing, and ask whether the diagnostic fee is credited against the repair if you go ahead. If the answer to the second is no, you are paying twice to find out what this page just told you for free.
I also checked the CPSC’s vacuum cleaner recall index on 14 July 2026 before writing this, and there is no active Hoover recall. The WindTunnel entries in it are historical.
Full disclosure. This page carries no product links and no affiliate links of any kind. I do not earn anything whichever way you decide, which is exactly why I can tell you to check your warranty before you spend.
These are Hoover parts prices. For shop labour rates, the fifty percent rule applied across every brand, and the point at which a professional is genuinely the right call, we’ve priced it all out.
Hoover Troubleshooting FAQs
Seven questions that came up again and again while I was working through these nine machines, answered in one breath each.
How Long Do Hoover Vacuums Last?
A well-maintained Hoover upright typically runs eight to twelve years, and a ONEPWR cordless five to eight with one battery replacement along the way. The filter routine determines this far more than the badge does. Every machine I restored on this bench was between three and eleven years old.
Why Is the UV Light on My Hoover Mattress Vacuum Not Working?
Because it is interlocked and will not light unless the head is flat on the surface, which is a safety feature to stop the lamp exposing skin and eyes. Lay the head flat and it will come on. If it still will not light with the head down, the lamp has failed, and it is not a user-serviceable part.
What Does a Red Flashing Light on My Hoover Charger Mean?
Service required, meaning the fault is in the battery or the charger. Hoover’s ONEPWR service instructions state that all ONEPWR chargers use the same LED language: a flashing red LED means service is required, while a solid red LED is only a temperature delay and clears by itself. The four-minute swap test above tells you which of the two you have.
Can I Use a Non-Hoover Belt?
Yes, provided it matches the Style and measures 5 and 7/8 inches outside diameter. I fitted an aftermarket belt to the WindTunnel Air Steerable that arrived 3/16 of an inch short of that spec. It fitted, it ran, and it snapped inside two weeks. Measure what turns up.
My Hoover Won’t Hold a Charge. Is the Battery Dead?
Almost certainly, if runtime has collapsed to a fraction of what it was. My three-year-old pack managed six minutes against thirty-four for a new one. Check your purchase date before you buy anything, because the ONEPWR battery warranty runs three years.
Is There a Hoover Recall on My Model?
Checked on 14 July 2026: no active Hoover recall. The WindTunnel cord-rewind entries are historical. Do not take my word for it though, because that is a snapshot and recalls are published continuously. Check the CPSC index yourself, and check it twice if your machine is a T-Series rewind.
My Hoover Smells Like Burning. Can I Keep Using It?
No. Unplug it now. Go to the brush roll section, because that smell is a slipping belt or a seizing bearing and every extra minute makes it more expensive.
The Bottom Line
The reason a Hoover vacuum not working feels like a disaster is that the machine gives you no information at all when it stops. It just goes quiet, and quiet feels terminal. But across nine Hoovers and six weeks, the quiet never once meant a dead motor.
It meant a filter full of dust, a belt that had stretched an eighth of an inch too far, a spool of cord folded over on itself, or a battery that was still under warranty and nobody had checked.
What changes the outcome is knowing which machine you own before you start. A corded WindTunnel is a mechanical thing that wears and jams, and it will nearly always be a cheap part and a quarter of an hour.
A ONEPWR stick is an electronic thing that fails with a code, and once you can read that code you can tell in four minutes whether the pack or the charger has gone. The two machines wear the same badge and share almost nothing else, and every wasted afternoon I have seen started with someone reading the wrong half of a guide.
So do the three checks. Unplug it, rinse the filter, turn the brush by hand. Five of my nine machines never needed anything more than that, and yours has a fair chance of being one of them. If it is not, work down the matrix, and check the warranty date before you spend a single dollar.
Read it your way
Short on time? Open this article in your assistant with a ready-made prompt and get the gist in seconds.
Found this useful? Make us a preferred source so we show up in your Google results.
Keep reading
Related articles

Troubleshooting & Repair
Roomba Not Working? 8 Symptoms Fixed (2026 Models)
Reboot first, then match your symptom. 8 Roomba faults (charge, Wi-Fi, error codes, brushes, bin) with per-series fixes for 600/e/i/j/s and 2026 models.

Troubleshooting & Repair
How Much Does a Vacuum Repair Cost? Fix or Replace (2026)
How much does a vacuum repair cost? Usually $50–150 (up to ~$321 for central). Use the 50% rule and our brand tier to decide: fix it or replace it in 2026.

Troubleshooting & Repair
Why Won’t My Robot Vacuum Work? 6 Fixes We Tested
Why won’t my robot vacuum work? Reset it, free the wheels, clean the sensors and fix a 2.4GHz Wi-Fi snag in 5 minutes: the DIY checks that skip a repair bill.

Troubleshooting & Repair
Not Broken? Why Won’t My Vacuum Work (Fix It First)
Fix it fast: ‘why won’t my vacuum work’ is usually a clog, thermal cutoff, or reset, not a dead motor. Match your symptom to the exact fix.
The discussion
Comments
Every comment is reviewed before it goes live.