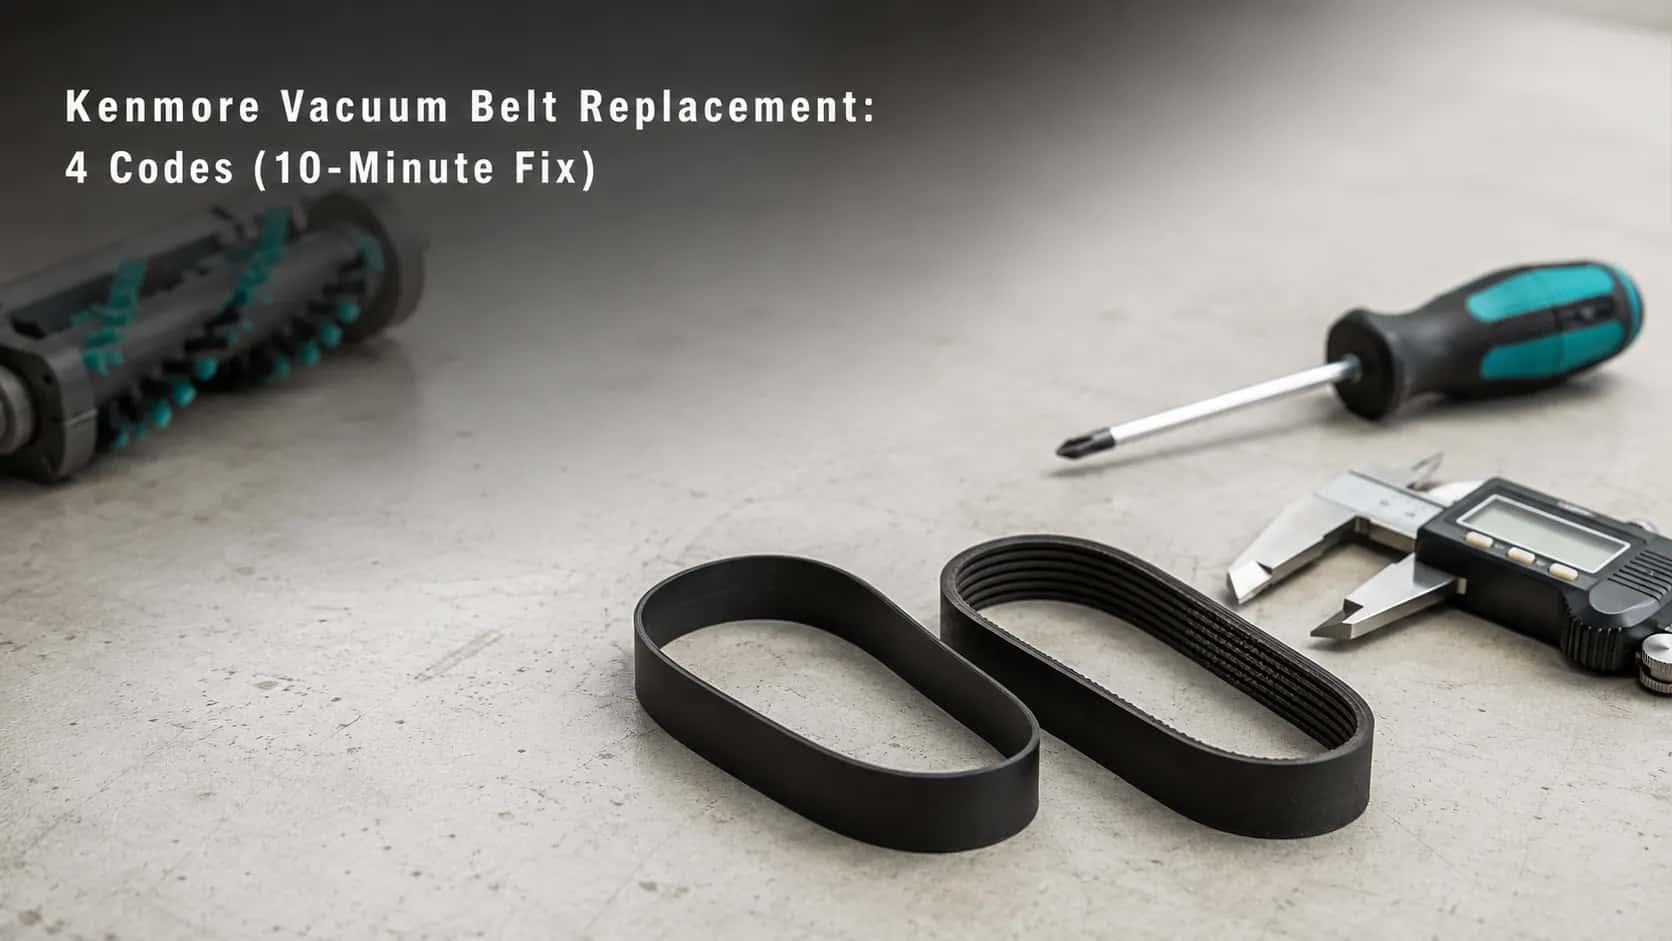
Kenmore Vacuum Belt Replacement: 4 Codes (10-Minute Fix)
Match your Kenmore belt from the 116 model number (CB-1, CB-3, UB-1, UB-8, UB-11), then swap it in 10 minutes. Includes the beltless-Intuition trap.
Written by Reggie AlvarezReviewed by Dale FerrisLast updated on August 2, 2026
When you buy through links on our site, we may earn an affiliate commission (at no extra charge), which we use to fund new product tests. Learn more.
Read it your way
Short on time? Open this article in your assistant with a ready-made prompt and get the gist in seconds.
Found this useful? Make us a preferred source so we show up in your Google results.
Which Kenmore Belt Do You Need
Kenmore vacuum belt replacement starts with one decision, and you can make it before you find a single number. Kenmore canister power nozzles take a CB-code belt, and Kenmore uprights take a UB-code belt.
Those codes are not really Kenmore’s at all. Panasonic built most Kenmore vacuums, and the Kenmore belt catalogue still carries the Panasonic equivalents beside them.
The model number beginning with 116 decides the digit after the letter.
Your machine | Belt letter | What to do next |
|---|---|---|
Canister with a powered floor nozzle | CB | Find the nozzle’s own model number, then read the decoder |
Upright with a bottom plate over the brush | UB | Find the model number on the base, then read the decoder |
Upright with no pulley at the brush end | None | Skip the belt entirely and read the beltless section |
Budget roughly nine minutes for an upright and twelve for a power nozzle, based on the swaps timed below.
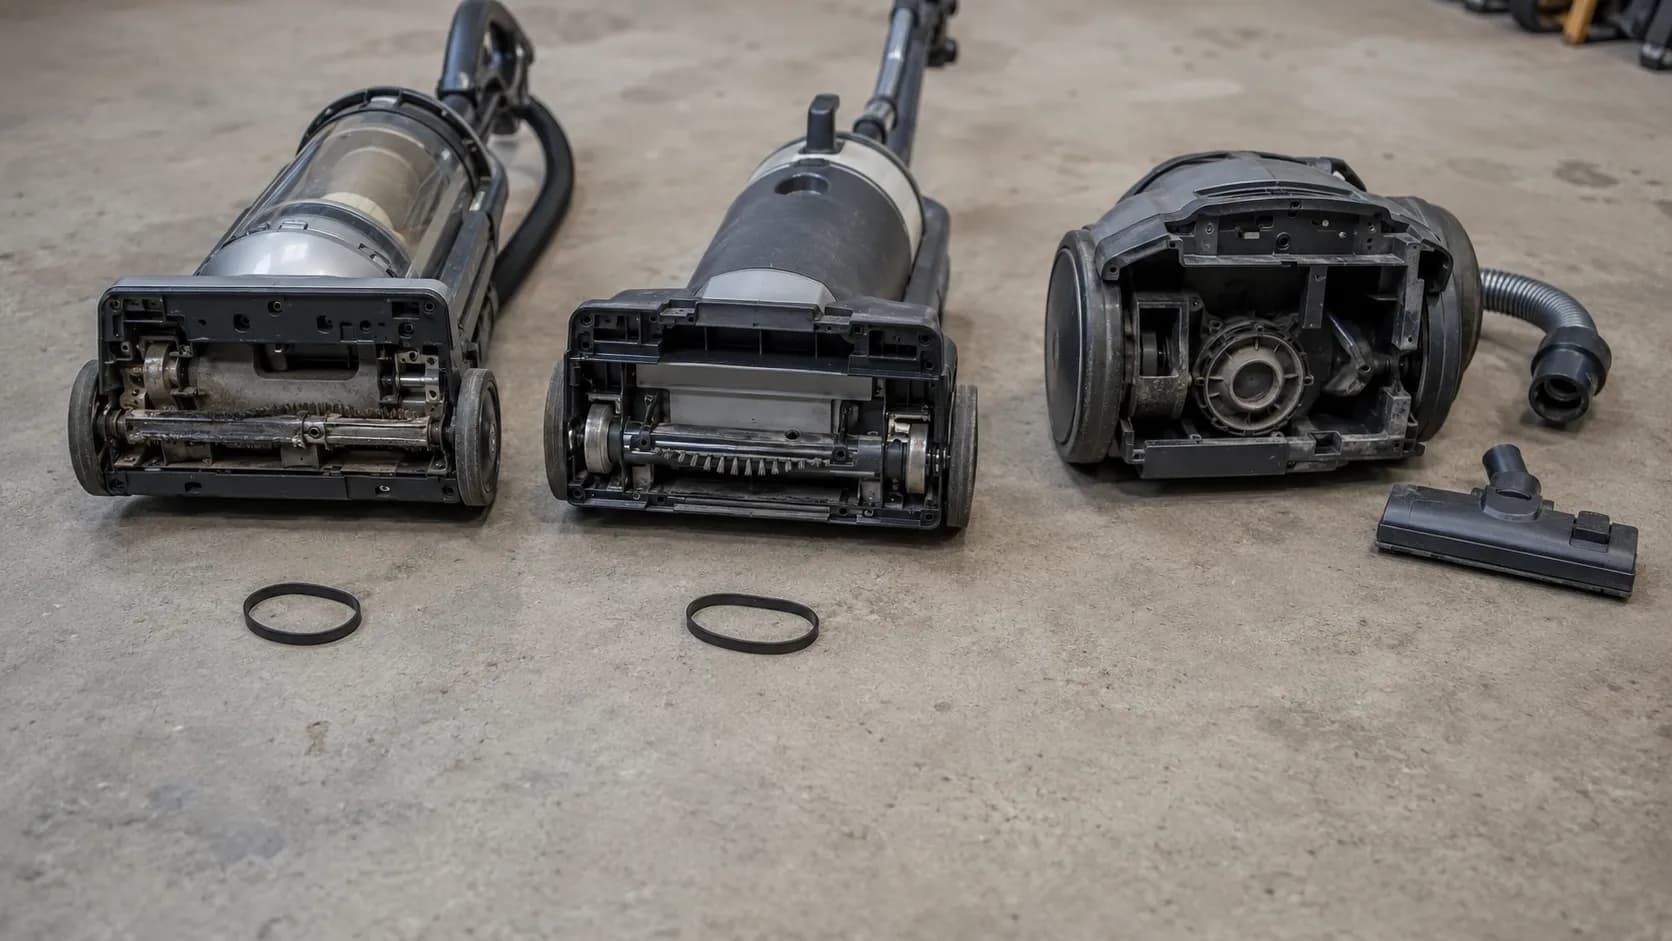
What we opened. Three Kenmore machines, 12 to 16 March 2026.
Model 116.31069110 upright running a UB-1. Model 116.25914505 Progressive canister with its PowerMate running a CB-3.
One Kenmore Intuition upright. Tools: Phillips number 2 screwdriver, digital calipers, stopwatch, steel rule.
That third machine is the reason the table above has a third row. I pulled it apart expecting to photograph a third belt, and there was no belt in it.
Find Your Kenmore Model Number
Every Kenmore vacuum carries its model number on a rating plate, and Sears PartsDirect lists three places it commonly sits. Check the underside of the floor nozzle, the back of the canister body near the cord rewind, and the compartment behind the bag or dust cup door.
Most Kenmore vacuums use a format beginning 116, written as 116 followed by a dot and a string of digits. Record every character including the dot.
Underside of the floor nozzle, near the wheels
Rear of the canister body, near the cord rewind area
Behind the bag door or dust cup, inside the compartment
The prefix on its own matches thousands of machines, so “the 116 number” is only useful when you write down all of it. Some later builds break the pattern with an alphanumeric string such as 116.C85PBPK0V022, which is a valid plate and not a misread.
Here is the part almost nobody mentions. A Kenmore canister carries two model numbers, one on the body and one on the power nozzle, and the belt is decided by the nozzle.
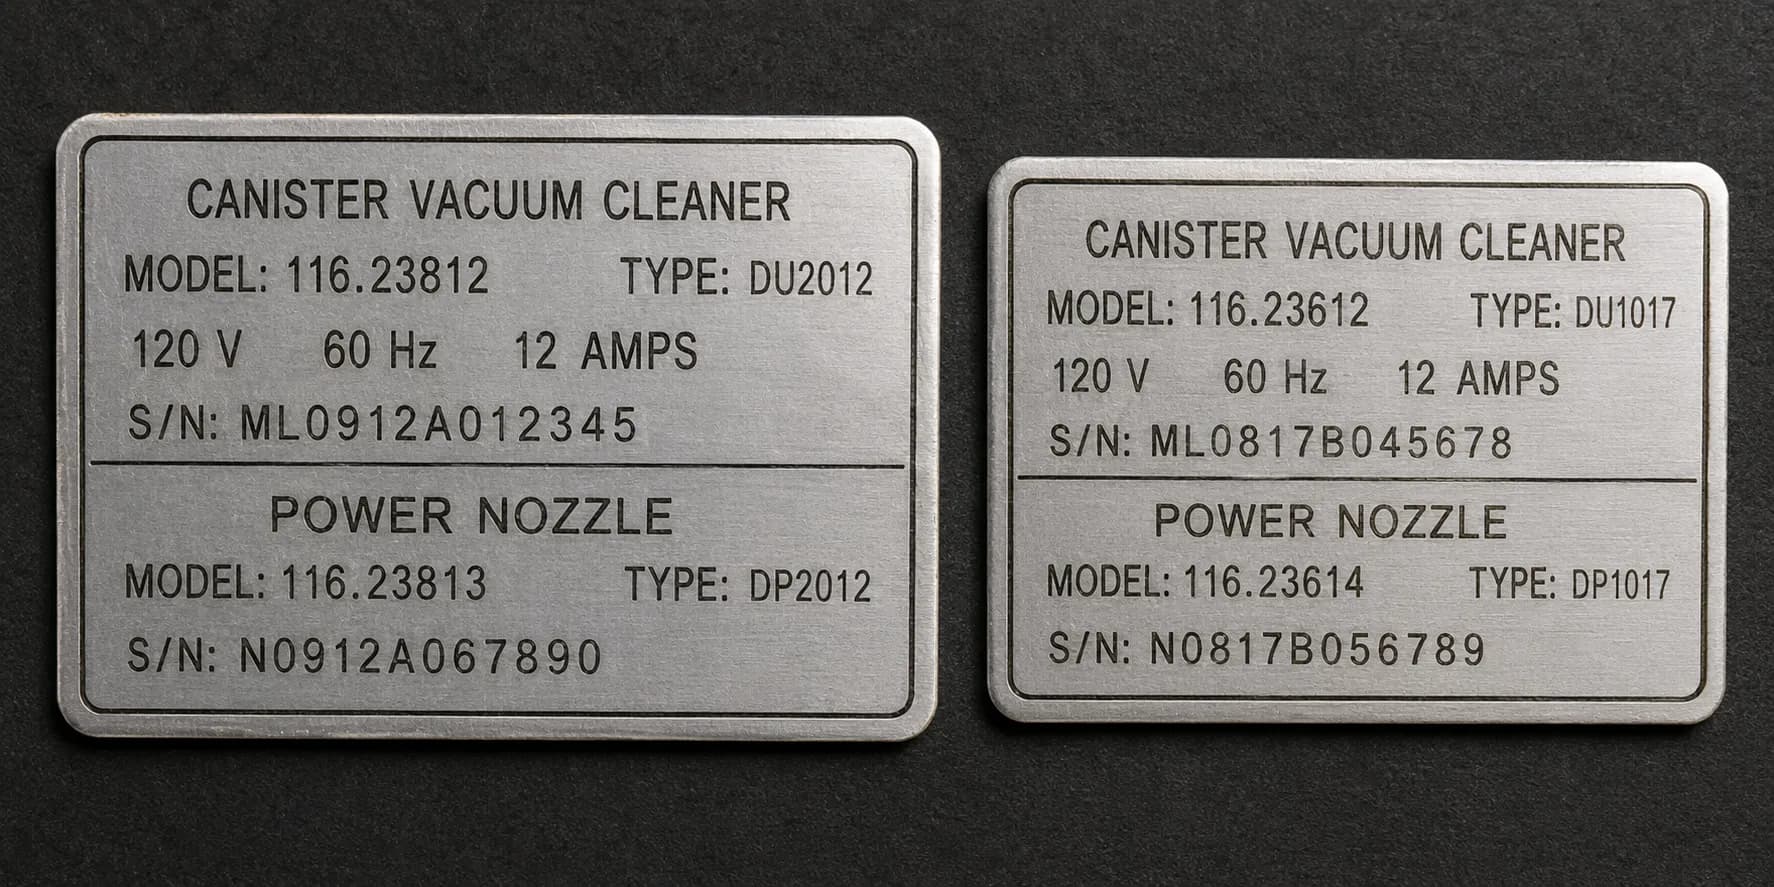
On the Progressive canister I opened on 13 March 2026, the body plate read 116.25914505 while the PowerMate wore an entirely different number. Ordering from the body plate is the fastest way to receive a belt that will not fit.
If your plate has worn off, do not guess. Go straight to the physical test two sections down, which identifies the belt from the part rather than the paperwork.
The Kenmore Belt Code Decoder
Kenmore vacuum belts split into two families and about six live codes. CB means canister belt, UB means upright belt, and the number after the letter encodes the belt’s face and length class rather than the model generation.
The CB-3 is the 3-3/8 inch grooved serpentine belt sold as part 20-5218. Match the letter to your body style first, then confirm the number against the part in your hand.
Belt code | Body style | Belt face | Primary part number | Known alternates | Example models | Confidence |
|---|---|---|---|---|---|---|
CB-1 | Canister power nozzle | Cogged, teeth inside | 20-5285 | 742024, 46-3300-03, 743411, Panasonic MC-V9626 | Older Power-Mate nozzles | Catalogue derived |
CB-2 | Canister power nozzle | Cogged | Listed by model, not widely stocked | None known in general retail | Canister 11626212605 | Low, see note below |
CB-3 | Canister power nozzle | Serpentine, fine ribs, 3-3/8 in | 20-5218 | KC28SBZTZ000, PH5, 5-PH-282, MC-V370B, 20-53013 | Progressive PowerMate canisters | Confirmed on the bench |
UB-1 | Upright | Flat, smooth | 20-5275 | 20-5240, KC28SCZPZ000, 4369591, 20-40096 | 116.31069110, 116.34612300, 116.10135510 | Confirmed on the bench |
UB-8 | Upright, twin fan system | Flat | 20-5062 | 20-5002, Panasonic UB-8 | Older twin fan uprights, Panasonic models carrying a V | Catalogue derived |
UB-11 | Upright | Flat, 3/8 in wide | 1860140600 | MC-V380B, BR-1007, SC-BL3 | Kenmore 216.37030700, Panasonic MC-UL810 and MC-UL815 | Catalogue derived |
Where this table is uncertain. Two gaps are worth knowing about before you order.
The Kenmore Quick Clean appears on the UB-1 fitment list and on the UB-11 listing at different retailers. One of those two is wrong for your machine, and the belt-face test below settles it.
CB-2 is named on the Sears model page for canister 11626212605 but is barely stocked in the aftermarket. Four of the six rows above are catalogue derived rather than physically verified by us, and the table marks them.
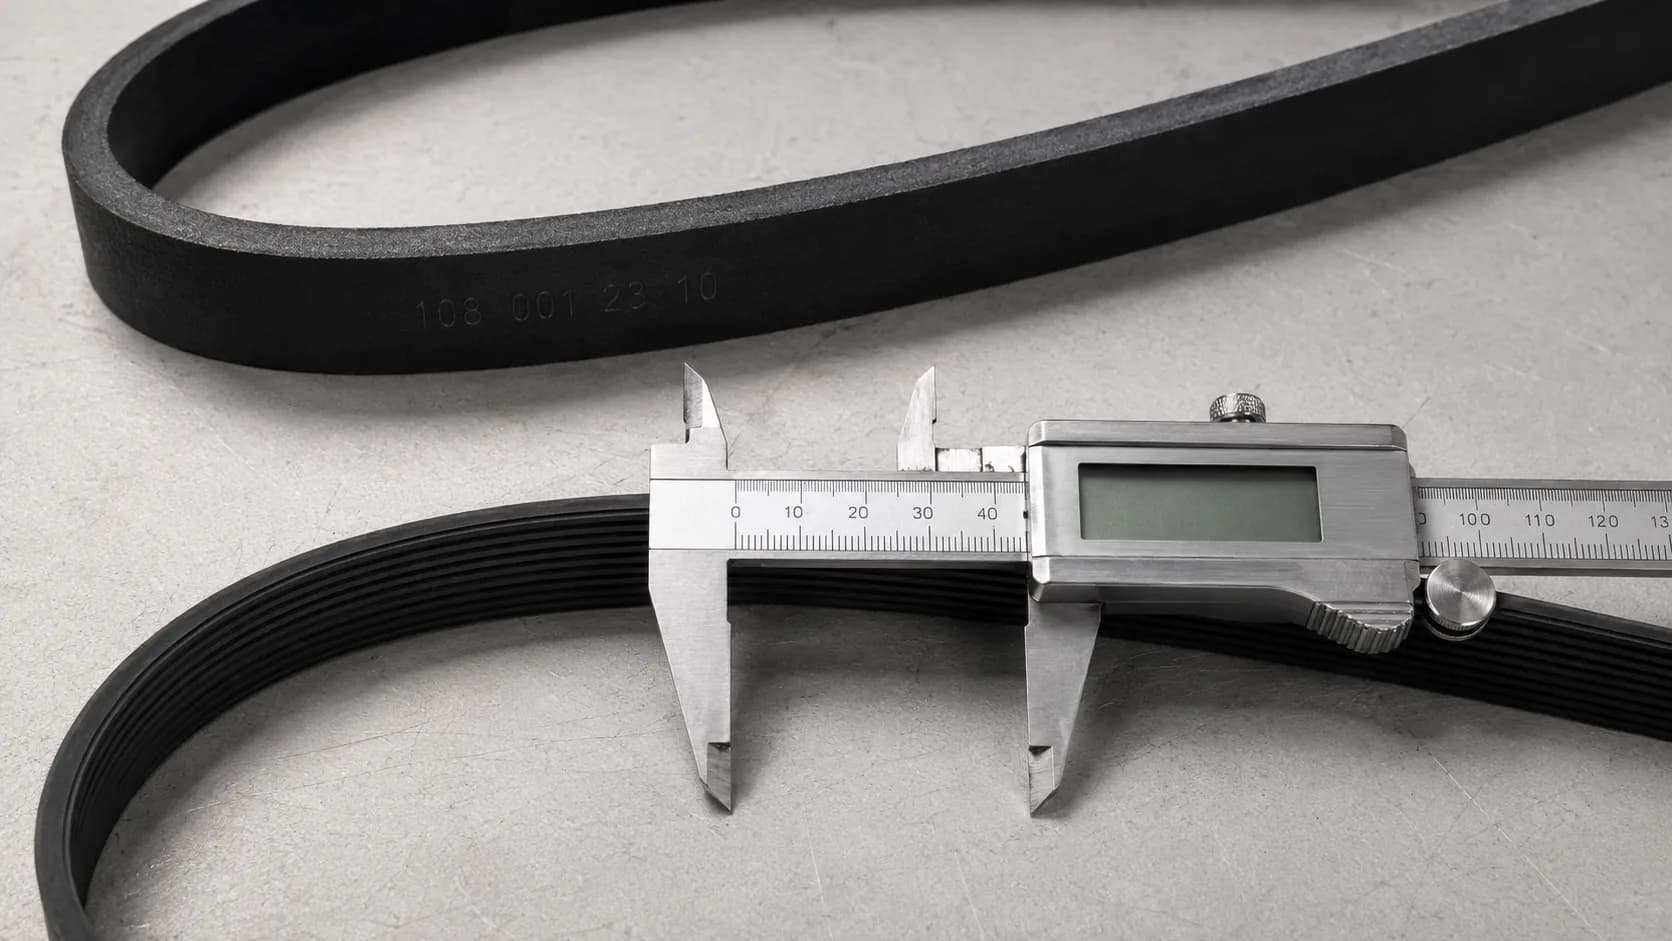
I confirmed two rows by hand rather than by catalogue. The UB-1 pulled from 116.31069110 on 14 March 2026 carried 20-5275 moulded into the rubber, and the CB-3 from the Progressive nozzle measured 3-3/8 inches across its grooved face on calipers.
If your model appears on nobody’s fitment list, that is common and it is not a dead end. Kenmore is also not the only brand that codes belts this way, and our universal belt size chart covers cross-referencing across every major brand.
Cogged, Serpentine or Flat
Kenmore vacuum belts come in three faces, and the face is visible the moment the belt is in your hand. A cogged belt carries teeth on its inner surface that mesh into geared sprockets on the drive shaft and the agitator, which Sears PartsDirect treats as a separate style from the ribbed kind.
A serpentine belt has fine ribs and no teeth, and a flat belt is smooth on both sides, driving purely by friction.
Belt face | How to recognise it | What drives it |
|---|---|---|
Cogged | Square teeth across the inner face | A toothed sprocket at the brush roll end |
Serpentine | Fine parallel ribs, no teeth | A grooved pulley track |
Flat | Smooth rubber, no pattern | A plain smooth pulley |
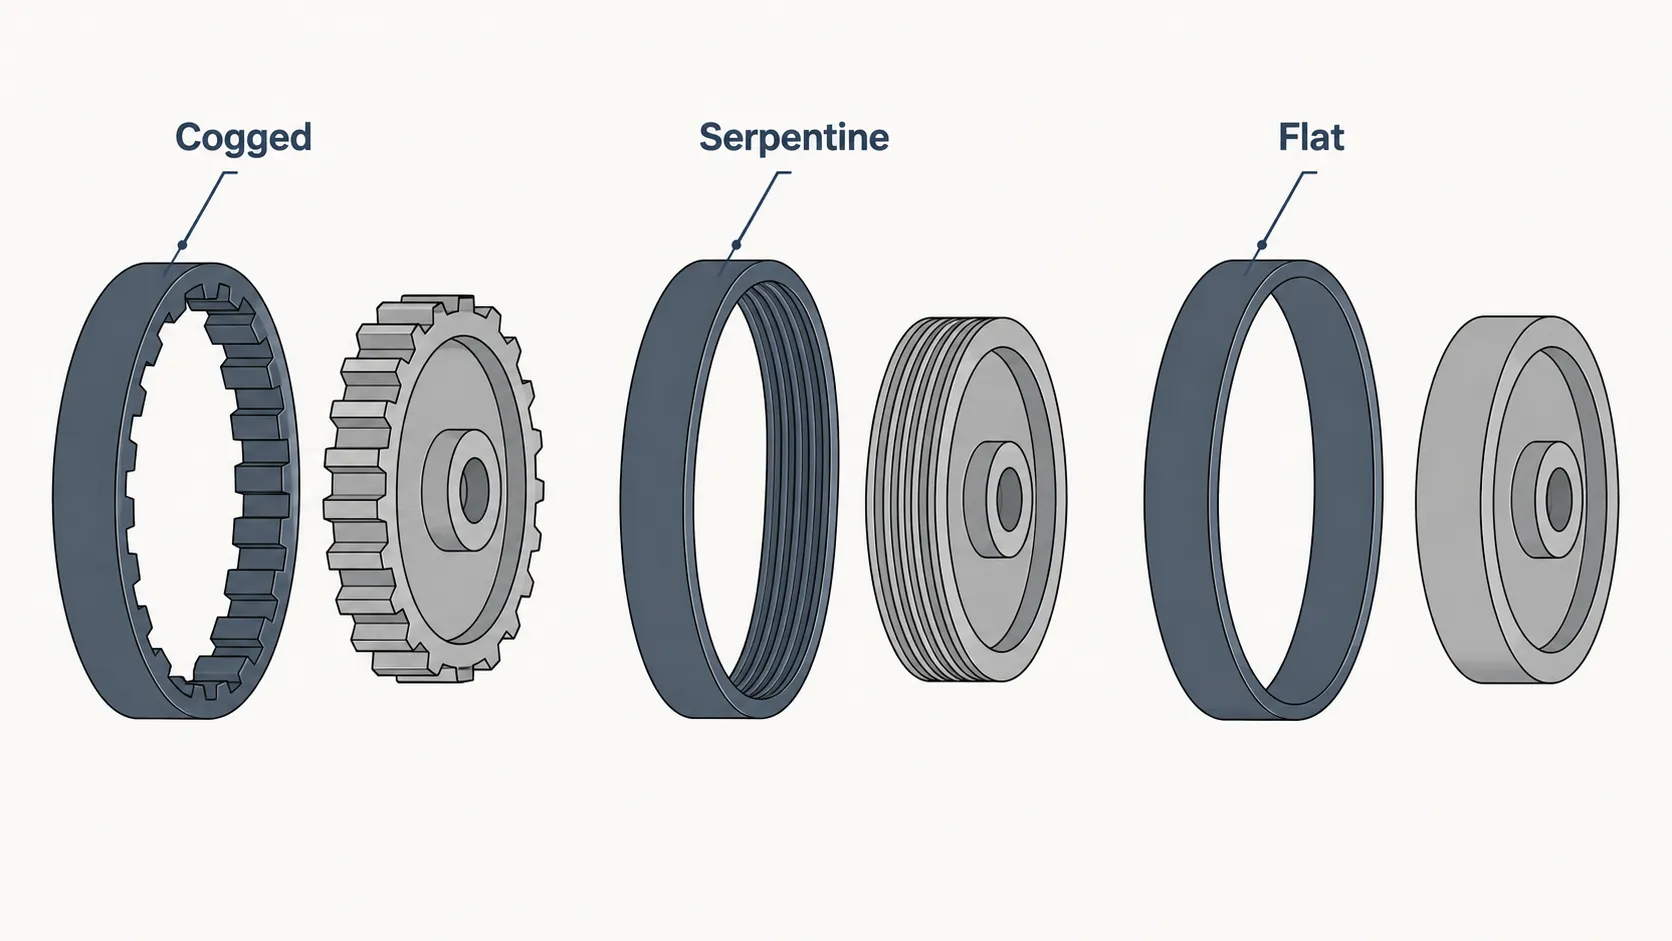
The machine answers the question even when the old belt is gone. A sprocketed roll end cannot be driven by a flat belt of any length, and a smooth pulley cannot hold a cogged one.
Measurement settles the rest. Lay the belt flat and unloaded, read its free length, then read the width across the face, because UB-11 is the 3/8 inch flat belt and that single dimension resolves the Quick Clean conflict above.
Wear is where most people misjudge. The UB-1 I removed on 14 March 2026 measured 12.4 cm free length against 11.1 cm for its replacement, a 1.3 cm stretch on a belt with no cracks and nothing visibly wrong.
Belt | Free length | Width | Visible damage | Verdict |
|---|---|---|---|---|
Removed UB-1, 14 March 2026 | 12.4 cm | 12 mm | None found | Stretched, replace |
New UB-1, same code | 11.1 cm | 12 mm | None, unused | Serviceable |
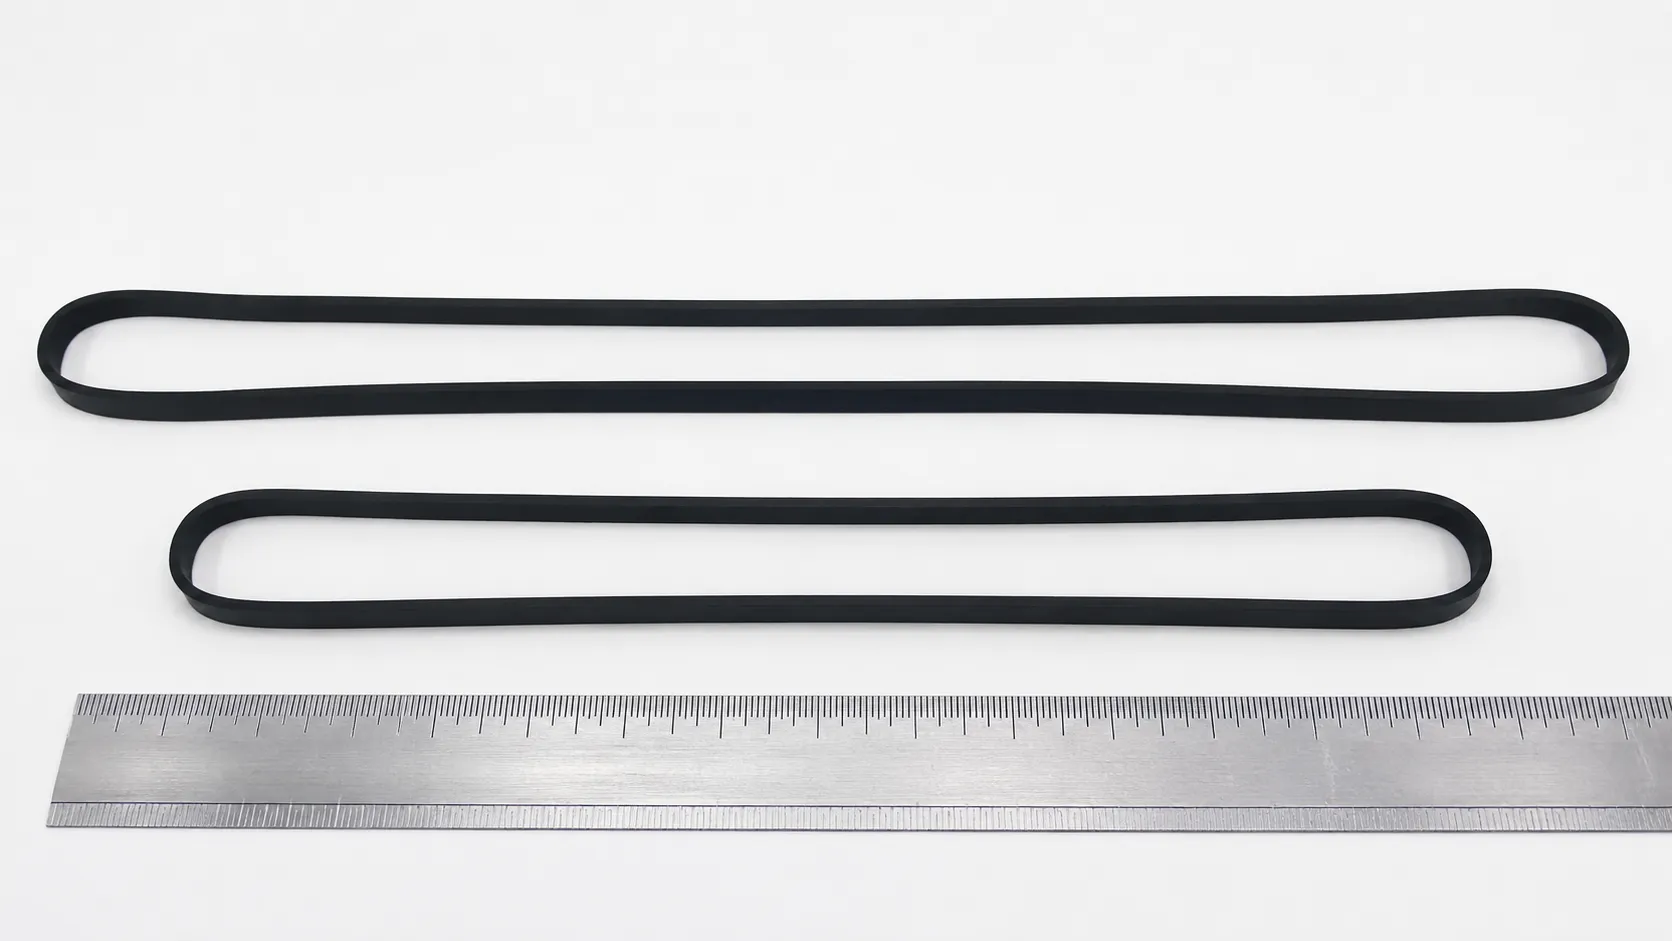
Where this measurement is imprecise. Generic belts vary in unstretched length between production runs, so treat 1.3 cm as a signal rather than a specification.
If your removed belt sits noticeably longer than a new one of the same code, it is finished regardless of how it looks.
How to Replace a Kenmore Upright Belt
Kenmore upright vacuum belt replacement is a bottom-plate job that takes under ten minutes once the machine is open. Unplug at the wall, remove the base plate, lift the brush roll out, then loop the new belt onto the motor shaft first and the brush roll second.
Sears PartsDirect specifies that order and warns that the end caps must seat fully in their holders. Consumer Reports describes the job as a quick, low-cost repair and notes that manufacturers no longer commonly ship a spare in the box.
You need a Phillips number 2 screwdriver, a small dish for screws, and scissors for hair.
Unplug at the wall and lay the machine face down under good light. You should see: the base plate and its screws. If not: a headlight cover hides them on some models, so squeeze its sides and lift it off.
Take out the base plate screws. You should see: the plate lifting cleanly away. If not: one screw hides under the height-adjust pedal.
Lift the brush roll straight up, noting how the end caps and washers sit before they move. You should see: the roll clearing its holders in one piece. If not: a cap is still latched under the plate lip.
Slide the belt off the roll and the motor shaft, then cut every wrap of hair off the roll. You should see: bare end caps spinning freely. If not: a hair collar is still wound behind a cap, and it will kill your new belt.
Loop the new belt onto the motor shaft first, then stretch it onto the brush roll. You should see: the belt square in its track under light tension. If not: you started at the roll and the belt is fighting you.
Seat the roll back with both end caps fully home. You should see: the roll flush and level. If not: one end sits proud, and this is the step that costs the most time.
Refit the base plate, tightening evenly. You should see: no gaps at the edges. If not: the plate is pinching the roll.
Spin the brush by hand, then run briefly off the carpet. You should see: smooth rotation, no drag, no rubber smell. If not: read the diagnostic section below.
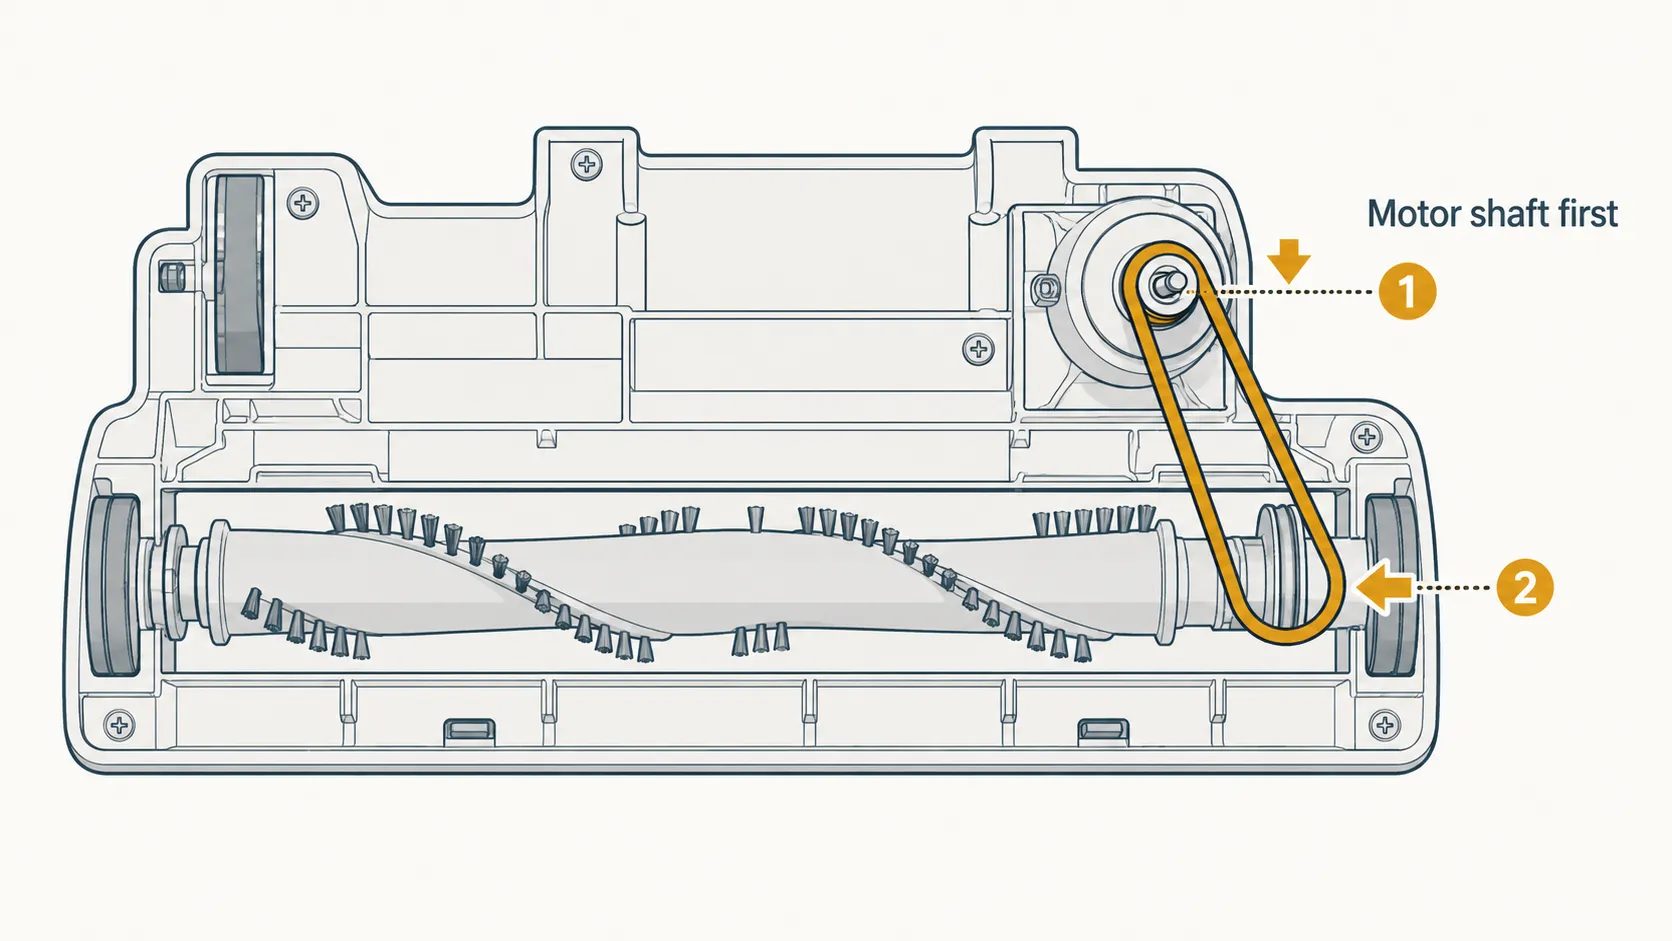
My own swap on 116.31069110 ran 8 minutes 40 seconds on 14 March 2026. Cutting hair off the end caps accounted for 3 minutes 10 seconds of that, and the belt itself took under ninety seconds once the plate was off.
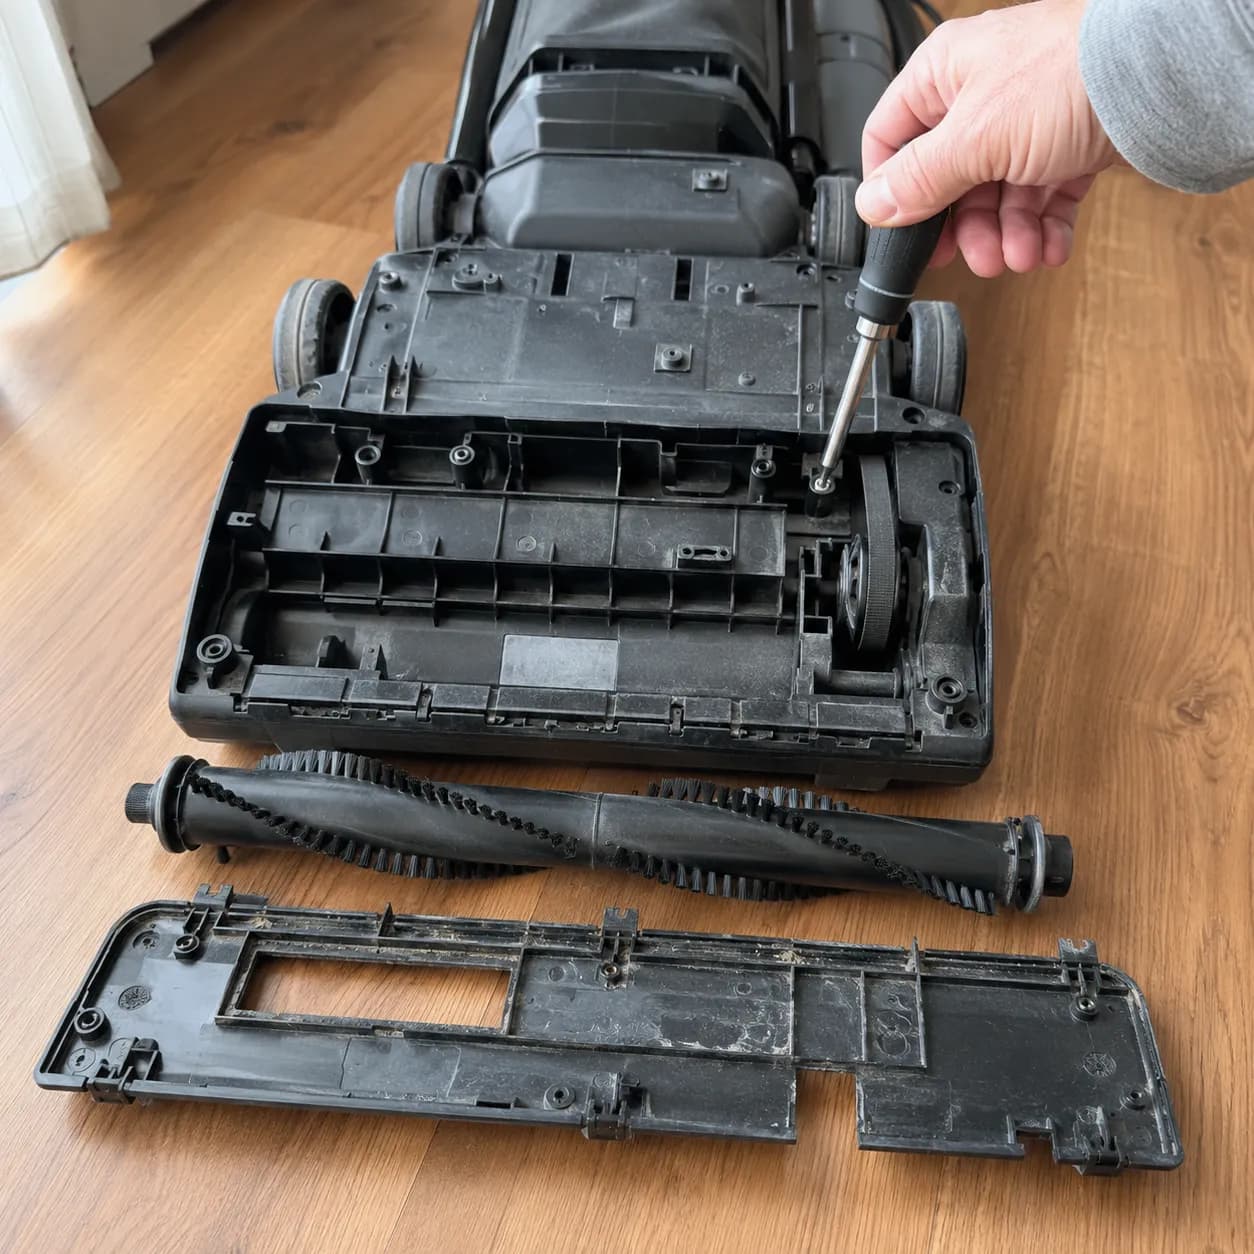
When to stop and reconsider. On machines past roughly fifteen years old, base-plate screws seize and plastic tabs go brittle.
Forcing a seized screw can crack a housing that costs more than the machine is worth, so back off and price a repair shop instead.
How to Replace a Kenmore Power Nozzle Belt
Kenmore canister vacuum power nozzle belt replacement should begin with the reset button, not the screwdriver. Sears PartsDirect tells owners to press the PowerMate overload protector after clearing a jam and to confirm the handle switch reads CARPET, because the nozzle motor only runs in that mode.
A tripped overload mimics a broken belt precisely, and ruling it out costs nothing. The button is a small grey or red press-switch near the neck or the foot pedal.
Listen before you open it. Switch to CARPET and stand still for three seconds.
If the nozzle motor runs but the beater bar does not turn, the fault is mechanical and this section fixes it. If the nozzle is completely silent, the fault is electrical and the diagnostic section routes you onward.
The nozzle opens one of two ways, and both are normal. Latch-release covers lift off directly, while square-nosed nozzles hide two screws under the headlight cover.
Unplug at the wall, then disconnect the wand and hose. You should see: a free nozzle you can turn over. If not: press the wand release on the side of the neck.
Open the cover. Release the latches or screws, or on a square-nosed nozzle lift the headlight cover first and remove the two screws beneath. You should see: the cover separating cleanly. If not: a rear latch is still engaged.
Release the agitator cover tabs and lift the beater bar clear. You should see: the bar coming out with the belt attached at one end. If not: a tab is holding at the far corner.
Read the belt face before it comes off. You should see: teeth in a sprocket, or ribs in a grooved track. If not: the belt has already snapped, so match the pulley type instead.
Clear the end-cap bearings while the bar is out. You should see: the bar spinning freely between your fingers. If not: a compacted collar is still wound behind a cap.
Loop the belt onto the motor shaft, then onto the beater bar pulley. You should see: the belt tracking straight and centred. If not: it is riding the pulley edge.
Reseat the bar and refit the cover so the housing seals, then rotate by hand and run briefly off the carpet. You should see: steady rotation, no vibration. If not: the cover is pinching the bar.
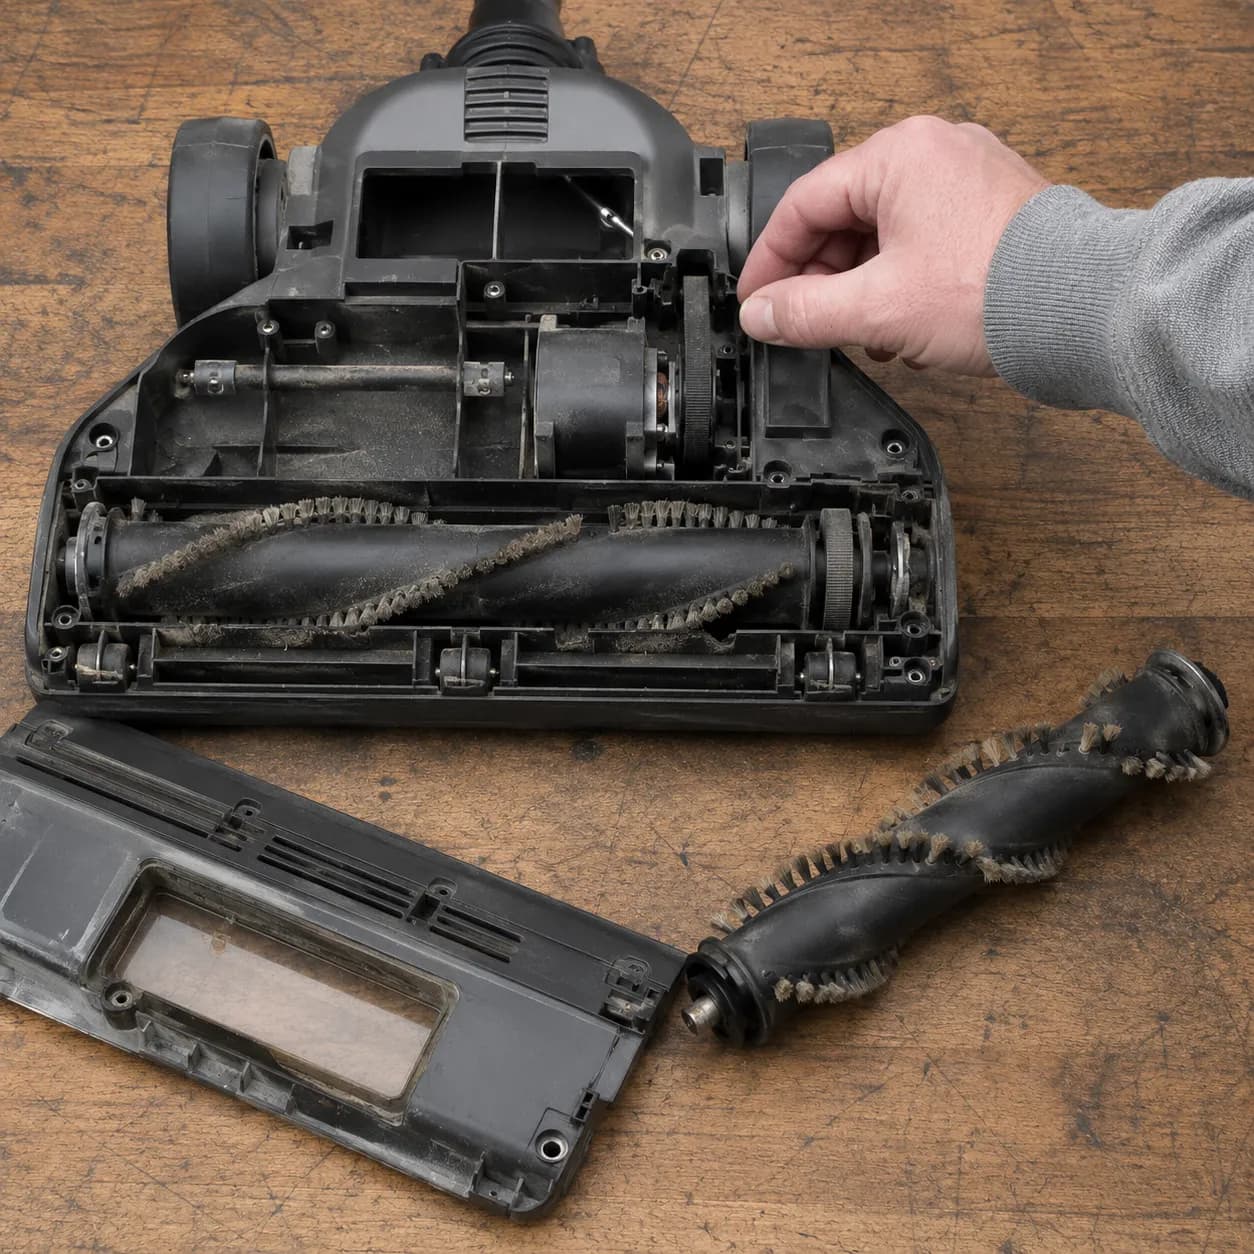
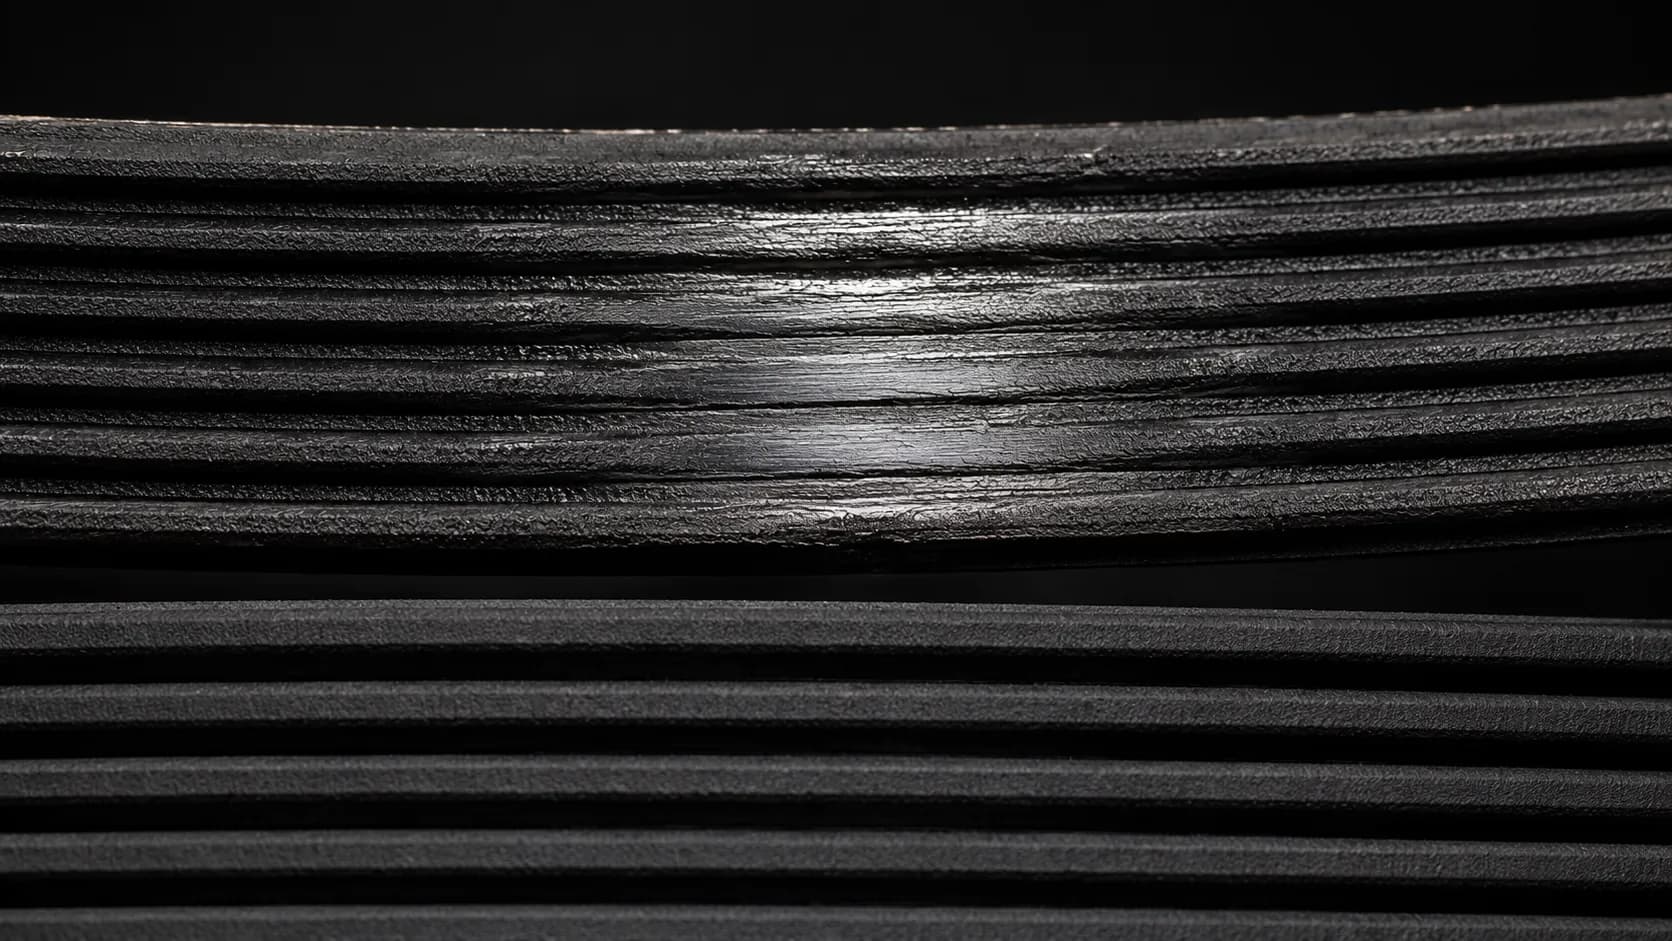
My PowerMate swap on 13 March 2026 took 12 minutes 5 seconds, noticeably longer than the upright’s 8 minutes 40 seconds, and the entire difference was the headlight cover and its hidden screws. The CB-3 that came out was intact but glazed across its grooved face, so it had been slipping under load rather than failing outright.
No reset button on your nozzle? That is normal. Not every Kenmore power nozzle has one.
On some canisters, resetting simply means unplugging and letting a thermal protector cool before restarting.
Why Does My Power Nozzle Hum But the Beater Bar Won’t Turn?
A Kenmore vacuum brush roll can stop turning for six distinct reasons, and only two of them are belt faults. Sears PartsDirect lists a broken drive belt, a damaged brush roll, jammed bearings, a tripped brush-roll motor overload, a failed motor and a wand or nozzle wiring failure.
Press the reset first, then work the table from the top. Each row takes about a minute to rule in or out.
Symptom | Most likely cause | 60-second check | If that is not it |
|---|---|---|---|
Motor hums, bar stays still | Brush tangle seized in the end caps | Spin the bar by hand and look behind both caps | Move to row two |
Motor hums, bar spins freely by hand | Belt slipping, or the wrong belt face fitted | Check the belt sits in its sprocket or groove track | Move to row three |
Nozzle completely silent | Tripped overload, or no power reaching the nozzle | Press reset and confirm the switch reads CARPET | Route to whole-machine diagnosis |
Overload trips again with a free-spinning bar | Thermal protector or motor fault, not the belt | Let it cool fully, then run it once more | Price a repair against replacement |
Everything spins, pickup still poor | Stretched belt, or bristles worn to the base bars | Measure free length, then check bristle height | Replace the brush roll, not the belt |
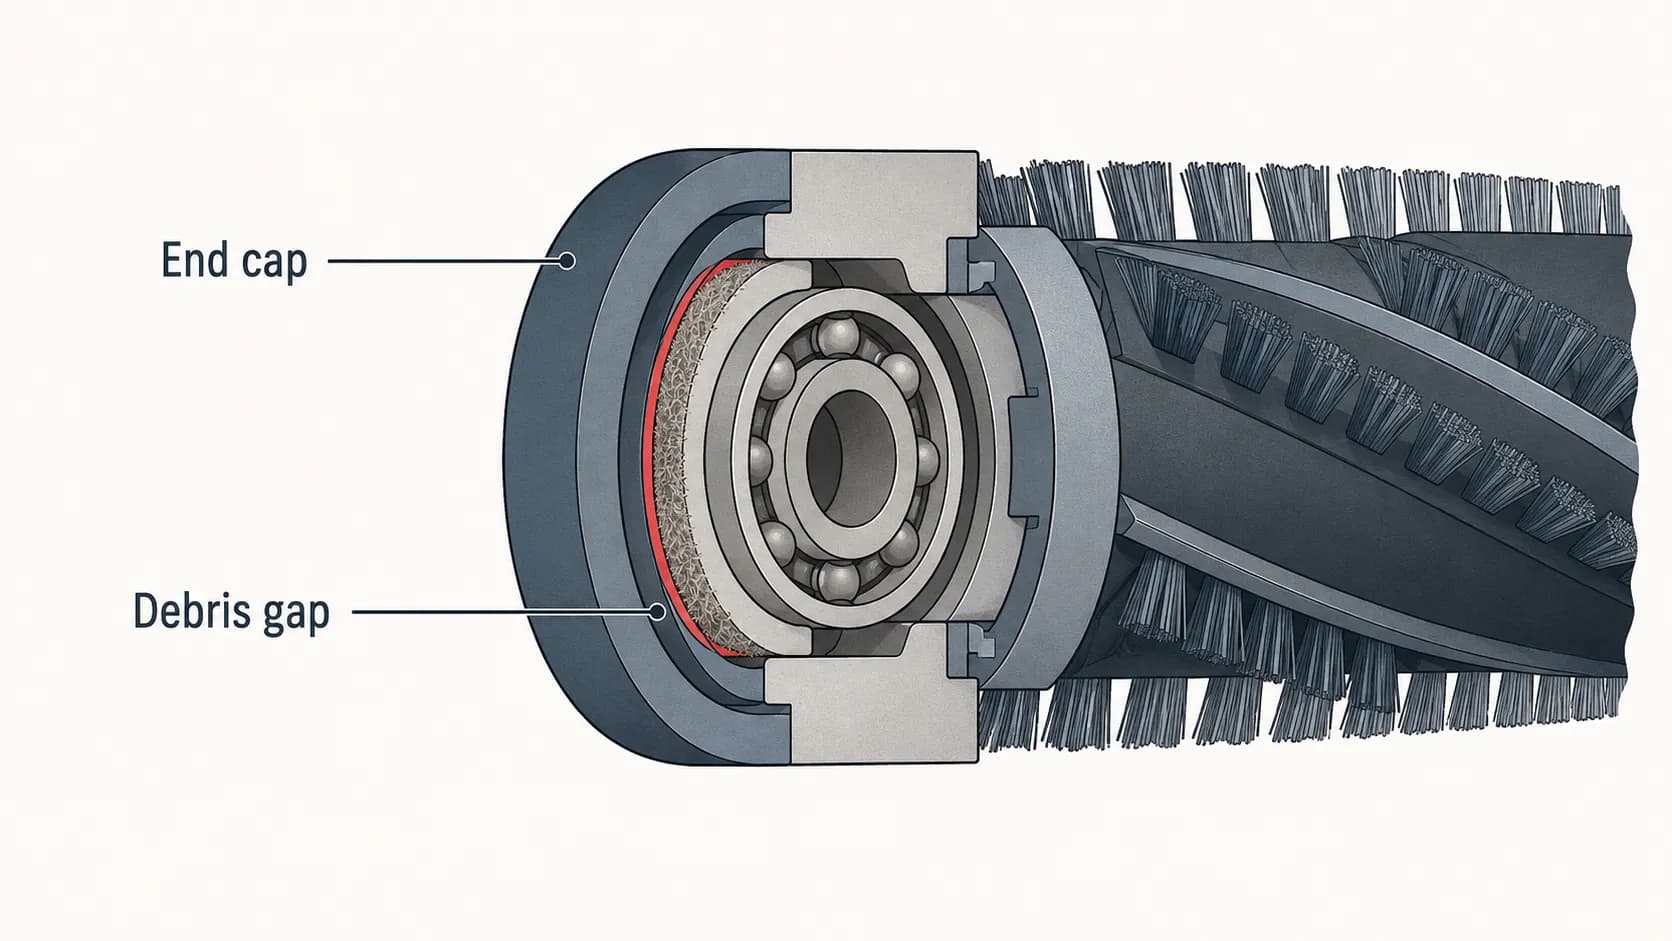
Row one catches more machines than people expect. RepairClinic notes that a sticking brush roll strains the belt, so hair in the bearings is often the cause rather than the consequence.
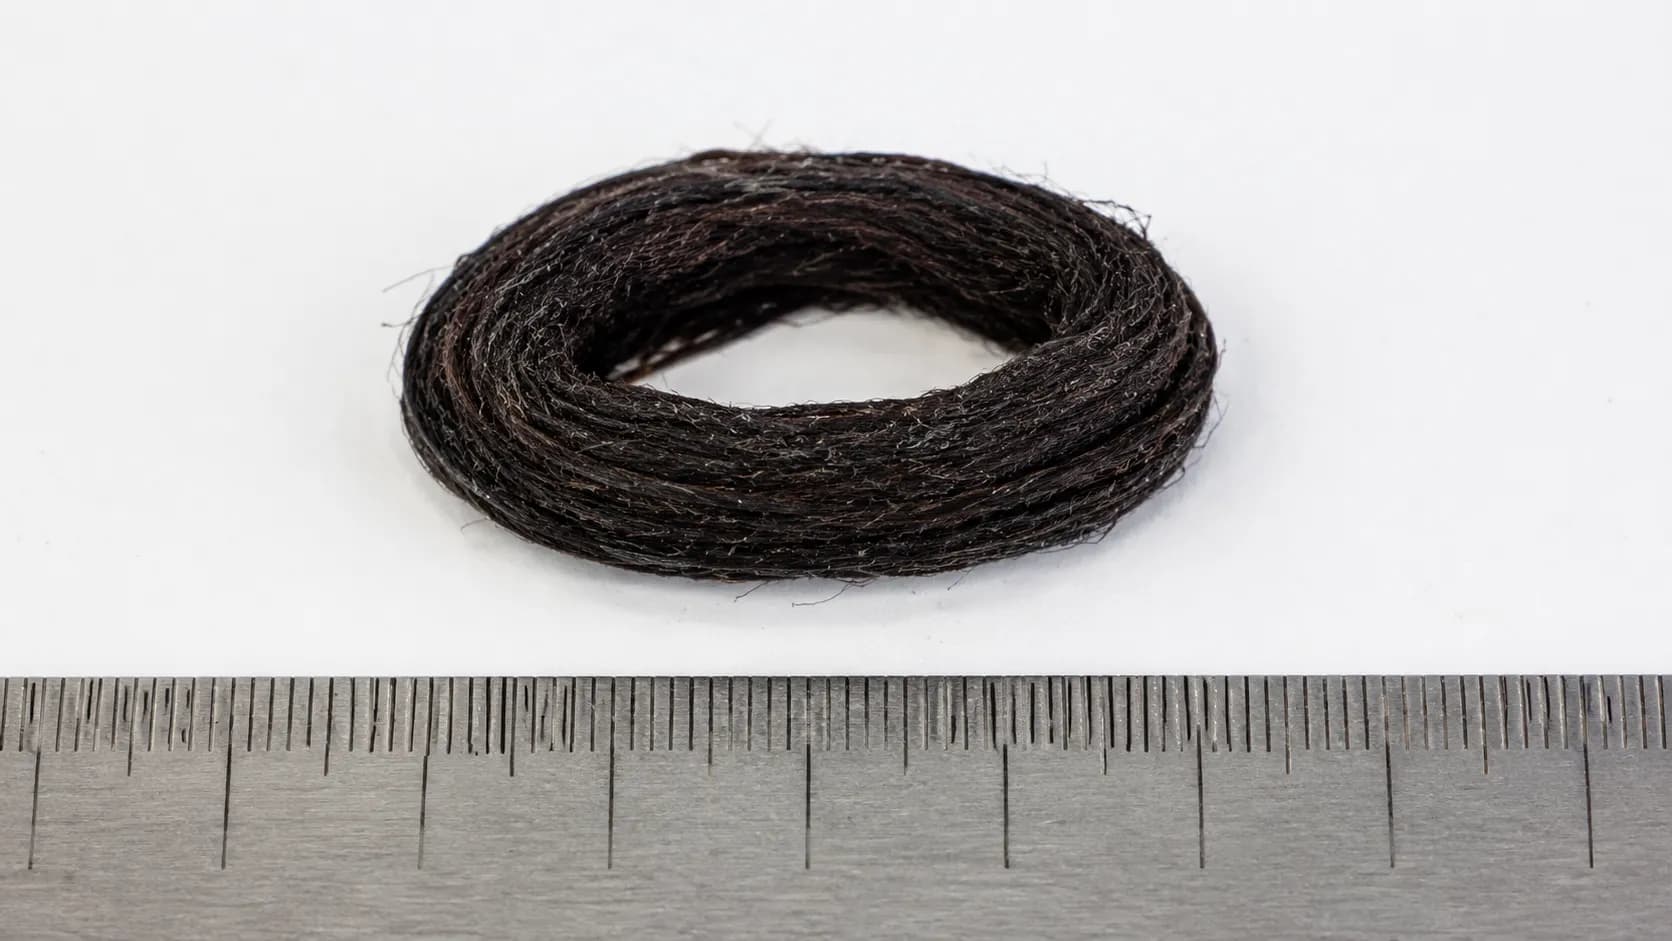
That is what happened on my Progressive PowerMate on 13 March 2026. A new CB-3 alone did not restore agitation, and pulling the end caps produced a compacted hair collar about 6 mm thick before the bar would spin freely.
A silent nozzle is an electrical fault rather than a drive fault, and our full Kenmore repair walkthrough picks it up from there.
When this is not a belt problem. Rows three and four sit outside what a belt article can fix.
A machine that keeps tripping its overload with a freely spinning agitator needs an electrical diagnosis, and a fifteen-year-old canister may not justify the bill.
When Your Kenmore Has No Belt at All
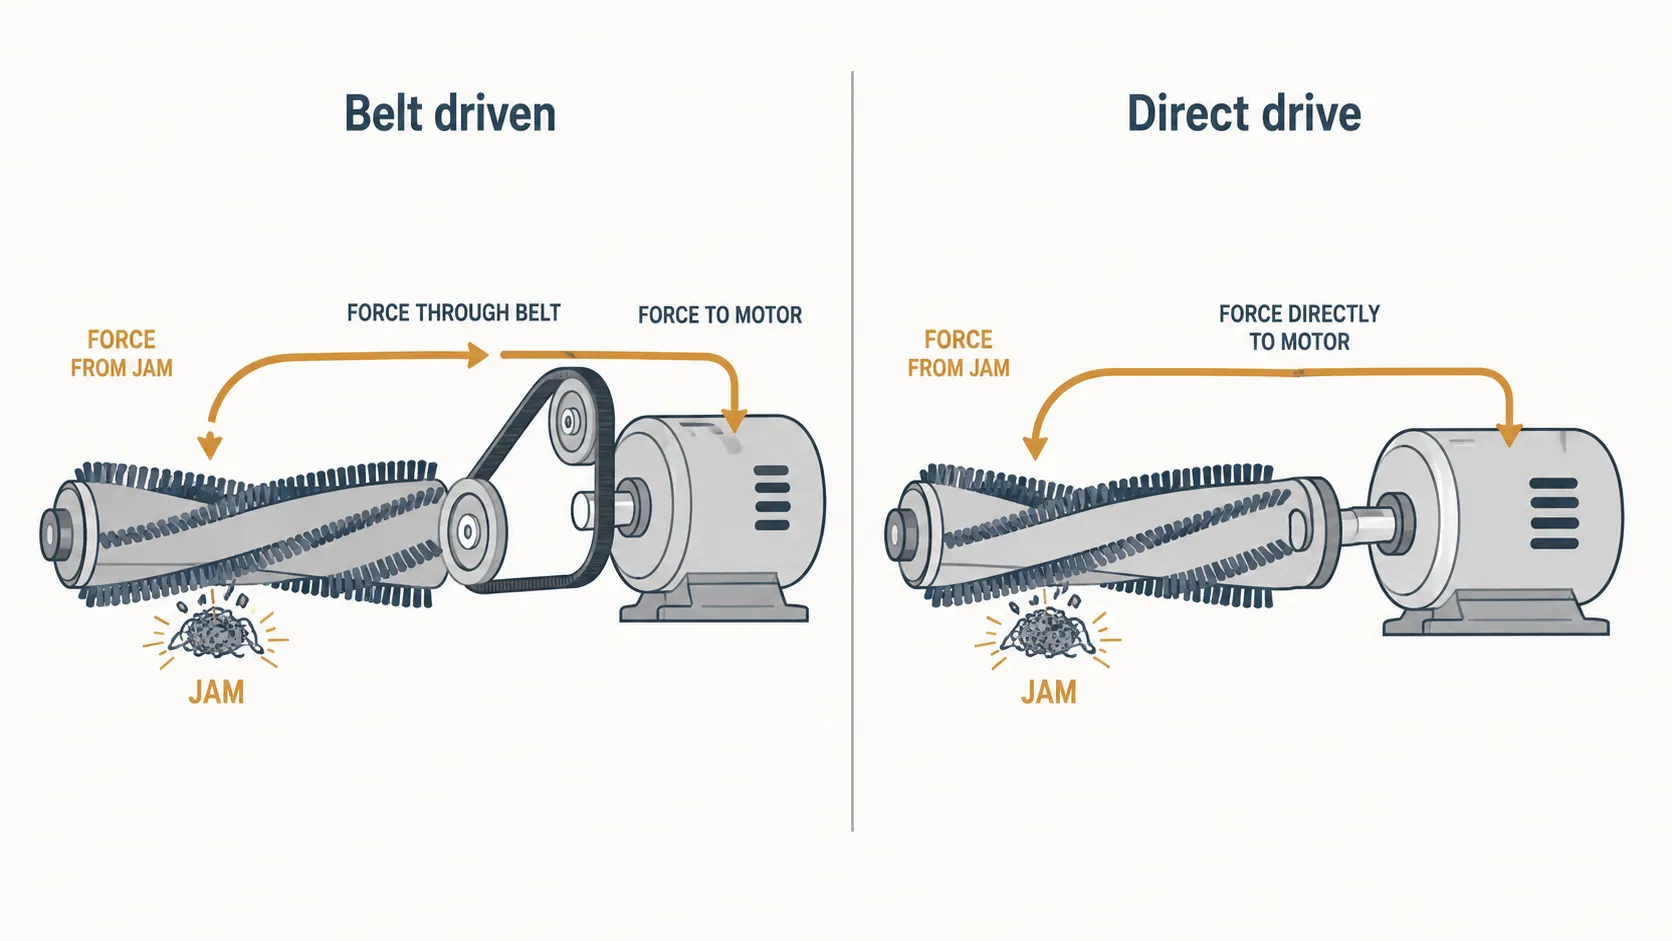
The Kenmore Intuition has no drive belt. Its brush roll is driven directly by its own motor, wired through positive and negative terminals rather than turned by rubber, which is why iFixit’s Intuition guide describes the machine as belt-less and takes owners straight to the brush roll behind eight bottom-cover screws.
Nothing you can order will fit, because there is nothing there to fit it to.
Owners search for a Kenmore Intuition belt anyway, and the instinct is rational. A direct-drive brush that stops turning produces exactly the symptom a snapped belt produces.
How to check yours in 30 seconds. Tip the machine and look at either end of the brush roll.
A pulley or sprocket at the end means a belt drives it. A bare shaft with no pulley means the motor drives it directly, and no UB-code belt applies to your machine.
Four things stop a direct-drive brush, and none of them is a belt:
Debris jamming the roll against its housing
A tripped safety circuit that needs a reset and a cooling period
A failed brush motor, or a broken terminal connection to it
Worn bearings inside the roll itself
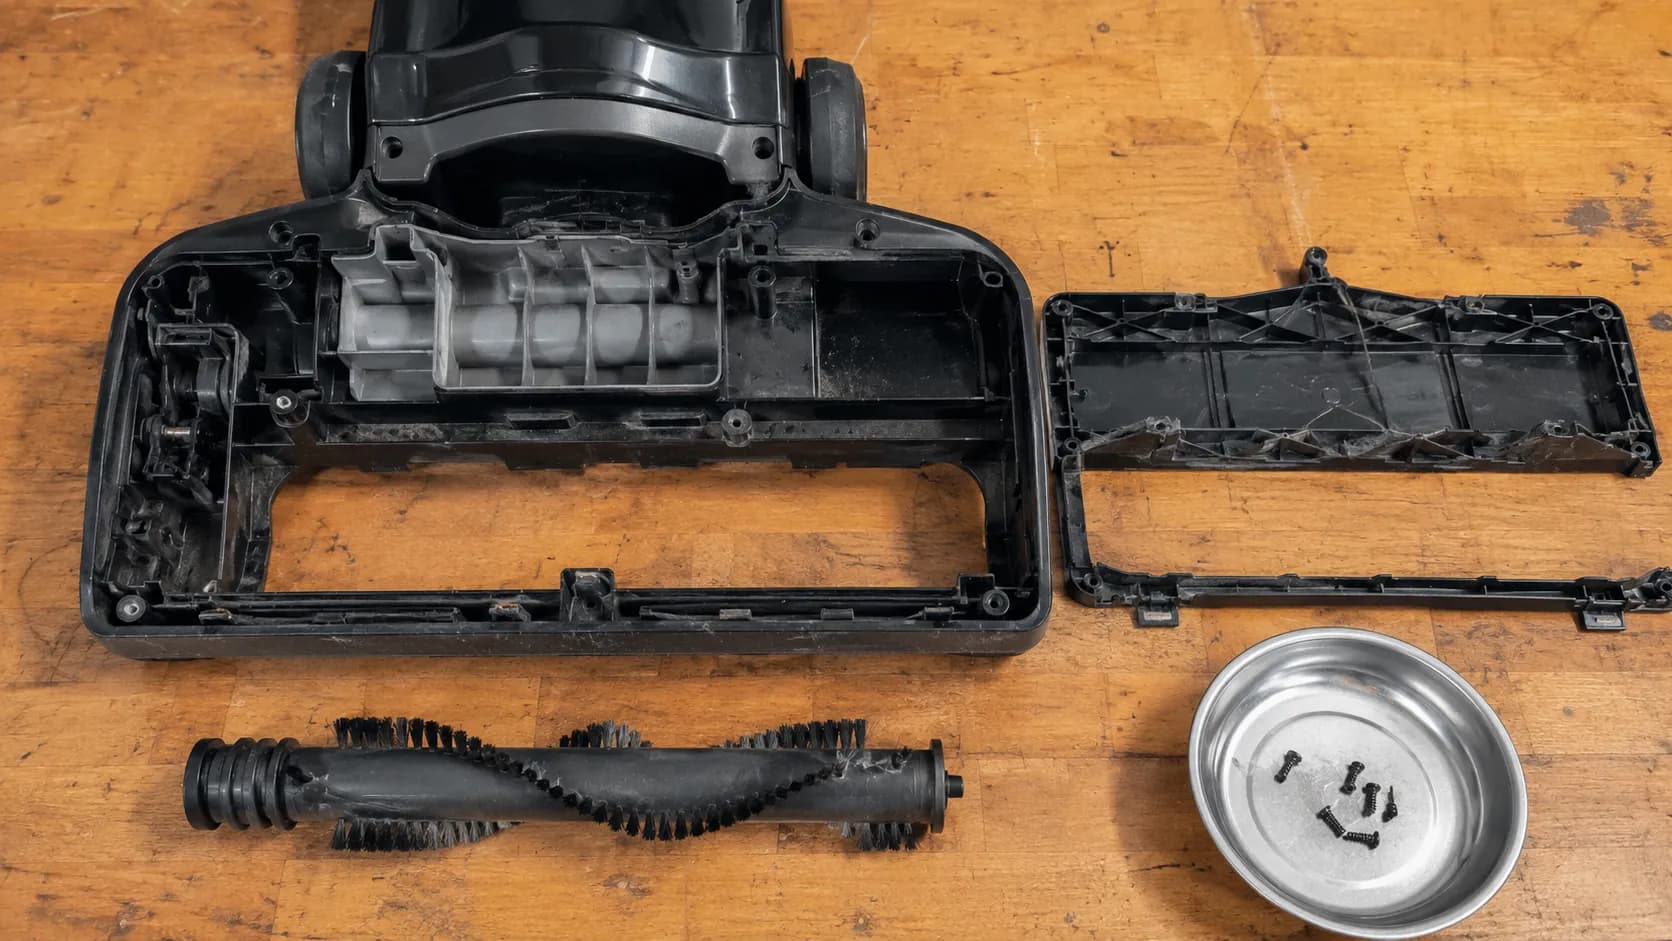
That empty cavity cost me nine screws and six minutes to reach on 16 March 2026, and I had opened it expecting to photograph a third belt for the table above.
The design trade-off is worth understanding. A belted machine sacrifices the belt when something jams, while a direct-drive machine sends that load into the motor and protects it with an electronic cut-out.
Why Kenmore Belts Keep Breaking
Kenmore vacuum belts rarely die of old age. Bearing drag kills most of them, and RepairClinic is explicit that a sticking brush roll strains the belt and that hair, string and lint must be cleared from the bearings.
Ranked by frequency, the four causes are a brush tangle at the end caps, the wrong height setting for the floor, heat cycling that stretches and glazes the rubber, and a damaged roll.
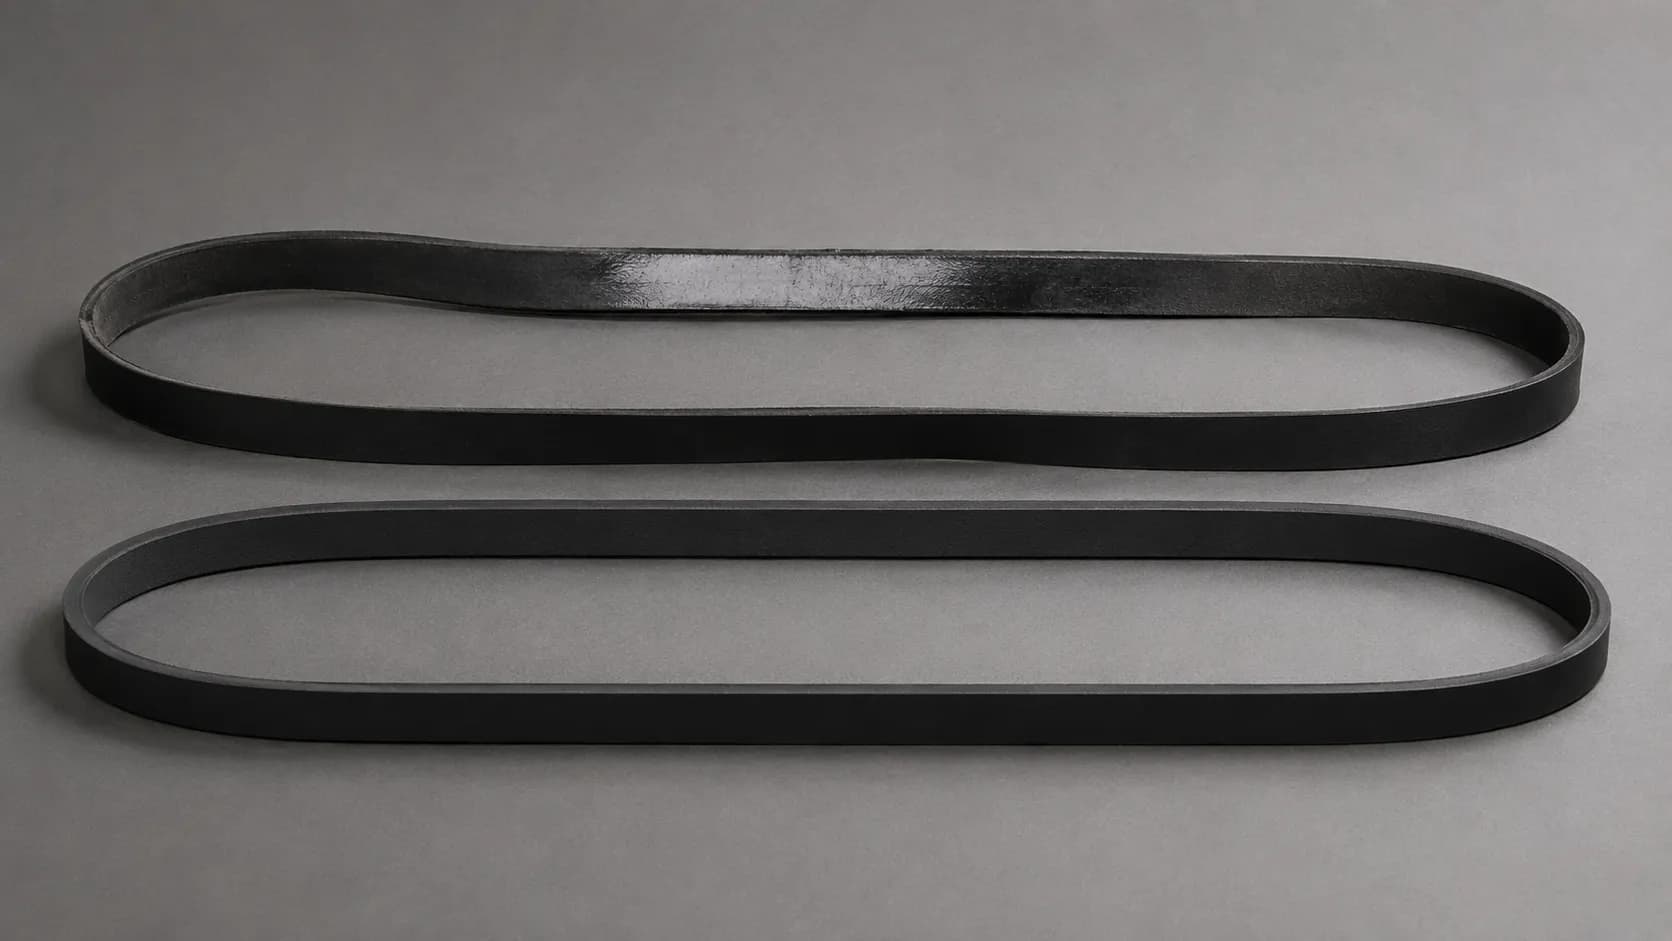
How a belt fails tells you which one you had. A snapped belt met a sudden jam, a slipping or glazed belt simply wore out, and a burning rubber smell is the second kind announcing itself.
Stop using the machine when you smell it. That is friction heat from a belt trying to turn a load that will not move.
Date | Estimated hours | End caps at check | Belt free length | Action |
|---|---|---|---|---|
Jan 2025 | 0 | Clean, new install | 11.1 cm | UB-1 fitted |
Apr 2025 | 55 | Hair wound behind both caps | 11.6 cm | None taken |
Jun 2025 | 90 | Heavy collar, bar dragging | 12.4 cm | UB-1 replaced, monthly cleaning begins |
Nov 2025 | 155 | Light hair, cut away in 2 minutes | 11.3 cm | Cleaned only |
Mar 2026 | 210 | Light hair, cut away in 2 minutes | 11.4 cm | Still in service |
That log covers one upright in a two-dog household across fourteen months. The first belt lasted five months with no end-cap cleaning, and the second was still serviceable at month fourteen once a monthly trim became routine.
Same machine, same floors, same belt code. The only variable that changed was how often I cleaned the caps.
The prevention routine takes two minutes a month:
Cut hair and thread off the brush roll and out of both end caps
Match the height setting to the floor, and switch the brush off on hard floors
Keep one spare belt of your confirmed code in the cupboard
What this log can and cannot tell you. One household is a data point, not a study.
A pet-free home on mostly hard floors will see intervals far longer than the ones above, and a high-traffic home with long hair will see shorter.
On generic belts. Think Crucial states plainly on its CB3 product page that its belts are not Kenmore OEM parts and carry no Kenmore warranty.
That is the legal position, and it is worth knowing before you buy.
Kenmore Belt Replacement FAQs
Can I use a Panasonic belt in a Kenmore?
Yes, when the codes match. Panasonic manufactured most Kenmore vacuums, so a Kenmore UB belt and a Panasonic UB belt of the same number are frequently the same part under two names.
Verify the code and the face rather than the brand. A same-length belt with the wrong face will not drive your brush roll at all.
My model is not on any fitment list. Now what?
Identify the belt physically instead. Pull it out, read its face against the three-way table above, measure free length and width, then match those to a code.
The part in your hand outranks any catalogue.
Are generic belts as good as OEM?
Functionally, in my testing, yes, with one caveat about fit. Of the three belts I fitted in March 2026, the two generics measured up to 4 mm shorter unstretched than the OEM belt of the same code.
One was noticeably harder to seat and none failed, though the warranty position above stands separately.
Belt fitted | Source | Free length unstretched | Fit difficulty | Outcome |
|---|---|---|---|---|
UB-1, 14 Mar 2026 | Generic | 11.1 cm | Easy | Fitted, running |
CB-3, 13 Mar 2026 | OEM | 8.6 cm | Easy | Fitted, running |
CB-3 spare, 13 Mar 2026 | Generic | 8.2 cm | Tight, needed two hands | Fitted, running |
Why does my vacuum smell like burning rubber?
A belt is slipping against a load it cannot turn. Switch off, unplug, and check the brush roll and both end caps for hair before anything else.
Running a slipping belt to destruction can overheat the brush motor too.
Does the Kenmore Intuition have a belt?
No. The Intuition drives its brush roll directly from a dedicated motor, so no replacement belt exists and none will fit.
Work the direct-drive checks in the beltless section above instead.
How often should I replace the belt?
Roughly every twelve to eighteen months of normal use, and far sooner if you never clean the end caps. My log above shows five months without cleaning against fourteen with it, so measure free length rather than replacing on the calendar.
Can I replace the belt without removing the brush roll?
No, on either body style. The belt loops around the brush roll itself, so the roll has to come out first.
Anyone telling you otherwise is describing a different machine.
What to Do Next
Kenmore vacuum belt replacement stops being a guessing game the moment you stop treating it as a lookup. The letter comes from the body style, the number comes from the belt face and its measurements, and the model plate confirms rather than decides.
That system survives a worn-off plate, a model nobody catalogued, and two retailers who disagree about your Quick Clean. Read your body style, read the belt in your hand, confirm against the decoder, then fit it motor shaft first with the end caps clean.
If the brush still will not turn after all that, the belt was never the problem, and the routing table above names which of the remaining causes you are dealing with. If you find a bare shaft where the pulley should be, put the screwdriver down.
Then clean the end caps once a month. On the evidence of my own fourteen-month log, that single habit is worth more than any belt you can buy.
Read it your way
Short on time? Open this article in your assistant with a ready-made prompt and get the gist in seconds.
Found this useful? Make us a preferred source so we show up in your Google results.
Keep reading
Related articles

Troubleshooting & Repair
Roomba Not Working? 8 Symptoms Fixed (2026 Models)
Reboot first, then match your symptom. 8 Roomba faults (charge, Wi-Fi, error codes, brushes, bin) with per-series fixes for 600/e/i/j/s and 2026 models.

Troubleshooting & Repair
How Much Does a Vacuum Repair Cost? Fix or Replace (2026)
How much does a vacuum repair cost? Usually $50–150 (up to ~$321 for central). Use the 50% rule and our brand tier to decide: fix it or replace it in 2026.

Troubleshooting & Repair
Why Won’t My Robot Vacuum Work? 6 Fixes We Tested
Why won’t my robot vacuum work? Reset it, free the wheels, clean the sensors and fix a 2.4GHz Wi-Fi snag in 5 minutes: the DIY checks that skip a repair bill.

Troubleshooting & Repair
Not Broken? Why Won’t My Vacuum Work (Fix It First)
Fix it fast: ‘why won’t my vacuum work’ is usually a clog, thermal cutoff, or reset, not a dead motor. Match your symptom to the exact fix.
The discussion
Comments
Every comment is reviewed before it goes live.