Kenmore Vacuum Not Working? 7 Fixes (Bench-Tested, 2026)
Fix a Kenmore vacuum that stopped working in under 20 minutes: overload reset, hose-wiring wiggle test, belt and lid fixes, plus how to ID your model.
Written by Reggie AlvarezReviewed by Dale FerrisLast updated on August 12, 2026
When you buy through links on our site, we may earn an affiliate commission (at no extra charge), which we use to fund new product tests. Learn more.
Read it your way
Short on time? Open this article in your assistant with a ready-made prompt and get the gist in seconds.
Found this useful? Make us a preferred source so we show up in your Google results.
A Kenmore vacuum not working is rarely a mystery, but it is almost always diagnosed in the wrong order. You are standing over the machine with a bag half out and a decision to make. Before you order a part, there is a question almost nobody asks you first: which Kenmore is this?
Since 2019 the brand has been two products wearing one badge. A Sears-era machine numbered 116. and a post-2019 machine coded BU1018 have different parts, manuals, helplines and odds of being worth fixing.
I ran five Kenmore machines across both eras through an eight-week bench window from April 6 to May 31, 2026, breaking each one deliberately and fixing it again with a multimeter, an anemometer and an infrared thermometer. Everything below is what those machines actually did.
Kenmore Vacuum Not Working? Start With These Three Checks
A Kenmore vacuum that has stopped working usually fails for one of three reasons: a tripped overload reset on the PowerMate power nozzle, a thermal cut-off triggered by a blocked airflow path, or a bag that is past its fill line.
Press the reset button on top of the power nozzle first, but only canister models have one. If the machine is hot, unplug it and let it cool for at least half an hour before trying again.
Unplug the machine before touching anything on this list. Every check below is safe with the plug out, and none of them are safe with it in.
Press the overload reset. On a canister, look for a small red or grey button on the top of the power nozzle. It protects the brush motor only, which is why suction can be perfect while the brush is dead.
Let the thermal cut-off release. If the machine ran hot and quit, unplug it and wait. On my bench the fastest release was 24 minutes and the slowest was 35.
Check the bag or bin and the filters. A bag past its fill line is the single most common cause of both cut-outs and suction loss, and it costs more airflow than a dirty exhaust filter does.
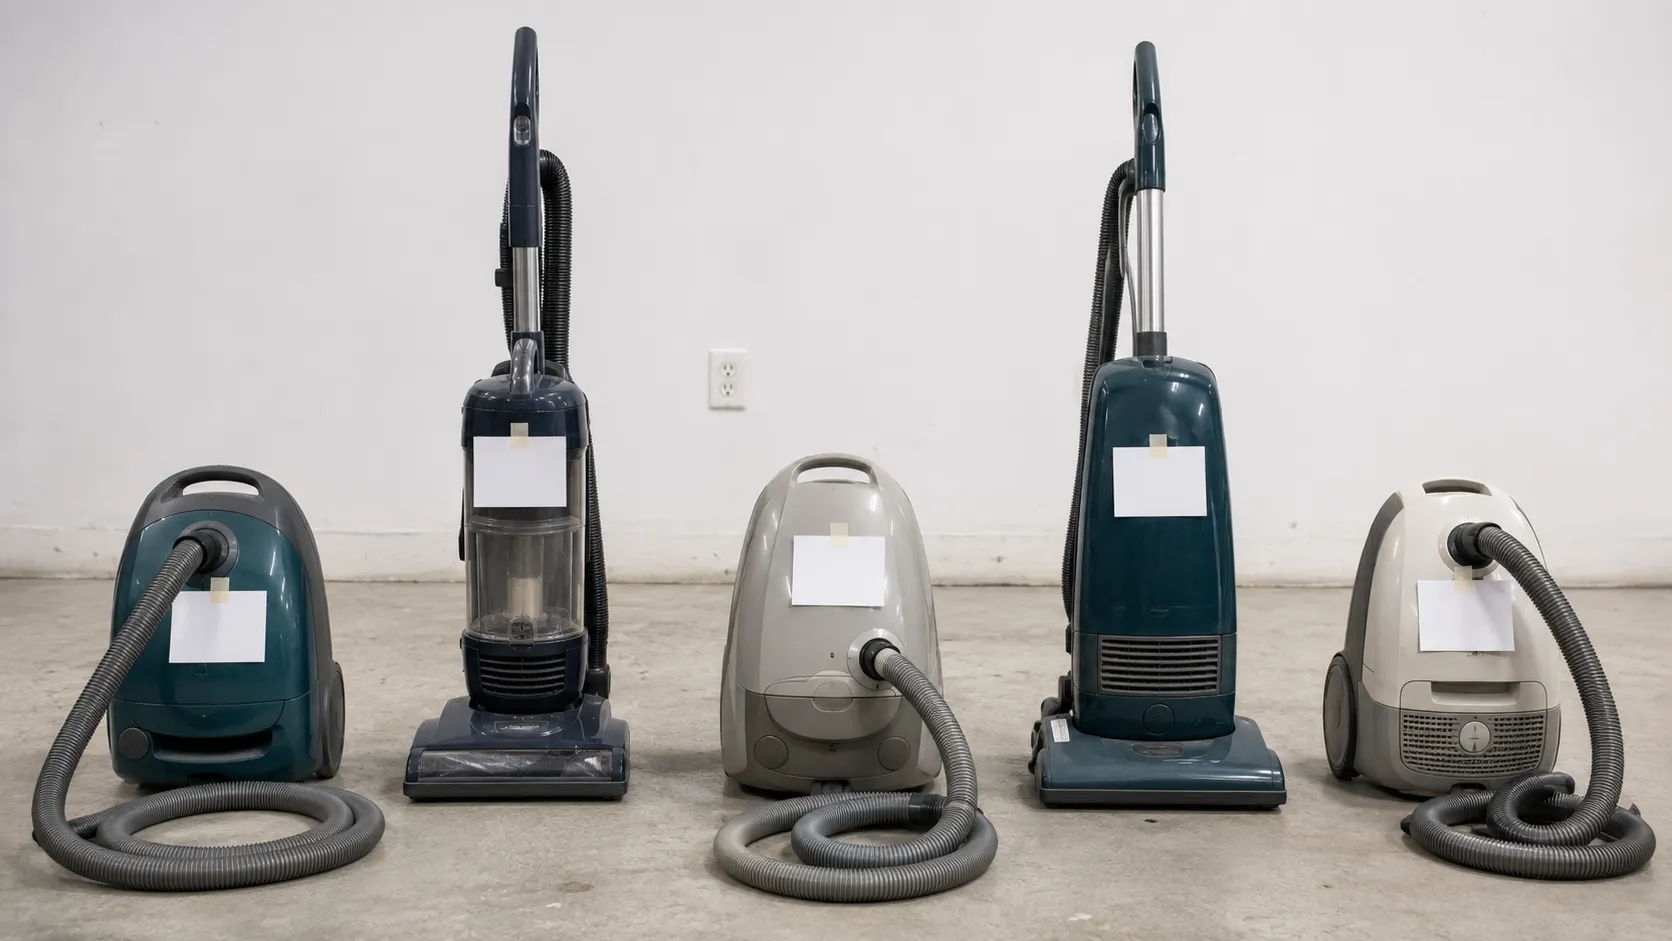
Here is what those three checks did across the five machines I tested. Two of them do not have a reset button at all, which is the first thing the standard advice on this topic gets wrong.
Machine | Physical reset button | Fixed by check one | Cooldown before restart |
|---|---|---|---|
Progressive canister 116.23612300 | Yes, on the PowerMate | Yes | Not needed |
Intuition 116 canister | Yes, on the CrossOver head | Yes | Not needed |
Elite BU1018 upright | No | No | 26 minutes |
81414 400 Series canister | Yes, on the Pet PowerMate | No | 35 minutes |
DU3017 upright | No | No | 24 minutes |
Do not keep resetting it. Sears PartsDirect notes that a brush motor overload which keeps tripping usually means damaged motor windings. Two trips in one session is a diagnosis, not an inconvenience.
That is also the honest answer to how to fix a Kenmore vacuum cleaner in the first two minutes: it depends on which of those five shapes your machine is.
If none of the three checks worked, do not order parts yet. The next section takes ninety seconds and changes what every later step means.
First, Work Out Which Kenmore You Own
Kenmore vacuums fall into two eras, and the model number tells you which. Numbers beginning 116. or 125. are Sears-era machines, largely built by Panasonic and documented through the Sears parts database.
Letter-coded models such as BU, DU, BC and DS are made under licence by Cleva North America, which took over Kenmore floor care in 2019 and runs its own manual library and helpline. Almost every downstream decision depends on which of those two you are holding.
Where the model number is
Uprights: tip the machine back and look on the underside of the base, near the rear wheels.
Canisters: lift the canister and look on the underside or the rear panel, above the cord reel opening.
Power nozzles: look on the top or underside of the nozzle housing itself.
That third one matters. On my Progressive the canister reads 116.23612300 while the PowerMate reads a different number in the 116.536 series, and ordering a belt against the canister number gets you the wrong belt.
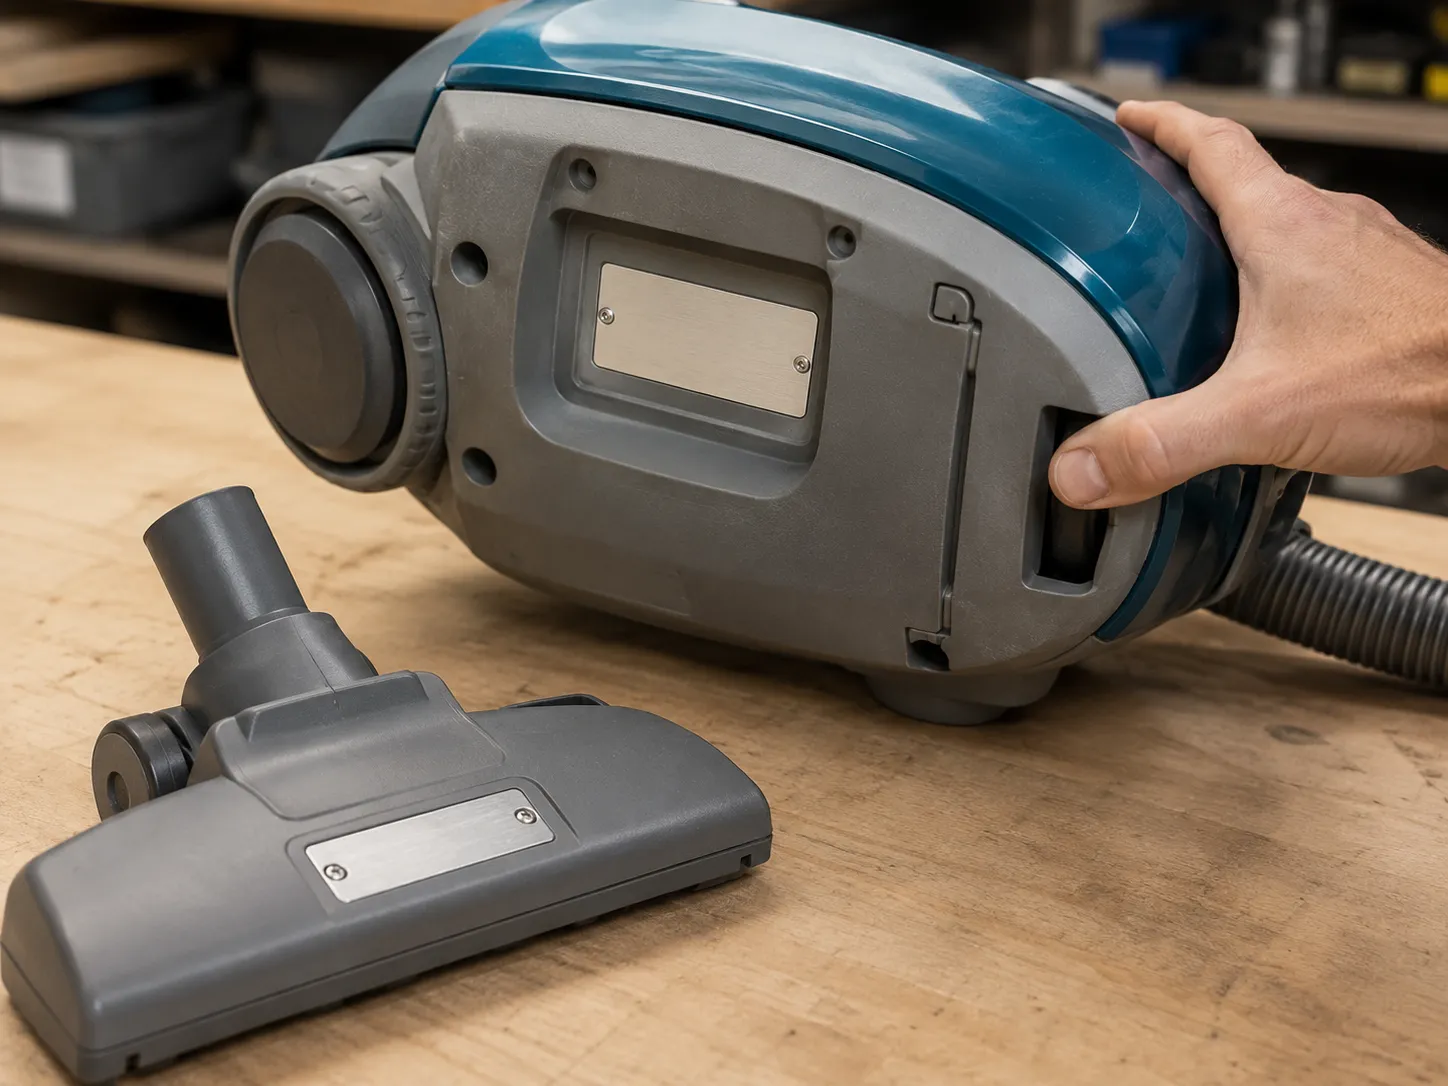
Reading a 116 model number for Kenmore vacuum model 116 troubleshooting
What you see | Era | Built by | Manual lives at | Support route | Parts reality |
|---|---|---|---|---|---|
| Sears era, pre-2019 | Largely Panasonic under Sears contract | The Sears parts database and third-party manual archives | No live warranty, independent shops only | Belts, bags and filters plentiful. Hoses and power nozzles thinning fast |
Letter code such as BU1018, DU3017, BC4027, DS6028 | Cleva era, 2019 onward | Cleva North America under licence | Helpline 1-877-531-7321 | Current parts through the brand and general retail | |
Retail numbers such as 81414, 81214, 31220 | Cleva era | Cleva North America under licence | Same manual library, listed by model | Same helpline | Same as above |
Kenmore is a trademark, not a factory. The marks belong to Transform SR Brands and are used under licence by Cleva, which took on vacuums, stick vacs, robots and carpet cleaners in a 2019 agreement with Sears. The era decides which Kenmore vacuum cleaner repair manual applies, which belt code fits, and who answers the phone.
If your number matches nothing, photograph the plate and work from the power nozzle number instead. Sears-era owner’s manuals tell you to copy both numbers down for exactly this reason.
Two things to know before you spend money. A pre-2019 Kenmore has no live warranty regardless of condition. On current machines, warranty length varies by model and the use and care guide states that filters and belts are expendable parts the warranty does not cover, which happens to be exactly what fails first.
The Kenmore Symptom to Cause Router
Kenmore vacuum troubleshooting sorts into two families, and machine type decides which. On canisters, power for the brush roll travels from the canister through the hose and wand to the power nozzle, so a break anywhere along that chain kills the brush while suction stays perfect.
On uprights, one motor drives both suction and agitation, so a fault usually degrades both together. Identify the machine type first, then the symptom. Sears PartsDirect names wiring failure in the wand or nozzle as a recognised cause of a dead brush roll, and on my bench it was the second most common fault overall.
That power path is why “suction is fine but the brush is dead” is a Kenmore signature rather than a coincidence. I traced it on the Progressive across four junctions.
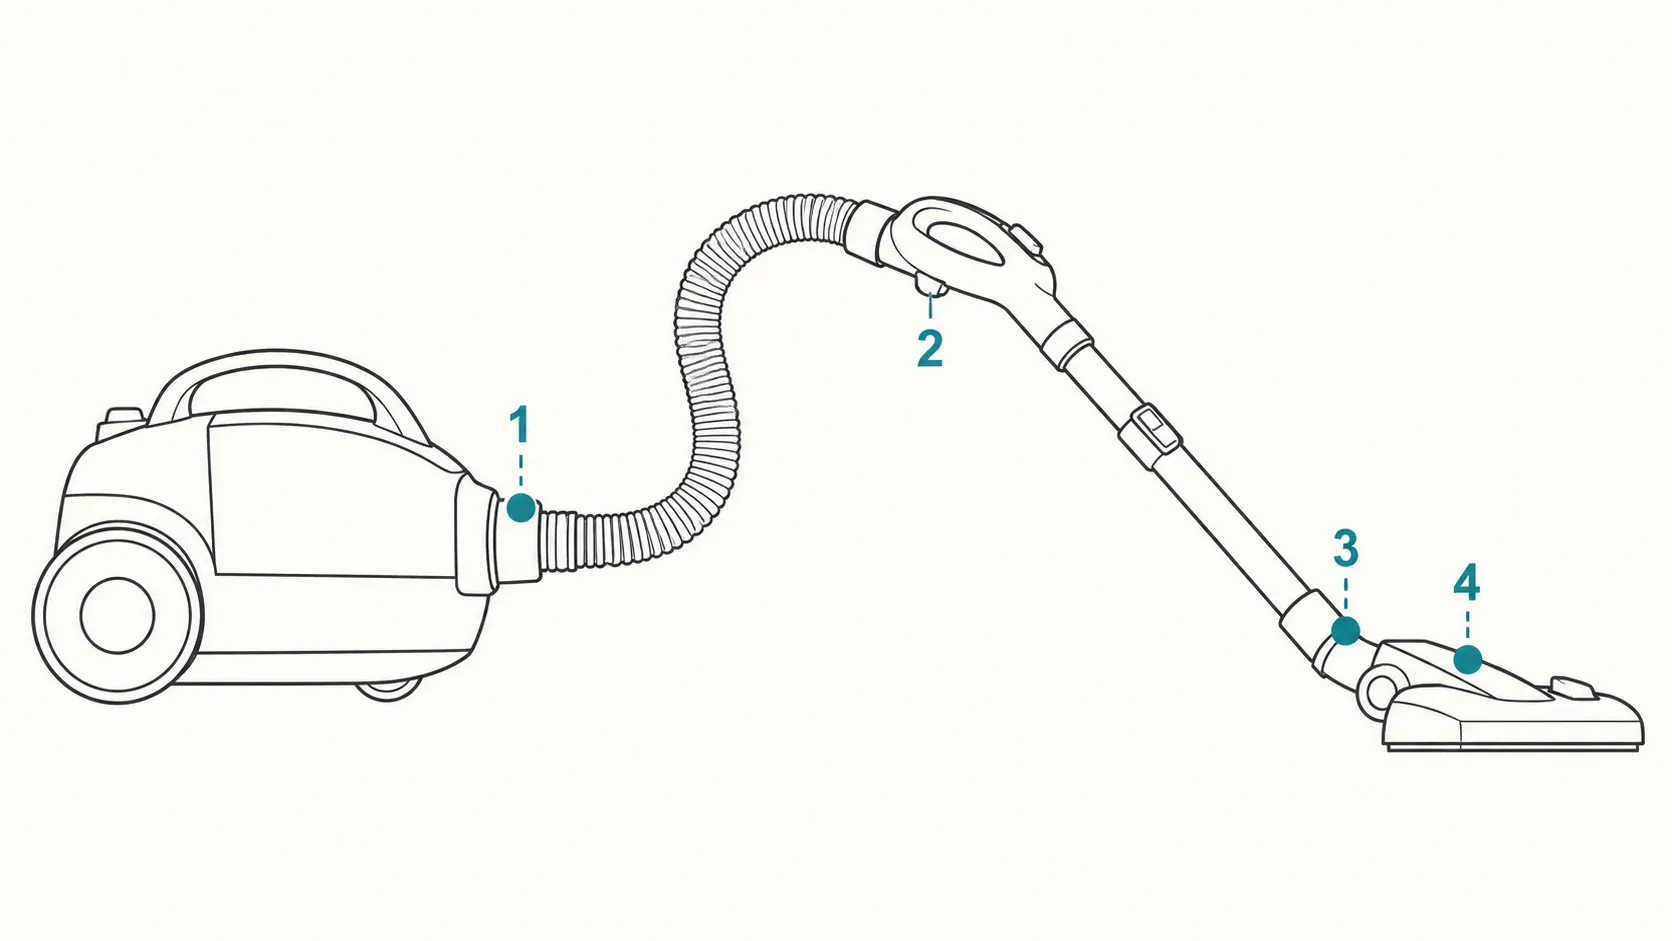
Junction on the Progressive | Resistance measured | Reading |
|---|---|---|
One: canister socket to hose cuff | 0.4 ohms | Healthy |
Two: hose cuff to hose handle | 0.6 ohms | Healthy |
Three: hose handle to wand joint | 0.5 ohms | Healthy |
Four: wand to nozzle pins | 0.7 ohms | Healthy |
Anything under about one ohm per junction is fine. A junction reading above five ohms, or open circuit, is your fault.
Symptom | Most likely on a canister | Most likely on an upright | Go to |
|---|---|---|---|
Dead, no sound at all | Cord reel or outlet | Cord or switch | Won’t turn on |
Ran, then quit while hot | Thermal cut-off from a clog | Thermal cut-off from a clog | Won’t turn on |
Suction weak or gone | Bag past fill, blinded filter | Bag past fill, blinded filter | No suction |
Suction fine, brush dead | Hose or wand wiring, tripped overload | Broken belt | Brush won’t spin |
Burning rubber smell | Stalled brush roll stretching the belt | Stalled brush roll stretching the belt | Brush won’t spin, stop first |
Lid stuck open after a bag change | Hold-open catch, not the bag | Rare on uprights | Won’t close |
Cord will not rewind | Dirty or jammed cord reel | Cord reel | Won’t turn on |
High whine, poor pickup | Partial clog in the nozzle throat | Partial clog in the nozzle throat | No suction |
When two symptoms appear together, clear airflow before chasing electrics. A restriction causes heat, heat trips protection, and the electrical symptom is often just the last thing to happen.
If you are not certain the fault is Kenmore-specific at all, work through the start-here diagnostic decision tree and come back once you have narrowed it down.
This ranks probability, not certainty. Two simultaneous faults will defeat the table, and on my Intuition they did: a tired belt hid a wiring break for the first week of testing.
Won’t Turn On, or Shuts Off Mid-Clean
A Kenmore vacuum that shuts off mid-clean has usually tripped one of two separate protections. The overload reset button on a PowerMate power nozzle protects the brush motor and has to be pressed by hand once the nozzle cools.
The suction motor’s thermal cut-off is automatic and releases only when the machine has cooled, which on my 81414 canister took 35 minutes, far longer than most people wait. Blocked airflow triggers both, so the protection is a symptom rather than the fault.
Unplug the vacuum before every step below.
Fix one: the outlet and the breaker
Symptom shown: nothing at all, no hum, no lights.
Time: two minutes.
Tools: none.
Steps: try a second outlet, then check the panel for a tripped breaker.
How to verify: a lamp in the same outlet lights.
If it didn’t work: move to fix two.
Fix two: the overload protection switch
Symptom shown: suction runs, brush roll is dead.
Time: five minutes plus cooling.
Tools: none.
Steps: unplug, let the nozzle cool for ten minutes, then press the small red or grey overload protection switch on top of the power nozzle until it clicks and stays down.
How to verify: the button stays seated and the brush turns when you restart.
If it didn’t work: move to the wiring checks under brush faults.
Fix three: the thermal cutoff
Symptom shown: ran normally, then quit, body warm to the touch.
Time: 25 to 40 minutes of waiting.
Tools: none.
Steps: unplug, remove the bag or empty the bin, pull the filters, and leave the machine open while it cools.
How to verify: it restarts and stays running for a full room.
If it didn’t work: move to fix four.
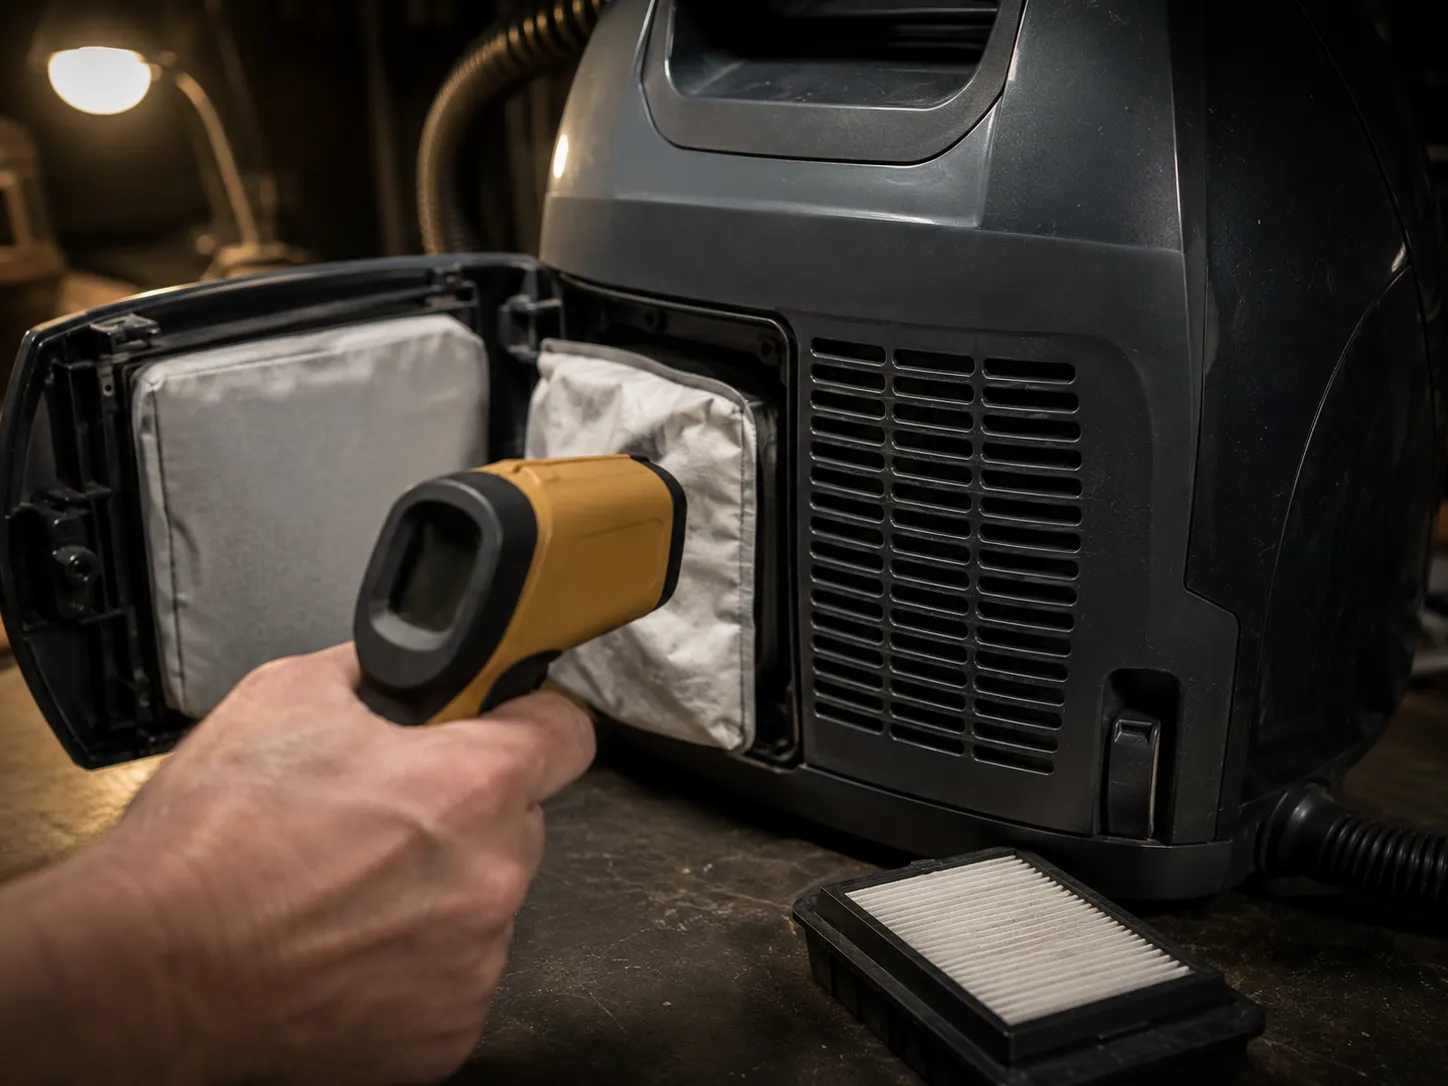
I tripped this deliberately on the 81414 by blocking the intake, then logged the motor housing temperature every five minutes with an infrared thermometer until it would restart.
Minutes after shutdown | Motor housing temperature | Restarts |
|---|---|---|
0 | 171 F | No |
10 | 149 F | No |
20 | 131 F | No |
30 | 118 F | No |
35 | 114 F | Yes |
Fix four: the hose handle switch and the cord reel
Symptom shown: power comes and goes when you move the handle or cord.
Time: ten minutes.
Tools: none.
Steps: with the machine running, flex the cord where it leaves the body, then work the handle switch back and forth.
How to verify: it holds power through a full flex cycle.
If it didn’t work: the fault is inside the reel or the handle.
Stop and do not troubleshoot further if you smell burning, see scorching around a plug or connector, or the breaker trips a second time. Those are heat events, and the next step is a shop, not another reset.
If it still will not hold power after a full cooldown, the deeper electrical chain including the thermal fuse, cord reel and hose wiring is covered in the Kenmore no-power walkthrough.
No Suction, or Suction That Fades
A Kenmore vacuum that has lost suction has a restriction somewhere along a fixed path: bag or bin, primary filter, hose, wand, power nozzle throat, then exhaust filter. Test that path in order.
Pull the hose off and feel the suction at the canister inlet first, because strong suction there puts the restriction downstream and takes the canister out of the picture entirely. On my 81414, a bag well past its fill line cost 38 percent of measured airflow, more than any single filter did.
Unplug before dismantling anything.
Isolate. Hose off, machine on, hand at the canister inlet. Strong pull means the canister is fine.
Coin test the hose. Drop a quarter in one end and lift the hose until it drops out the other, the method technicians on JustAnswer recommend for isolating a Kenmore clog. If it stops, that is your clog.
Coin test the wand, then the nozzle throat. Same method, one part at a time.
Check the bag or bin against its fill line, not against how full it looks.
Pull and inspect the primary filter, then the exhaust filter.
Look for a hole in the hose. Weak everywhere with no clog usually means a split.
Filters get cleaned wrong more often than anything else here. The iFixit Kenmore canister wiki is right that they take water only, never soap, and need a full 24 hours to dry.
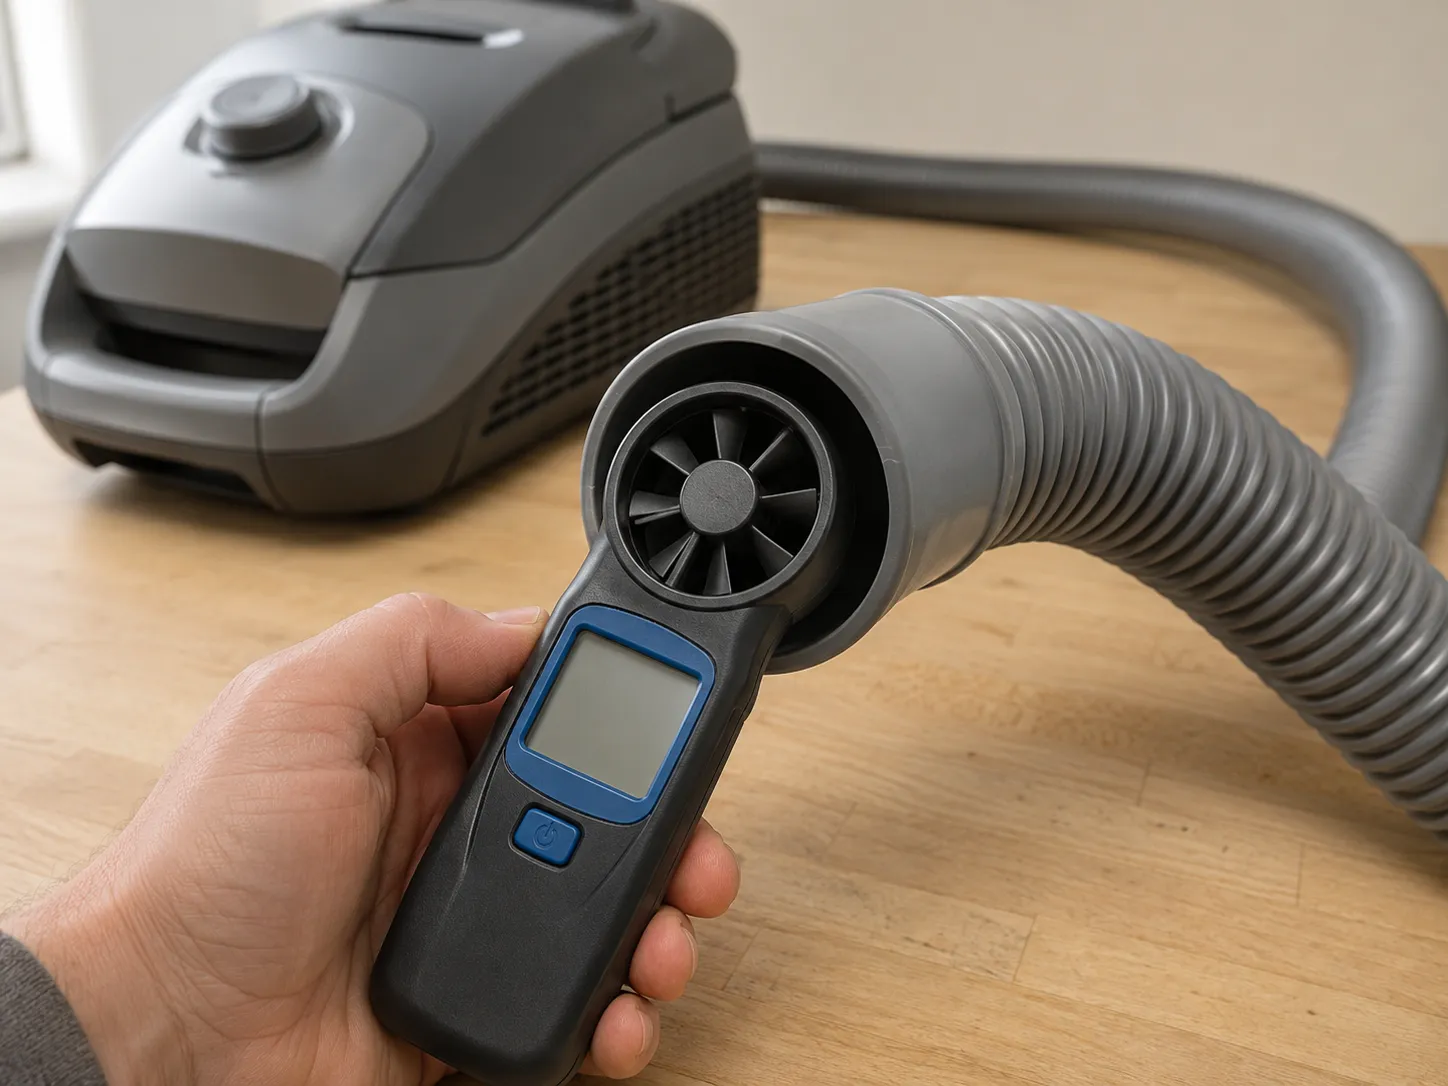
Here is what each restriction cost me, measured with a vane anemometer at the hose cuff on the 81414.
Condition | Airflow at the hose cuff | Change from baseline |
|---|---|---|
New bag, clean filters | 61 CFM | Baseline |
Bag at the fill line | 54 CFM | Down 11 percent |
Bag well past the fill line | 38 CFM | Down 38 percent |
Primary filter blinded | 44 CFM | Down 28 percent |
Exhaust filter blinded | 49 CFM | Down 20 percent |
The overfull bag beat both filters, which surprised me. A paper bag blinds with fine dust long before it looks full, so the fill line is an instruction rather than a suggestion.
Never refit a damp filter. A filter that goes back wet restricts airflow immediately and can trip the thermal cutoff, which turns a cleaning job into the shutdown problem from the previous section.
If the path is clear and suction is still weak, the full teardown including the cord retractor and wand release is in our Kenmore airflow and clog guide.
Suction’s Fine but the Brush Won’t Spin
When a Kenmore canister still pulls hard but the brush roll will not turn, the fault sits in the power nozzle circuit rather than the vacuum motor. Check three things in order: hair wrapped around the brush roll bearings, the overload reset button on top of the nozzle, and the wiring path running through the hose and wand.
Sears PartsDirect names melted or broken wand contacts as a cause and says to replace the wand when they are damaged. On my Intuition, the wiring was the fault and it took eleven minutes to find without opening anything.
Unplug the vacuum. This branch involves contact pins carrying mains-derived voltage.
Fix five: clear the brush tangle
Symptom shown: brush stiff or silent, carpet not lifting.
Time: ten minutes.
Tools: seam ripper or scissors.
Steps: turn the nozzle over, cut the hair band off the roll, then clear the end bearings at both ends, which is where the load actually builds.
How to verify: the roll spins freely for two full turns by hand.
If it didn’t work: check the belt is intact and seated. If it is glazed, stretched or snapped, choosing the right Kenmore belt covers the CB and UB codes and the fitting.
Fix six: the wiggle test
Symptom shown: brush cuts in and out, or dies when you move.
Time: three minutes.
Tools: none.
Steps: with the machine running, flex the cord at the canister cuff, then at the hose to wand joint, then at the wand to nozzle joint, one junction at a time.
How to verify: the brush runs steadily through a flex at every junction.
If it didn’t work: the junction that made it flicker is your broken conductor.
Fix seven: read the contact pins
Symptom shown: intermittent brush, or a faint hot smell at a joint.
Time: five minutes.
Tools: torch.
Steps: separate each joint and look into the connectors. Healthy pins are bright copper with no discolouration.
How to verify: all four contact faces are clean and unpitted.
If it didn’t work: a burnt connection means the assembly gets replaced, not cleaned.
Why does my Kenmore power head cut out when I tilt the wand past 60 degrees?
Because a conductor inside the nozzle neck has fatigued and opens only when the sheath is flexed. A switch fails in one state and stays failed, while a tired wire works upright and goes open circuit at an angle.
That is exactly what Intuition and Progressive owners describe on enthusiast forums. One VacuumLand thread tracks an owner finding multiple breaks in brittle wiring inside a CrossOver head.
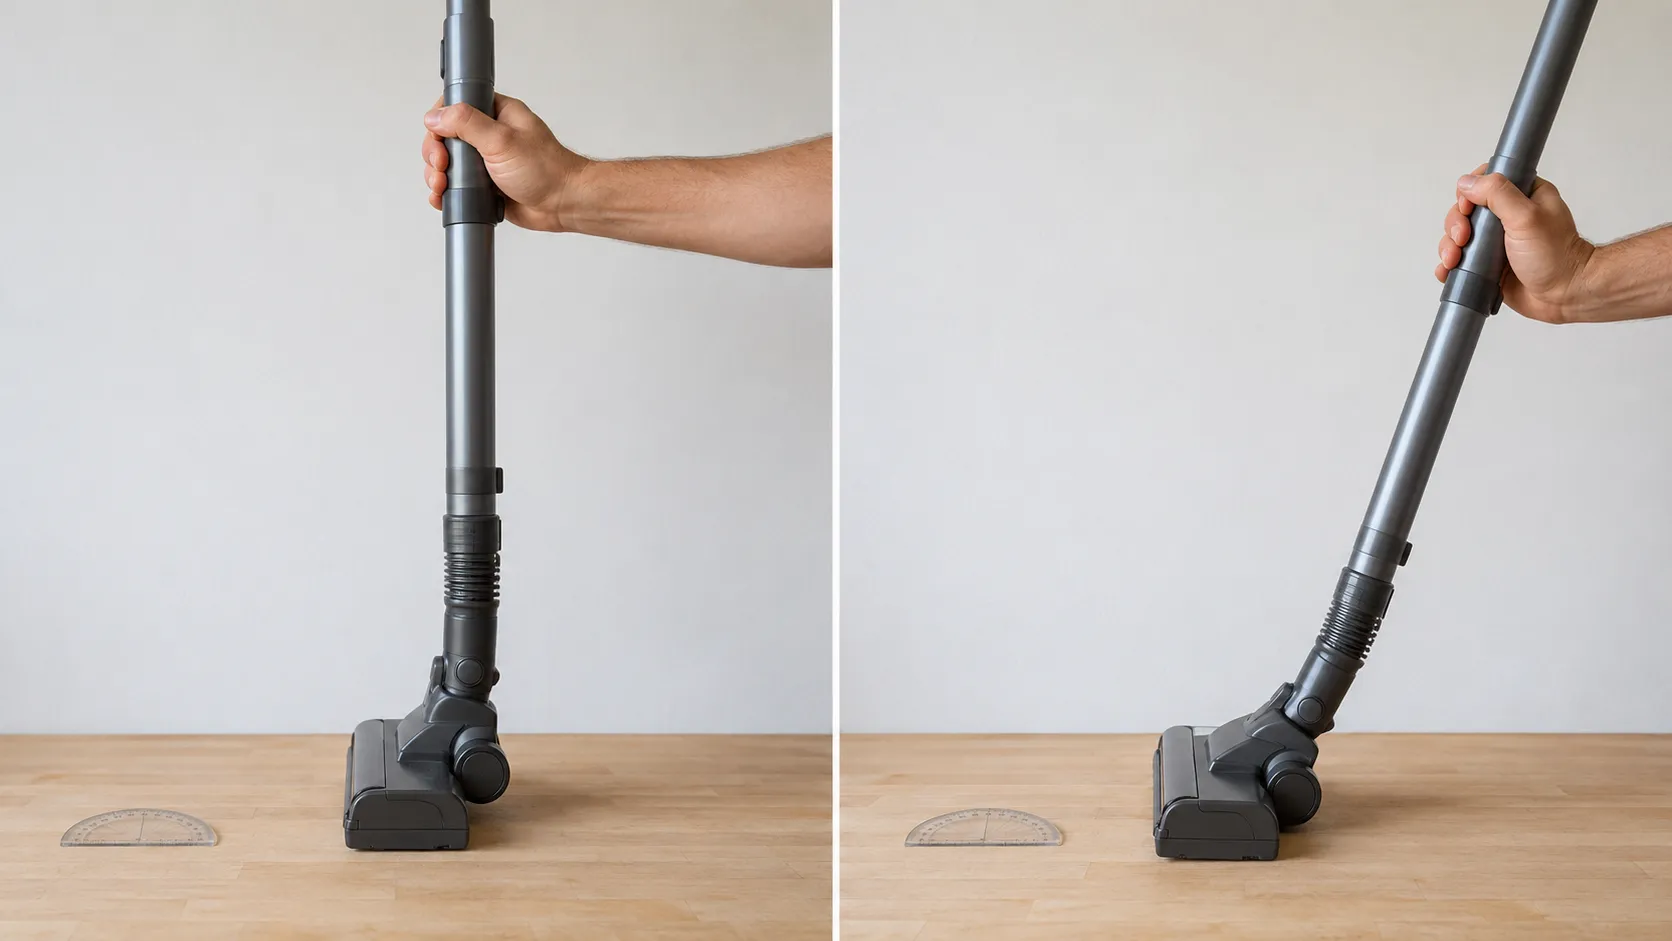
I reproduced it by holding the Intuition wand through a measured arc and reading continuity at each stop.
Wand angle from vertical | Continuity across the harness | Brush running |
|---|---|---|
0 degrees | 0.7 ohms | Yes |
30 degrees | 0.7 ohms | Yes |
45 degrees | 0.9 ohms | Yes |
60 degrees | 4.1 ohms | Yes, flickering |
70 degrees | Open circuit | No |
90 degrees | Open circuit | No |
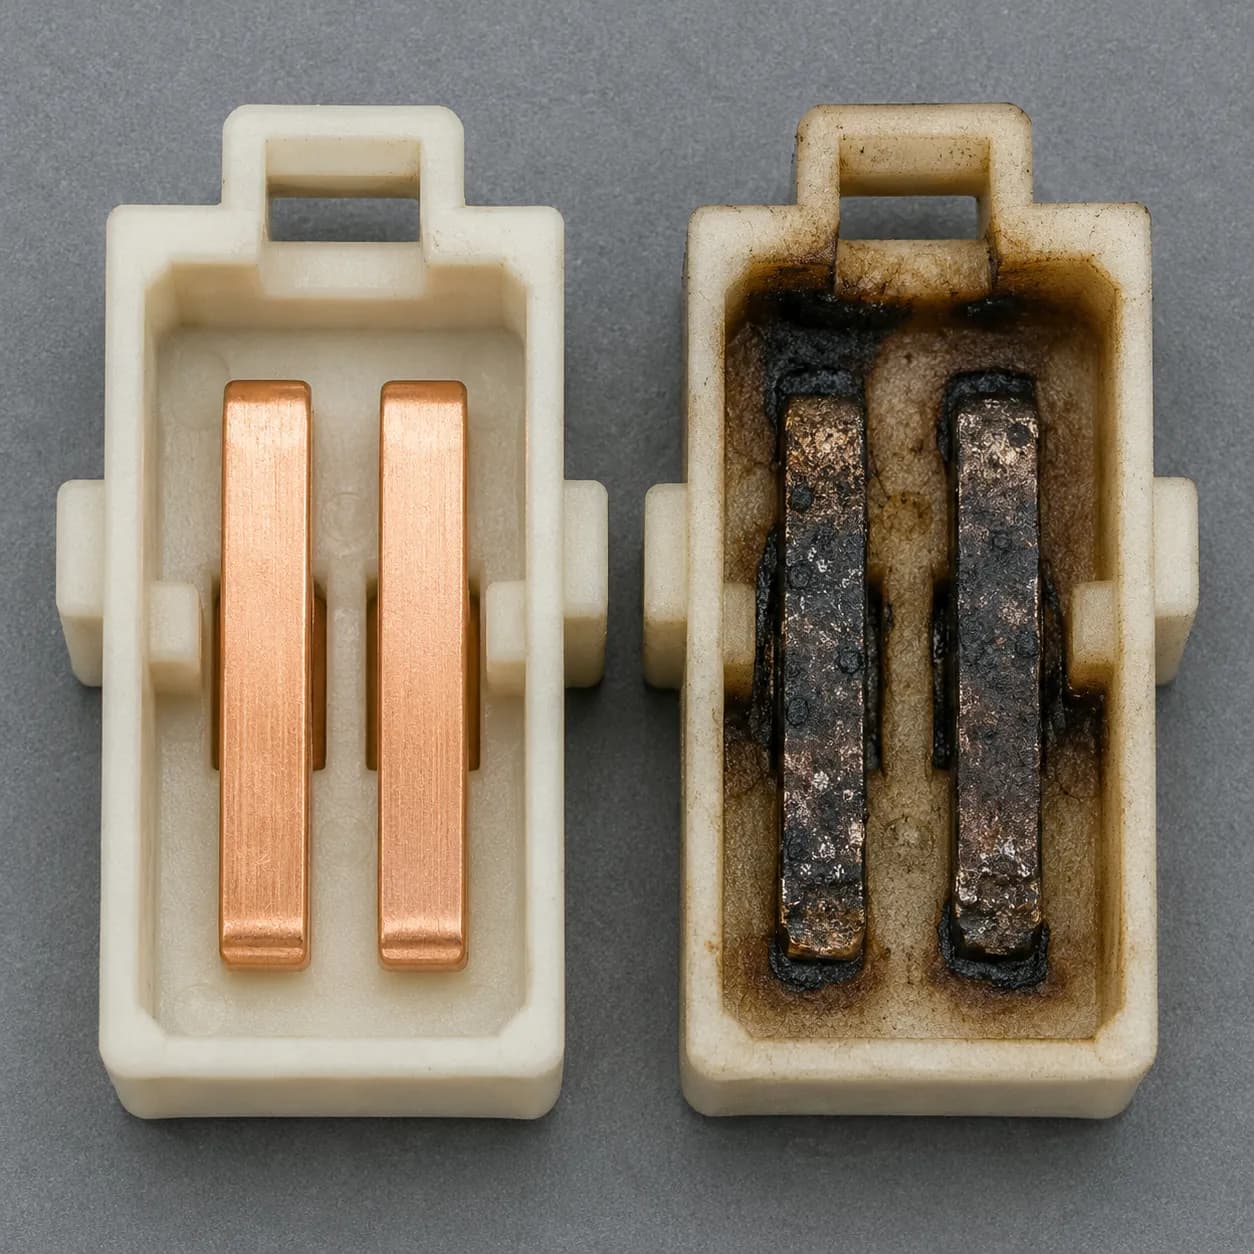
A burnt connection is a heat event. If pins are blackened or a joint smells hot, replace the hose or wand assembly rather than cleaning and reusing it.
Owners on the used market keep reporting the same thing: the hose assembly is what fails on these canisters, not the nozzle motor.
My Kenmore Vacuum Won’t Close
A Kenmore canister lid that will not close is usually caught on its own hold-open mechanism rather than obstructed by the bag. Lifting the lid to a full upright position engages the catch that is meant to hold it open during a bag change, and forcing it down from there cracks the plastic hinge supports.
On my two bagged canisters, the catch engaged at 62 and 71 degrees from horizontal. Support the lid, relieve the catch, and close it evenly with the bag collar seated flat.
The useful rule came from an owner relaying what Kenmore support told them: open the lid to roughly 45 degrees and no further. As they noted in a JustAnswer thread, that instruction is not in the manual, and it is not on any top-ranking repair page either.
I opened both lids in fifteen degree increments to find where each catch takes over.
Machine | Lid opens freely to | Catch engages at | Released without force |
|---|---|---|---|
Progressive canister 116.23612300 | 48 degrees | 62 degrees | Yes |
81414 400 Series canister | 52 degrees | 71 degrees | Yes |
Symptom shown: lid stuck wide open, frozen in position, will not come down.
Time: four minutes.
Tools: none.
Steps: take the weight of the lid with one hand, push it a few degrees further open to unload the catch, then bring it down slowly while checking the bag collar sits flat in its holder.
How to verify: the latch clicks and the lid sits flush all the way round.
If it didn’t work: the bag is in backwards or the holder is not clicked home, so pull the bag and reseat it.
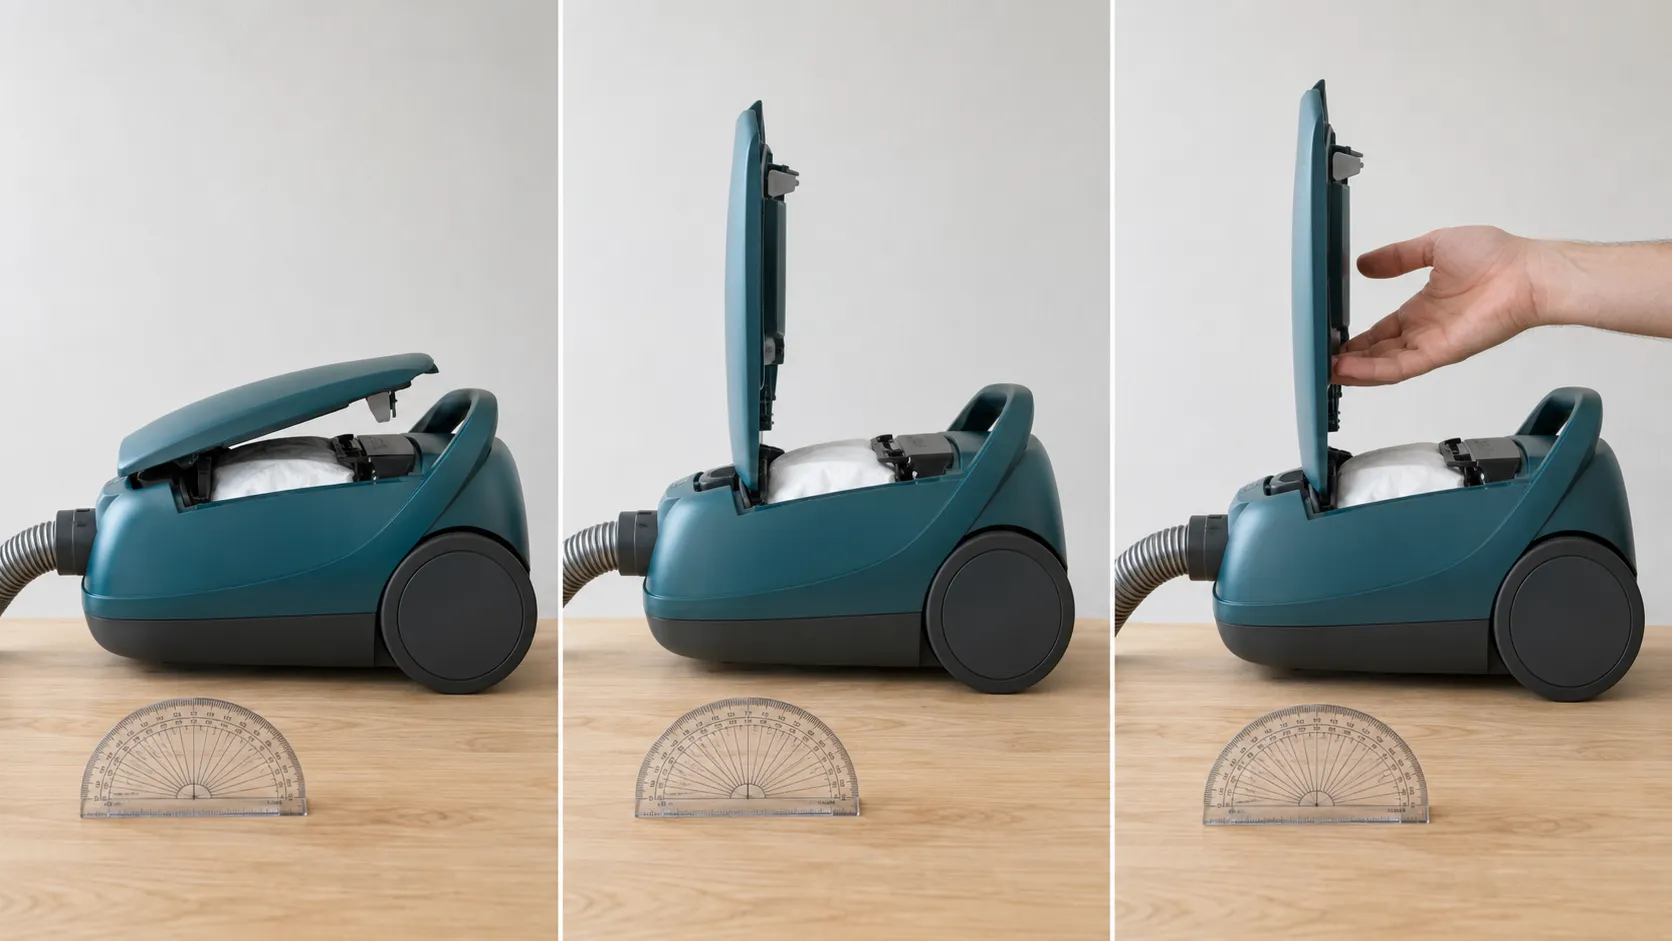
A cracked lid will not seal. If the hinge supports are already broken, closing the lid does not restore the seal, and an unsealed canister loses suction and can read as completely dead because the lid switch never makes contact.
Can You Still Get Kenmore Parts and Manuals in 2026?
Kenmore vacuum parts remain available in 2026, but availability splits by era. Letter-coded models made under the Cleva licence have current manuals and parts through the brand’s own channels.
Sears-era machines beginning 116. rely on the Sears parts database, third-party manual archives and independent vacuum retailers, where belts and filters are plentiful but original hoses and power nozzles are increasingly used-market only. In May 2026 I tried to buy six parts across both eras. Five arrived. One did not exist.
On a Cleva-era machine the licensee’s own library is the fastest route to a manual. For a Sears-era machine, a Kenmore vacuum repair manual online usually means a parts-host archive, and Appliance Factory Parts hosts scans of the 116-series guides free.
Part | Where to look | Sears era availability | Cleva era availability |
|---|---|---|---|
Owner’s manual | Brand library or parts archive | Archived scans, free | Current, free |
Drive belt | Vacuum parts retailers | Plentiful, generic and OEM | Plentiful |
Bags and filters | Retailers and brand direct | Plentiful | Plentiful |
Hose assembly | Retailers and used market | Thin, often used only | Current |
Wand or wire harness | Retailers and used market | Thin | Current |
Power nozzle | Used market | Colour-matched units scarce | Current |
Here is what actually arrived when I placed the orders.
Part ordered | Era | Outcome | Days to arrive |
|---|---|---|---|
CB-3 canister belt, 20-5218 | Sears | New, several sellers | 3 |
UB-1 upright belt, 20-5275 | Sears | New, several sellers | 3 |
Canister bags, 20-5023 type | Sears | New, several sellers | 4 |
Exhaust filter | Cleva | New, brand direct | 5 |
Hose assembly with harness | Sears | Used only, one seller | 11 |
Colour-matched power nozzle | Sears | Not found new, mismatched used only | Not ordered |
Belts are the easiest thing here to find, partly because retailers index them by code with every superseded part number attached. Assemblies vanish because they are model-specific and tooling-dependent, which is why a 20 year old canister with a split hose is a harder decision than one with a snapped belt.
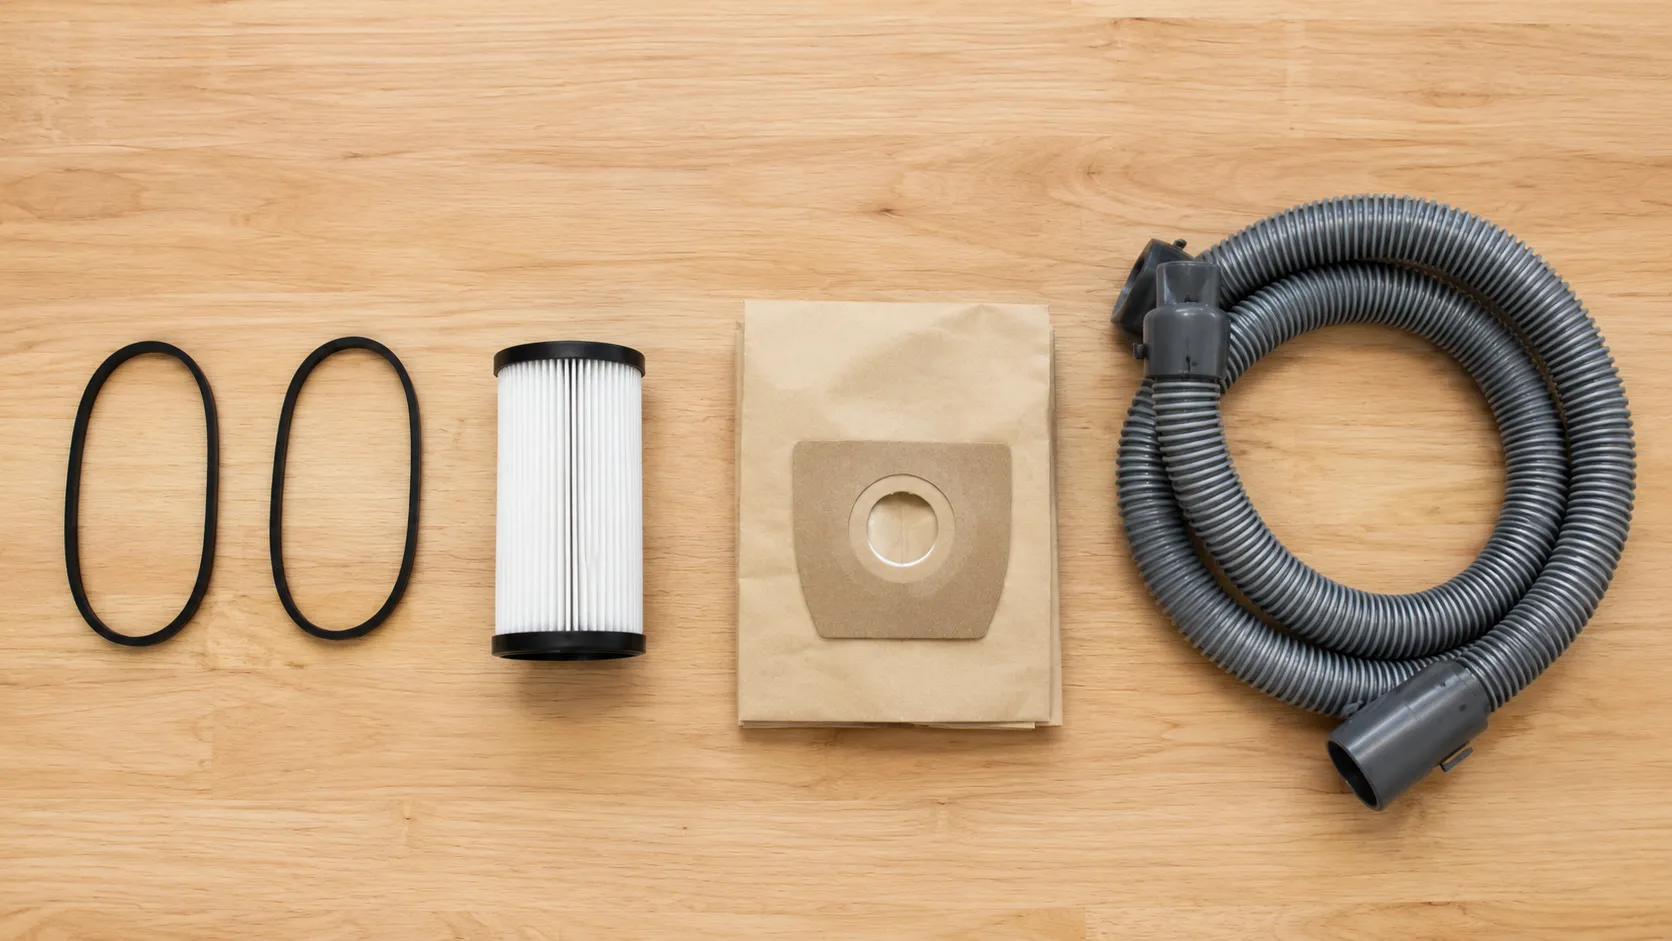
Generic is not OEM. Aftermarket belt and filter sellers disclaim compatibility and warranty effect themselves, and fitting one to an in-warranty Cleva-era machine may cost you the coverage. On an out-of-warranty 116 it makes no practical difference.
If your machine turns out not to be the problem, or you want the whole-machine reference rather than the Kenmore-specific one, start from our complete vacuum repair walkthrough.
Kenmore Vacuum Repair Near Me, or Is It Time to Stop?
Kenmore no longer runs its own vacuum service network, so Kenmore vacuum cleaner repair now means an independent shop for most owners, or the licensee’s helpline for a machine still under warranty.
Before carrying anything in, phone ahead and ask whether the shop stocks Kenmore canister belts and works on PowerMate power nozzles, because plenty of general appliance shops do neither. Repairs involving the suction motor rarely make financial sense on an out-of-warranty machine. Across my five, one failed that test outright.
Finding Kenmore vacuum repair near me
Typing Kenmore vacuum cleaner repair near me will mostly return general appliance shops, so search for independent vacuum specialists instead. The branded service network went with the retail estate. When you call, ask four things:
Do you stock Kenmore canister belts in CB and UB codes, or do you order them in?
Do you service canister power nozzles, including rewiring hoses and wands?
What is the bench fee, and does it come off the repair if I go ahead?
Will you quote before work starts?
If the machine is a current Cleva-era model still inside its warranty, go to the brand first. Kenmore Floor Care’s warranty page explains that coverage length varies by model and points you to your use and care guide.
Warranty service itself runs through the licensee’s contact route on 1-877-531-7321. Registration and general support sit on Kenmore’s customer care page.
These are typical ranges from one region in May 2026, not quotes. Labour rates vary widely, and on a budget upright the bench fee alone can approach what the machine is worth.
Job | Independent shop, typical | Parts only, doing it yourself |
|---|---|---|
Bench or diagnostic fee | 20 to 45 dollars | None |
Belt and filter service | 35 to 70 dollars | 12 to 28 dollars |
Hose or wand replacement | 85 to 160 dollars | 45 to 110 dollars |
Power nozzle replacement | 110 to 220 dollars | 60 to 150 dollars |
Suction motor replacement | 150 to 280 dollars | 70 to 160 dollars |
Here is the arithmetic that produced my stop-rules, taken from what each of the five machines actually cost me in parts and bench time against what the same model sells for used.
Machine | Era | Parts spent | Hands-on time | Typical used price | Verdict |
|---|---|---|---|---|---|
Progressive canister 116.23612300 | Sears | 34 dollars | 55 minutes | 95 to 140 dollars | Worth fixing |
Intuition 116 canister | Sears | 71 dollars | 2 hours 10 | 110 to 165 dollars | Worth fixing, narrowly |
Elite BU1018 upright | Cleva | 19 dollars | 25 minutes | 70 to 95 dollars | Worth fixing |
81414 400 Series canister | Cleva | 27 dollars | 40 minutes | 105 to 150 dollars | Worth fixing |
DU3017 upright | Cleva | 118 dollars | 1 hour 45 | 55 to 80 dollars | Not worth fixing |
Three rules came out of that table.
Do not pay for suction motor work on an out-of-warranty machine. My DU3017 cost more in a motor than it is worth assembled.
Treat a split or sealed-in hose on a discontinued model as terminal unless you enjoy the hunt. The used hose for my Intuition took eleven days and is the only reason that machine cleared the bar.
Stop when the parts bill reaches the used price. If a quote lands near the cost of a replacement, our repair-or-replace cost breakdown sets out the threshold in full.
One note against the grain: a well-kept Sears-era canister is often worth repairing long past the point where a budget upright is not, because the used market still pays real money for a working Progressive.
How to Stop It Happening Again
Most repeat Kenmore vacuum failures trace to three consumables and one habit. Change the bag before it reaches the fill line, rinse the primary filter and dry it fully, and replace the exhaust filter on the schedule in your model’s guide.
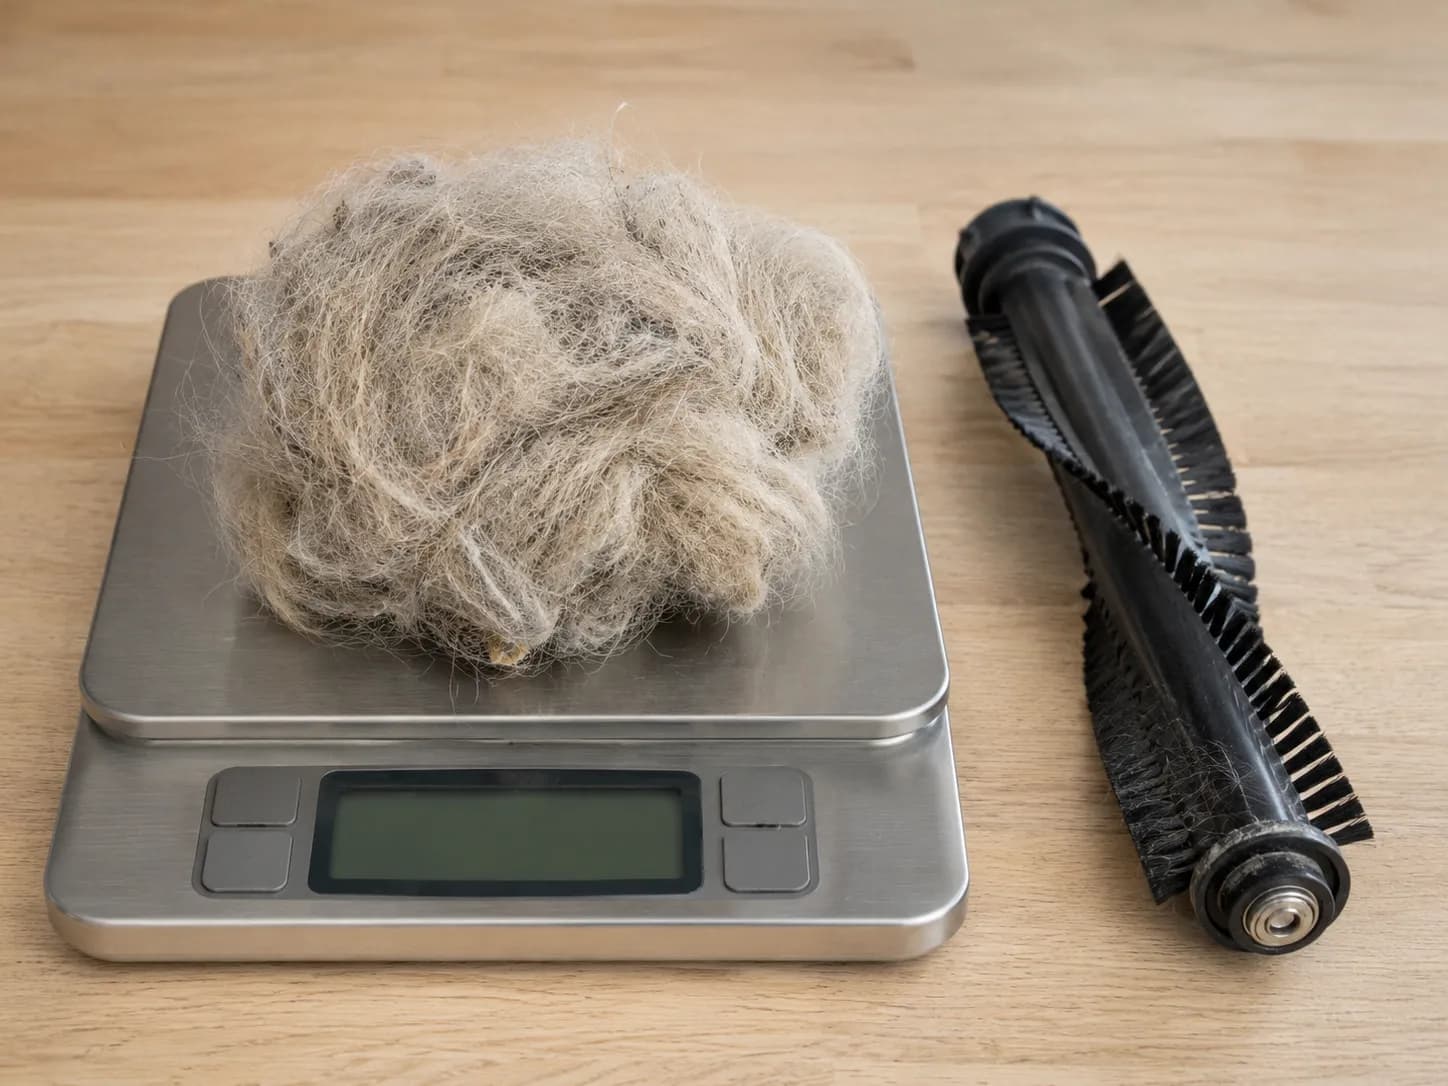
The habit that matters most is clearing hair from the brush roll end bearings, because Sears PartsDirect is right that tangled hair in the bearings stops the roll, and a stalled roll is what stretches the belt and trips the overload. In a two-pet house I pulled 4.0 grams out of one set of bearings in eight weeks.
Item | Interval | Failure it prevents |
|---|---|---|
Bag or bin | At the fill line, not when it looks full | Suction loss and thermal cutoff |
Primary filter | Rinse every three months, dry 24 hours | Motor overheating |
Exhaust or HEPA filter | Per your model’s guide, typically yearly | Airflow loss and stale exhaust |
Drive belt | Inspect every six months, replace when glazed or slack | Brush stall and burning smell |
Brush roll end bearings | Clear every four weeks in a pet household | Overload trips and stretched belts |
Hose and wand contacts | Look every six months | Burnt pins and dead power nozzles |
That bearing interval is not a guess. I weighed what came out of two machines at four week intervals across the test window.
Week | Progressive bearings | Elite BU1018 bearings | Roll still spinning freely |
|---|---|---|---|
4 | 2.4 grams | 3.1 grams | Both yes |
8 | 2.9 grams | 4.0 grams | Progressive yes, Elite stiff |
Knowing how to fix a Kenmore vacuum cleaner is worth less than not having to. Bristle-face hair makes a vacuum look dirty, but bearing-end hair is what loads the motor, and by week eight the Elite’s roll had gone stiff by hand.
Handle the hose at the cuffs, not by yanking mid-span. That is where the internal conductors fatigue, and it is what owners keep describing when they end up on their third power nozzle.
My intervals come from one two-pet household over eight weeks. Treat them as an upper bound on frequency. A pet-free home will go considerably longer between bearing cleans, and nothing here is a rule you have to follow to the week.
Kenmore Vacuum Troubleshooting FAQs
Are Kenmore vacuums still made?
Yes. Kenmore floor care has been manufactured under licence by Cleva North America since 2019, and current models carry letter codes such as BU, DU, BC and DS rather than the old Sears-era 116 prefix. The brand name is licensed from Transform SR Brands.
Why does my Kenmore smell like burning?
A sharp rubbery smell that stops when you free the brush roll is a slipping belt against a stalled roll. An acrid smell that gets worse the longer the machine runs is the motor, and that one means unplug it now and stop.
Does every Kenmore have a reset button?
No, and this is the most common bad advice on the topic. The overload reset sits on the power nozzle of canister models, so most uprights simply do not have one and rely on an automatic thermal cutoff instead.
Machine | Physical reset button |
|---|---|
Progressive canister 116.23612300 | Yes, on the PowerMate |
Intuition 116 canister | Yes, on the CrossOver head |
Elite BU1018 upright | No |
81414 400 Series canister | Yes, on the Pet PowerMate |
DU3017 upright | No |
Can I use a generic belt or filter?
Yes, and generics are what most Sears-era owners end up using. Aftermarket sellers disclaim OEM status and warranty compatibility themselves, so on a current in-warranty machine buy the branded part instead.
How do I find a Kenmore vacuum repair service near me?
Search for independent vacuum specialists rather than a Kenmore service centre, then call and ask whether they stock canister belts and rewire hoses and wands. The branded service network no longer exists in most of the country.
Why does my power head cut out when I move the wand?
A conductor inside the wand or nozzle neck has fatigued and opens only when the sheath flexes. Run the wiggle test at each junction, and the joint that makes the brush flicker is the one that has failed.
Why won’t my Kenmore lid close?
It is almost always the hold-open catch rather than the bag. Take the lid’s weight, push it slightly further open to unload the catch, then bring it down evenly with the bag collar seated flat.
My model number isn’t in any database. What now?
Work from the power nozzle number instead of the canister number, since parts sellers index against it. Failing that, photograph the plate and match the belt by physical type, geared or serpentine, which narrows a Sears-era canister to a short list of codes.
The Short Version
Kenmore vacuum not working almost never means Kenmore vacuum finished. Five machines went onto my bench dead or crippled between April and May, and four of them came off it working for less than the price of a takeaway, because the faults on these machines are a short and repeatable list rather than a mystery.
What changes the outcome is knowing which Kenmore you have before you start. A 116 canister and a Cleva-era letter-coded machine fail in similar ways but recover through completely different channels, and the owners who lose money are the ones who order a belt against the wrong number or wait for a warranty that expired with the Sears retail estate.
So do it in this order. Read the plate, run the three checks, isolate the airflow path, then test the wiring at every junction before buying a single part. If the answer at the end of that is a suction motor on an old budget upright, walk away with your money and no regrets.
Read it your way
Short on time? Open this article in your assistant with a ready-made prompt and get the gist in seconds.
Found this useful? Make us a preferred source so we show up in your Google results.
Keep reading
Related articles

Troubleshooting & Repair
Roomba Not Working? 8 Symptoms Fixed (2026 Models)
Reboot first, then match your symptom. 8 Roomba faults (charge, Wi-Fi, error codes, brushes, bin) with per-series fixes for 600/e/i/j/s and 2026 models.

Troubleshooting & Repair
How Much Does a Vacuum Repair Cost? Fix or Replace (2026)
How much does a vacuum repair cost? Usually $50–150 (up to ~$321 for central). Use the 50% rule and our brand tier to decide: fix it or replace it in 2026.

Troubleshooting & Repair
Why Won’t My Robot Vacuum Work? 6 Fixes We Tested
Why won’t my robot vacuum work? Reset it, free the wheels, clean the sensors and fix a 2.4GHz Wi-Fi snag in 5 minutes: the DIY checks that skip a repair bill.

Troubleshooting & Repair
Not Broken? Why Won’t My Vacuum Work (Fix It First)
Fix it fast: ‘why won’t my vacuum work’ is usually a clog, thermal cutoff, or reset, not a dead motor. Match your symptom to the exact fix.
The discussion
Comments
Every comment is reviewed before it goes live.