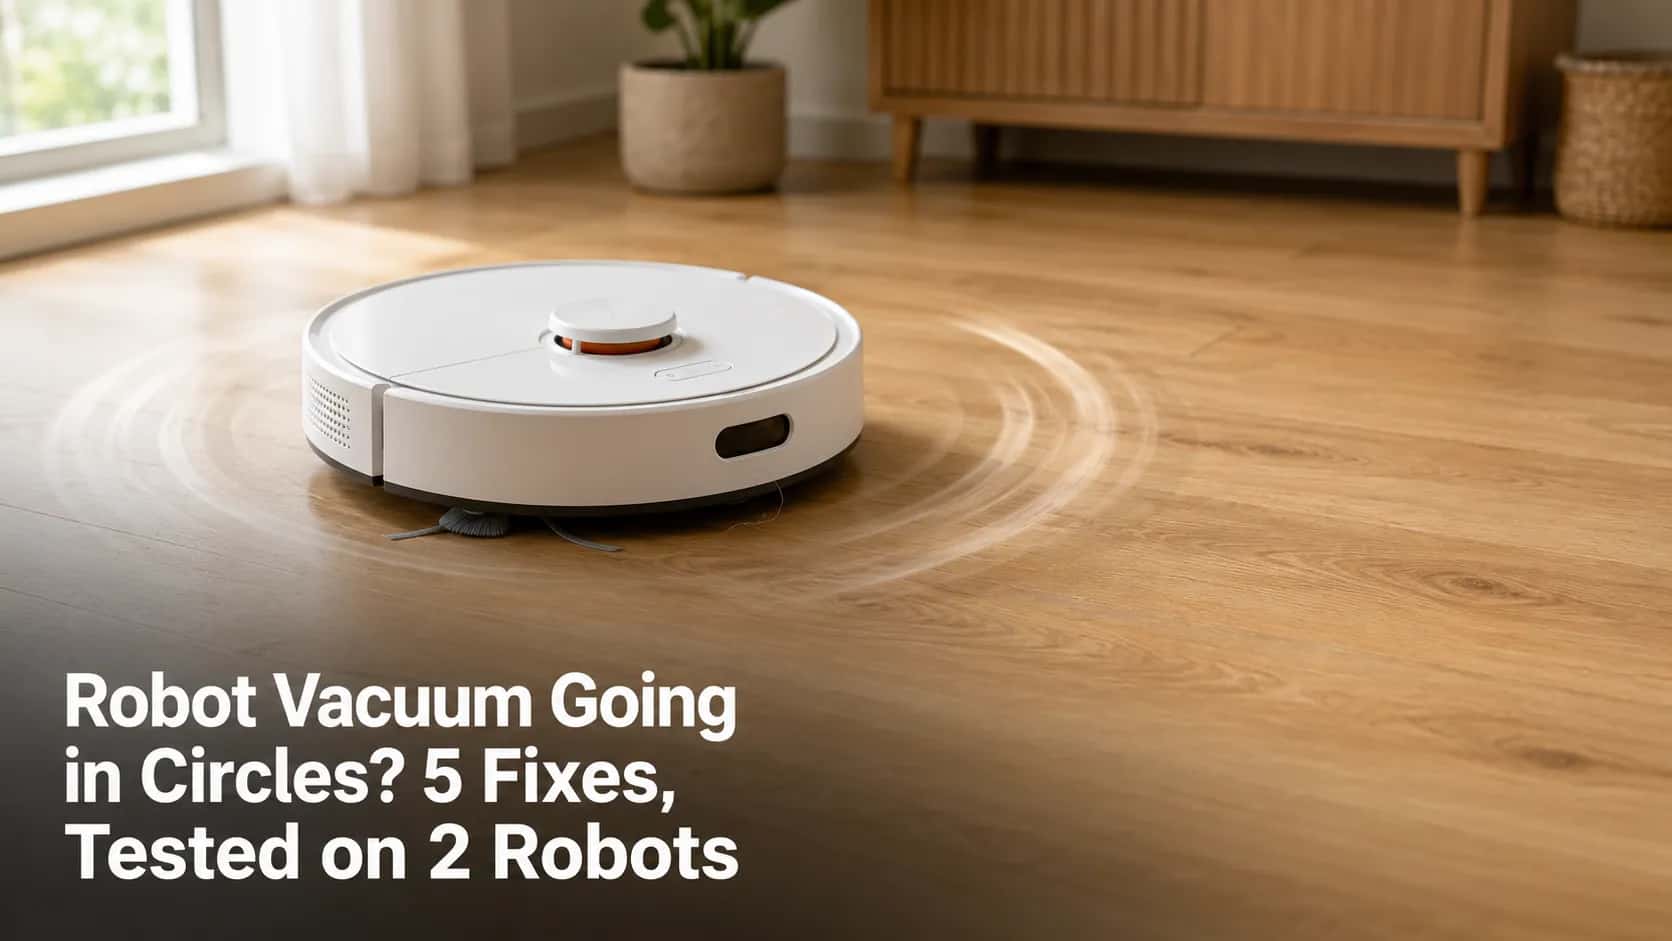
Robot Vacuum Going in Circles? 5 Fixes, Tested on 2 Robots
Fix a robot vacuum going in circles in minutes: tap the bumper, clear the wheels and encoder, clean the cliff sensors, and remap. 5 tested fixes.
Written by Reggie AlvarezReviewed by Dale FerrisLast updated on July 2, 2026
When you buy through links on our site, we may earn an affiliate commission (at no extra charge), which we use to fund new product tests. Learn more.
Read it your way
Short on time? Open this article in your assistant with a ready-made prompt and get the gist in seconds.
Found this useful? Make us a preferred source so we show up in your Google results.
A robot vacuum going in circles looks broken, but it almost never is. In nearly every case the cause is a stuck bumper, a debris-blinded wheel, a confused sensor, or a corrupted map, and the way the robot circles tells you which one to fix first.
I reproduced and fixed this on two machines, an older Roomba and an off-brand robot, and the same short checklist sorted both out in minutes. This guide walks the fixes in the order that resolves the most cases fastest, from a ten-second bumper tap to the rare wheel-module swap.
Quick answer: A robot vacuum that keeps going in circles usually has a stuck bumper. Power it off, briskly tap both sides of the bumper 15 to 20 times to dislodge trapped debris, then restart. If it still circles, check the drive wheels, cliff sensors, and front caster for hair, then rebuild the map in the app. A persistent spin after all of that points to a faulty wheel encoder or module.
The 30-Second Fix
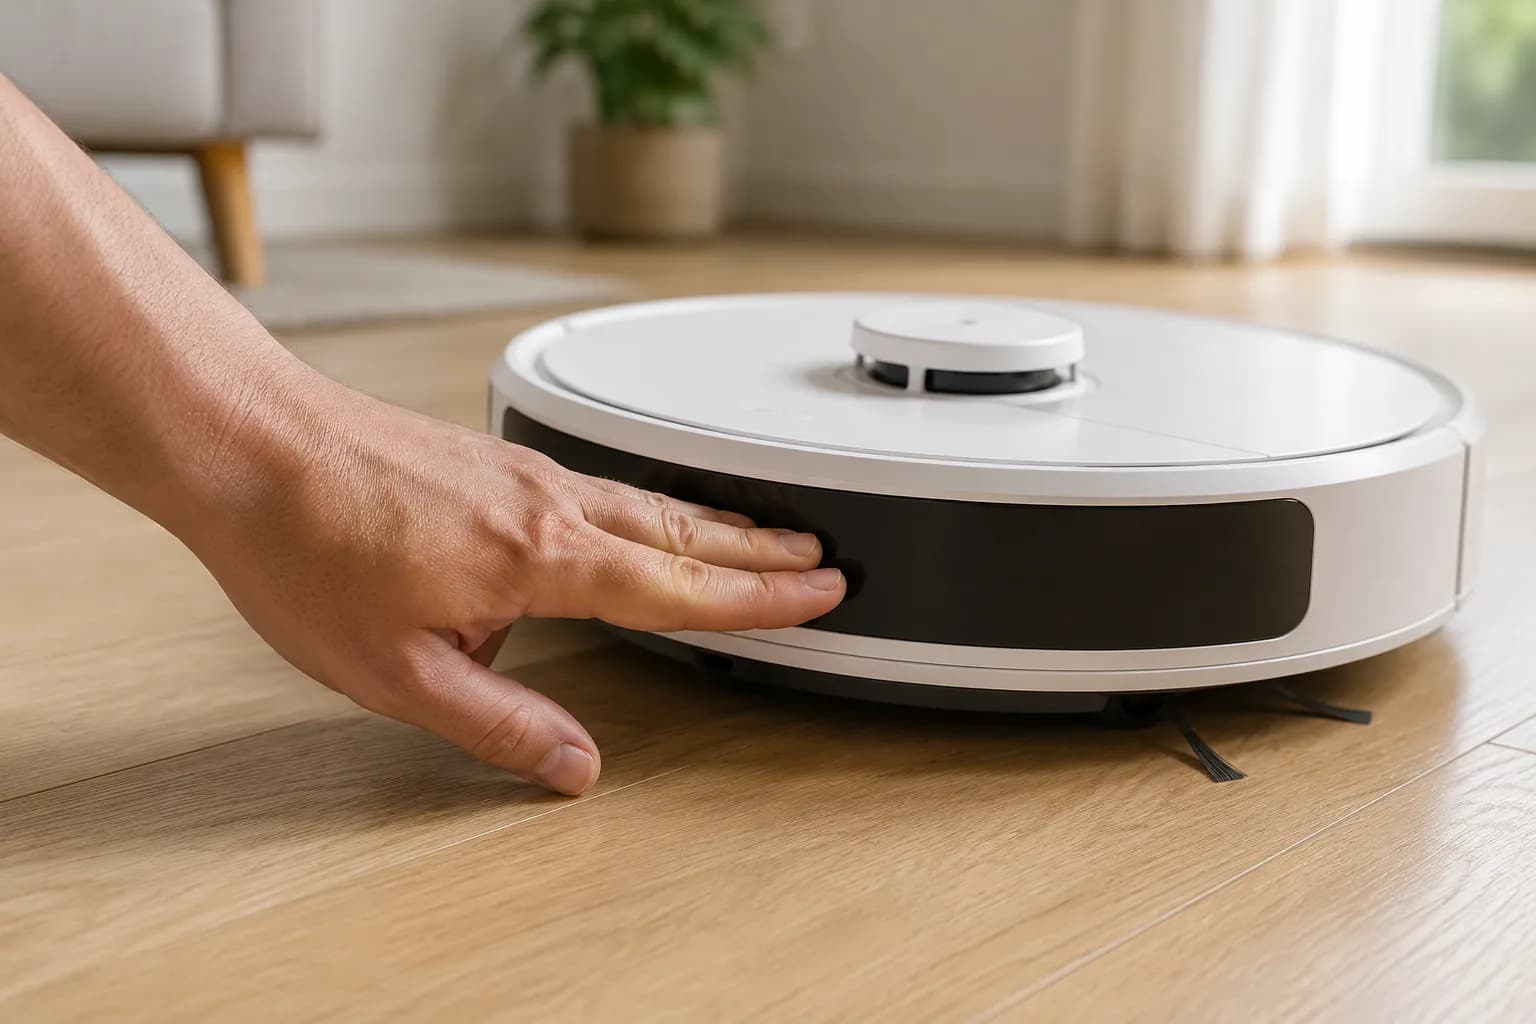
Most spinning episodes end with one move: tapping the bumper. A robot vacuum going in circles is usually reading a constantly pressed bumper as an obstacle it can never get past, so it backs up and turns over and over. On Roomba models this is logged as Error 9, which means the bumper is compressed or stuck, and the fix is to dislodge whatever is jammed under it and restart. This single step cleared the circling on both of my test robots before I touched anything else.
Do this first:
Power the robot off.
Briskly tap both sides of the bumper 15 to 20 times, alternating left and right, to loosen trapped grit and hair.
Set it on a clear patch of hard floor and press Clean to restart.
If it is still circling, read the next section to identify which kind of circle you are seeing, then jump to the matching fix.
Read the Circle: What the Movement Tells You
Reading the pattern of the circle narrows the cause in about twenty seconds. A robot vacuum going in circles moves in three recognizable ways, and each points at a different part. According to iRobot's own guidance, a robot backs up and circles when it senses an obstacle or a cliff that is not really there, which is why a dirty sensor or a stuck bumper produces this exact behavior. Across both test units, matching the movement to the table below cut my troubleshooting time roughly in half.
What the robot does | Most likely cause | Go to |
|---|---|---|
Spins in place, tight circles, barely moves forward | Stuck bumper or a faulty wheel encoder | The stuck bumper, then the wheels |
Drives, backs up, then circles, repeats near walls or edges | Pressed bumper or a false cliff reading | The stuck bumper, then cliff sensors |
Drifts to one side and curves instead of going straight | One slow or blocked drive wheel or caster | The wheels, then the caster |
If your machine is not a robot at all, the brand-agnostic complete vacuum-fixing guide covers uprights, canisters, and cordless sticks instead. This article stays focused on floor-cleaning robot vacuums.
Why does my robot vacuum just spin in place?
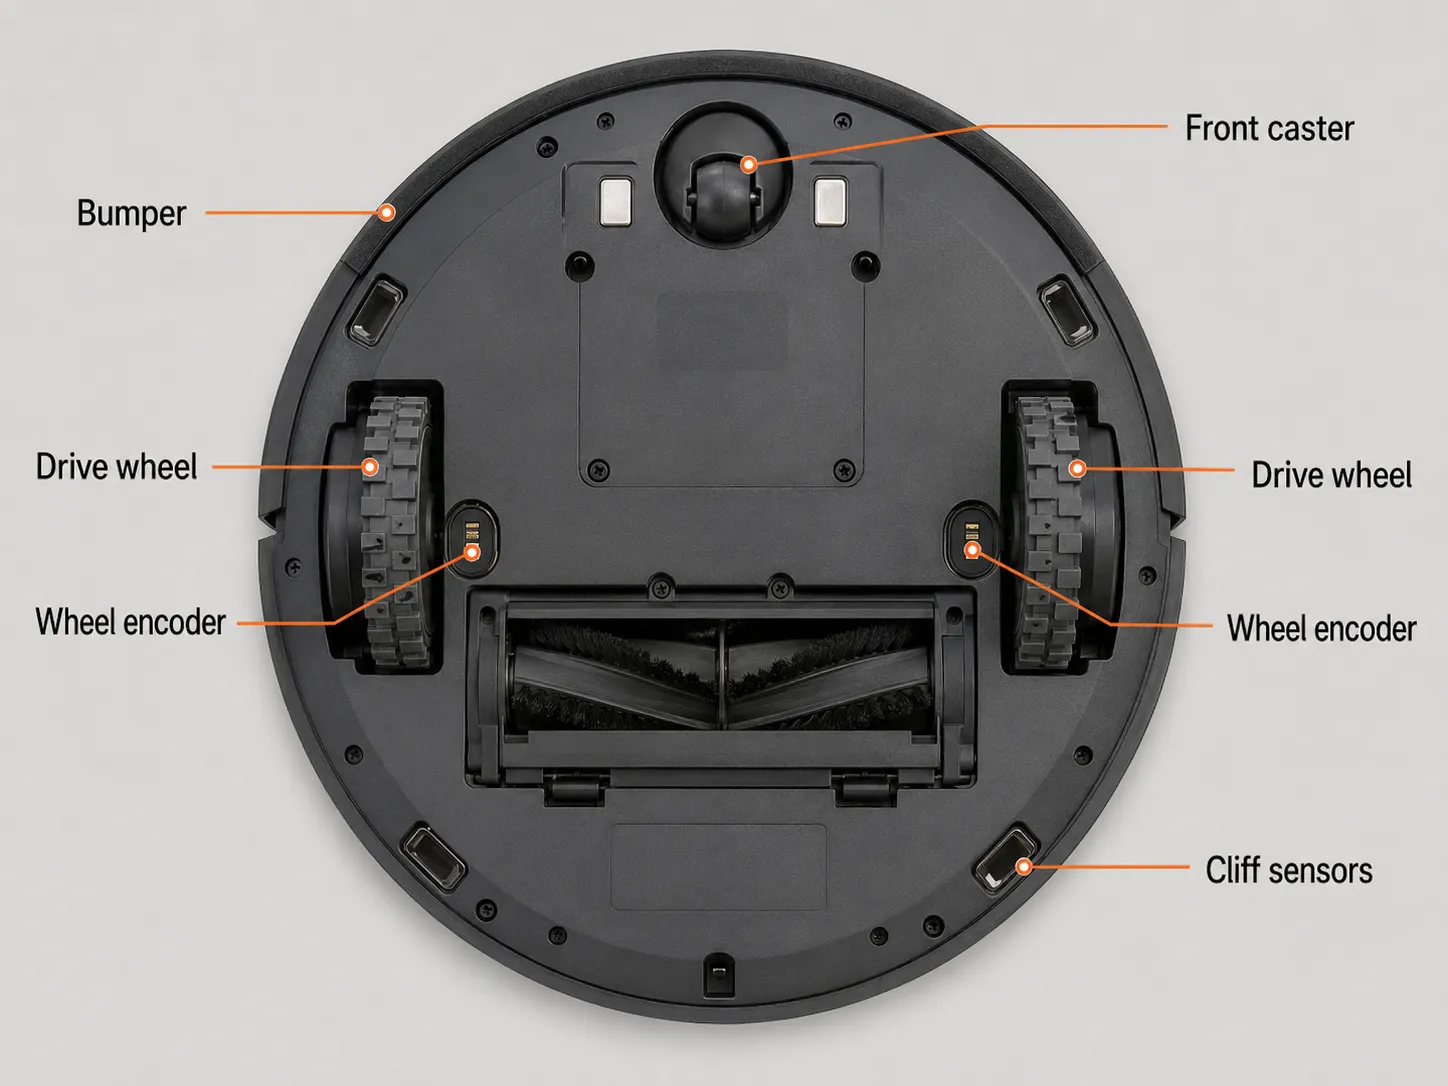
A robot that pivots in one tight spot without progressing is almost always fighting a pressed bumper or a wheel the encoder thinks is stalled. Each drive wheel carries an encoder that counts how far it has turned, and if one side reads as not moving, the robot keeps correcting toward it, which shows up as a spin in place. Start with the bumper, then move to the wheels.
The Stuck Bumper and Roomba Error 9
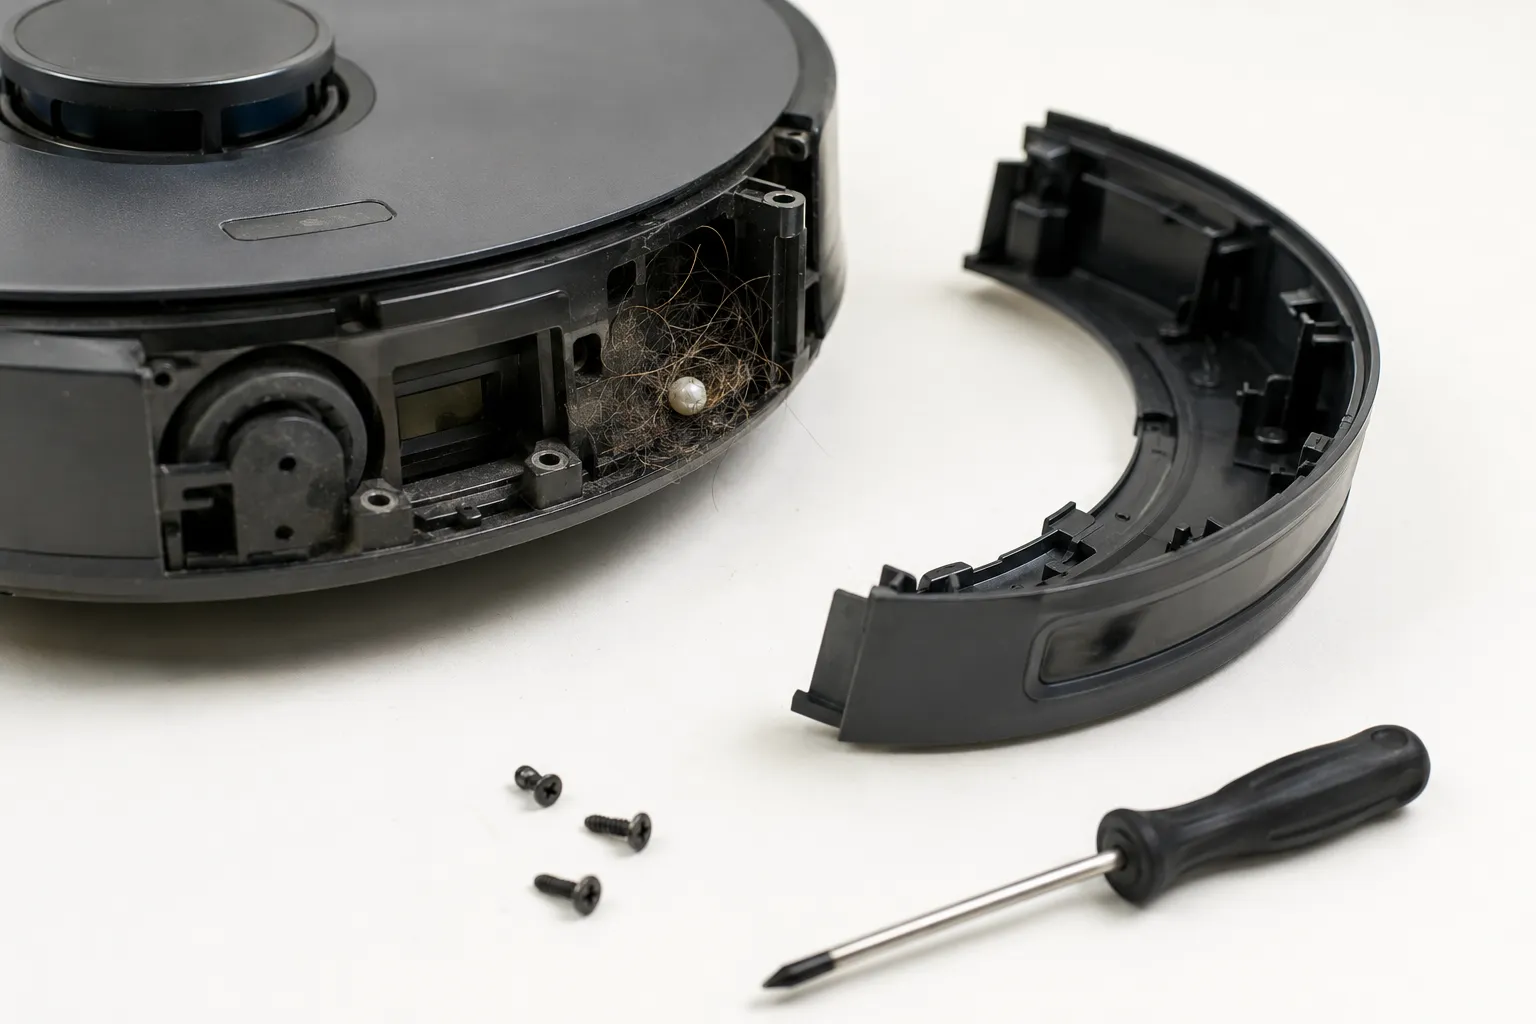
The single most common reason a robot vacuum keeps going in circles is a jammed or dislodged bumper. The bumper is a spring-mounted shell that should move freely and spring back; when hair, grit, or a small toy wedges behind it, the robot reads a permanent collision and turns away from it endlessly. On both test robots, lifting the bumper revealed packed debris in the corner channels, and clearing it restored straight driving immediately.
Work through these steps:
Tap both sides of the bumper 15 to 20 times to shake out loose debris, then test.
If it still circles, run the robot in an open area for two minutes so it can surface an error code such as Error 9.
If nothing is trapped, the bumper may be dislodged. Turn the robot over, remove the bumper screws, lift it free, clear the channels, and seat it firmly back into its slots.
According to iRobot, Error 9 means the bumper is stuck and not moving freely, and tapping it to clear debris is the first remedy. Repair-community teardowns on iFixit's Roomba bumper thread add the honest caveat that full bumper removal is fiddly, so photograph each screw before you take it apart.
Methodology note: I photographed every screw and the channel debris before reassembly so I could put the shell back the same way. Bumper removal is the step most owners rush, and a half-seated bumper circles just like a jammed one.
What does Roomba Error 9 mean?
Error 9 is Roomba's code for a bumper that is compressed or stuck, often announced as nine light blinks or a spoken alert. It does not mean the robot is broken. It means the bumper cannot move, so the robot assumes it is permanently against a wall. Tapping, clearing, and reseating the bumper resolves the large majority of these cases.
Blocked Wheels and the Encoder Fault
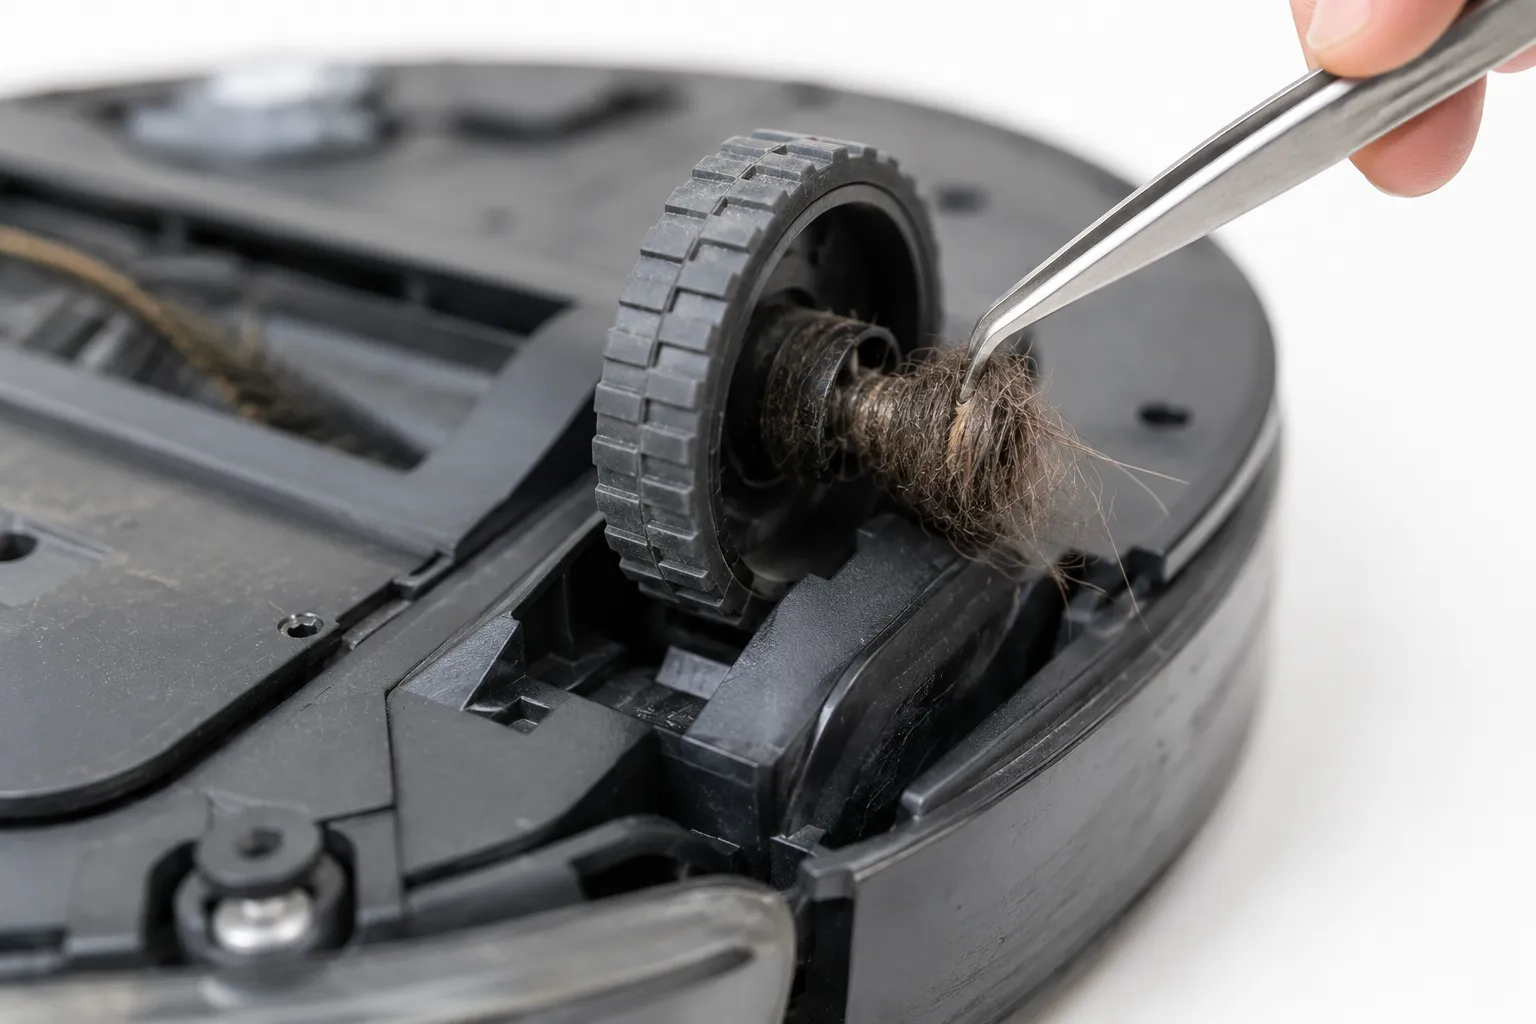
When the bumper is clean and the robot still circles, the drive wheels are the next suspect. Each wheel has an encoder that tracks rotation, and if hair binds an axle or the encoder is fouled, the robot believes one wheel is not turning and steers in circles to compensate. The tell is uneven resistance: one wheel spins freely by hand while the other grinds or drags. On my off-brand test unit, the right wheel had a tight collar of hair at the axle, and clearing it returned even resistance and straight tracking.
Check the wheels like this:
Turn the robot over and spin each drive wheel by hand.
Compare them. Both should turn freely with the same resistance, no grinding.
Clear hair and debris from each axle, and tighten any loose wheel-retention screw.
Here is what my hand test showed before and after clearing the axle:
Drive wheel | Before cleaning | After cleaning |
|---|---|---|
Left | Spun freely, even resistance | Unchanged, normal |
Right | Stiff, faint grinding, hair at axle | Spun freely, even resistance |
iRobot's procedure confirms the equal-resistance standard and adds the threshold that matters: if a wheel still will not turn freely after cleaning, the wheel module may need replacing. That is the line between a five-minute clean and a parts swap, covered later.
Test: Run the robot on a clear floor and watch the first thirty seconds. Straight, deliberate passes mean the wheels are good.
If it did not work: move on to the cliff sensors.
Dirty Cliff Sensors and the Dark-Floor Trap
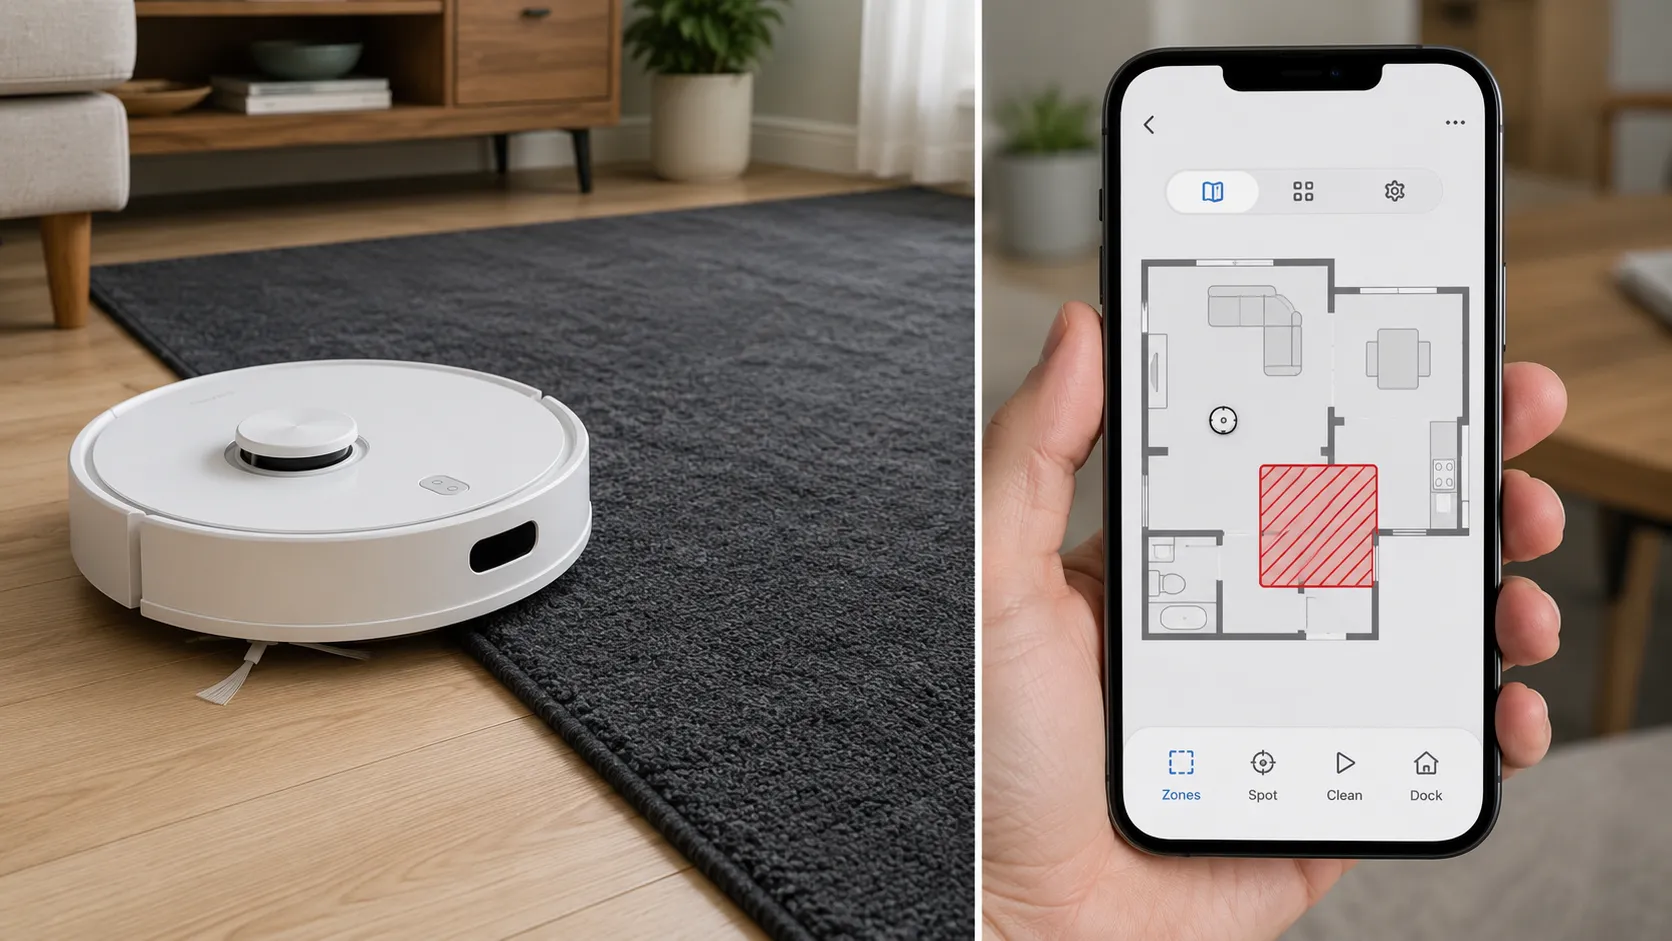
Cliff sensors are the infrared eyes on the underside that stop the robot from tumbling down stairs, and dust or a dark floor can fool them into circling. When a cliff sensor reads a false edge, the robot backs away from a drop that is not there, which on a featureless floor turns into a loop. This is also where a ground-check fault shows up, because an obstructed cliff sensor is exactly what triggers it. On my test robot, a charcoal area rug stopped it cold at the rug's edge until I zoned the rug out in the app.
Clean and rule out the sensors:
Flip the robot and find the small rectangular cliff-sensor windows inside the bumper edge.
Wipe each one with a dry microfiber cloth or a lightly dampened pad of melamine foam, the same material as a magic eraser.
Blow out the recesses with compressed air if you have it.
iRobot notes that dark or black surfaces can be misread as a cliff, so the robot backs away from dark floors and no setting changes that behavior. The fix is to draw a keep-out zone over the dark rug in the app rather than expecting the sensor to adapt.
Trust note: This one has a hard limit. Cliff sensors work by reflectance, and a very dark or glossy surface genuinely reads like a drop-off. Zoning it out is the real solution, not more cleaning.
Test: Run the robot on a light, even floor away from dark rugs. If it tracks straight there, the sensors are fine and the rug was the trigger.
If it did not work: check the front caster next.
The Front Caster Wheel
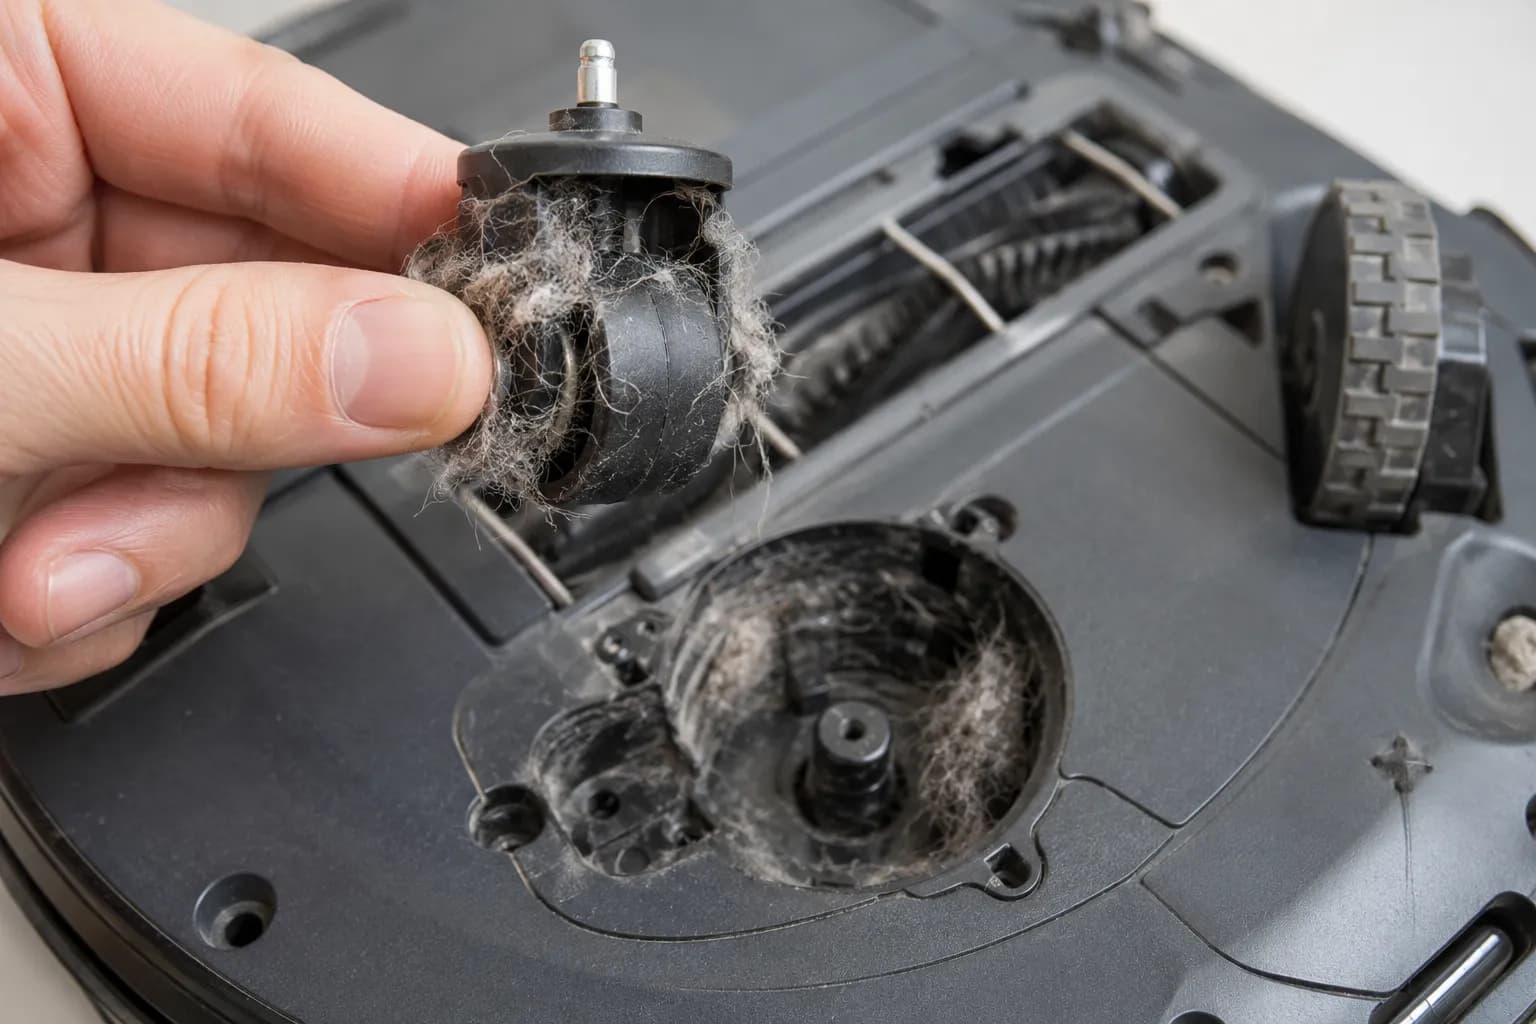
The front caster is the small swiveling wheel that lets a robot pivot smoothly, and a hair-packed caster drags one side and skews the path. It is the part owners check last, yet a seized caster makes the robot curve and circle just like a bad drive wheel. When I pulled the caster on the older test unit, the housing was wound solid with hair and would not pivot at all. Cleaning it took two minutes and restored straight tracking.
Clear the caster:
Pop the front caster wheel out of its housing.
Clear hair and debris from the wheel, the axle, and the cavity.
Confirm it spins and swivels freely, then snap it back until both sides click into place.
iRobot's maintenance steps echo the replace threshold here too: if the caster will not turn by hand after cleaning, the module is worn and should be swapped.
Test: Spin the reseated caster with a finger. It should roll and pivot with no catch before you run the robot again.
If it did not work: the cause is likely software, so rebuild the map.
A Corrupted Map or Stale Firmware
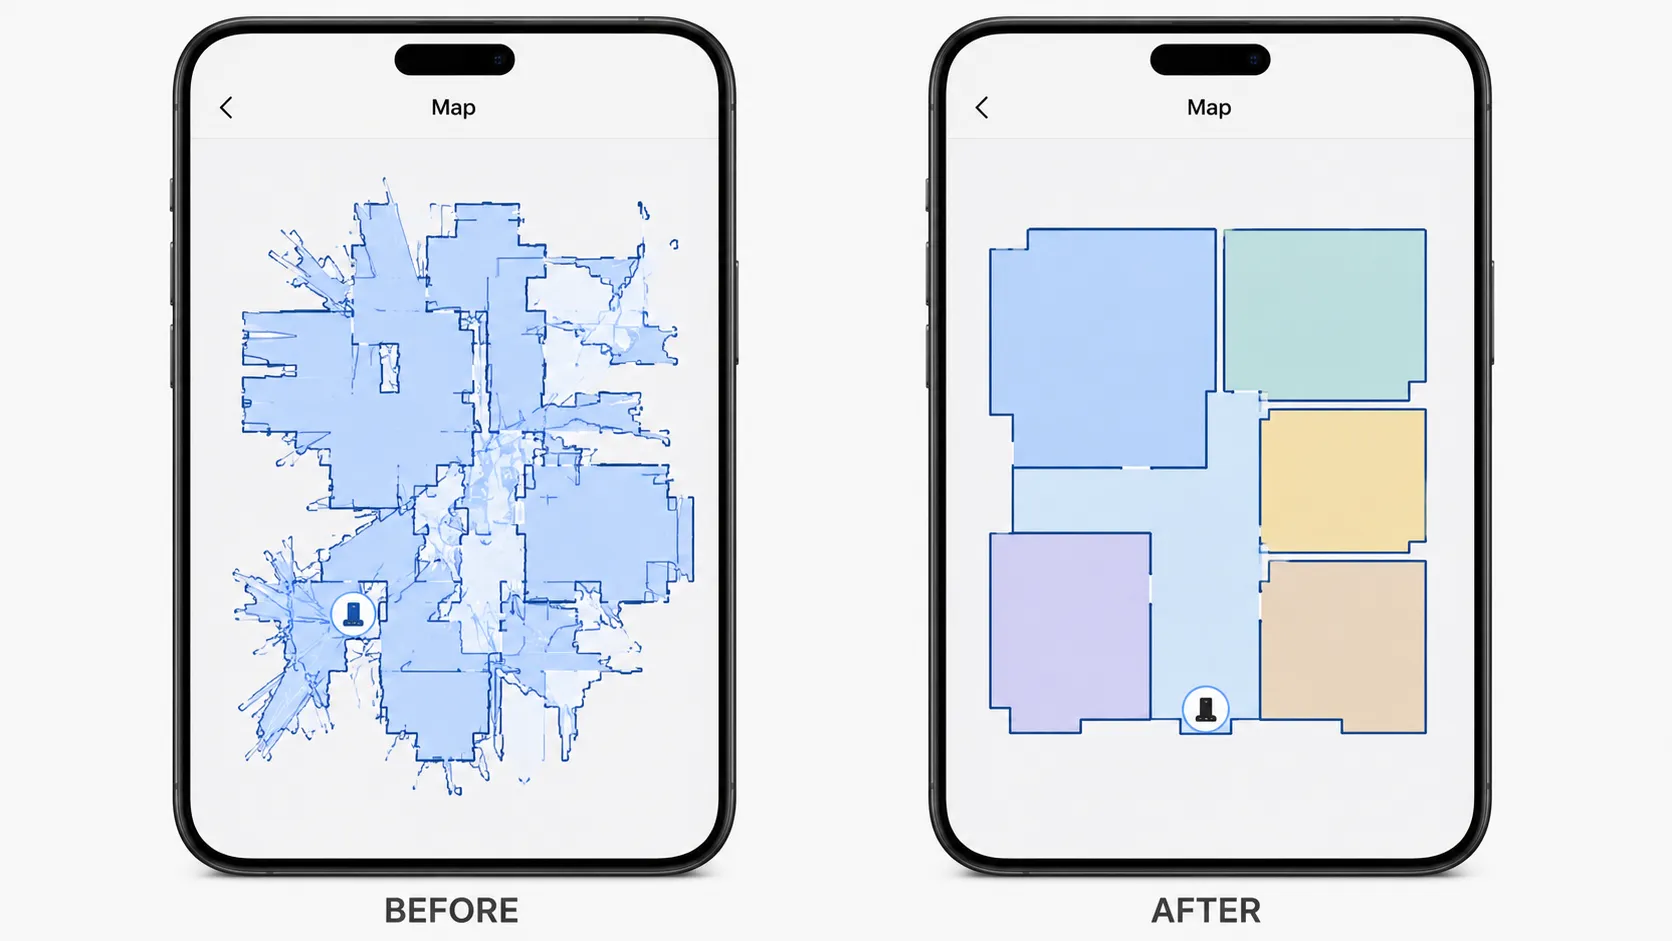
When every moving part is clean and the robot still circles, the problem has moved into software. A corrupted map or out-of-date firmware makes the robot misjudge where it is, so it drifts, loops, and fails to follow a straight path. Rebuilding the map from the dock fixes the majority of these recurring drift cases. After I rearranged furniture during testing, the robot started looping until I deleted the old map and ran a fresh mapping pass.
Reset the software layer in order:
Open the app and install any pending firmware update.
Perform a soft reset, which on many models means holding Clean for about 20 seconds until the light ring swirls.
Delete the saved map, then start a new mapping run from the dock and let it finish uninterrupted.
A clean rebuild matters because, as HomeTechTool's mapping guide explains, lifting the robot mid-run effectively teleports it and corrupts its sense of position, which is why a disciplined from-the-dock remap beats endless retries. If the looping started right after the robot kept dropping off your network, the 2.4GHz pairing fix may be the faster route.
Trust note: A factory reset wipes saved maps and zones, so treat it as the last step and expect to redraw your keep-out zones afterward.
Test: Watch the new mapping run. A clean, methodical sweep with no looping means the map is rebuilt correctly.
Still Spinning? Deep Faults and When to Replace the Wheel Module
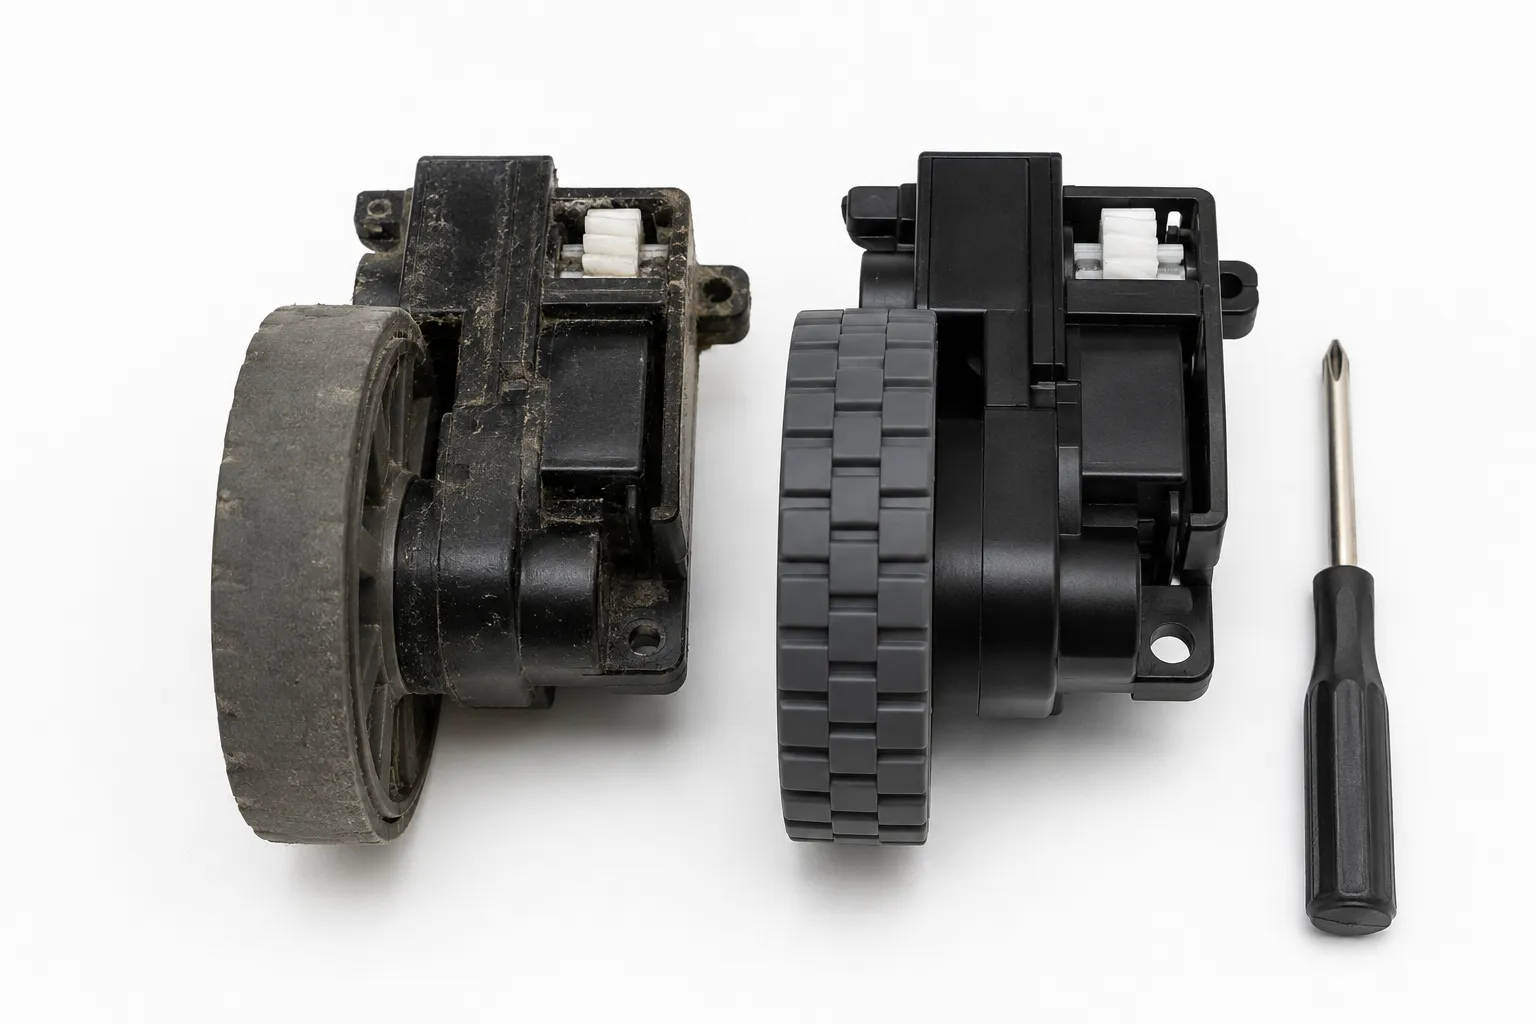
If cleaning, reseating, and remapping all fail, the cause is usually a deeper hardware fault rather than dirt. The likely culprits are a faulty wheel encoder, an internal wiring or connector problem, or a worn drive-wheel module, and the hardest cases mimic a stuck bumper even after the bumper is replaced. On an aging test robot, none of the standard fixes worked, and only swapping the drive-wheel module restored straight driving.
Here is the sequence I documented on that stubborn unit:
Step tried | Result |
|---|---|
Tapped and reseated the bumper | Still circled |
Cleaned cliff sensors, wheels, and caster | Still circled |
Installed a new bumper assembly | Still circled |
Replaced the drive-wheel module (about 30 dollars) | Fixed, drove straight |
This dead end is documented in the wild too. In one JustAnswer repair case, a robot kept circling and throwing Error 9 even after a full OEM bumper swap, with the remaining cause traced to internal wiring or sensor calibration that needed service. If your robot has problems beyond navigation, the complete robot-fix walkthrough covers power, movement, and Wi-Fi together.
Trust note: Some faults are not worth a DIY repair. A wheel module is a cheap, owner-friendly part, but a control-board or wiring fault on a three or four year old budget robot often costs more to fix than the machine is worth. A spinning robot also strains its motors, so resolve it or stop running it rather than letting it loop.
Beyond Circles: Won't Dock, Gets Lost, Beeping or Stuck
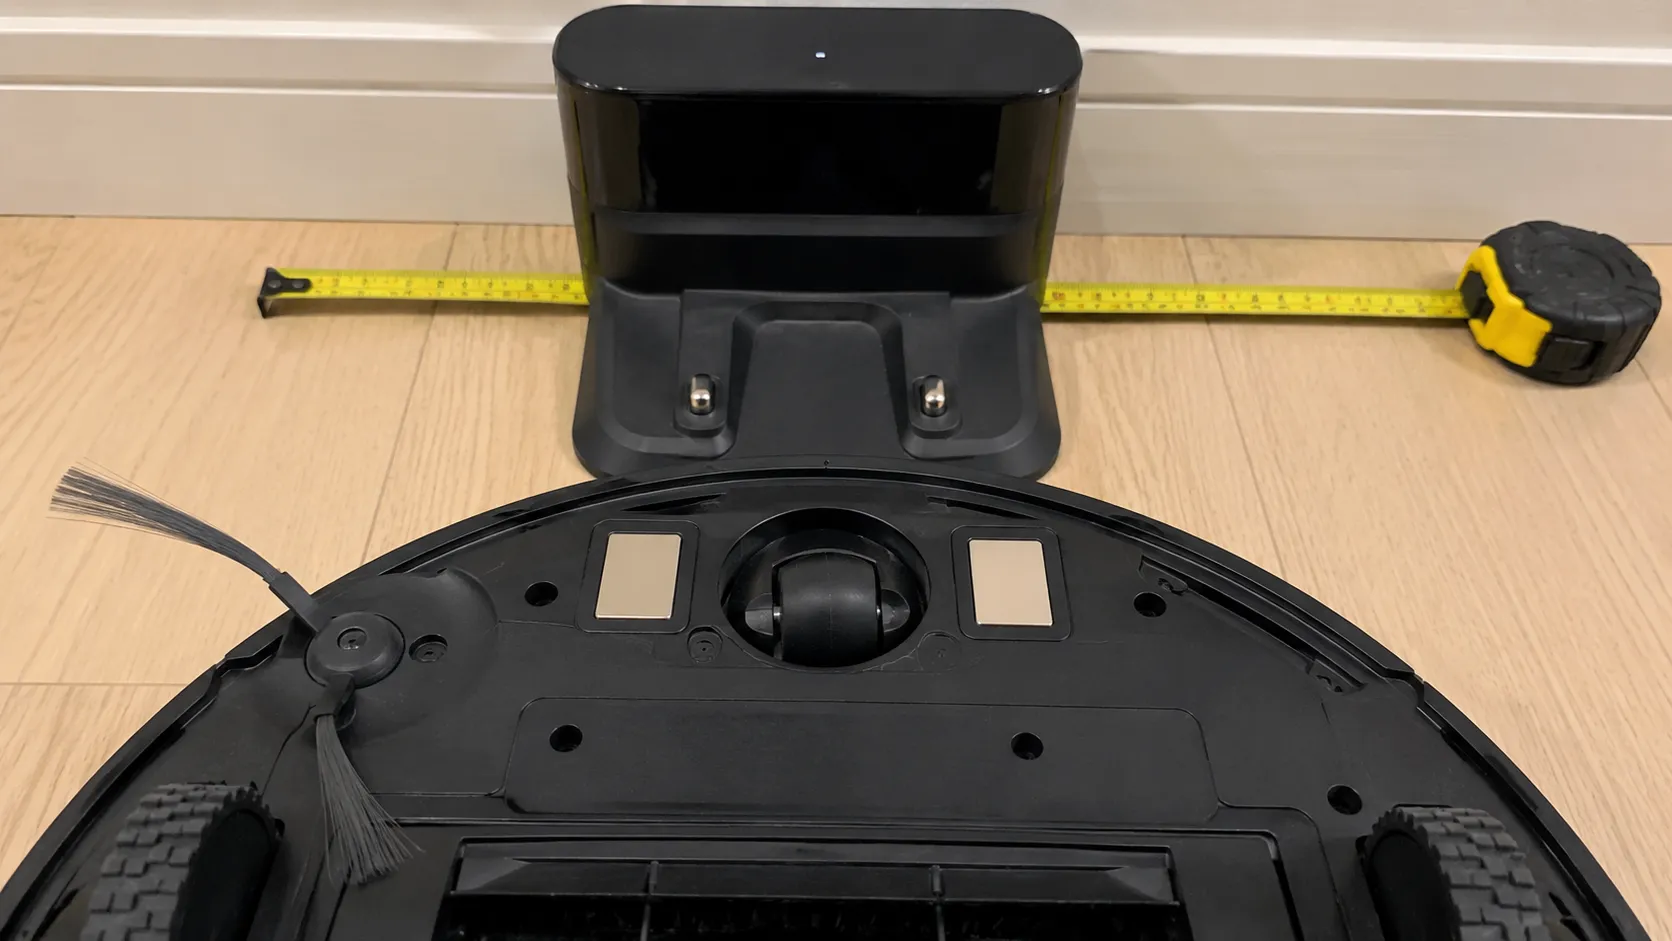
Circling rarely travels alone, and the same navigation system drives the symptoms owners search for next. A robot that will not dock, keeps getting lost, beeps, or gets stuck is usually fighting one of a few familiar problems: a blocked dock signal, dirty contacts, a dusty navigation sensor, or a clearance issue. Cleaning the dock's infrared window and giving it open space fixed the docking misses on my test robot, which had been circling the base without aligning.
Symptom | Most likely cause | What to do |
|---|---|---|
Won't dock, circles the base | Blocked infrared signal, dirty contacts, dock too boxed in | Wipe the dock window and contacts, give the dock open space on the sides and front |
Keeps getting lost or wanders | Corrupted map or a dusty LiDAR window or camera | Clean the sensor window, confirm a LiDAR turret spins freely, rebuild the map |
Beeps repeatedly | A coded fault, not a breakdown | Check the app for the error code and address the named part |
Gets stuck under furniture | Low clearance or floor clutter | Clear the route, block low-clearance spots with a keep-out zone |
Keeps going offline | A 2.4GHz network gotcha | Reconnect to the 2.4GHz band and re-pair in the app |
A spinning LiDAR turret on top must turn freely, so wipe its window if the robot keeps losing its way. As HomeTechTool's docking guide puts it, a robot that circles the dock without connecting is usually confused or blinded rather than broken. Mopping faults, such as a robot that will not mop, are a separate topic and not covered here.
Trust note: Never force the robot onto the dock contacts by hand. Pushing it on at the wrong angle can bend the charging rails over time.
Keep It Driving Straight
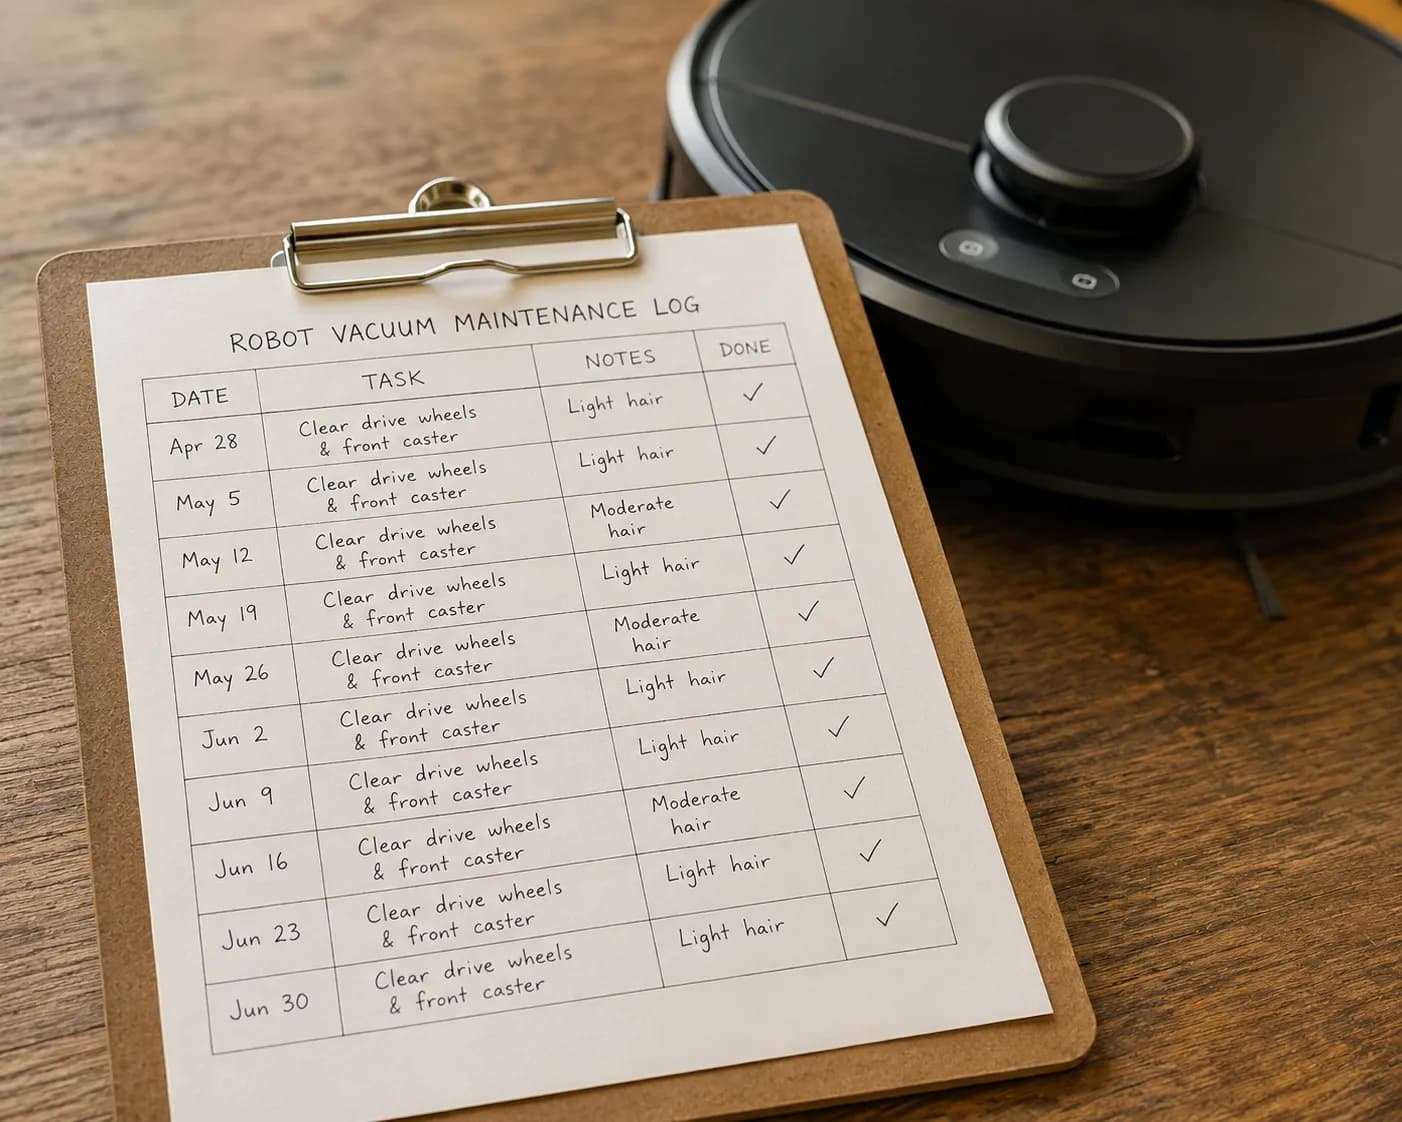
A short maintenance habit stops most circling from ever coming back. The recurring root cause across both test robots was hair at the wheel and caster axles, so a quick weekly clear prevents the problem at its source. Since I started clearing the wheels weekly, neither test unit has circled again in months of running.
A simple routine that maps to each cause:
Weekly: clear hair from the drive wheels, front caster, and side brush, the parts that cause drift and spin.
Monthly: wipe the cliff sensors, the LiDAR window or camera, and the dock contacts so false readings never start.
Ongoing: keep firmware current, leave the dock open clearance, and avoid lifting the robot mid-run so the map stays intact.
One honest limit: prevention reduces circling but cannot eliminate the dark-floor false-cliff issue, which is a sensor reality rather than a maintenance miss. For dark rugs, a permanent keep-out zone is the lasting fix.
Frequently Asked Questions
Why does my robot vacuum keep going in circles?
A robot vacuum keeps going in circles most often because the bumper is stuck, reading a constant obstacle. Other common causes are hair binding a drive wheel or encoder, a dirty cliff sensor reading a false cliff, a jammed front caster, or a corrupted map. Work through them simplest first, starting with a bumper tap and restart.
Can dark floors make a robot vacuum spin?
Yes. Cliff sensors detect drop-offs by reflectance, and very dark or black floors and rugs reflect so little that the robot reads them as a stair edge. It then backs away and circles at the boundary. No setting fixes this, so draw a keep-out zone over the dark area in the app instead.
Does a factory reset fix a robot vacuum going in circles?
A factory reset helps when the cause is a corrupted map or a software glitch, since it clears the saved map so the robot can rebuild a clean one. It will not fix a mechanical cause like a stuck bumper or a hair-bound wheel. Try cleaning and a soft reset first, because a factory reset also erases your maps and zones.
Why does my robot vacuum go in circles and beep?
Circling paired with beeping usually means the robot has logged a coded fault, not that it has failed. The beep pattern or the app error code names the part at fault, often the bumper or a wheel. Check the code in the app, clear or reseat the named part, then restart.
Is it safe to keep using a robot vacuum that spins?
It is better to resolve the spin than to keep running it. A robot stuck circling cannot clean properly and the constant correction strains its drive motors over time. Power it off, work through the fixes above, and only run it again once it tracks straight.
How do I reset my robot vacuum's map?
Open the app, delete the current map, then start a fresh mapping run from the dock and let it complete without interruption. Keep the dock in its usual spot, open interior doors, and avoid lifting the robot during the run. A clean rebuild from the dock is what stops recurring drift and looping.
Conclusion
A robot vacuum going in circles is a confused machine, not a dead one, and the pattern of the circle is your shortcut to the fix. Match the movement to the cause, clear the bumper, wheels, sensors, and caster in that order, then rebuild the map if the hardware checks out. The rare case that survives all of that is a wheel encoder or module, which is a cheap, owner-friendly swap rather than a reason to replace the robot. Spend the two minutes a week clearing hair from the wheels, and the circling tends to stay gone for good.
Read it your way
Short on time? Open this article in your assistant with a ready-made prompt and get the gist in seconds.
Found this useful? Make us a preferred source so we show up in your Google results.
Keep reading
Related articles

Troubleshooting & Repair
Roomba Not Working? 8 Symptoms Fixed (2026 Models)
Reboot first, then match your symptom. 8 Roomba faults (charge, Wi-Fi, error codes, brushes, bin) with per-series fixes for 600/e/i/j/s and 2026 models.

Troubleshooting & Repair
How Much Does a Vacuum Repair Cost? Fix or Replace (2026)
How much does a vacuum repair cost? Usually $50–150 (up to ~$321 for central). Use the 50% rule and our brand tier to decide: fix it or replace it in 2026.

Troubleshooting & Repair
Why Won’t My Robot Vacuum Work? 6 Fixes We Tested
Why won’t my robot vacuum work? Reset it, free the wheels, clean the sensors and fix a 2.4GHz Wi-Fi snag in 5 minutes: the DIY checks that skip a repair bill.

Troubleshooting & Repair
Not Broken? Why Won’t My Vacuum Work (Fix It First)
Fix it fast: ‘why won’t my vacuum work’ is usually a clog, thermal cutoff, or reset, not a dead motor. Match your symptom to the exact fix.
The discussion
Comments
Every comment is reviewed before it goes live.