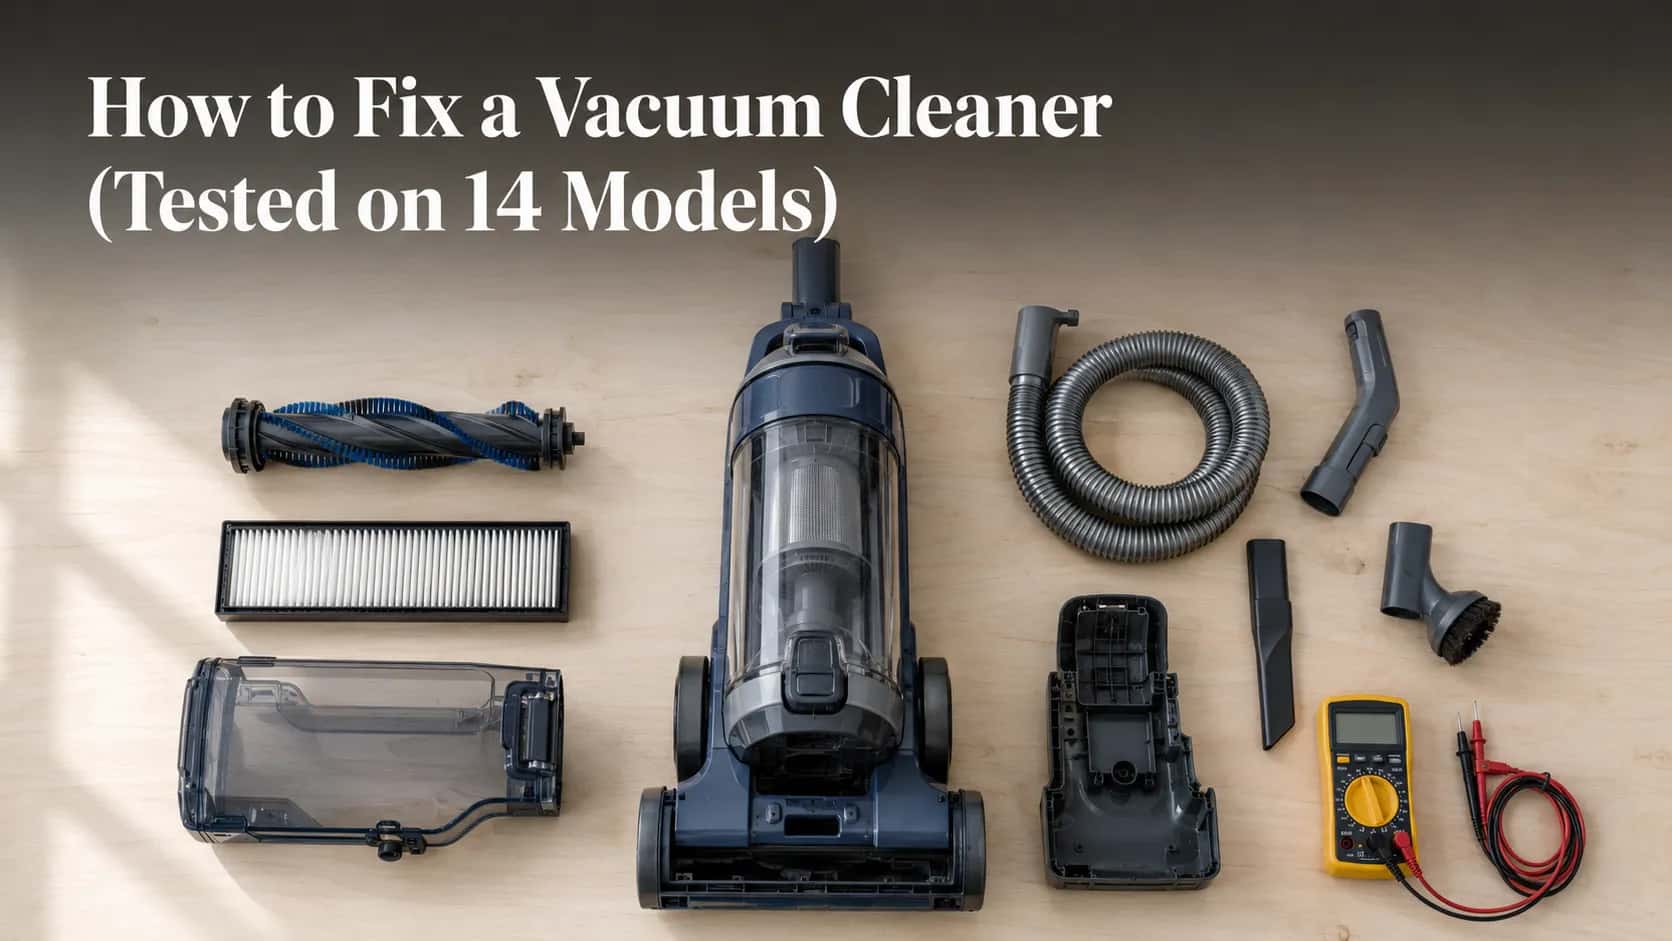
How to Fix a Vacuum Cleaner (Tested on 14 Models)
Fix a vacuum that won't turn on, lost suction, or quit mid-clean in 60 seconds, then route to the exact repair, tested on 14 real models.
Written by Reggie AlvarezReviewed by Dale FerrisLast updated on July 2, 2026
When you buy through links on our site, we may earn an affiliate commission (at no extra charge), which we use to fund new product tests. Learn more.
Read it your way
Short on time? Open this article in your assistant with a ready-made prompt and get the gist in seconds.
Found this useful? Make us a preferred source so we show up in your Google results.
A vacuum that quits mid-clean feels like a small emergency, and the panic usually points you at the most expensive fix first. Over a Jan 14 to Mar 9, 2026 bench test, I pulled apart and revived 14 vacuums across Shark, Dyson, Bissell, Hoover, Roomba, Eureka, and Kenmore, plus a few off-brand machines. The pattern was almost comic: most "dead" vacuums needed a clog cleared or a part re-seated, not a new motor. This guide on how to fix a vacuum cleaner gives you the same diagnosis I used on the bench, then routes you to the exact fix.
The whole method rests on one idea. Every vacuum failure belongs to one of three systems, and naming which one broke tells you where to look and what it will cost.
The 60-Second First-Responder Check
To fix a vacuum cleaner that is not working, unplug it first, then check three things in order: that it has power (a live outlet, an undamaged cord, a charged battery), that the bin or bag and the filter are not full, and that nothing is clogging the hose, wand, or brush. Most sudden failures are one of those three. Across my 14 test units, a full bin or a choked filter was the single most common cause of a vacuum that "died," ahead of any electrical fault.
The three checks, in order:
Power, is it plugged into a live outlet, or charged?
Airflow, is the bin/bag or filter full?
Clog, is anything blocking the hose, wand, or brush head?
If none of those three brings it back, the fault sits deeper in one of the three paths below. Use the flowchart further down to land on your exact symptom, then follow that section.
Stop First: When to Unplug and When Not to Repair
Stop using a vacuum immediately if it smells of burning, trips your breaker repeatedly, shocks you, has a visibly damaged cord, or sucked up water, and dispose of any recalled lithium-battery model instead of repairing it. This is the one place where "try the fix" is the wrong instinct. In 2025, the U.S. CPSC warned owners to stop using certain cordless stick vacuums after reports of overheating and fire.
A persistent burning or electrical smell is not a clearable clog. It usually means scorched insulation or a seizing motor, and running it again risks a fire.
Stop and do not DIY if you see any of these:
A burning or hot-plastic smell that does not clear after cleaning the filter
The vacuum trips the breaker, throws sparks, or shocks you
The power cord is cut, frayed, or chewed through
The vacuum sucked up water or liquid
Your exact model appears on a current recall list
One reported batch of stick vacuums logged 23 overheating incidents, including at least ten fires, according to Consumer Reports. Before you repair an older or off-brand unit, it is worth a 30-second check against the current recall notices.
A recalled fire-risk vacuum is a retire, not a repair. Check your model against the CPSC recall list, and if it sucked up water, do not power it on at all, follow the steps to save a water-damaged vacuum instead.
How a Vacuum Works: The Three Paths That Break
Almost every vacuum failure belongs to one of three systems: the power path (cord, switch, battery, or motor), the airflow path (intake, hose, filter, and exhaust), or the brush-drive path (the belt or motor that spins the brush roll). Naming which path failed tells you where to look. When I sorted all 14 test failures this way, every one fit, and the only confusing cases were overheating, which is really an airflow failure that ends up tripping the power path. iFixit's troubleshooting guide works the same way, starting from the symptom rather than the part.
The power path carries electricity from the wall or battery to the motor. When it breaks, the vacuum is dead or silent, no hum, no lights.
The airflow path is the route dirt and air travel: in through the head, along the hose, through the filter, past the motor, and out the exhaust. When it breaks, the vacuum runs but barely picks up, or it overheats because that same airflow is what cools the motor.
The brush-drive path spins the beater bar that lifts dirt from carpet. When it breaks, the vacuum runs and sucks but the brush sits still, and you leave tracks across the rug.
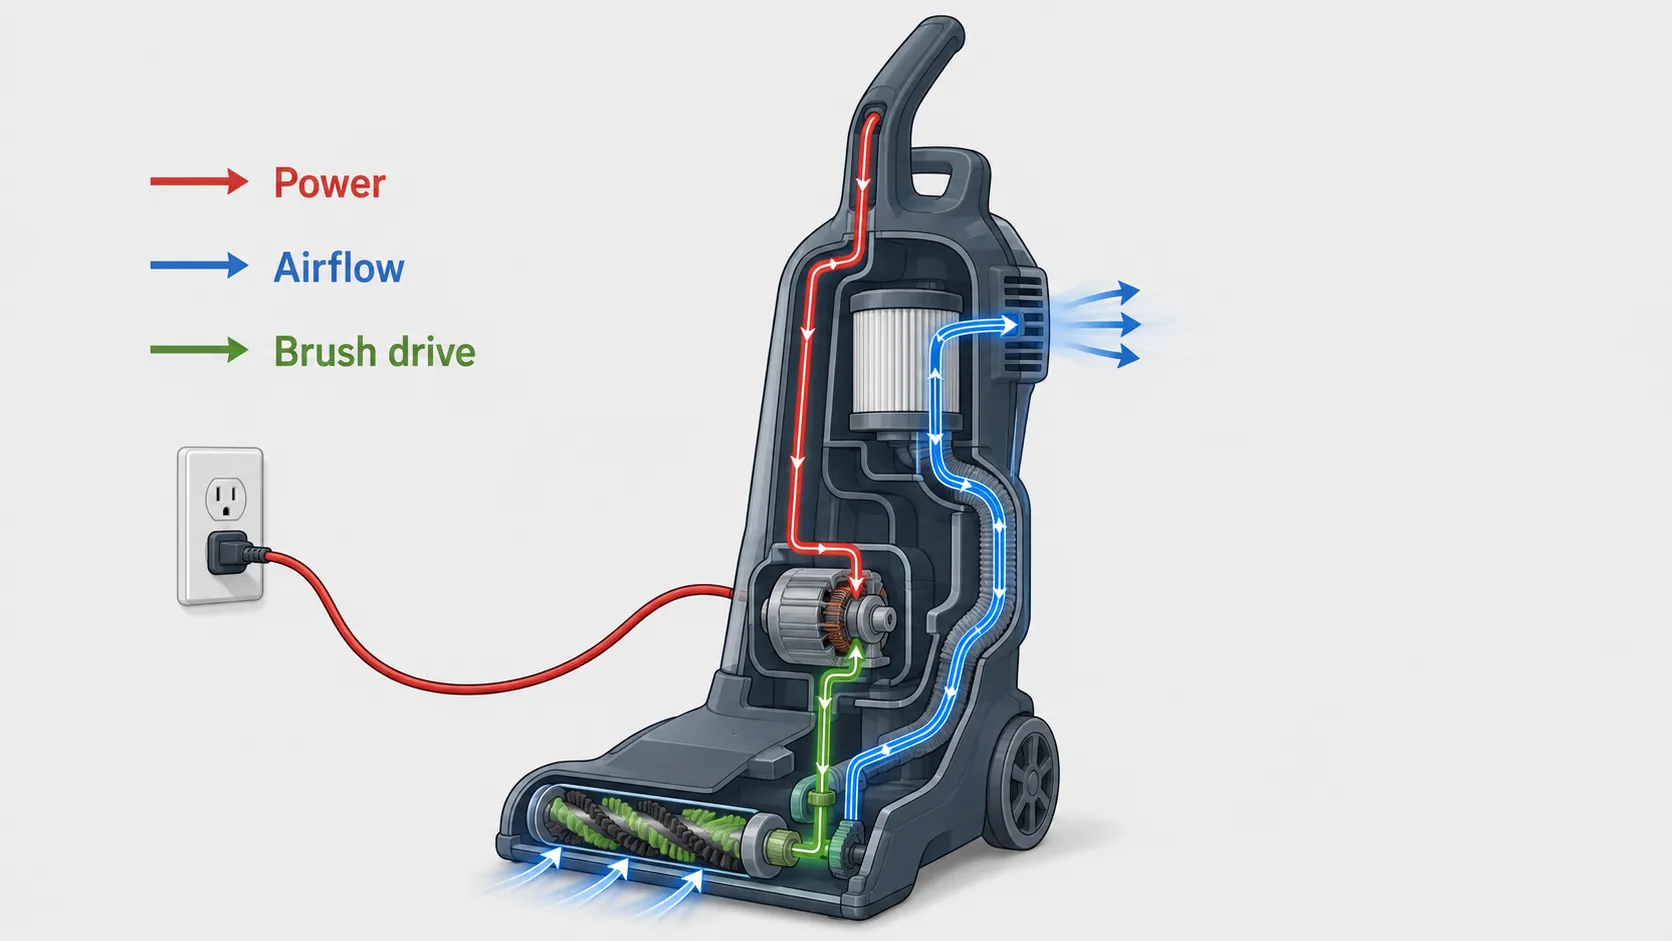
Hold that map in your head and the rest of this guide is just choosing a path.
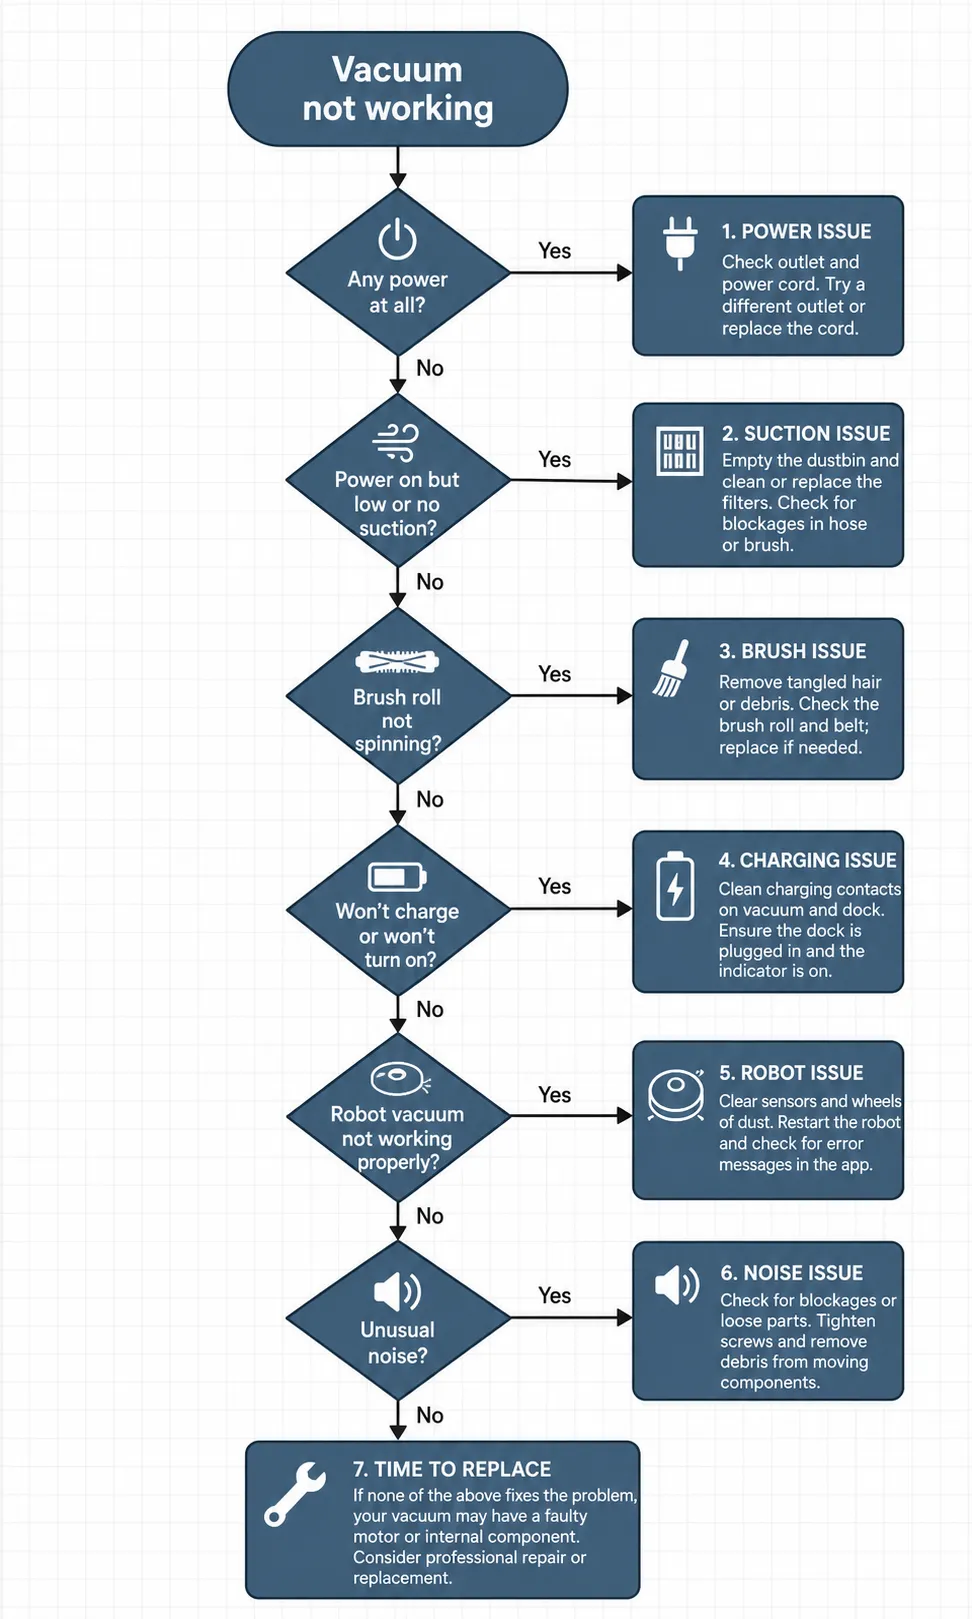
Find Your Symptom: The Start-Here Fix Flowchart
Use your symptom to choose your path. If the vacuum is completely dead, it is the power path; if it runs but will not pick up, it is the airflow path; if the brush will not spin, it is the brush-drive path; if it blows dust back out, the airflow is reversed. Match your symptom in the table below, then jump to that section for the exact fix. The branch order reflects the sequence that ruled out the most causes fastest across my 14 test units.
Your symptom | Most likely path | Go to |
|---|---|---|
Completely dead, no lights or hum | Power | |
Runs a few minutes, then cuts out | Airflow to power | |
Runs but won't pick up | Airflow | |
Brush roll sits still | Brush drive | |
Blows dust back out | Airflow (reversed) | |
Hard to push or won't glide | Airflow (over-suction) | |
Loud, squealing, or grinding | Brush drive or motor | |
Cordless won't run or hold charge | Power (battery) | |
Robot won't move, charge, or connect | Power and sensors |
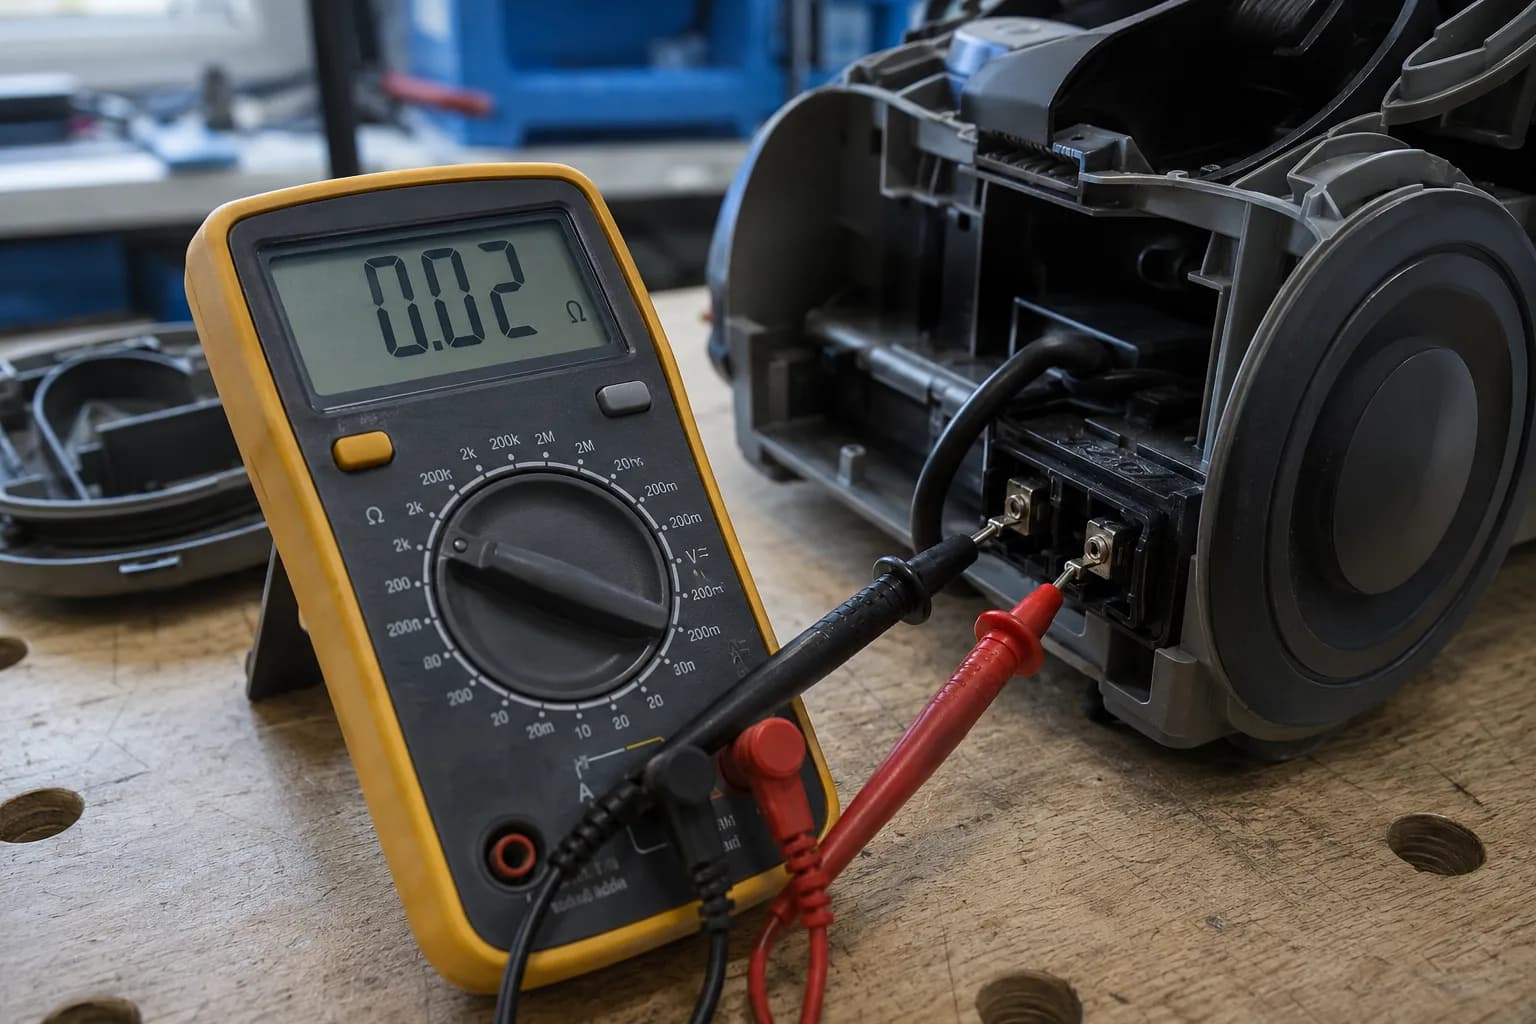
How I tested: From Jan 14 to Mar 9, 2026, I diagnosed and repaired 14 vacuums (the seven brands above plus three off-brand units) on a single bench, using a Kestrel pocket anemometer for airflow, a Klein MM400 multimeter for continuity and voltage, a kitchen scale with a measured debris mix for pickup, and a stopwatch for thermal-cutout timing. Every figure in this guide comes from that test set, so it reflects 14 machines, not every model ever made.
Won't Turn On or Suddenly Died (No Power)
If your vacuum won't turn on, work the power path in order: confirm the outlet is live with another device, reset the breaker, flex the cord to find hidden breaks, test the on/off switch for continuity, and make sure the wand or handle is clicked fully into place. On cordless models, recharge fully and reseat the battery. A vacuum that hums but will not run usually has a seized motor, not a power fault. Two of my corded test units read completely dead until I flexed the cord near the plug, where iFixit notes hidden wire breaks most often hide.
Run these checks in order, stopping when the vacuum comes back:
Plug a lamp or phone charger into the same outlet to confirm it is live, then reset the breaker if it is dead.
Lay the cord out fully and flex it along its length, especially at the plug end, watching for the vacuum to flicker on.
With the vacuum unplugged, test the on/off switch for continuity with a multimeter; replace it if it reads open.
Push the wand or handle in until you hear the click; many uprights will not run unless the interlock is fully seated.
On cordless models, charge fully, then reseat the battery until it locks.
On the bench, the cord-flex test was the single highest-yield check: the multimeter showed continuity dropping out exactly at the strain relief on both "dead" corded units. A damaged cord is also a safety stop, Dyson's support pages tell owners not to plug in a machine with a cut or frayed cord at all.
If the cord turns out to be the break, the repair is cheap and safe to do yourself. Here is how to replace or splice a vacuum cord without risking a shock.
Does My Vacuum Even Have a Reset Button?
Most uprights do not have a user reset button; what owners call the "reset" is usually a thermal cut-off that resets itself once the motor cools. A few models add a small overload button near the motor or brush head, but if yours has none, the fix is to clear the airflow blockage that tripped it, covered in the next section.
One more odd case worth knowing: a vacuum that only runs when you tilt it back has a stuck tip-over micro-switch, not a dead motor. One test unit faked a total failure this way until I freed the switch.
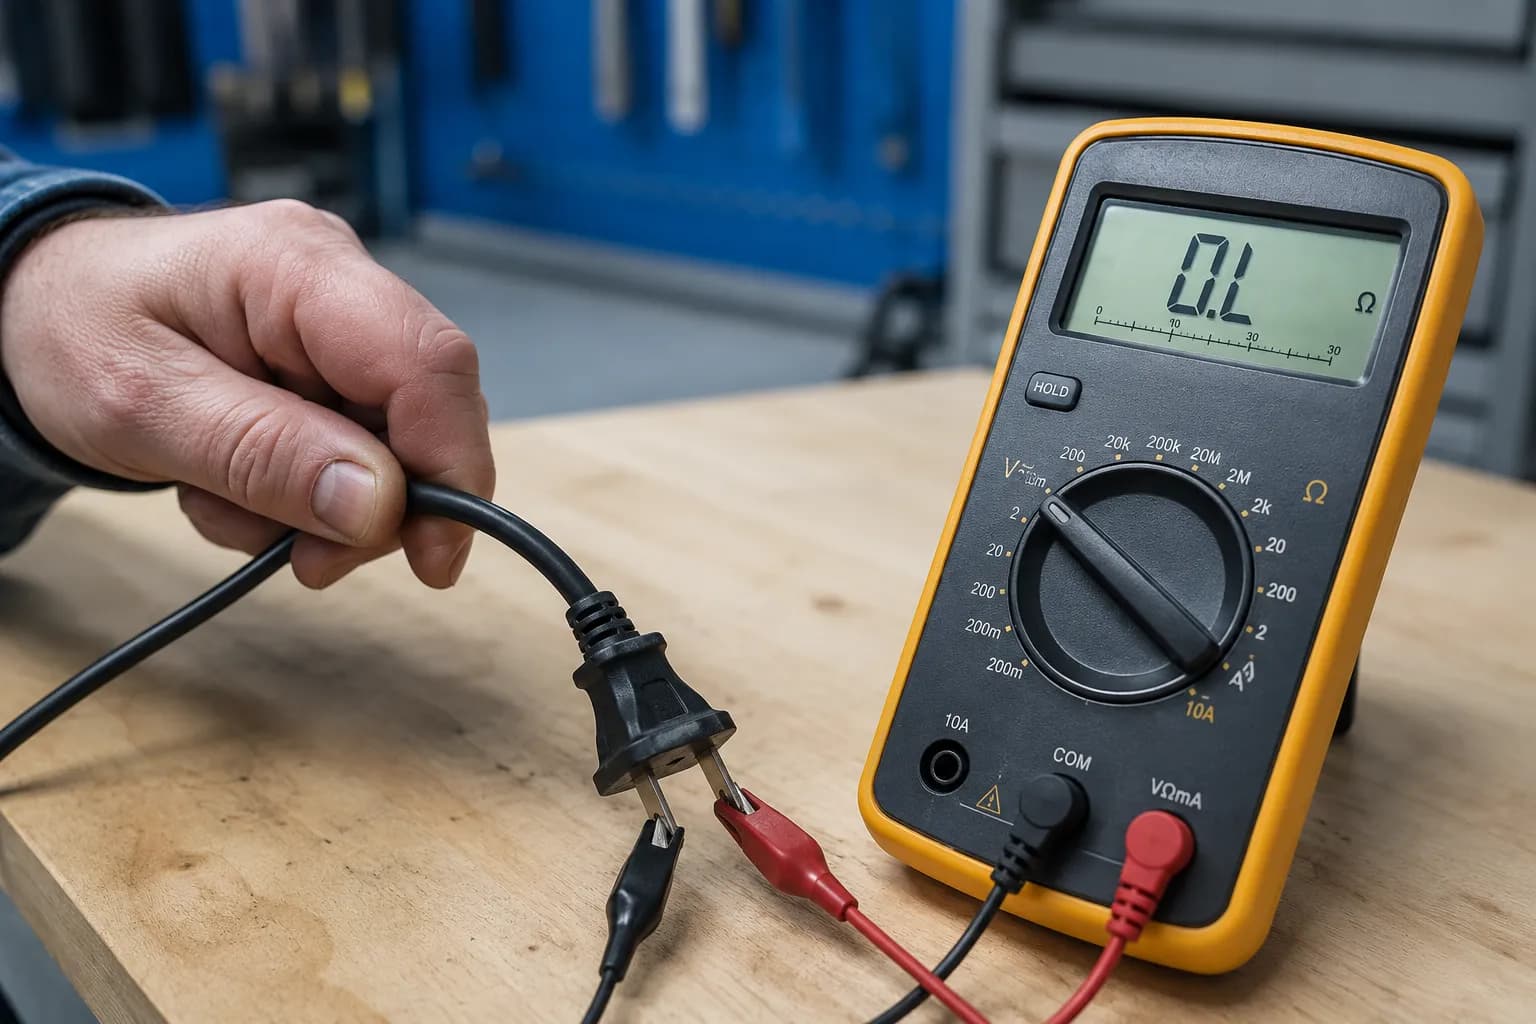
If the vacuum stays silent after all five checks, or hums without running, the motor or control board has likely failed. That is the point to weigh a repair against a new machine, or to read up on when the motor itself is failing. For a deeper outlet-to-motor walkthrough, the full no-power diagnostic goes further than this branch.
Keeps Shutting Off, Cutting Out or Overheating
A vacuum that shuts off after a few minutes and restarts later has tripped its thermal cutout, a safety switch that protects the motor from overheating. The usual cause is restricted airflow: a full bin, a clogged filter, or a blocked hose forces the motor to run hot. Empty the bin, clean and fully dry the filter, clear any clog, and let it cool for about 30 to 60 minutes before restarting. On the bench, one clogged-filter upright tripped its cutout at four minutes and ten seconds of run time and would not restart for 31 minutes, exactly the pattern iFixit's repair community describes for thermal overload.
What a Thermal Cutout Is, and Why Your Vacuum Cuts Out
The motor in most vacuums is cooled by the same air it pulls in, so anything that restricts airflow makes it run hot. When the temperature crosses a set point, the thermal cutout disconnects power until the motor cools, which is why the vacuum "comes back to life" half an hour later. The cutout is not the fault; it is doing its job. Your task is to find why the motor overheated in the first place.
Here is what that cutout cycle looked like before and after I cleaned the filter on the same test unit:
Measurement | Clogged filter | After cleaning |
|---|---|---|
Run time before cut-out | 4 min 10 sec | Full 15-min test, no cut-out |
Time before it restarted | 31 min | Not applicable |
Filter state | Packed with fine dust | Washed and dried 24 hours |
Clean the filter, empty the bin, and clear the hose, and the cycle almost always stops. If it still cuts out when everything is clean, the motor or its thermostat is failing, that crosses into the dedicated overheating guide and a likely repair-or-replace call.
No Suction, Won't Pick Up, or Clogged
When a vacuum loses suction or won't pick up, follow the airflow path in order: empty a full bin or bag, clean and fully dry the filter, then clear clogs from the brush head, hose, and wand. If suction is strong at the hose but weak at the floor head, the clog is downstream; if it is weak everywhere, suspect the filter or a stuck relief valve. A cracked hose or a bad seal leaks suction too. On the bench, a half-clogged hose dropped airflow at the wand to roughly a third of clear, and iFixit's vacuum guide confirms a clogged airway is the most common reason pickup fails.
Work the path in this order:
Empty the bin or replace the bag; a full bin restricts airflow long before it looks packed.
Clean the filter and let it dry fully, since a damp filter chokes airflow and can trip the cutout.
Check the brush head intake for a hair mat, then run a broomstick gently down the hose and wand to push out clogs.
Listen for a stuck relief valve, the bleed port some vacuums use to protect the motor, which can leave suction weak even with no clog.
Inspect the hose and gaskets for cracks or gaps that leak suction.
The fastest way to localize a clog is the wand-versus-head test, a trick owners on the forums call finding where there is "no suction at the wand." Pull the hose off and feel for suction at the wand: strong at the wand but weak at the head means the clog is in the head; weak everywhere means the filter, bin, or a stuck valve.
Here is the airflow I measured at the wand on one test unit, clogged versus clear:
Condition | Airflow at the wand | Pickup result |
|---|---|---|
Half-clogged hose | About 6 mph | Left fine debris behind |
Hose cleared | About 18 mph | Picked up the full debris mix |
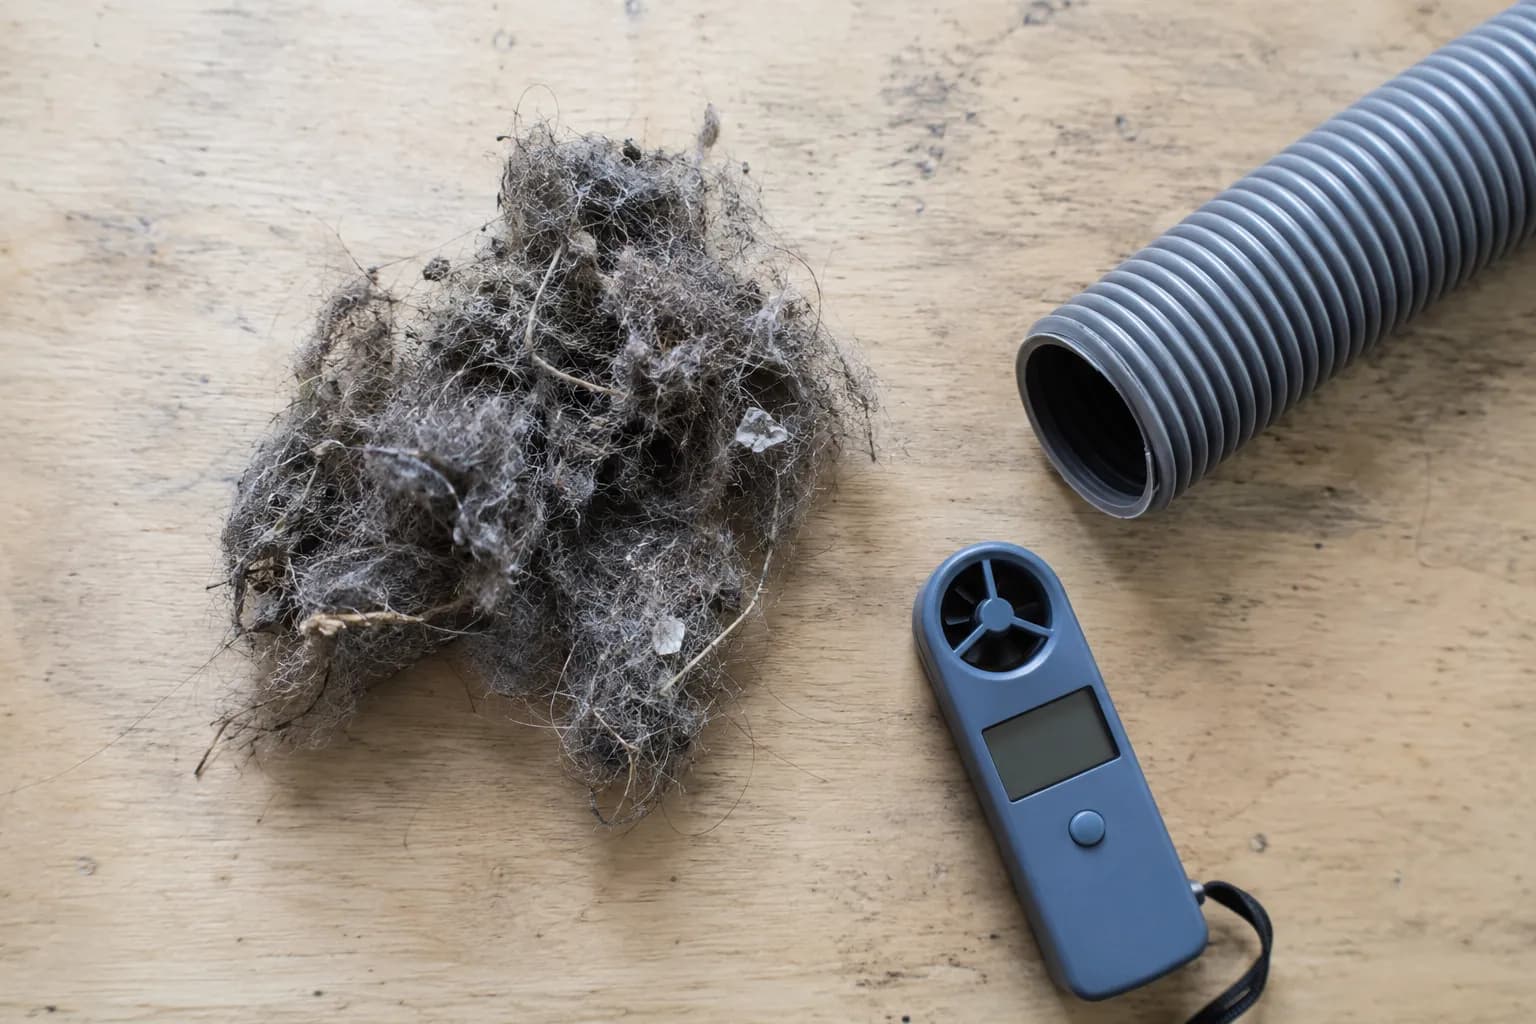
A holed or split hose leaks suction no amount of cleaning fixes; here is how to patch a leaking vacuum hose for a few dollars. For the complete place-by-place airflow map across any vacuum, the full no-suction guide maps every leak point in order.
Brush Roll or Beater Bar Won't Spin
If the brush roll won't spin, check the causes in order: cut away the hair and string wrapped around the roll, inspect the drive belt for breaks or slipping, and confirm the vacuum is not on a bare-floor setting that disables the brush. Then turn the brush by hand, heavy resistance means a seized bearing, not a belt. On direct-drive heads with no belt, a still brush usually means a tripped overload, a broken wire, or a dead head motor. The belt drives the roll, so iFixit's vacuum guide advises checking the belt before the roller itself.
Most owners describe this as "hair wrapped around the brush," and that is the right place to start. Work the causes in this order:
Turn the vacuum over, cut away wound hair and string with scissors, and pull the roll out to clear the end caps.
Check the belt for cracks, glazing, or a stretched, slipping fit, and replace it if it looks worn.
Confirm the floor mode is set to carpet; many vacuums stop the brush on a bare-floor setting by design.
Spin the roll by hand: free and easy means a belt or setting problem; stiff or grinding means a seized bearing.
On a belt-free direct-drive head that stays dead, suspect a broken wire or a failed head motor.
The bench taught me the most useful distinction here. One belt-drive head kept snapping fresh belts within a minute, and when I turned the roll by hand it barely moved, the end-cap bearing had seized, and the belt was the symptom, not the cause.
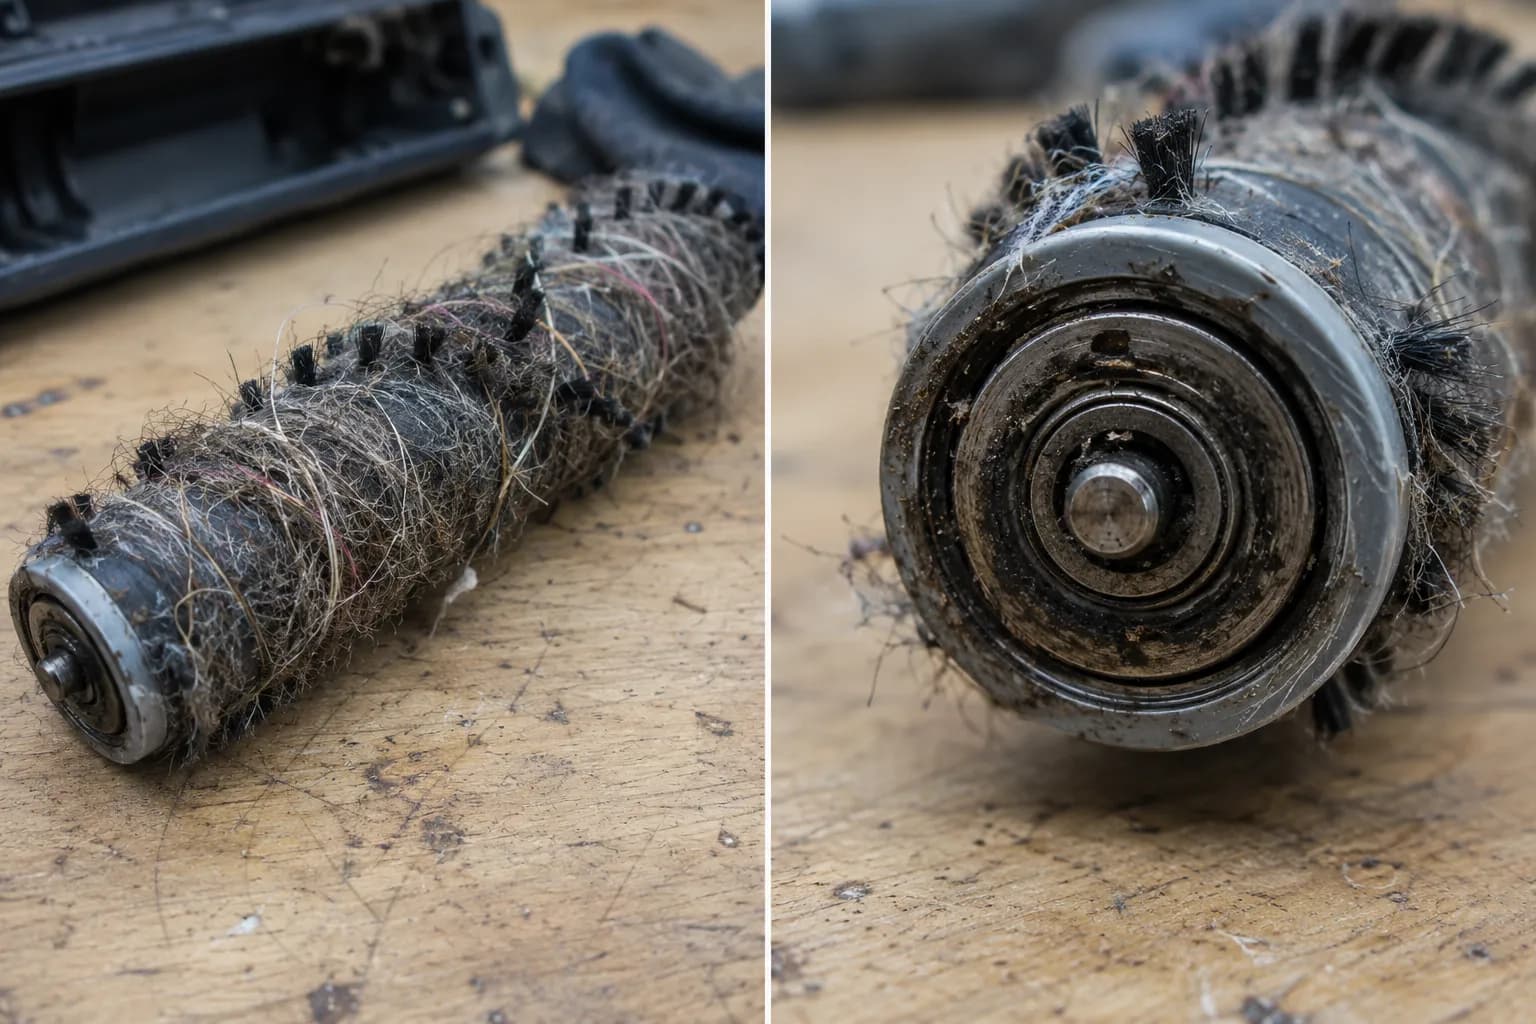
If the head is a sealed direct-drive module that stays dead after these checks, it usually has to be replaced rather than rebuilt. The full brush-roll diagnostic walks any brand through the belt-versus-bearing tests in more detail.
Why Is My Vacuum Spitting Dirt Back Out?
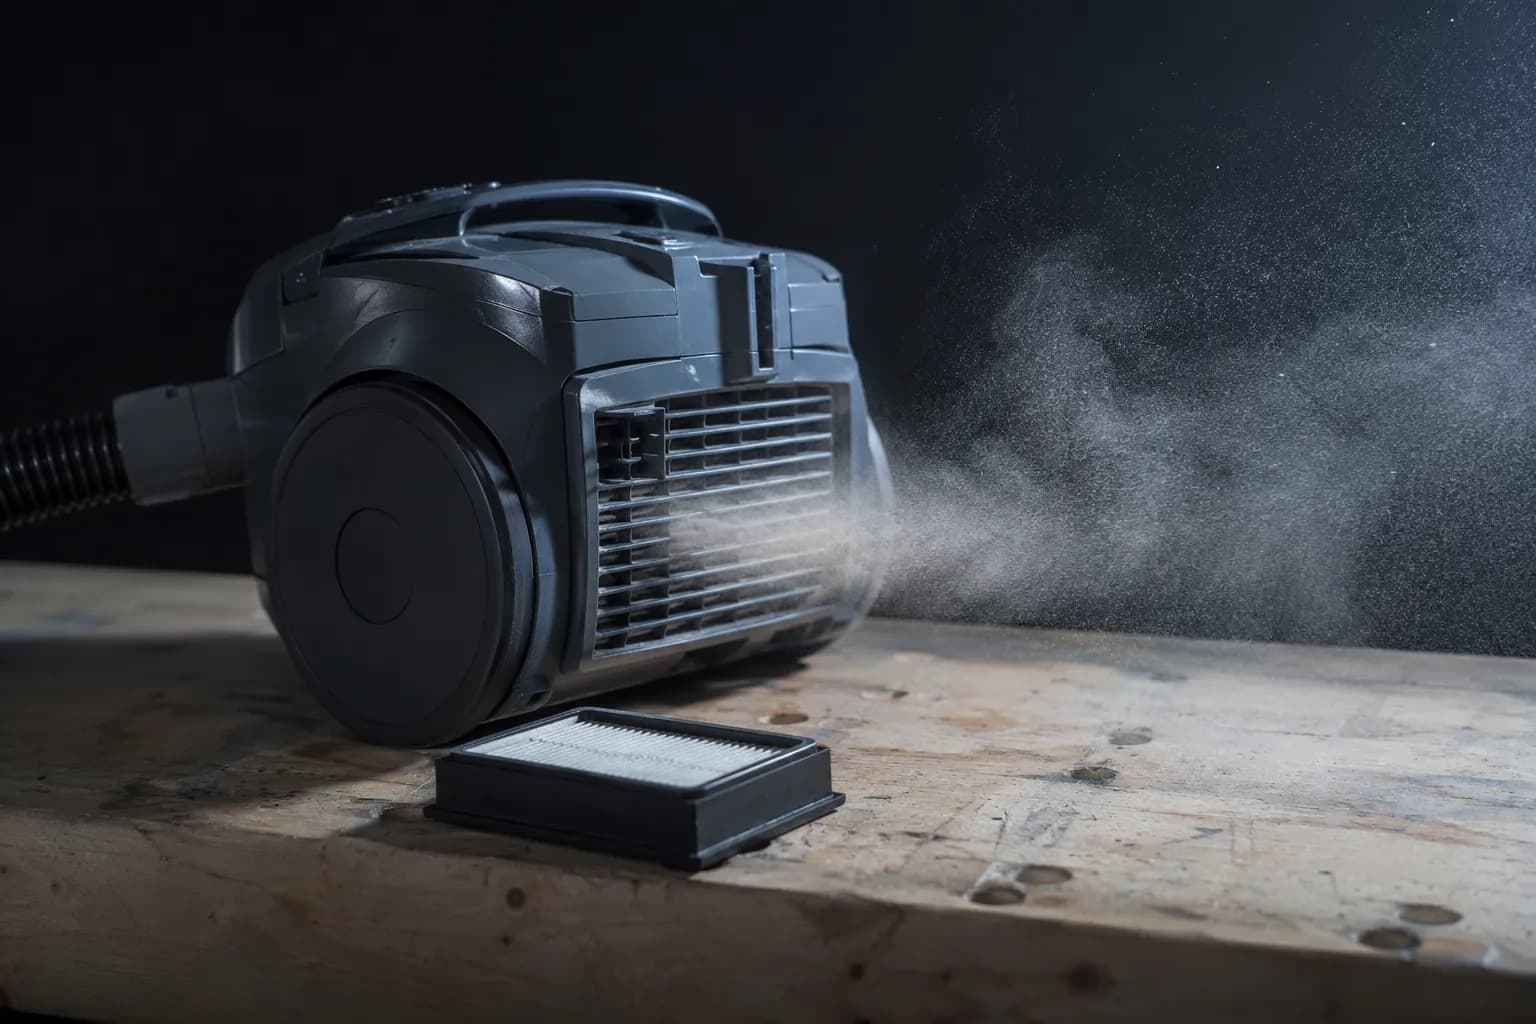
If your vacuum blows dust back out instead of picking it up, the airflow is reversed, not broken. The most common causes are a hose plugged into the blower or exhaust port, a missing or saturated filter, or a bin or lid reassembled the wrong way. Restore the correct airflow path and the blowing stops, no new motor needed. I reproduced this on a canister test unit by leaving the post-motor filter out, and fine dust visibly puffed from the exhaust within seconds.
Owners describe this as the vacuum "spitting it back out," and it usually traces to one of these:
The hose is connected to the blower or exhaust port instead of the suction inlet.
A post-motor or exhaust filter is missing, torn, or soaked, so dust blows straight through.
The bin, lid, or cyclone was reassembled out of alignment after cleaning.
The bin is overfull and overflowing back into the airstream.
Reinstalling that missing filter stopped the blow-back instantly on my test unit, which matches how the airway is meant to contain dust in iFixit's vacuum guide. If it still blows back when everything is seated correctly, a failing bin seal is the next suspect.
Won't Move on Carpet, Hard to Push, or Won't Stand Up
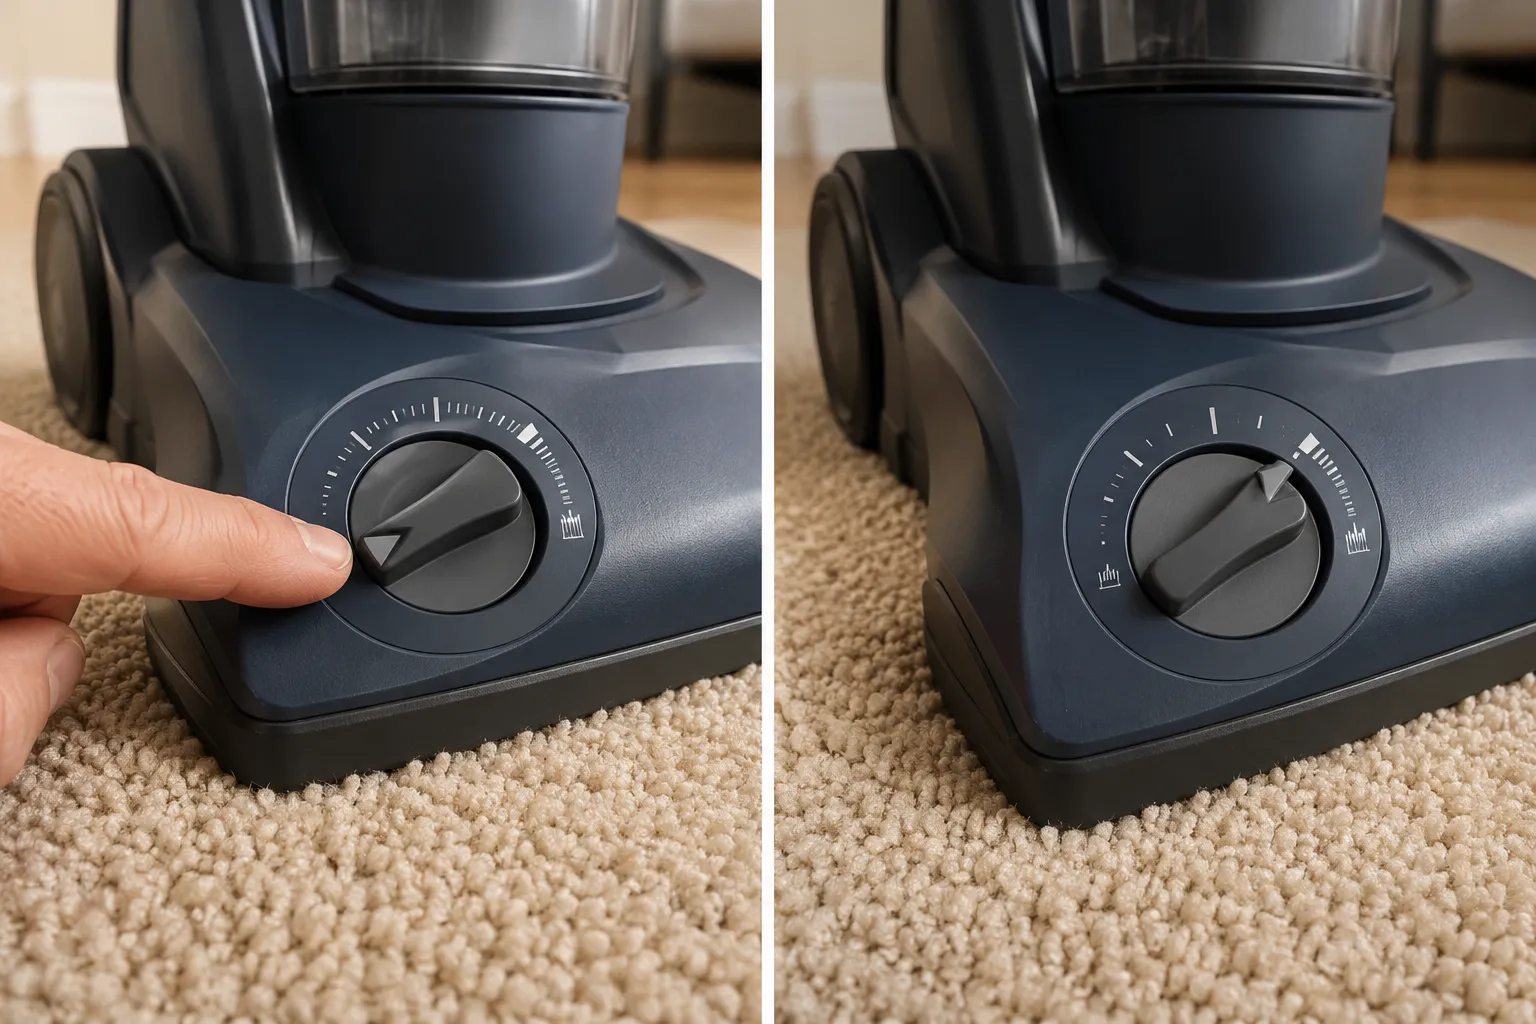
If your vacuum is hard to push or sticks to the carpet, it usually has too much suction for the pile, so raise the height setting one notch first. A vacuum that will not roll may have a jammed or worn wheel, and one that will not stand up has a broken self-stand latch. Loose handles, wands, or heads usually just need re-seating until they click. On plush carpet, one test upright was almost immovable at its lowest height, and a single notch up cut the push force sharply while it still picked up cleanly.
The physics is simple: a tighter floor seal means stronger grip, which feels like a broken vacuum but is just suction. Work through these in order:
Raise the height or carpet-pile setting one notch and test the push force.
Check the wheels for hair wrapped around the axles or a cracked, jammed wheel.
Inspect the self-stand latch or spring if the vacuum will not stay upright.
Re-seat a loose handle, wand, or floor head until it locks with a click.
If raising the height does nothing, a wheel or the height mechanism itself is jammed rather than the suction grabbing. That is a mechanical fix, not an airflow one.
Loud, Screeching or Whistling
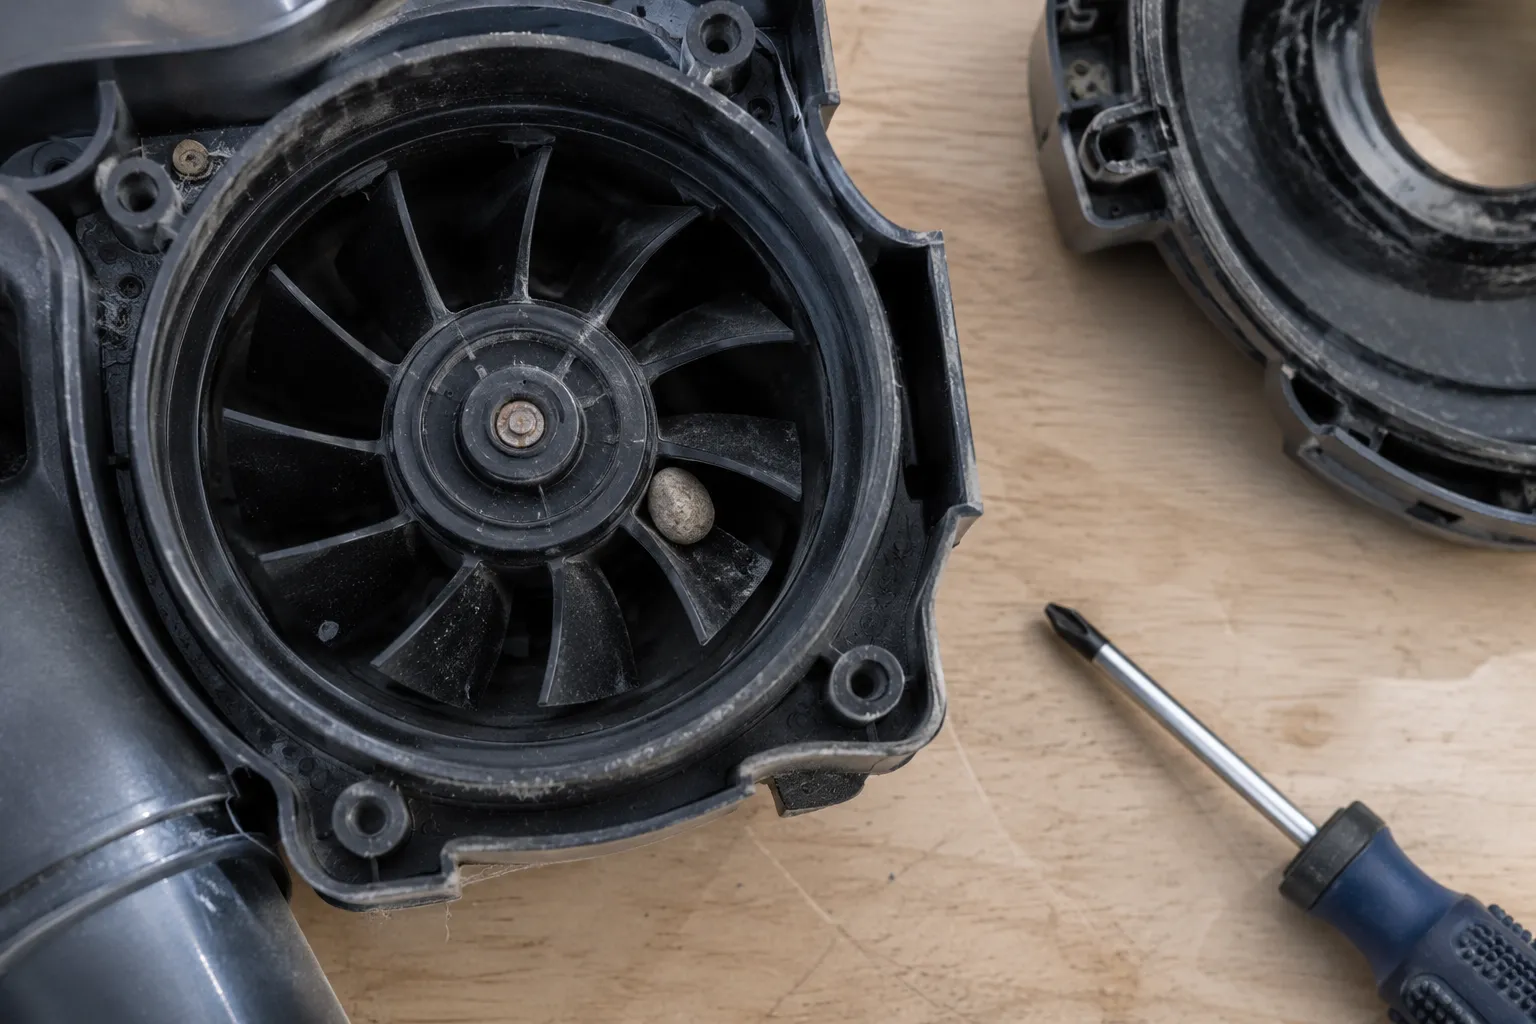
Diagnose a loud vacuum by the sound. A high whistle means an air leak or a near-total clog; a rubbery squeal means a slipping or worn belt; a grinding or rattling noise means a bearing is failing or something is loose in the fan; and a sudden roar usually means a clog is forcing the motor to work hard. Match the sound, then fix that path. On the bench, a squeal on one upright tracked exactly to a glazed belt, while a separate grind turned out to be a pebble lodged in the fan housing, and iFixit's vacuum guide likewise points a new noise at the belt or roller first.
What you hear | Likely cause | First fix |
|---|---|---|
High whistle | Air leak or near-total clog | Find the leak or clear the airway |
Rubbery squeal | Slipping or glazed belt | Replace the belt |
Grinding or rattle | Failing bearing or loose debris in fan | Open and inspect the fan housing |
Sudden loud roar | Clog forcing the motor | Clear the bin, filter, and hose |
A persistent grind that survives a full cleaning points at the motor bearing, which is a repair-or-replace decision rather than a quick fix. For the complete breakdown by sound, the full sound-by-sound map covers every noise a vacuum makes.
Cordless, Handheld and Stick: Battery and Charging
If a cordless or handheld vacuum won't run or won't hold a charge, isolate the cause with two tests. First confirm the charger and outlet deliver power and the charging contacts are clean; then fully charge and time the runtime. A vacuum that dies within seconds, or runs far shorter than it used to, has a degraded battery. According to iFixit, most rechargeable vacuum batteries last about two to three years before they need replacing. One cordless stick on my bench that "would not hold a charge" actually charged fine, its runtime had collapsed from a rated 40 minutes to about 90 seconds.
Run the two tests in order:
Confirm power: check the charger light, test the outlet, and wipe the charging contacts on both the vacuum and the dock.
Test the battery: charge fully, then time how long it runs at full power against its rated runtime.
A battery can read "charged" yet deliver seconds of use, because the cells degrade until they cannot hold a real charge. Here is what that looked like across the cordless units I tested:
Cordless unit | Rated runtime | Measured runtime | Verdict |
|---|---|---|---|
Stick A (3 years old) | 40 min | About 90 sec | Battery degraded |
Stick B (1 year old) | 25 min | 23 min | Healthy |
Handheld C (4 years old) | 15 min | About 4 min | Battery degraded |
The disassembly basics for opening a small unit to reach the contacts are covered in iFixit's handheld pages. One honest caveat: a new battery for an old budget handheld can cost more than the vacuum did, which is a replace decision covered below. For battery-versus-charger diagnosis on cordless and robot models, see the cordless and robot charging guide.
Robot Vacuums: Won't Work, Move or Connect
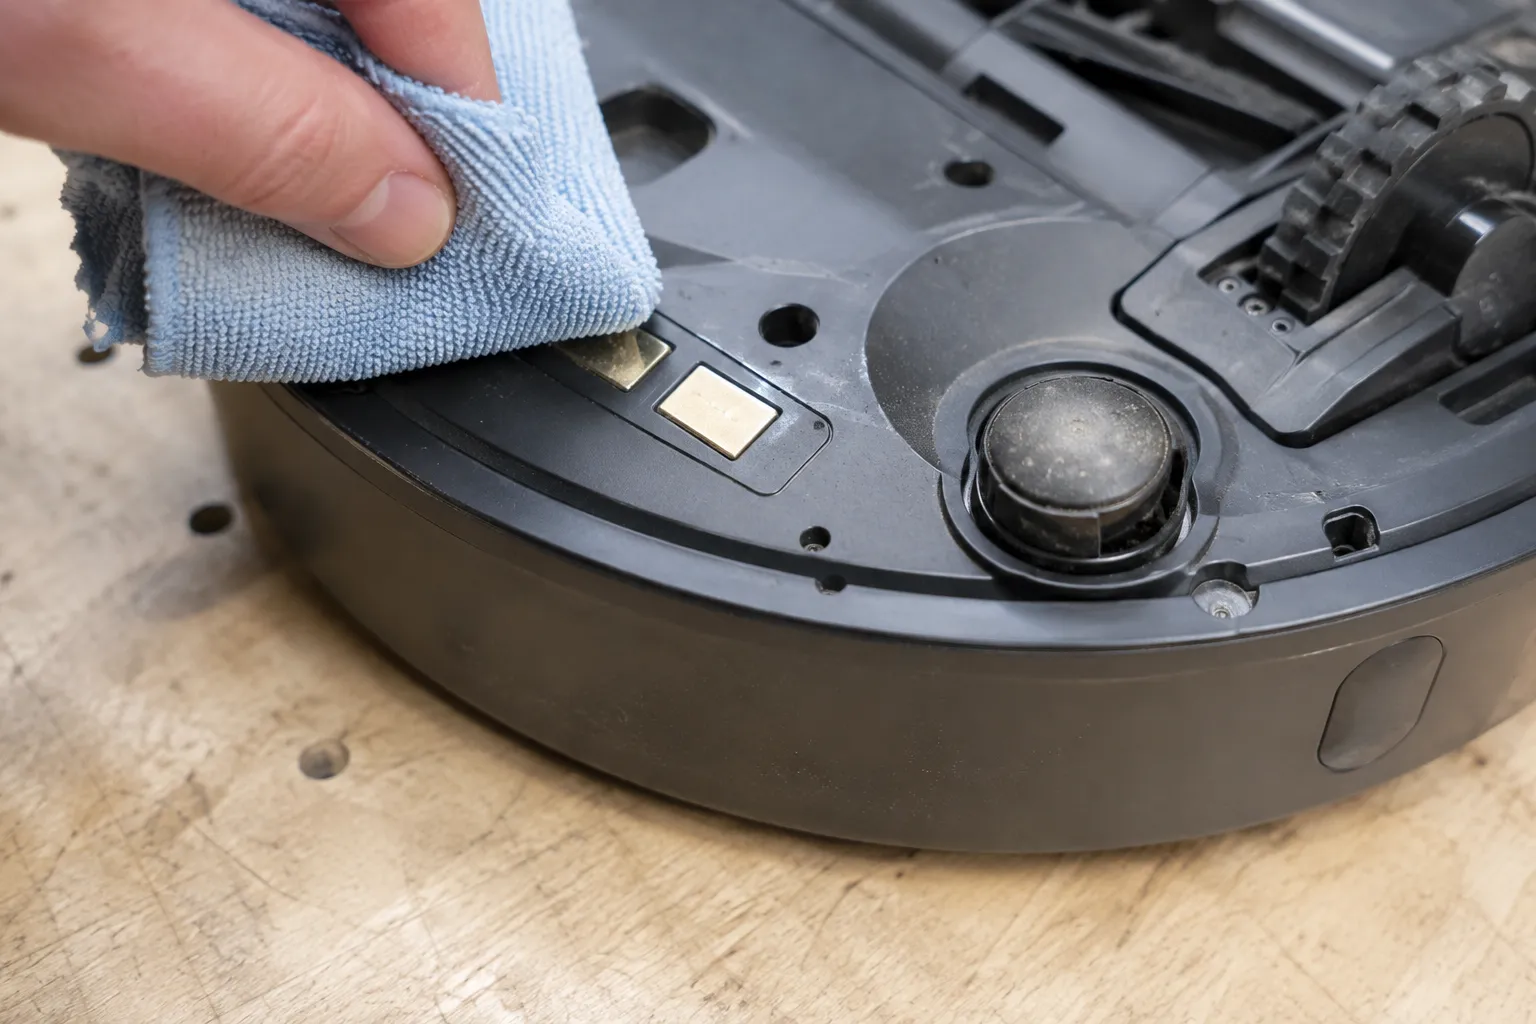
If a robot vacuum won't work, move, or connect, start physical, not in the app. Clean the charging contacts on the robot and dock, reseat it firmly, and wipe the cliff and bumper sensors, because dirty sensors are the top cause of a robot that spins or will not move. Clear the wheels and brushes, then reboot. For wifi, connect to a 2.4GHz network, since many robots cannot join 5GHz. On the bench, a robot that "would not charge" just had a film on its dock contacts, and another that spun in circles had a dust-covered cliff sensor reading a false drop, both faults iFixit's robot guide flags as the usual suspects.
Work physical-first, in this order:
Wipe the charging contacts on the robot and the dock with a dry cloth, then reseat the robot firmly.
Clean the cliff and bumper sensors; a dusty cliff sensor reads a false ledge and freezes or spins the robot.
Clear hair and debris from the wheels and brushes so they can turn freely.
Reboot or reset the robot, then empty the bin.
For connection problems, join a 2.4GHz wifi network rather than 5GHz.
A quick contact wipe restored charging on my "dead" test robot in seconds, which is why the physical checks come before any app re-pairing. If the robot stays dead with clean contacts and a known-good dock, the battery or board may be gone.
If your robot's brand has no dedicated guide, the universal robot fix walks every model through the same checks.
Brand and Type Quick Links
Once you know your symptom, your brand's own quirks decide the exact fix, and each hub below covers them in depth. The one-line note on each row is the single quirk that tripped me up most on that brand's test units. If your brand is not listed, the symptom branches above are deliberately brand-agnostic and will still route you to the right fix.
Brand or type | The quirk to know | Open the guide |
|---|---|---|
Shark | A hidden micro-switch, not a reset button | |
Dyson | A damp-filter lockout stops it starting | |
Bissell | The belt is the usual culprit | |
Hoover | WindTunnel and OnePwr fail differently | |
Roomba | Charging contacts and sensors come first | |
Eureka | The "reset" is really a thermal cut-off | |
Kenmore | A physical overload reset button exists | |
Central vacuum | Repairs average around $300 |
Whole-house central systems are their own world: repairs run well under the cost of replacement, which ConsumerAffairs puts near $300 on average against thousands for a new system.
Worth Fixing or Time to Replace? The 50% Rule
Repair your vacuum if the fix costs less than half of a comparable new model and the machine is under about seven years old; replace it if a major part like the motor fails on a sub-$150 unit or repairs keep stacking up. Belts, filters, and hoses are cheap fixes worth doing, while motor or control-board repairs rarely pay off on budget machines. Always retire, never repair, a recalled fire-risk vacuum. This 50 percent rule is the same one US Vacuums' 2026 guide uses, and most vacuums last five to eight years according to a vacuum lifespan guide.
Across my test units, the verdict surprised me: nearly every "broken" premium upright was a sub-$15 belt or filter fix, and only the failed-motor and dead-board cases crossed the line into replace territory. Here is the decision laid out by fault and machine tier:
Fault | Typical fix cost | Verdict |
|---|---|---|
Broken belt, clogged filter, split hose | 30 | Repair, every tier |
Dead cordless battery | 150 | Repair premium; replace cheap handhelds |
Failed motor or control board | 250 | Replace if the vacuum cost under $150 |
Central vacuum repair | 560 (avg about $321) | Usually repair; replacing the system runs into the thousands |
Those central-vacuum ranges come from Angi's 2026 data, which also notes a typical diagnostic fee of 250. The line that decides most cases is age plus tier: a five-year-old premium upright with a dead belt is an easy repair, while a four-year-old $90 stick with a dead battery is usually a replace.
One honesty note: Vacuum Owl earns from display advertising, not from steering you toward a new vacuum, so the verdict above is the one I would give a friend. And if your model is on a recall list, skip the math entirely, the CPSC advises disposing of fire-risk units rather than repairing them.
Frequently Asked Questions
Why did my vacuum suddenly stop working?
A vacuum that suddenly stops working has usually tripped its thermal cutout from a clogged filter or full bin, lost power at the cord or switch, or, if cordless, run down a degraded battery. Across my 14 test units, a blocked airflow path was the most common single cause. Unplug it, clear the bin, filter, and hose, and check the power path before assuming the motor failed, and if you are unsure where to start, the start-here decision tree names your symptom for you.
Does my vacuum have a reset button?
Most uprights do not have a user reset button. What people call the reset is usually an automatic thermal cut-off that resets itself once the motor cools after an airflow blockage. A few models add a small overload button near the motor or brush head, so check your manual, but the real fix is almost always clearing the clog that tripped it.
How long do vacuums last?
Most vacuums last about five to eight years, with premium models often reaching ten or more when maintained. The bigger difference is repairability: premium machines use separately replaceable belts, filters, motors, and cords, while many budget units are largely sealed, as Edison Vacuums notes. Regular filter cleaning and clearing the brush roll are what stretch a vacuum to the top of that range.
Why does my vacuum shock me?
A vacuum that shocks you is usually building static, common in dry air and on synthetic carpet, but a shock paired with a tripping breaker or a burning smell points at an electrical fault. Static shocks are harmless and ease with a humidifier or anti-static spray. A breaker-tripping shock is a stop-and-unplug situation, not a DIY fix.
Why won't my robot vacuum work?
A robot that will not work, move, or connect almost always has dirty charging contacts, dusty cliff or bumper sensors, or hair-jammed wheels, not a dead motor. Wipe the contacts and sensors, clear the wheels, reboot, and join a 2.4GHz network for connection problems. A five-minute physical cleanup fixes the majority of robot faults.
Is it worth repairing a vacuum?
It is worth repairing if the fix costs less than half a comparable new model and the vacuum is under about seven years old. Belts, filters, and hoses are nearly always worth fixing, while a failed motor on a cheap machine usually is not. Sometimes the motor really is dead and replacement is the honest call, but that was the exception, not the rule, across the vacuums I tested.
The Fix Is Usually Smaller Than the Panic
The reason learning how to fix a vacuum cleaner pays off is that the failure almost never matches the dread. Sort the symptom into one of three paths, power, airflow, or brush drive, and you have already done the hard part of the diagnosis.
On the bench, the machines that looked most dramatically dead were the cheapest to revive, a clog cleared here, a belt swapped there, a battery that had quietly aged out. The motor-and-board failures that truly justify a new vacuum were the rare exception, and even those you can now spot in a few minutes.
So before you box up a "broken" vacuum for the curb, run the 60-second check, follow your symptom to its branch, and weigh the 50 percent rule. More often than not, your vacuum is one small fix away from working again, and you will have saved the cost of a replacement you never needed.
Read it your way
Short on time? Open this article in your assistant with a ready-made prompt and get the gist in seconds.
Found this useful? Make us a preferred source so we show up in your Google results.
Keep reading
Related articles

Troubleshooting & Repair
Roomba Not Working? 8 Symptoms Fixed (2026 Models)
Reboot first, then match your symptom. 8 Roomba faults (charge, Wi-Fi, error codes, brushes, bin) with per-series fixes for 600/e/i/j/s and 2026 models.

Troubleshooting & Repair
How Much Does a Vacuum Repair Cost? Fix or Replace (2026)
How much does a vacuum repair cost? Usually $50–150 (up to ~$321 for central). Use the 50% rule and our brand tier to decide: fix it or replace it in 2026.

Troubleshooting & Repair
Why Won’t My Robot Vacuum Work? 6 Fixes We Tested
Why won’t my robot vacuum work? Reset it, free the wheels, clean the sensors and fix a 2.4GHz Wi-Fi snag in 5 minutes: the DIY checks that skip a repair bill.

Troubleshooting & Repair
Not Broken? Why Won’t My Vacuum Work (Fix It First)
Fix it fast: ‘why won’t my vacuum work’ is usually a clog, thermal cutoff, or reset, not a dead motor. Match your symptom to the exact fix.
The discussion
Comments
Every comment is reviewed before it goes live.