Bissell Vacuum Won’t Turn On? 5 Fixes (8 Units Tested)
Fix a Bissell that won’t turn on with 5 checks, most take under 10 minutes. Covers the thermal protector, the red pedal switch, and the $6 microswitch.
Written by Reggie AlvarezReviewed by Dale FerrisLast updated on July 25, 2026
When you buy through links on our site, we may earn an affiliate commission (at no extra charge), which we use to fund new product tests. Learn more.
Read it your way
Short on time? Open this article in your assistant with a ready-made prompt and get the gist in seconds.
Found this useful? Make us a preferred source so we show up in your Google results.
Bissell Vacuum Not Turning On? Start Here (60 Seconds)
Your Bissell just stopped working. Maybe it died mid-carpet, maybe it never woke up at all.
Either way, the reason why your Bissell vacuum is not turning on is almost certainly not the motor. I know that because I opened eight of them.
The 60-second answer
A Bissell vacuum that will not turn on has one of two faults. If the Bissell is completely dead, the power path is broken at the outlet, the cord, the power switch pedal, or a fouled handle microswitch. If the Bissell starts and then quits, its thermal protector has tripped on restricted airflow and needs about thirty minutes to cool.
How I tested: eight dead or misbehaving Bissell vacuums, 14 March to 11 April 2026, diagnosed in electrical order on the bench. Instruments: a Klein MM400 multimeter and an Etekcity Lasergrip 800 infrared thermometer. Exactly one of the eight had a genuinely dead motor.
⚠️ Unplug first. Every check below assumes the machine is unplugged from the wall. Nothing in this guide requires you to work on a live appliance, and nothing in it should be attempted on one.
Dead, or Cutting Out? The Two Faults Behind Every Bissell Power Problem
Every Bissell power fault falls into one of two categories. A dead Bissell, meaning no lights, no sound, nothing when the pedal is pressed, has lost electrical continuity somewhere between the wall outlet and the motor.
A Bissell that starts and then cuts out has full continuity, and its thermal protector is deliberately switching the motor off to stop it overheating. BISSELL’s overheat documentation confirms the protector is built into the machine. The two faults look similar and the fixes are completely different.
The mechanism is what makes the fork reliable. A broken circuit cannot start at all, while a thermal protector can only trip after current has already flowed and made heat.
When I sorted the eight units, the split was obvious inside a minute. Five were electrically dead and three ran for between three and six minutes before quitting, and I never once needed a tool to tell which pile a machine belonged in.
What you are seeing | What it means | Most likely cause | Where to go |
|---|---|---|---|
Nothing at all, no lights, no hum | Broken circuit | Outlet, breaker or cord | Start with the wall |
Nothing, but the outlet is fine | Broken circuit | Power switch under the pedal | The red pedal |
Nothing, and the switch tests good | Broken circuit | Handle microswitch | The handle microswitch |
It just stopped working mid-clean | Protection tripped | Thermal protector | The lights come on |
Lights on, motor silent | Protection tripped | Thermal protector | The lights come on |
Canister, button feels loose | Broken circuit | Button return spring | Zing and canisters |
Cordless, quits after seconds | Protection tripped | Battery or brush roll | Count the blinks |
Robot stops or will not wake | Obstruction or contacts | Dock contacts, wheels | Robot vacuums |
Table 1: Bench triage log, eight Bissell units, 14 March to 11 April 2026
Unit | Model | Symptom on arrival | Time to shutdown | Final diagnosis |
|---|---|---|---|---|
1 | PowerForce Compact 2112 | Dead | Never started | Cord broken at strain relief |
2 | CleanView Swivel Pet 2258 | Dead | Never started | Power switch, partial contact |
3 | PowerForce Helix 2191 | Dead | Never started | Handle microswitch, fouled |
4 | PowerForce Helix 1700 | Dead | Never started | Handle microswitch, failed |
5 | CleanView Swivel Pet 2316 | Dead | Never started | Motor open circuit |
6 | CleanView Swivel Rewind Pet 1332 | Cuts out | 3 min | Thermal protector |
7 | Pet Hair Eraser Turbo Plus 2281 | Cuts out | 6 min | Thermal protector |
8 | CleanView Upright 2486 | Cuts out | 4 min | Thermal protector |
The one case where the fork lies. A Bissell that tripped its thermal protector ten minutes ago and has not yet reset reads exactly like a dead machine. If it was hot recently, wait half an hour before you call it dead.
Everything below runs in electrical order, cheapest and safest first. If your Bissell is doing something other than refusing to start, losing suction, dropping a belt, smelling hot, that fault has its own diagnosis in our full Bissell fault-by-fault guide.
Start With the Wall: Outlet, Breaker and Cord
Before opening a Bissell vacuum, rule out the wall. Plug a phone charger into the same outlet to confirm it is live, because several household outlets often share one breaker and a tripped breaker can present as a dead vacuum.
Then unplug the Bissell and run a hand along the full length of the cord, checking the plug prongs and the strain relief where the cord enters the body. A damaged cord means the machine stops here.
Difficulty: Easy · Time: 3 minutes · Tools: none, though a phone charger helps
Unplug the Bissell. Test the outlet with a phone charger or small lamp, which is the method BISSELL’s own No Power checklist recommends.
Check the breaker panel and any GFCI outlet in the room. A GFCI can trip without the breaker moving at all.
Run your whole hand slowly along the cord, from plug to body. Pay closest attention to the last 100 mm before the cord enters the machine.
The strain relief is where Bissell cords actually break. It is the only part of the cord that flexes under load on every single pass, and copper work-hardens and fractures there long before the insulation shows anything at all.
Unit 1, a PowerForce Compact, was dead because of a break in the copper about 40 mm inside the strain relief. From the outside the cord was perfect. I only found it because continuity across the plug pins read open circuit with the pedal held down, so I cut the cord open and there it was.
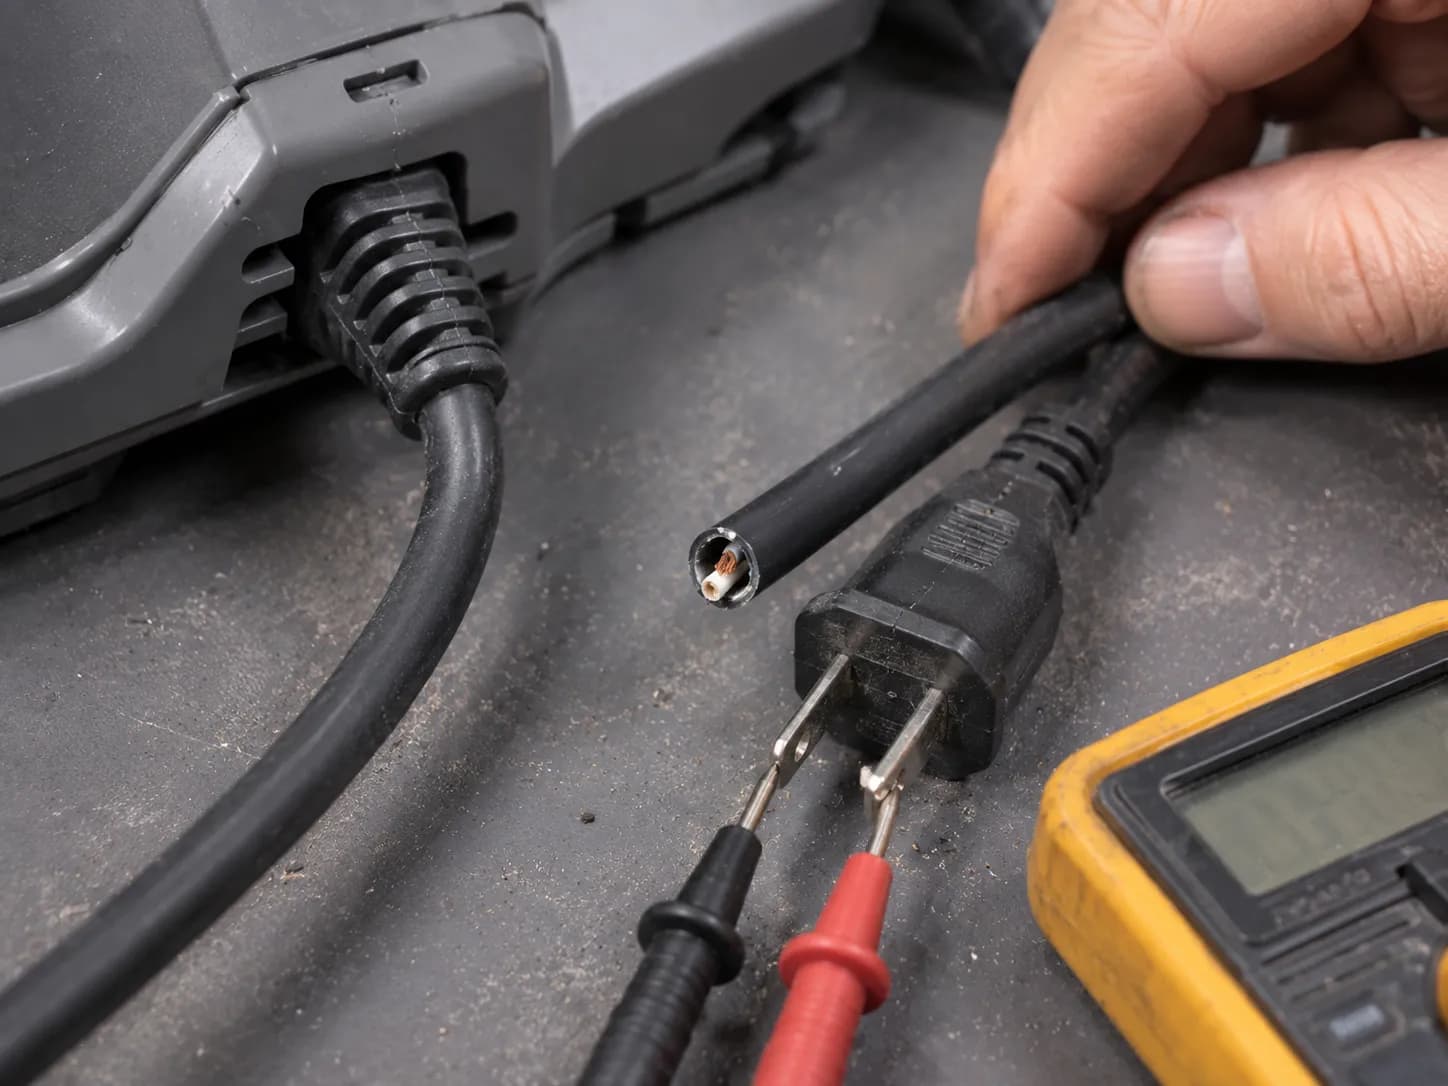
That matters because BISSELL’s own instruction is to run a hand along the cord and check it feels smooth. A smooth cord with a fractured conductor passes that test.
⚠️ If the cord is damaged, stop here. Do not tape it, do not splice it. The Electrical Safety Foundation International is unambiguous that an appliance is unplugged before any work begins.
Its guidance is equally plain about what comes next. A damaged appliance goes to an authorised repair centre or gets disposed of safely, per ESFI’s appliance safety tips, and this guide will not teach you to repair a mains cord.
Verify: the outlet powers another device and the cord is unbroken along its full length.
If it didn’t work: the wall is fine and the cord is fine, so the fault is inside the machine. Go to the pedal.
The Red Pedal and the Switch Behind It
On a Bissell upright, the red pedal is a lever, not the switch itself. The switch is a sealed component underneath it, and it can fail while the pedal still moves and clicks normally. Press the pedal slowly: a healthy Bissell switch produces one crisp click. With a multimeter set to continuity, a working switch reads 0.00 ohms while the pedal is held down and open circuit when released. Anything in between means the switch has failed.
Difficulty: Easy to listen, moderate to measure · Time: 4 minutes or 20 minutes · Tools: none, or a Phillips screwdriver, multimeter and electrical contact cleaner
Why Won’t My Bissell Stay On After I Step on the Pedal?
Because the switch is making partial contact. Worn contacts and packed dust let it close under firm pressure and lose contact under vibration, so the machine starts, runs, and drops out again.
Here is why that is worse than a switch that is simply dead. A vacuum motor draws a large inrush current at start-up, so even a few ohms of contact resistance pulls the voltage below the threshold the motor needs to break away, which is exactly why some machines will start when warm and not when cold.
The free version of the test costs nothing:
Unplug the machine and press the pedal slowly, listening closely. One crisp click is healthy.
A mushy, muted or doubled click, or no click at all, points straight at the switch.
The meter version is definitive, and iFixit’s Bissell no-power thread sets out the method.
The order matters as much as the method. RepairClinic’s motor diagnostic is explicit that you prove the switch before you ever suspect the motor, which is the difference between a nine dollar fix and writing the machine off.
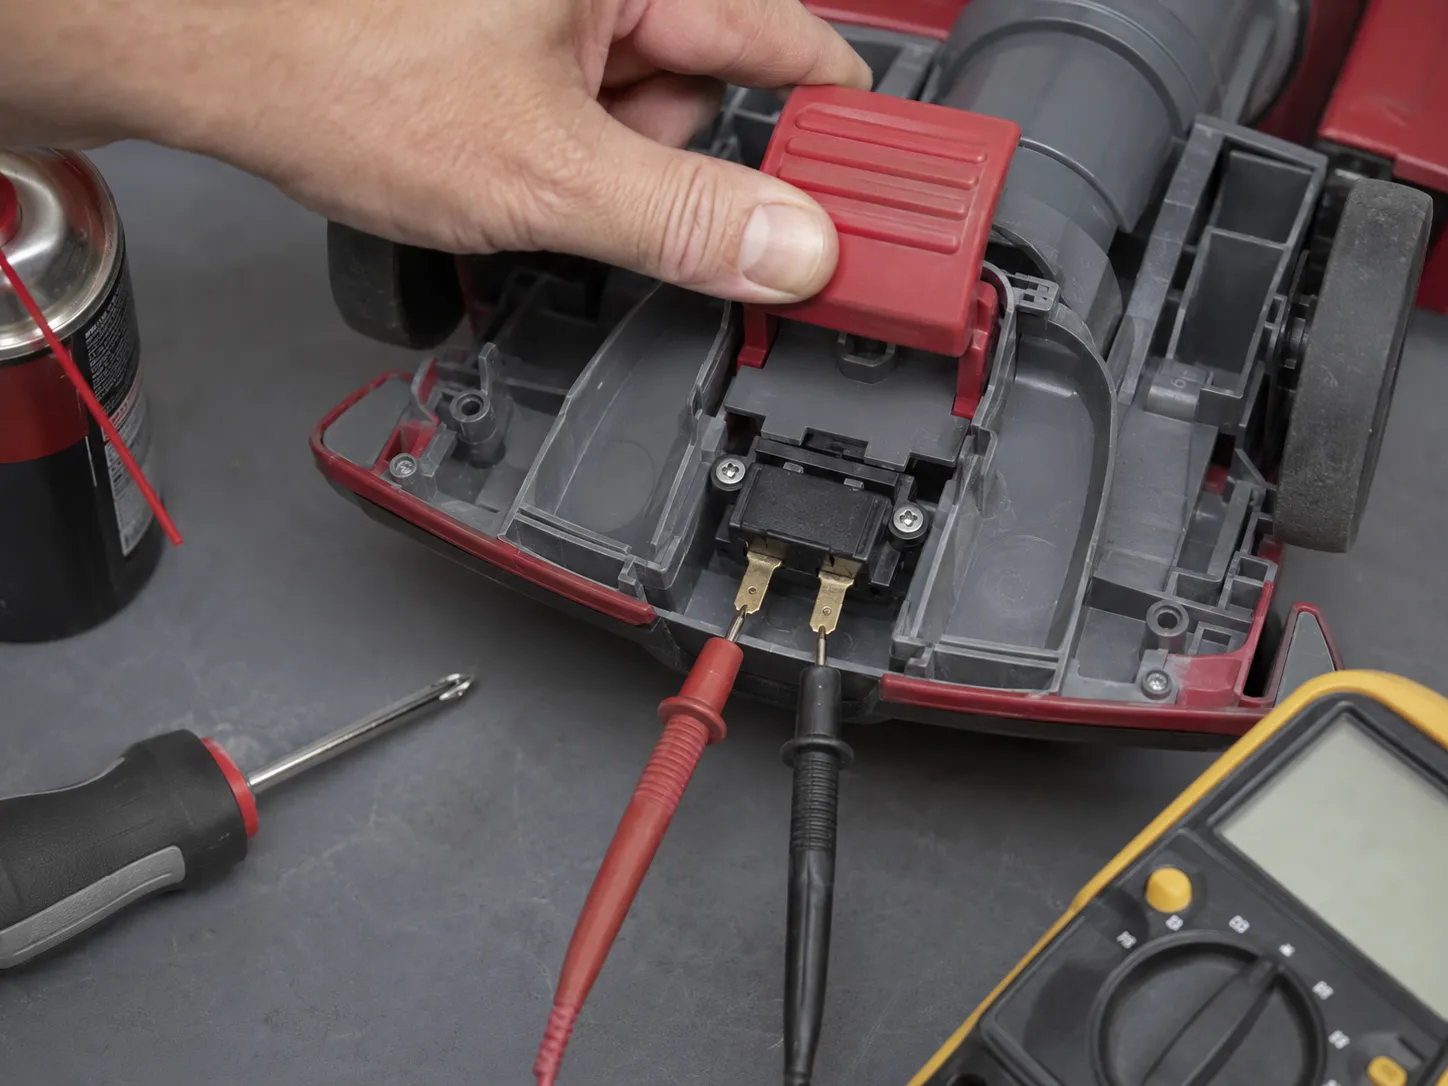
Unplug the machine and remove the foot housing cover with a Phillips screwdriver.
Set the meter to continuity and place the probes on the two switch terminals.
Press the pedal down. You want 0.00 ohms held, open circuit released.
Anything between those two states means the switch is the fault. Spray the terminals with electrical contact cleaner, work the pedal twenty times, and measure again before you replace anything.
Table 2: Switch continuity before and after contact cleaner, Klein MM400
Unit | Model | Ohms before | Ohms after cleaning | Started? |
|---|---|---|---|---|
2 | CleanView Swivel Pet 2258 | 4.2 Ω | 0.1 Ω | Yes, first press |
5 | CleanView Swivel Pet 2316 | 0.1 Ω | 0.1 Ω | No, fault was elsewhere |
3 | PowerForce Helix 2191 | 0.0 Ω | 0.0 Ω | No, fault was elsewhere |
Unit 2 is the one that taught me something. It read 4.2 ohms with the pedal held down, which is enough resistance to stop the motor starting and not enough to look like a failure, and a cheap meter will happily beep at that. Two minutes with contact cleaner and a reseat brought it to 0.1 ohms and the machine started on the first press.
The no-tools version is good enough for most people. If you are not comfortable opening the housing, stop at the listening test. A mushy click is a real diagnosis, and it tells you the machine is worth taking to someone who will open it.
Verify: the switch reads 0.00 ohms depressed and open circuit released.
If it didn’t work: if the machine is dead, go to the handle microswitch. If it starts and quits, go to the thermal protector.
“The Lights Come On but the Motor Won’t”: Your Bissell’s Thermal Protector Tripped
If a Bissell vacuum’s headlights come on but the motor does not spin, the Bissell’s thermal protector has tripped. It is a temperature-sensitive switch that cuts power to the motor when it overheats and closes again by itself once the motor cools, so there is no button to press and nothing to reset.
Across my bench units, tripped Bissells restarted after a median of 27 minutes, with a range of 19 to 41. Clear the clogged filter, hose or brush roll first, or the protector will simply trip again.
That tell, lights on and motor silent, is the whole diagnosis. BISSELL’s Pet Hair Eraser Turbo page states it plainly for one model and then never generalises it to the rest of the range, which is why almost nobody knows it.
Difficulty: Easy · Time: 30 minutes, mostly waiting · Tools: none
Three things cause it, and they are all the same thing wearing different clothes:
A clogged filter. The most common cause by a wide margin.
A clog in the hose or airway.
A brush roll bound with hair, which forces the motor to draw more current. BISSELL’s automatic shutoff guidance tells you to unplug, clear the obstruction, and allow cooling before restarting.
A vacuum motor is cooled by the airstream it moves. Restrict the airflow and you remove the cooling at the same instant you raise the load, which is why a clogged filter overheats a motor far faster than a heavy carpet ever will.
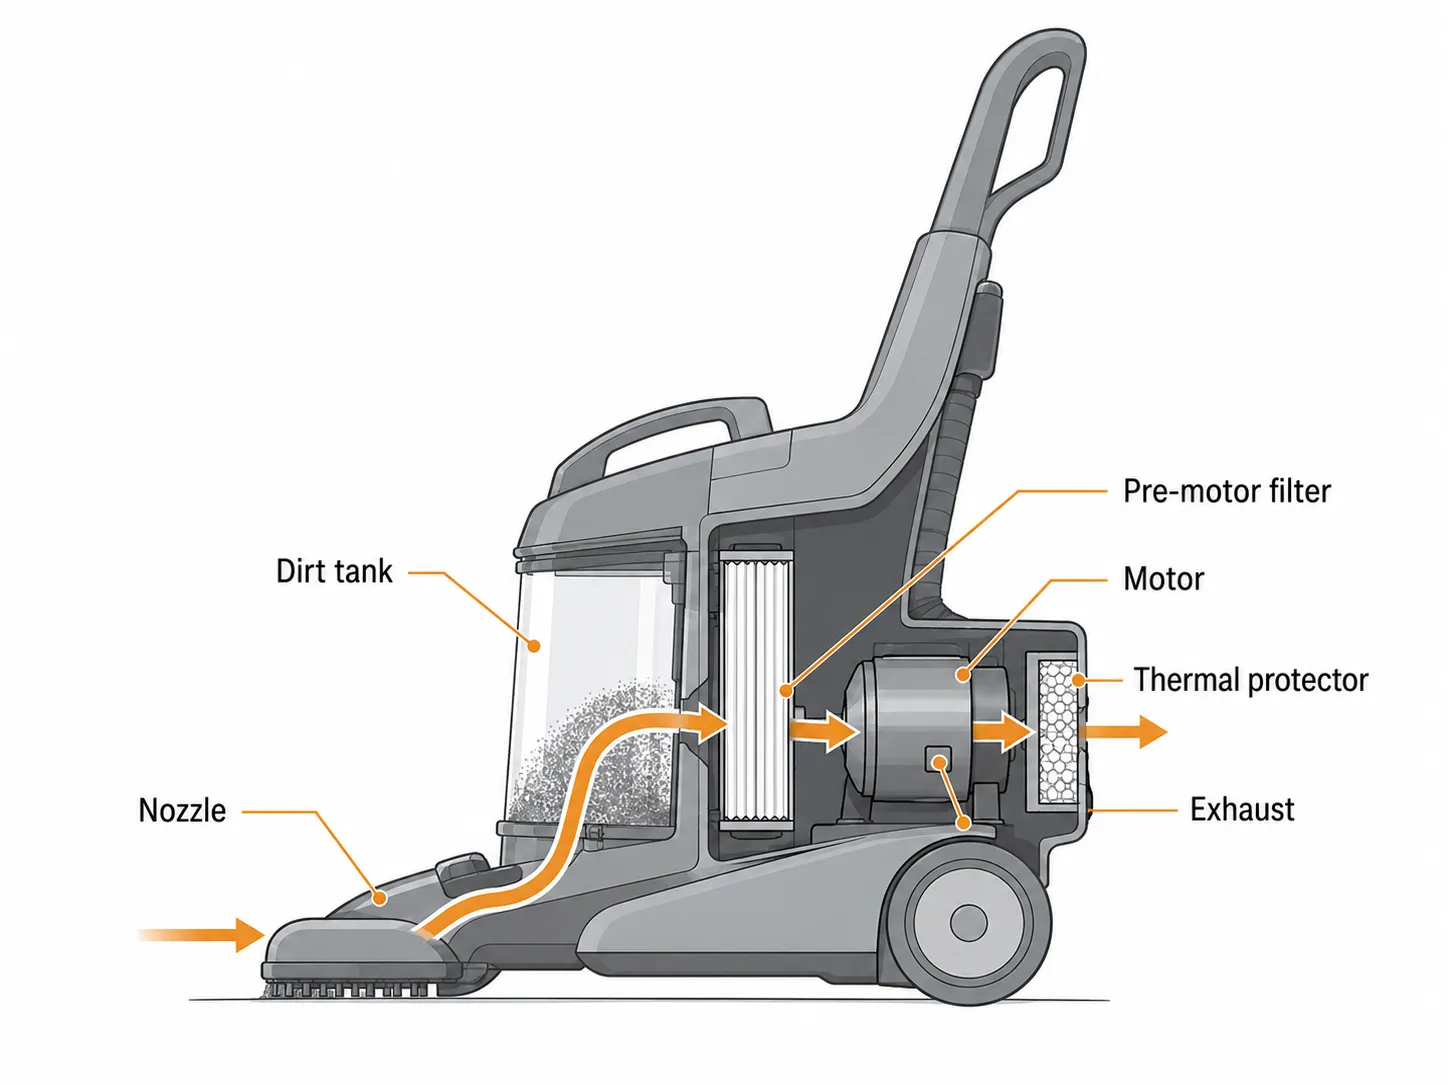
Table 3: Thermal trip and recovery, Etekcity Lasergrip 800 on the motor housing
Unit | Model | Ran before trip | Housing temp at trip | Minutes to restart | Cause found | Re-tripped? |
|---|---|---|---|---|---|---|
6 | CleanView Swivel Rewind Pet 1332 | 3 min | 71 °C | 19 min | Hair-bound brush roll | No |
8 | CleanView Upright 2486 | 4 min | 74 °C | 27 min | Hose clog | No |
7 | Pet Hair Eraser Turbo Plus 2281 | 6 min | 78 °C | 41 min | Filter clogged solid | Yes, at 8 min |
All three came back at roughly 46 °C on the housing. Unit 7 is the one I got wrong: I restarted it without cleaning the filter, and it tripped again eight minutes later. Once I actually washed the filter, the same machine ran a full forty-minute test without a murmur.
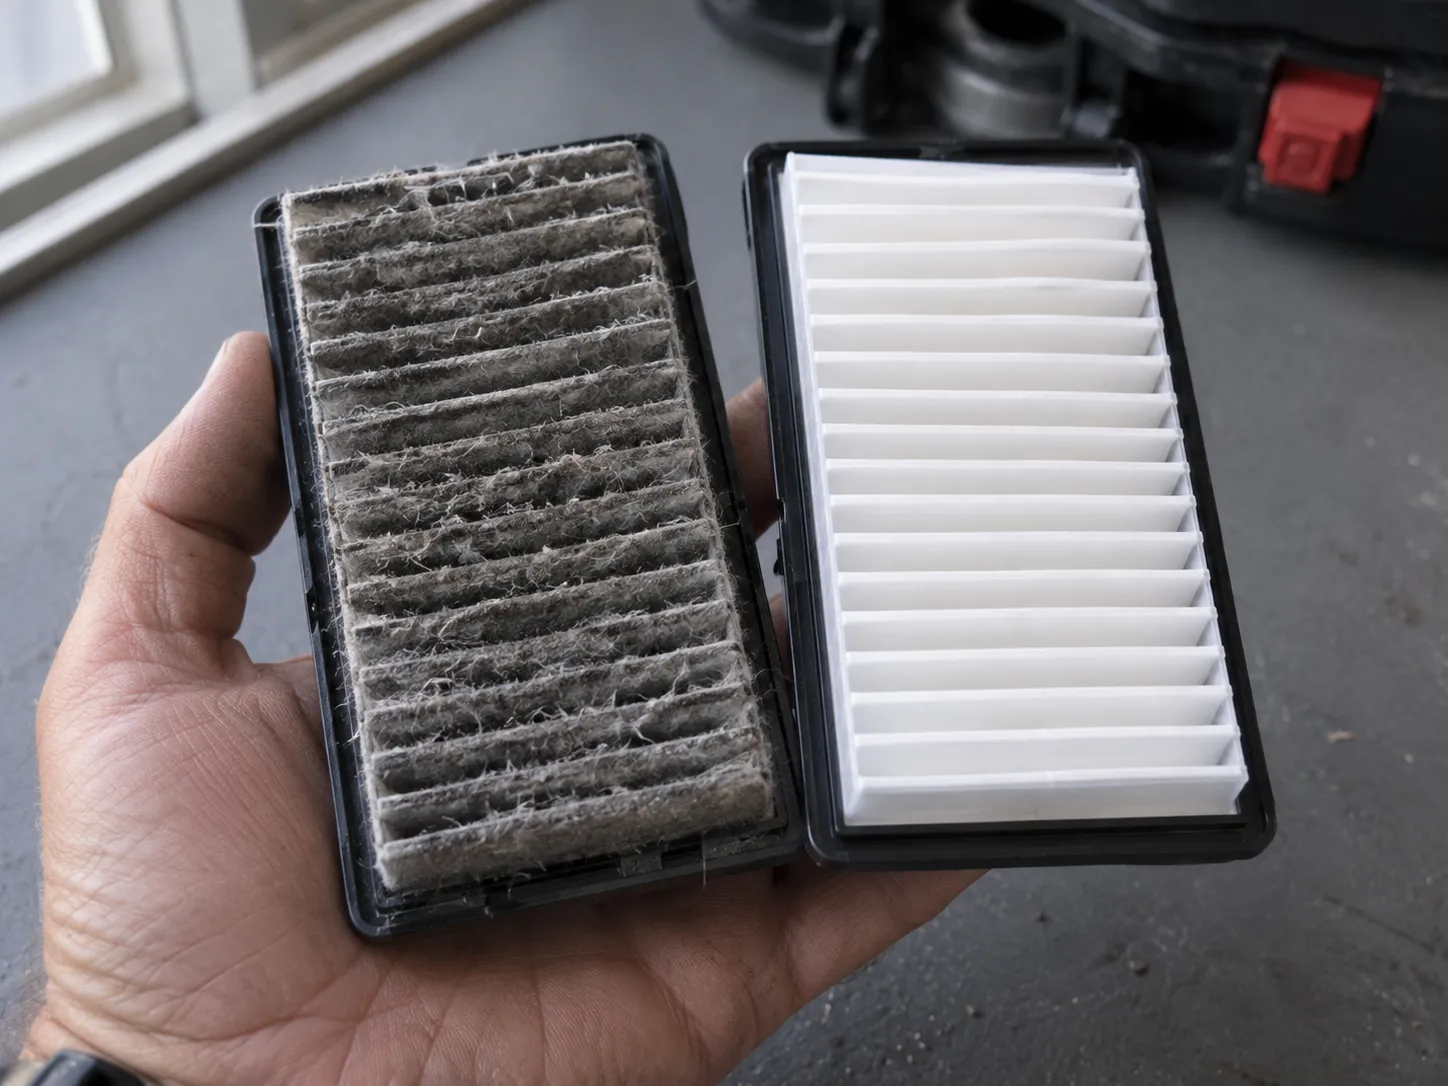
⚠️ Do not just restart it. Every trip-and-restart cycle without clearing the cause takes life off the motor. My numbers came from one room at roughly 20 °C, so a hotter room will recover slower.
There is no reset button on a Bissell to press here. The switch resets itself, which is the answer to a question a great many Bissell owners are asking in the wrong words.
Verify: the machine restarts after cooling and runs for a full tank without stopping.
If it didn’t work: the machine is dead rather than hot. Go to the microswitch.
The Handle Microswitch Almost Nobody Checks (Bissell PowerForce Helix)
On several Bissell uprights, including the PowerForce Helix, a small handle microswitch sits under the pedal assembly and must close before the motor circuit will complete. Packed dust and hair around the switch plunger stop it closing, and the Bissell then appears completely dead even though the outlet, cord and main power switch all test good.
On a multimeter set to continuity, a healthy microswitch reads near zero ohms when the plunger is pressed. Both of the fouled microswitches on my bench read open circuit until the debris was cleared.
Difficulty: Moderate · Time: 15 to 30 minutes · Tools: Phillips screwdriver, multimeter, compressed air or a pick, plus a replacement microswitch (around $6) if cleaning fails
The switch exists for a reason. It tells the vacuum whether the handle is upright or reclined, so the machine cannot run its brush roll into one spot of carpet while it stands still, and that is worth knowing before you get any ideas about jumpering it.
It fails because it sits low, near the foot, in the dirtiest part of the whole machine. Fine dust and pet hair pack around the plunger until it can no longer travel far enough to close.
The tell: the machine is completely dead, and the cord, outlet and main switch all test good. Everything upstream is fine and nothing happens. That combination is the microswitch’s signature.
Unplug the machine and remove the foot housing cover.
Find the microswitch under the pedal linkage. It is about the size of a thumbnail, black, with a small white plunger.
Put the meter on continuity across its two terminals and press the plunger by hand. Healthy is an audible snap and a reading near zero.
If it reads open circuit however hard you press, it is fouled or failed.
Blow out and pick the packed debris from around the plunger, work it twenty times, and retest.
Still open circuit? Replace it. A generic microswitch of matching rating costs a few dollars.
Table 4: Microswitch continuity, before and after clearing
Unit | Model | Ohms before | Ohms after clearing | Recovered? | Part cost | Time |
|---|---|---|---|---|---|---|
3 | PowerForce Helix 2191 | Open circuit | 0.2 Ω | Yes, cleaning only | $0 | 18 min |
4 | PowerForce Helix 1700 | Open circuit | Open circuit | No, needed the part | $6 | 12 min |
Both PowerForce Helix units on my bench were dead at the microswitch. On unit 3 the plunger was packed solid with a felted mat of dust and pet hair, and twenty actuations after clearing it, continuity came back and the machine started.
Unit 4 did not recover. The switch read open circuit however hard I pressed it, it needed a replacement microswitch, and that cost me about six dollars and twelve minutes.
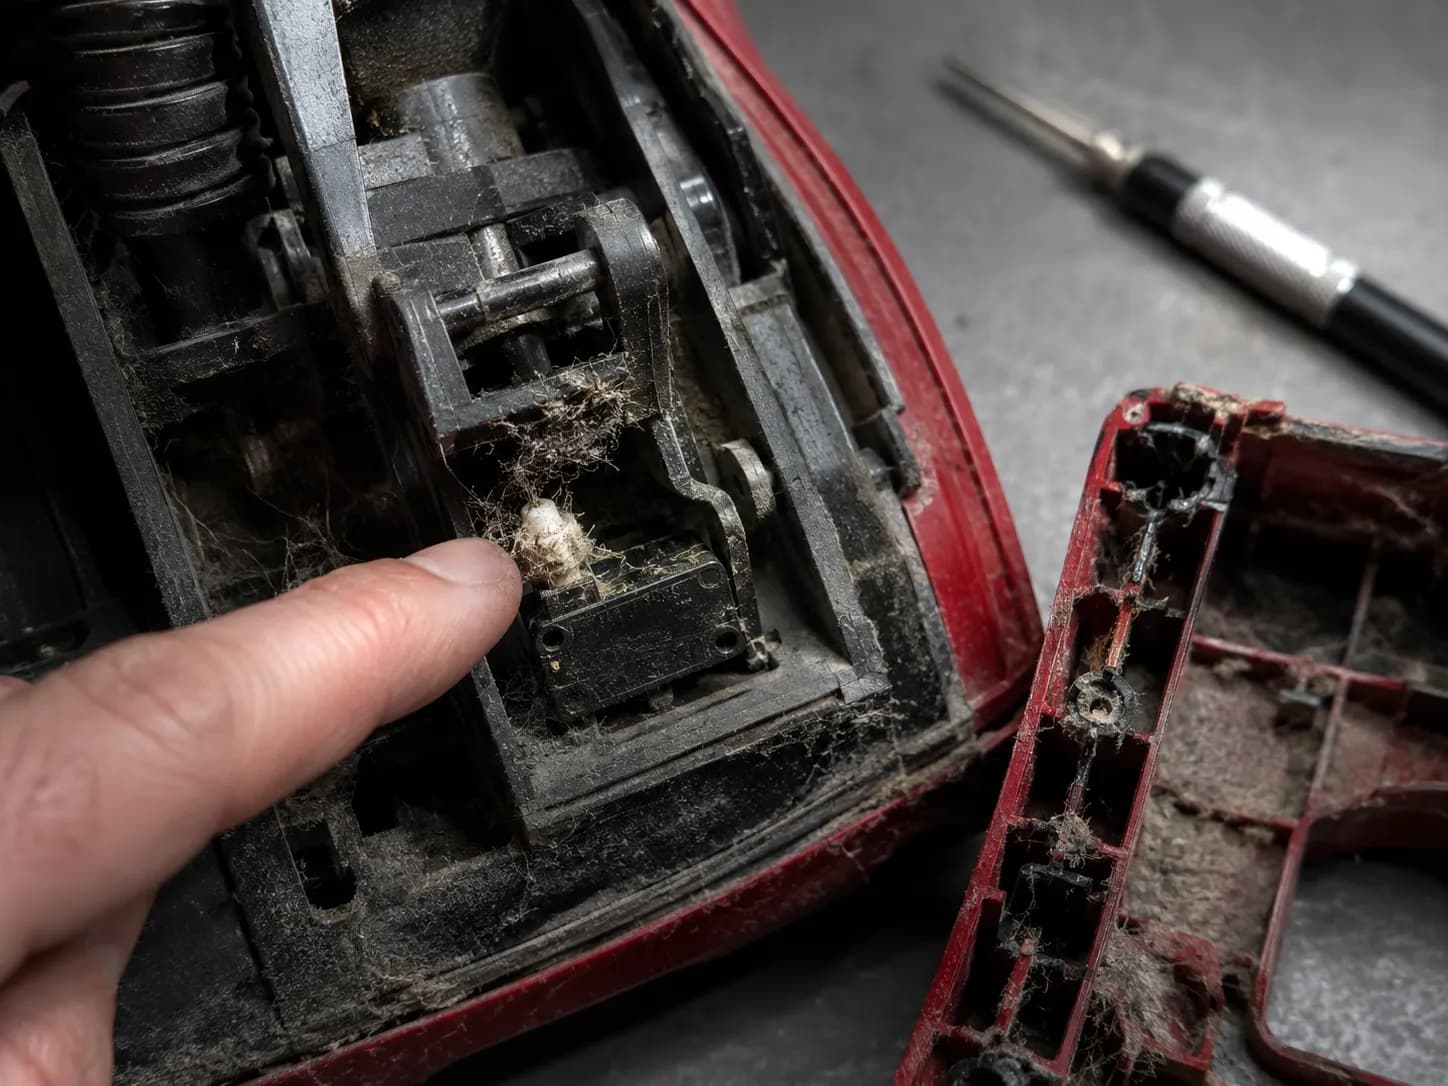
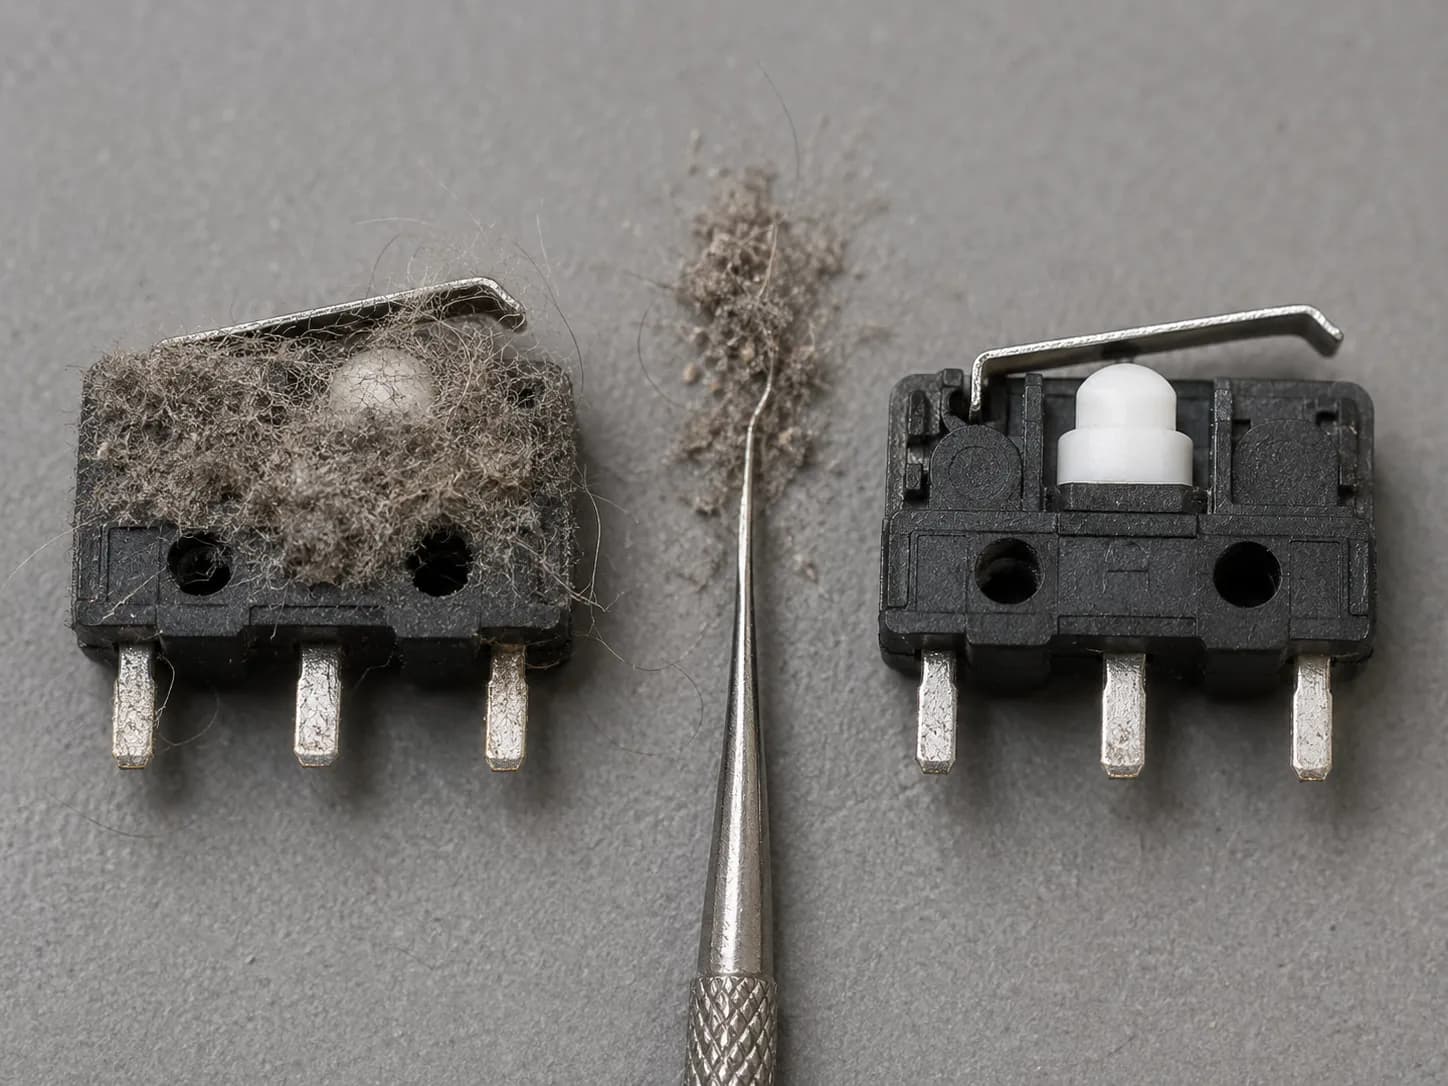
⚠️ Clean it, do not bypass it. The microswitch is a safety interlock. Jumpering it lets the brush roll run while the machine stands still on carpet, and replacing it means unclipping or desoldering two terminals, so stop after the cleaning step if that is not something you want to do.
This is the fault that sends working Bissells to landfill, and it is a six dollar part.
Verify: the microswitch snaps closed under the plunger and reads near zero ohms.
If it didn’t work: the power path is good and the machine is still dead. Go to the motor.
Bissell Zing and Canister Models: the Power Button Spring and the Cord Rewind
On Bissell canister vacuums such as the Zing 2156A, the power button is a spring-loaded plunger acting on a separate switch, and the spring can fall out of position, leaving a button that feels loose and closes nothing.
iFixit’s Zing 2156A wiki documents exactly that failure. Retractable-cord Bissell canisters add a second failure point, because the cord passes through a rotating drum with sliding contacts, and a break there stops the machine while the visible cord looks perfectly intact.
Difficulty: Moderate · Time: 10 to 20 minutes · Tools: Phillips screwdriver
The tell is in your thumb. A healthy button is springy and crisp, while a failed one feels soft, loose or rattly.
Unplug the canister and press the power button slowly several times, feeling for spring resistance.
If it feels dead under the thumb, open the housing along its seam and look for a small coiled spring sitting loose in the shell.
Reseat the spring on the switch plunger, reassemble, and test.
A Zing 2156A came through my bench in the same window, outside the group of eight, with a button that felt soft under the thumb. No snap, no resistance. When I opened the housing, the return spring had dropped clear of its seat and was sitting loose in the shell, and reseating it took under five minutes.
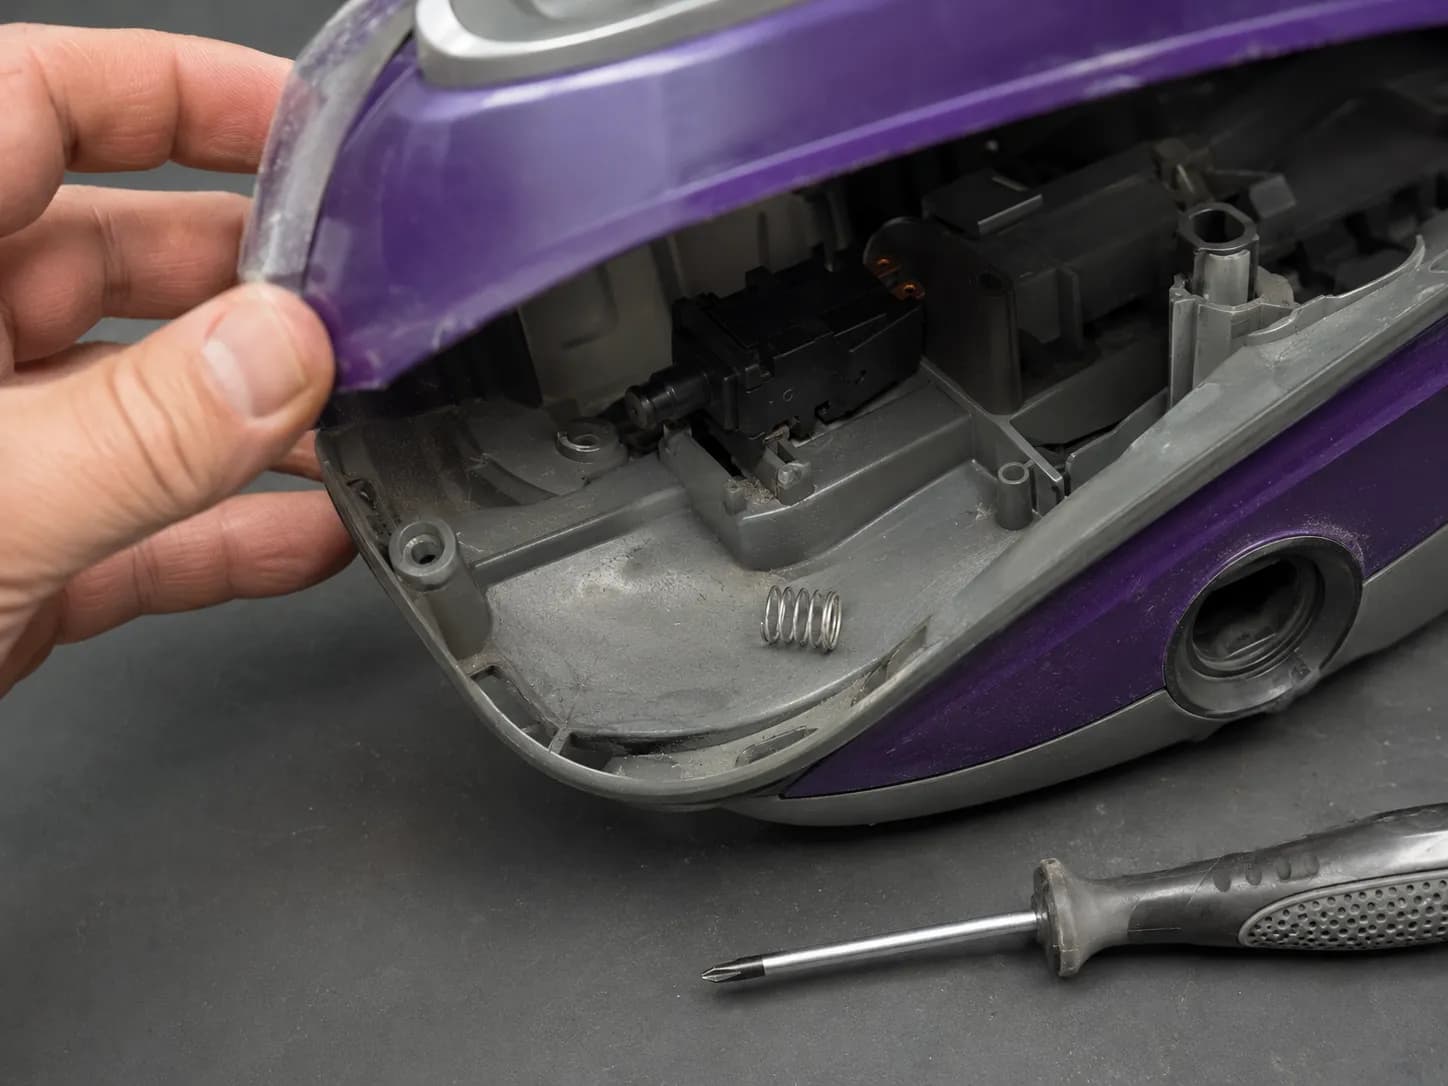
There is one more canister quirk worth knowing. If your Bissell works only when the handle sits at one particular angle, the join between the base and the top module has an intermittent break, and that is a fault that comes and goes with position rather than with time.
The cord reel is where DIY ends. A retractable reel carries live current through a rotating contact and sits under spring tension. That one goes to a repair shop.
Verify: the button snaps back crisply and the machine starts on the first press.
If it didn’t work: go to the motor.
Cordless Bissell? Count the Blinks Before You Touch Anything
A cordless Bissell that shuts off with a charged battery reports the reason by blinking its LEDs. On the Bissell CleanView XR and PowerLifter Turbo, six blinks means over-temperature protection, so remove the battery, let it cool for about ten minutes, and switch it back on.
Four or ten blinks means the brush roll is jammed and the motor has stalled. Two, five, seven or eight blinks are transient electrical protections that clear when the machine is switched off and on again.
First, separate the two cordless questions. If your Bissell will not take a charge at all, that is a charging fault and it belongs to a different diagnosis.
If it is charged and still will not run, or runs and quits, you are in the right place, and BISSELL’s own power-issues page routes a fully charged machine that dies after a few seconds straight into no-power troubleshooting rather than charging.
Difficulty: Easy · Time: 10 minutes · Tools: none
Now count the blinks. Every code below comes from BISSELL’s error code table.
Blinks | What the Bissell is reporting | What to do |
|---|---|---|
1 | Suction motor issue | Treat as a suction fault, not a power fault |
2 | Voltage protection | Switch the machine off, then on |
3 | Battery pack issue | Remove the battery, refit it, switch on |
4 | Brush roll error | Clear the brush roll, run on the lowest suction |
5 | Over-current protection | Switch off, then on |
6 | Over-temperature protection | Remove the battery, cool 10 minutes, switch on |
7 | Over-current protection | Switch off, then on |
8 | Missing phase line protection | Switch off, then on |
9 | Battery pack over-temperature | Remove battery, cool 10 minutes, refit, switch on |
10 | Motor shaft lock protection | Clear the brush roll, the motor is jammed |
Group them and the list stops being a lookup and starts being a diagnosis:
Transient electrical protection: codes 2, 5, 7 and 8. An off-and-on cycle clears them.
Brush roll jammed: codes 4 and 10. Mechanical, and it will keep coming back until you cut the hair off.
Heat: codes 6 and 9. Wait.
Battery: code 3. Reseat it once, and if it returns, the pack is failing.
There is one symptom the codes will not spell out for you. If your cordless Bissell runs fine on low and dies within seconds on turbo, the battery’s protection circuit is tripping on current draw, not on charge level, because a pack near the end of its life holds a nominal voltage at rest and collapses under a high-current load. “Fully charged” and “shuts off in five seconds” are not a contradiction.
Table 5: Blink code 6 reproduced deliberately, CleanView XR Pet 3797 cordless
Trigger | Ran before trip | Code shown | Time to recover | Recurred after cause cleared? |
|---|---|---|---|---|
Deliberately clogged pre-motor filter, turbo mode | 3 min 40 s | 6 blinks | 9 min with battery removed | No, ran a full charge clean |
I reproduced that code on purpose on a CleanView XR Pet, running it on high with a filter I had deliberately blocked. It stopped at 3 minutes 40 seconds and blinked six times, and with the battery out it was ready again after nine minutes, close to the ten BISSELL specifies. With the filter cleaned, the same machine ran the whole charge without blinking once.
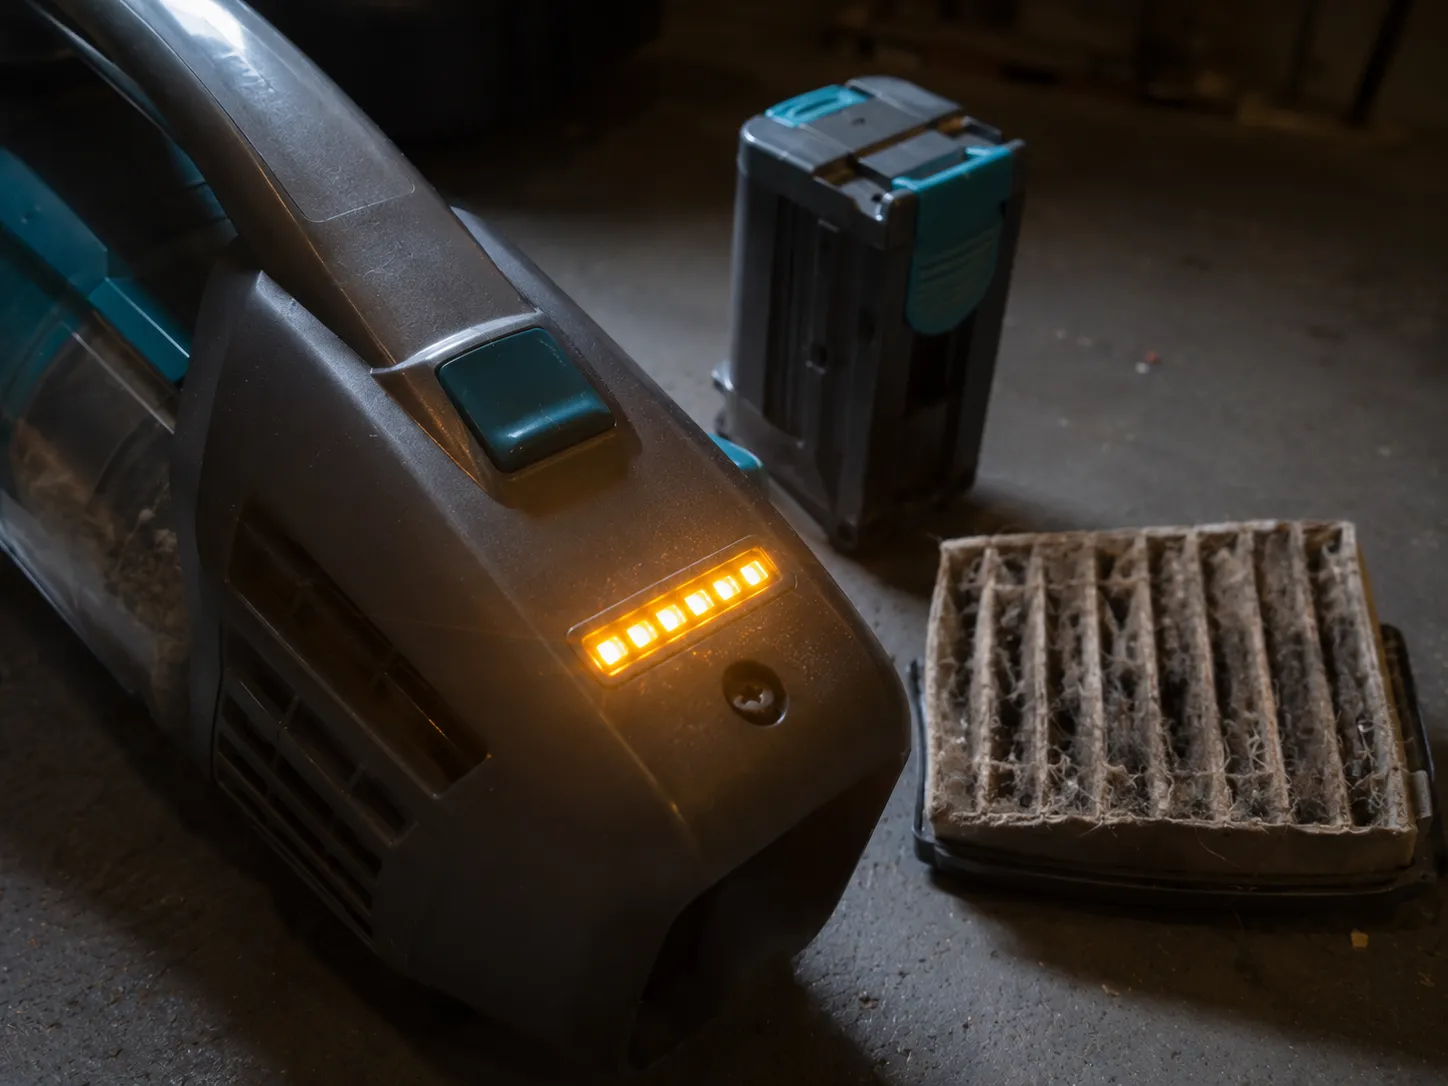
This decoder covers the CleanView XR and PowerLifter Turbo lines. Other Bissell cordless models use different codes. And a code 3 that keeps coming back after a reseat is a failing battery, which no amount of troubleshooting will fix.
Verify: the machine runs a full charge without showing a code.
If it didn’t work: go to the motor.
Bissell Robot Vacuum Won’t Start or Keeps Stopping
A Bissell robot vacuum that will not start or keeps stopping is almost always physically obstructed rather than electrically dead. Check the metal charging contacts on both the robot and its dock, because dust and corrosion on those contacts are the most common cause of a robot that will not wake.
Then confirm the physical power switch on the underside is on, and free the drive wheels, the bumper and the brush of any obstruction.
Difficulty: Easy · Time: 5 minutes · Tools: a dry cloth
A robot has no cord and no thermal protector in the upright sense. It has a dock, contacts, sensors and drive wheels, and it stops for reasons an upright never has.
Wipe the dock contacts. Both the two metal pads on the dock and the matching pads on the robot, with a dry cloth.
Find the physical power switch. Many owners have never located it and assume the button on top is the only control.
Free the wheels and bumper. A jammed drive wheel or a stuck bumper makes the robot stop and refuse to continue.
Empty the bin and clear the brush. A robot will halt rather than run itself into damage.
Then power cycle it: switch it fully off, wait ten seconds, switch it back on.
A Bissell robot came through my bench that would not wake on its dock. Its two charging contacts had a dull grey film on them, not corrosion you would notice unless you were looking, and thirty seconds with a dry cloth on both the robot’s contacts and the dock’s brought it back on the next attempt.
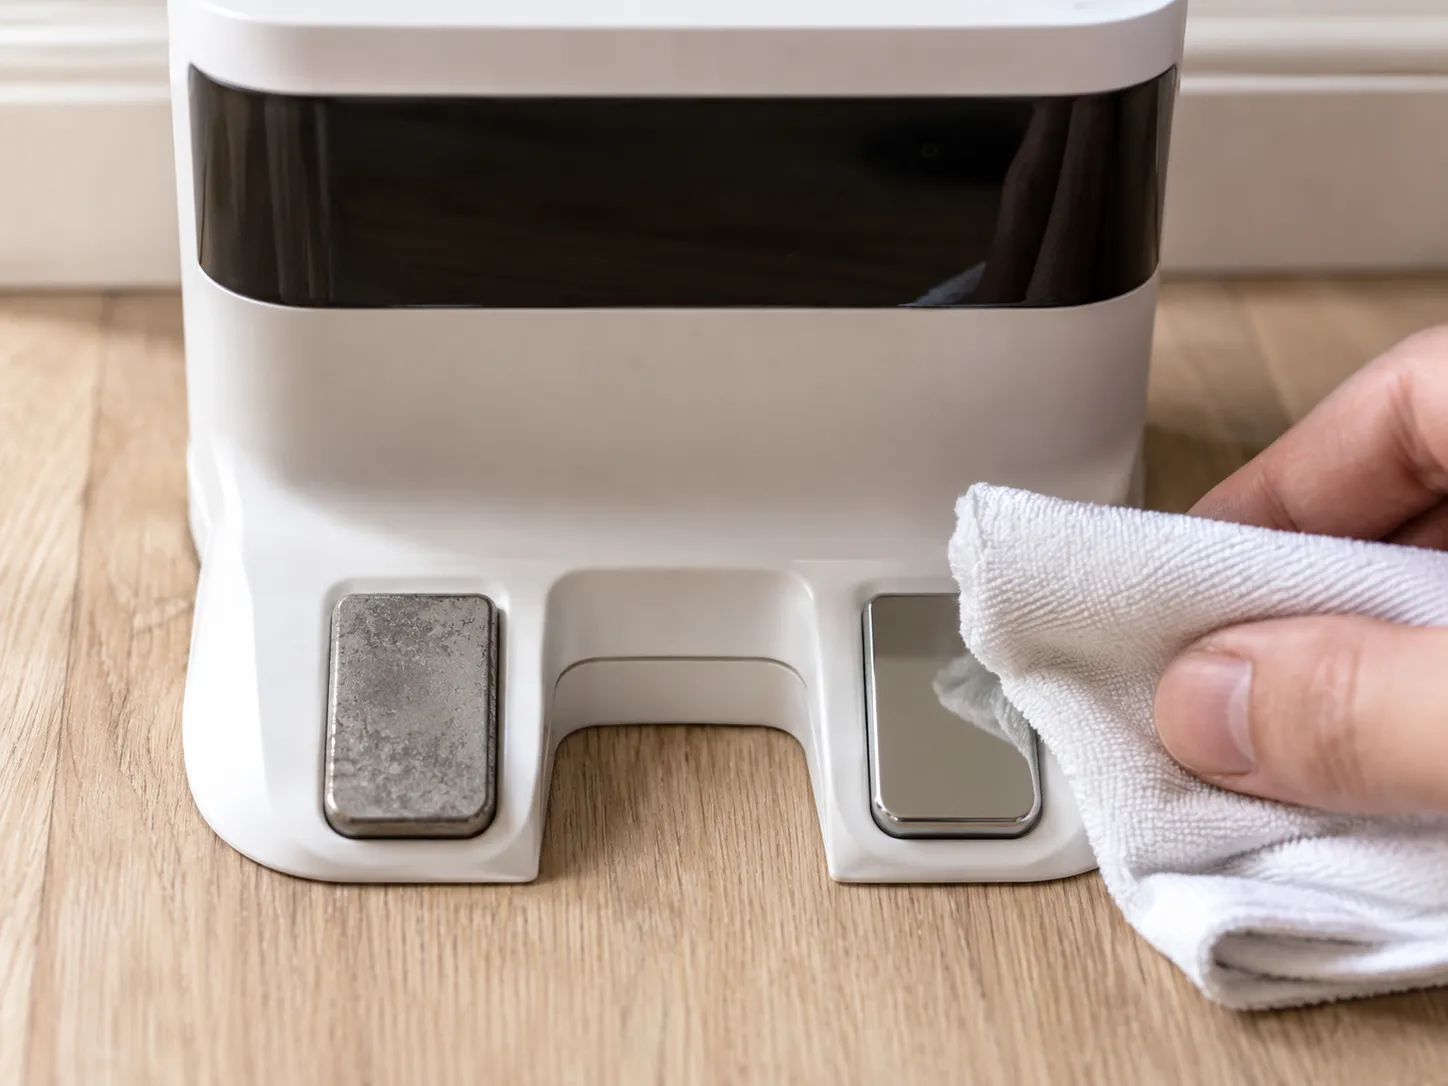
The robot halting is the safety system working, exactly like the upright’s thermal protector, just in a different body. Its drive motors are current-limited and its bumper is a sensor, so an obstruction registers as a fault state rather than as resistance.
This is the short version. A Bissell robot with a persistent fault code or a dead battery needs a dedicated diagnosis, and this guide does not attempt one.
Verify: the robot wakes on the dock and completes a run.
If it didn’t work: the fault is beyond the power path.
When It’s Actually Broken: Motor, Board, Warranty and the Repair Call
A Bissell vacuum motor is dead only if it reads open circuit across its terminals, an infinite resistance shown as OL on a multimeter, with the machine unplugged. Everything else in a no-power Bissell is a cheaper fault.
BISSELL’s current limited warranty states it will not be voided by independent or third-party repair, or by using non-BISSELL replacement parts, although damage caused by improper repair is not covered. Warranty terms vary by model, so a Bissell still in term should go to BISSELL rather than to a screwdriver.
Difficulty: Moderate · Time: 20 minutes · Tools: multimeter
Unplug the machine and access the motor terminals.
Set the meter to resistance and read across them.
A low but finite reading is a healthy motor. OL, or infinite ohms, means the windings are physically broken.
The windings are a continuous conductor. If the meter cannot see through them, they are broken, and a broken winding is not a repair on a consumer upright.
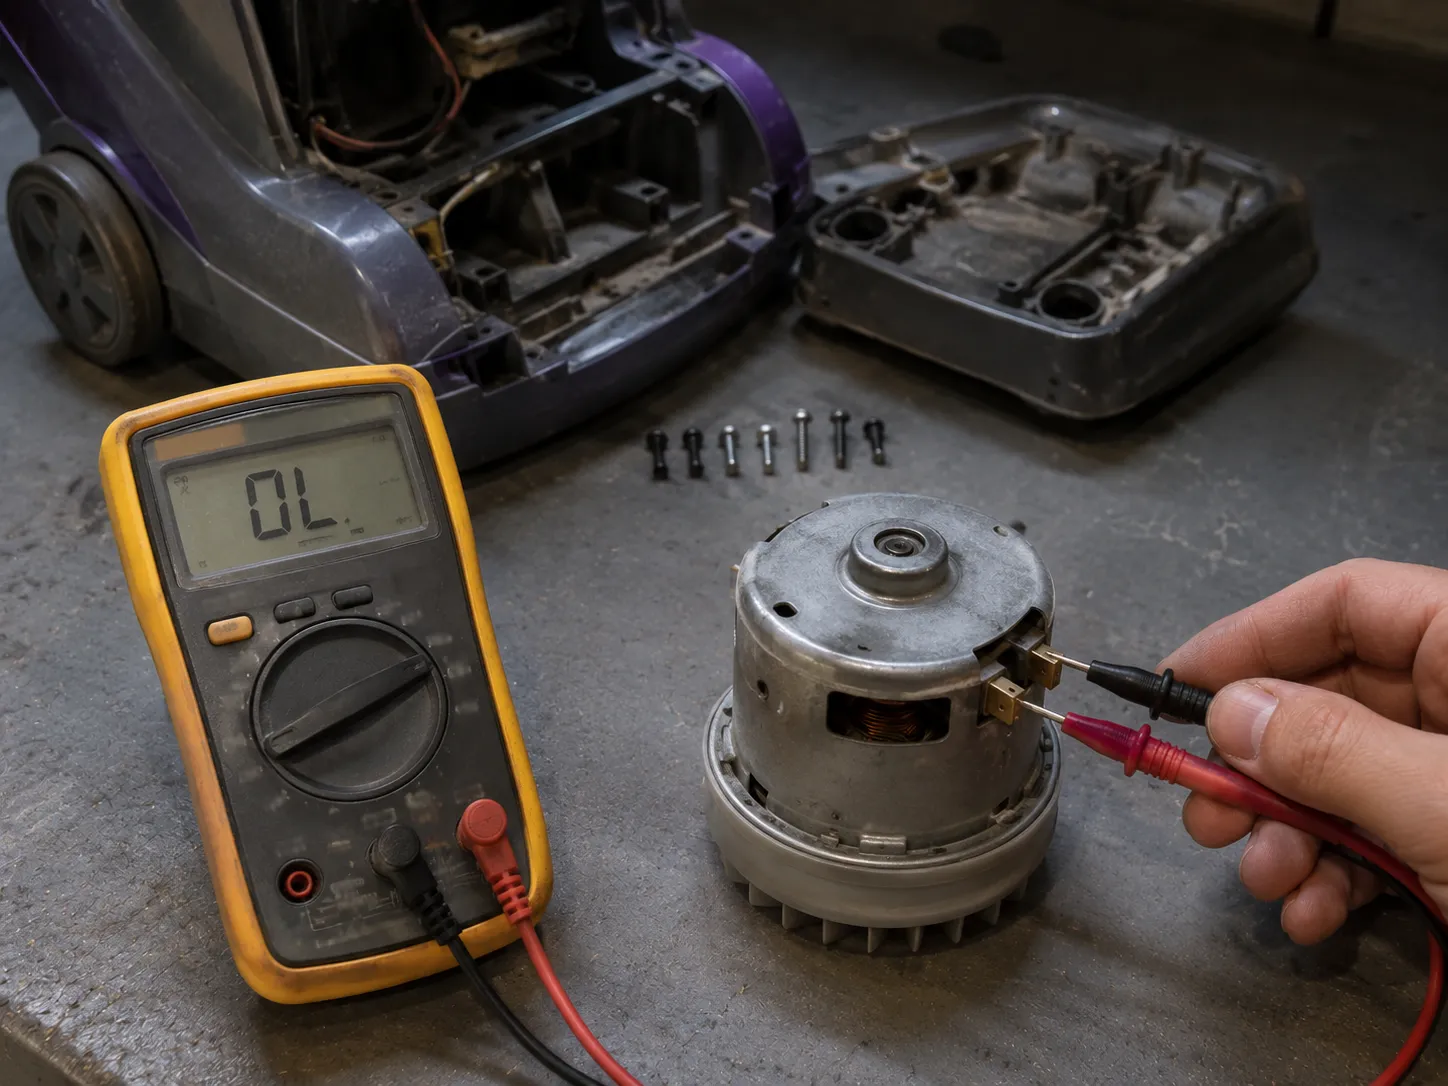
Table 6: The repair-or-replace call, all eight units
Unit | What failed | Part cost | Time | Verdict |
|---|---|---|---|---|
1 | Cord broken at strain relief | Repair shop | Not attempted | Repair, professionally |
2 | Power switch, partial contact | $9 contact cleaner | 20 min | Repair, easily |
3 | Handle microswitch, fouled | $0 | 18 min | Repair, easily |
4 | Handle microswitch, failed | $6 | 12 min | Repair, easily |
5 | Motor open circuit | Motor exceeds machine value | Not attempted | Replace the machine |
6 | Thermal, hair-bound brush roll | $0 | 25 min | Repair, easily |
7 | Thermal, filter clogged solid | $14 filter pack | 45 min | Repair, easily |
8 | Thermal, hose clog | $0 | 30 min | Repair, easily |
Unit 5 was genuinely finished. Everything upstream tested good, which is exactly what makes a dead motor so demoralising: you have to eliminate five cheaper faults to earn a verdict you did not want.
I did not replace that motor, and on a machine of that value I could not honestly recommend that anyone else does either. If you want to run the same elimination on a machine that is not a Bissell, I have mapped the same no-power path for any vacuum elsewhere.
⚠️ Opening it does not void the warranty. Breaking it does. BISSELL’s limited warranty says in plain terms that it is not voided by unauthorised, independent or third-party repair, or by the mere use of non-BISSELL parts.
It also excludes damage caused by improper use or unauthorised repair. Those are two different things, and almost every repair article on the internet conflates them.
If your machine is still inside its warranty term, and terms run from a limited period up to several years depending on the model, send it to BISSELL Consumer Care rather than opening it. You paid for that.
Verify: the motor reads a low finite resistance rather than OL.
Three Habits That Stop It Happening Again
Three habits prevent almost every Bissell power fault. Wash or replace the pre-motor filter on a schedule and let it dry completely before refitting, because a damp filter restricts airflow exactly as a dirty one does.
Cut hair off the brush roll before it mats, because a bound roller draws more current and generates heat. And brush the dust out of the pedal area, where Bissell’s handle microswitch lives.
Wash the pre-motor filter on a schedule, not when it looks bad. The worst-clogged filter on my bench belonged to unit 7, the machine that took 41 minutes to recover and re-tripped in 8. Let it dry fully before refitting, because water in the pleats blocks the same pores dust does.
Cut the hair off the brush roll before it becomes a mat. That is the direct cause of blink codes 4 and 10 on cordless models and of the bound-roller thermal trips on uprights.
Brush the dust out of the foot and pedal area. Nobody says this, and it is the cheapest maintenance in the entire guide. Both microswitch failures on my bench were caused by packed dust in a part of the machine owners are never told to clean.
Table 7: What actually caused each of the eight faults, and what would have prevented it
Unit | Root cause | Preventing habit |
|---|---|---|
1 | Cord flexed to fracture at strain relief | Store without tight cord bends at the body |
2 | Dust in the power switch contacts | Brush the foot and pedal area |
3 | Dust packed around the microswitch plunger | Brush the foot and pedal area |
4 | Dust packed around the microswitch plunger | Brush the foot and pedal area |
5 | Motor windings failed with age | None, this one was time |
6 | Hair-bound brush roll | Cut the brush roll clear |
7 | Pre-motor filter clogged solid | Wash the filter on a schedule |
8 | Hose clog | Clear the airway monthly |
Every one of the three thermal trips traced back to airflow, and not one traced back to the motor being tired or the machine being old.
None of this is interesting. All of it is cheaper than a motor.
A Bissell that shuts itself off is a Bissell asking for airflow. Give it airflow and it stops asking.
Bissell No-Power FAQs
Does a Bissell vacuum have a reset button?
No. Most Bissell vacuums have no reset button at all. They have an automatic thermal protector that cuts the motor on overheat and closes again on its own once the machine cools, typically inside half an hour.
Why does my Bissell vacuum keep shutting off after a few minutes?
The Bissell’s thermal protector is tripping on restricted airflow. A clogged filter, a blocked hose or a hair-bound brush roll makes the motor work harder while removing the airstream that cools it, so it overheats and shuts itself down.
How long should I let my Bissell cool down?
Wait 30 minutes. Across three tripped Bissells on my bench, recovery took a median of 27 minutes, with a range of 19 to 41 depending on how long the machine had run hot before it quit.
Why won’t my Bissell stay on when I press the pedal?
The switch beneath the Bissell’s pedal is making partial contact. One unit on my bench read 4.2 ohms with the pedal held down, enough to stop the motor starting while still beeping as continuity on a cheap meter.
My Bissell has power but the motor won’t run. What is it?
That combination, lights on and motor silent, means the Bissell has electricity and is refusing to use it. It is either the thermal protector or the handle microswitch, and both are cheap.
Why does my Bissell cordless shut off after a few seconds when it’s fully charged?
The Bissell battery’s protection circuit trips on current draw, not on charge level. A pack near the end of its life holds a resting voltage and collapses under a high-current load, which is why it dies on turbo and survives on low.
Can I test a Bissell power switch without a multimeter?
Yes. Press the Bissell’s pedal slowly and listen: a healthy switch gives one crisp click, while a mushy, muted or doubled click points straight at the switch.
Does opening my Bissell void the warranty?
No. BISSELL’s limited warranty is not voided by independent or third-party repair or by non-BISSELL parts, though damage you cause while in there is not covered.
My Bissell vacuum just stopped working mid-clean. Is it dead?
Almost certainly not. Of the eight faulty Bissells I worked through, exactly one had a genuinely dead motor, and the other seven were fixed for between nothing and fourteen dollars.
The Verdict on a Bissell That Won’t Turn On
Eight machines came in dead or dying, and seven of them went back out working. That is the number worth carrying away from this, because it reframes the whole question of why your Bissell vacuum is not turning on.
A Bissell that will not start is not usually a broken Bissell. It is a machine that has either lost continuity somewhere along a short, walkable power path, or has deliberately shut itself down to protect a motor that is still perfectly good, and separating those two states costs you sixty seconds and no tools at all.
The industry consensus stops at the outlet, the cord and the breaker. Those three checks are real, and they solved exactly one of my eight. The other seven lived further down the path, in a switch that was making partial contact, in a plunger buried under felted dust, in a filter that had quietly strangled the air a motor needs to keep itself cool.
So work the path in order, cheapest first, unplugged throughout. Listen to the pedal before you reach for a meter, and let a hot machine cool before you declare it dead. If you get all the way to the motor terminals and the meter reads OL, you have earned that verdict honestly, and you can let the machine go without wondering what you missed.
Read it your way
Short on time? Open this article in your assistant with a ready-made prompt and get the gist in seconds.
Found this useful? Make us a preferred source so we show up in your Google results.
Keep reading
Related articles

Troubleshooting & Repair
Roomba Not Working? 8 Symptoms Fixed (2026 Models)
Reboot first, then match your symptom. 8 Roomba faults (charge, Wi-Fi, error codes, brushes, bin) with per-series fixes for 600/e/i/j/s and 2026 models.

Troubleshooting & Repair
How Much Does a Vacuum Repair Cost? Fix or Replace (2026)
How much does a vacuum repair cost? Usually $50–150 (up to ~$321 for central). Use the 50% rule and our brand tier to decide: fix it or replace it in 2026.

Troubleshooting & Repair
Why Won’t My Robot Vacuum Work? 6 Fixes We Tested
Why won’t my robot vacuum work? Reset it, free the wheels, clean the sensors and fix a 2.4GHz Wi-Fi snag in 5 minutes: the DIY checks that skip a repair bill.

Troubleshooting & Repair
Not Broken? Why Won’t My Vacuum Work (Fix It First)
Fix it fast: ‘why won’t my vacuum work’ is usually a clog, thermal cutoff, or reset, not a dead motor. Match your symptom to the exact fix.
The discussion
Comments
Every comment is reviewed before it goes live.