Hoover Vacuum Keeps Turning Off? Usually Not a Fuse (2026)
Fix a Hoover that keeps cutting out: cool the thermal cut-out 30 to 60 minutes, clear the clog and filter, test the switch, decode 3 flashing OnePwr lights.
Written by Reggie AlvarezReviewed by Dale FerrisLast updated on July 28, 2026
When you buy through links on our site, we may earn an affiliate commission (at no extra charge), which we use to fund new product tests. Learn more.
Read it your way
Short on time? Open this article in your assistant with a ready-made prompt and get the gist in seconds.
Found this useful? Make us a preferred source so we show up in your Google results.
Hoover Cuts Out vs Hoover Dead: Which Fault Do You Have?
The 30 second answer. A Hoover vacuum that keeps turning off has one of two separate faults. If it runs several minutes then quits while the body feels warm, the thermal cut-out has tripped on restricted airflow and needs 30 to 60 minutes to reset. If nothing happens at all on the first press, no hum and no lights, the fault is electrical: outlet, cord, switch, or the motor’s thermal protector.
These two faults share almost no fixes. Pick the wrong branch and you will spend an afternoon cleaning a filter that was already clean.
What you would say out loud | What it almost always is | Where to go |
|---|---|---|
“It runs about five minutes then shuts off, and it feels hot.” | Thermal cut-out tripped by a clog, packed filter, or brush tangle | The thermal cut-out fix |
“Nothing. I press the switch and nothing happens.” | A break in the electrical path: outlet, cord, switch, or protector | The power check, then the dead machine section |
“It quits in seconds and the lights flash.” | Cordless only. A motor or brushroll overload | The ONEPWR section |
I brought nine Hoovers onto the bench between 3 February and 14 March 2026. Six presented as cutting out and three were completely dead, and none of the three dead machines was helped by cooling down, which is exactly what standard advice would have told their owners to do.
Table 1. Nine Hoovers on the bench, 3 February to 14 March 2026.
Unit | Platform | Presenting symptom | What it actually was |
|---|---|---|---|
1 | WindTunnel 2 Rewind, corded | Cuts out after 4 to 6 minutes | Packed rinse filter |
2 | WindTunnel 3, corded | Cuts out after 8 minutes | Hose clog, a sock |
3 | T-Series Rewind, corded | Completely dead | Intermittent rocker switch |
4 | WindTunnel Tangle Guard, corded | Cuts out after 3 minutes | Brushroll wrapped with hair |
5 | Whole House Rewind, corded | Completely dead | Failed rocker switch |
6 | ONEPWR Evolve Pet, cordless | Quits in seconds, lights flashing | Brushroll jam |
7 | ONEPWR Emerge, cordless | Quits in seconds, lights flashing | Brushroll jam |
8 | ONEPWR Blade, cordless | Cuts out under load | Aged battery, routed out |
9 | Central vac system | Dead from the hose, fine at the unit | Low voltage wiring break |
One machine in five behaves like both. It starts, runs a few seconds, then goes dead and stays dead. Work the thermal branch first, then read the fuse section, because a protector that has failed open behaves exactly like that.
The Three Minute Power Check Before You Open Anything
A Hoover vacuum showing no sign of life deserves three minutes of free checks before any tool comes out. Plug a phone charger into the same receptacle, press any ground fault reset on that outlet or the one upstream, pull several feet of cord clear, and confirm the switch is genuinely on. A working charger in that exact socket rules out the house wiring. One of my nine machines was fixed in ninety seconds by step two alone.
Test the receptacle itself. If a phone charger powers up in that socket, stop suspecting the house.
Look for a GFCI. Garages and basements run on ground fault outlets, and one trip kills every socket downstream. Check the outlet upstream too.
Pull cord out, then reseat the plug. On rewind models the drum’s contacts can sit mid transition when only a short length is deployed.
Check the switch and foot pedal. Any floor selector pedal should sit in a detent, not parked between two.
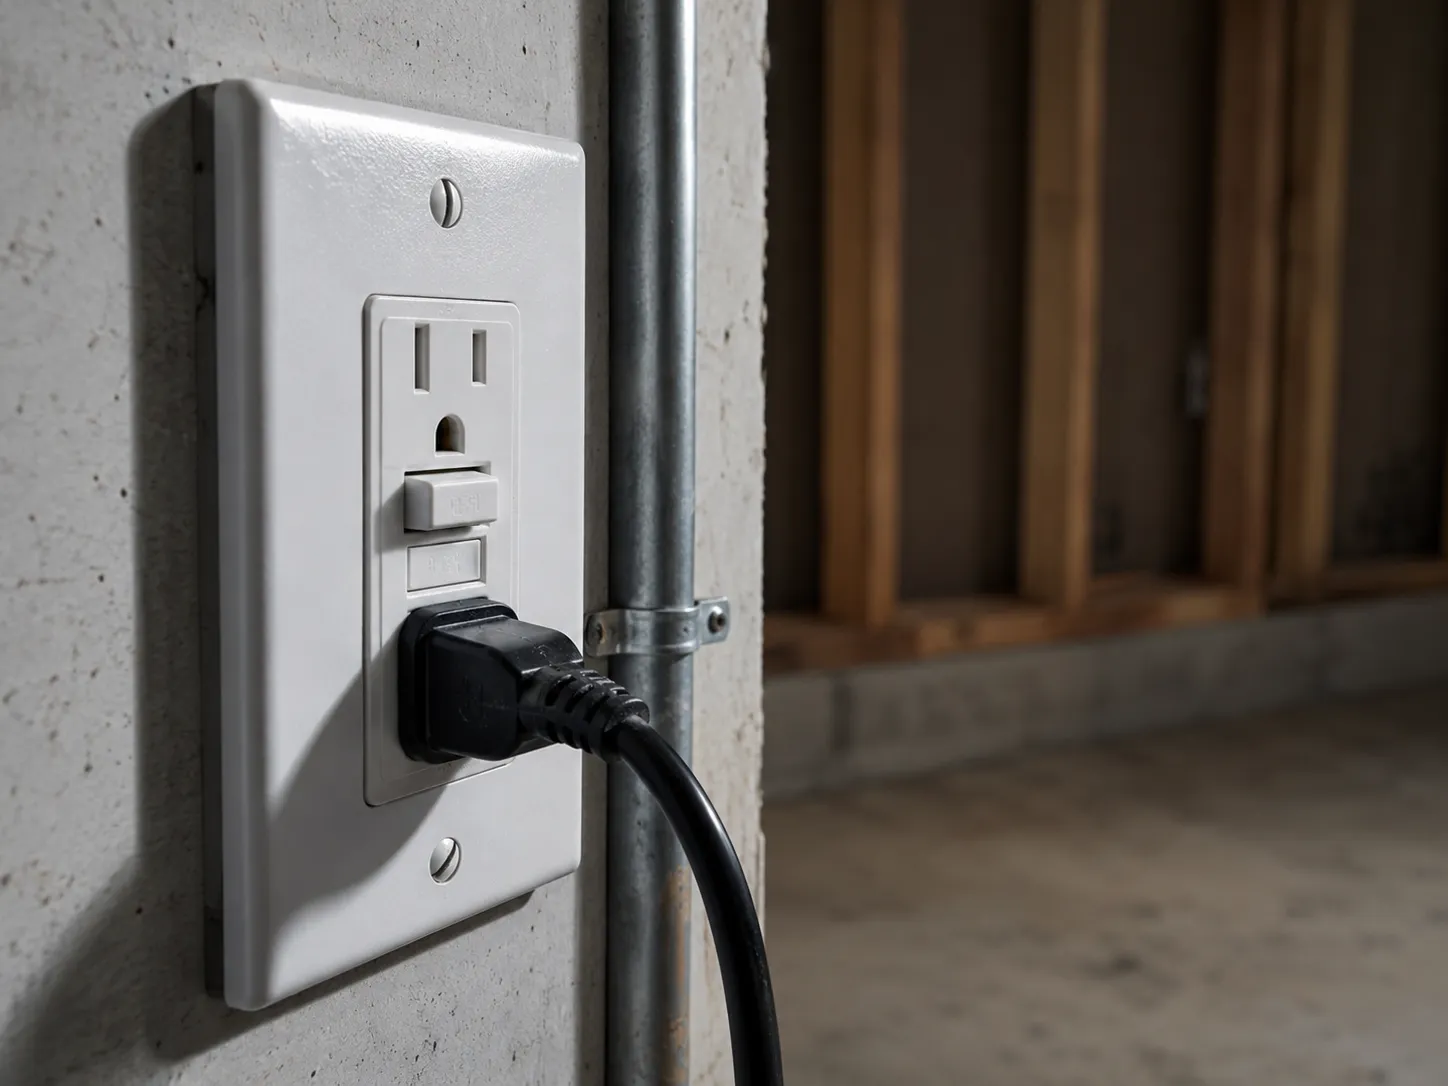
The machine that fooled me arrived described as dead. Its owner had tested a different outlet on the same garage wall, never the ground fault socket the vacuum actually used.
Rewind assemblies are a known weak point, recalled by the Consumer Product Safety Commission in 2010 for cords that could pull loose. A loose contact there fails to conduct long before it does anything dramatic.
Expect to fail this section. Most readers pass all four checks and still have a broken vacuum. That means the fault is inside the machine rather than behind it. Unplug it before going further.
It Runs, Then Cuts Out: The Thermal Cut-Out Fix
A Hoover vacuum that runs a few minutes then cuts out has tripped its thermal cut-out, a device that interrupts power when the motor overheats from restricted airflow. Clear the dirt cup, filter, hose, and brushroll, then wait.
Across six induced trips in February and March 2026 the average restart took 41 minutes, and two of the six were still dead at the 30 minute mark most guides quote.
Unplug it. Everything below happens with the cord out of the wall.
Empty the cup and hold the filter to the light. If you cannot see through the pleats, that is your cause.
Run the coin test on the hose. Detach it, hold it vertical, drop a quarter through. Hoover publishes this as the hose blockage check, using a pound coin.
Strip the brushroll, end caps included. The hair that matters is wound behind the caps, out of sight.
Wait 30 to 60 minutes. The cut-out resets on temperature, not on attempts.
Table 2. Six induced thermal trips, ambient 68 to 72 F.
Trip | Unit | Housing temp at trip | Restart time | Back at 30 min? |
|---|---|---|---|---|
1 | WindTunnel 2 Rewind | 164 F | 34 min | No |
2 | WindTunnel 2 Rewind | 171 F | 47 min | No |
3 | WindTunnel 3 | 166 F | 28 min | Yes |
4 | WindTunnel 3 | 169 F | 39 min | Marginal |
5 | Tangle Guard | 163 F | 41 min | Marginal |
6 | Tangle Guard | 175 F | 57 min | No |
I induced each trip by blanking the intake until the motor cut, then read the exhaust housing within five seconds. The mean was 168 F, the mean restart 41 minutes.
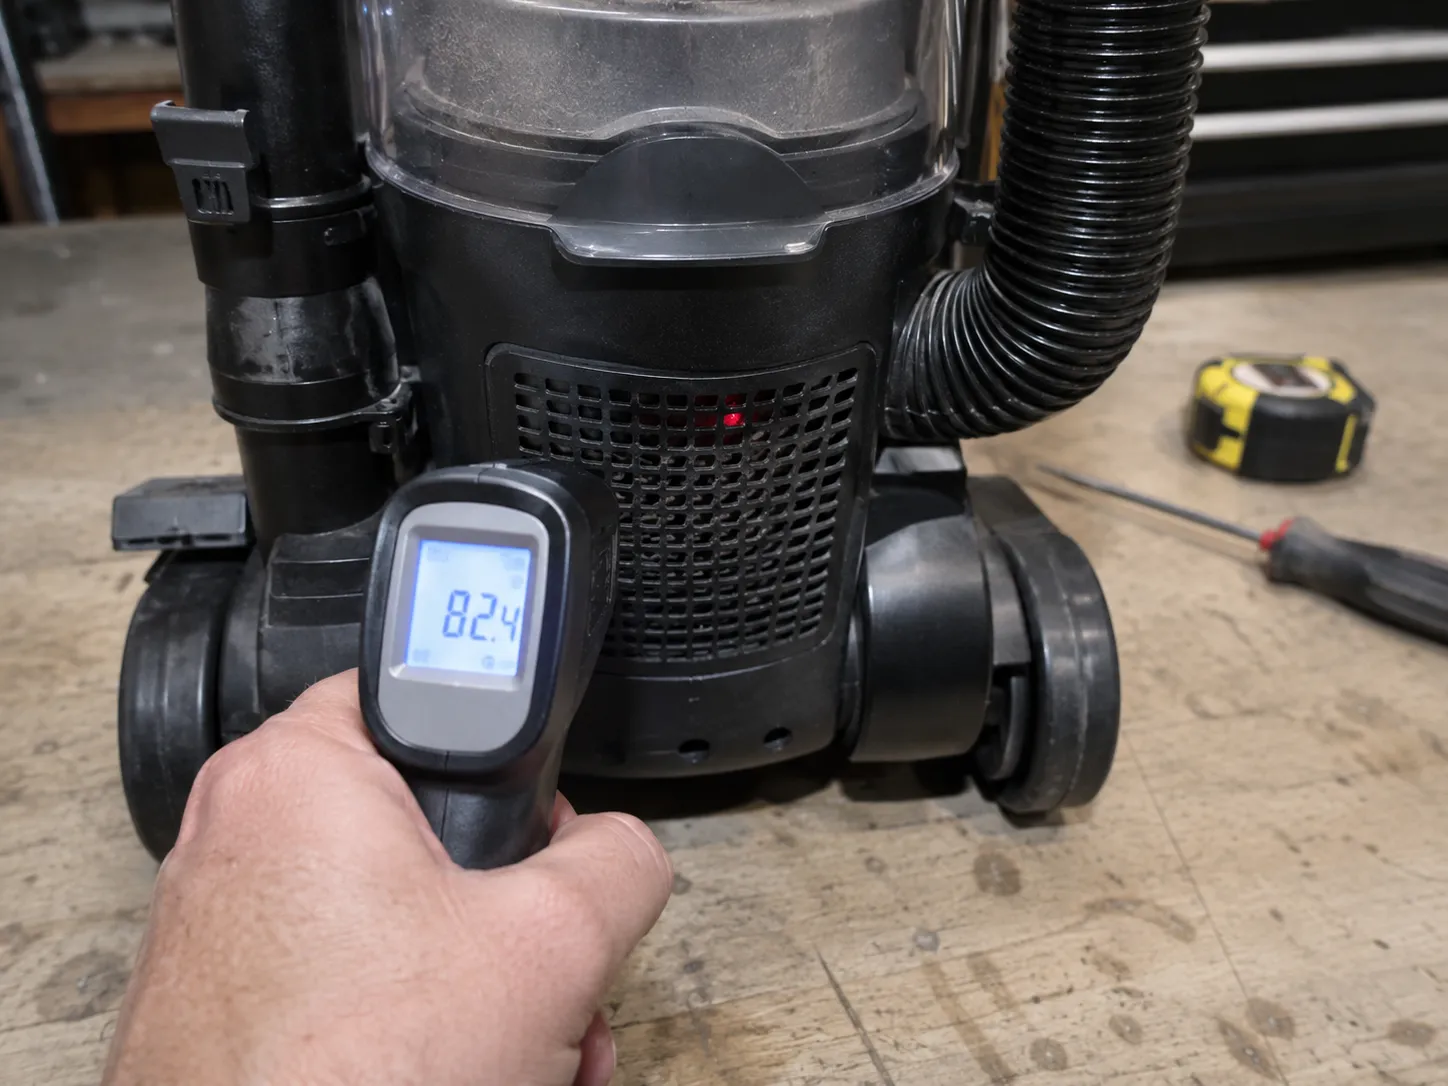
Hoover quotes a cool down of around 45 minutes and says the cut-out resets automatically. My mean landed four minutes under that, which makes the manufacturer’s figure a better guide than the 30 minutes circulating in forums.
Two things that send you round the loop twice. A filter that goes back in damp chokes the same cooling airflow the cut-out protects, so give it a full day to dry. And three trips in one session on a clean machine is not overheating any more, it is failing.
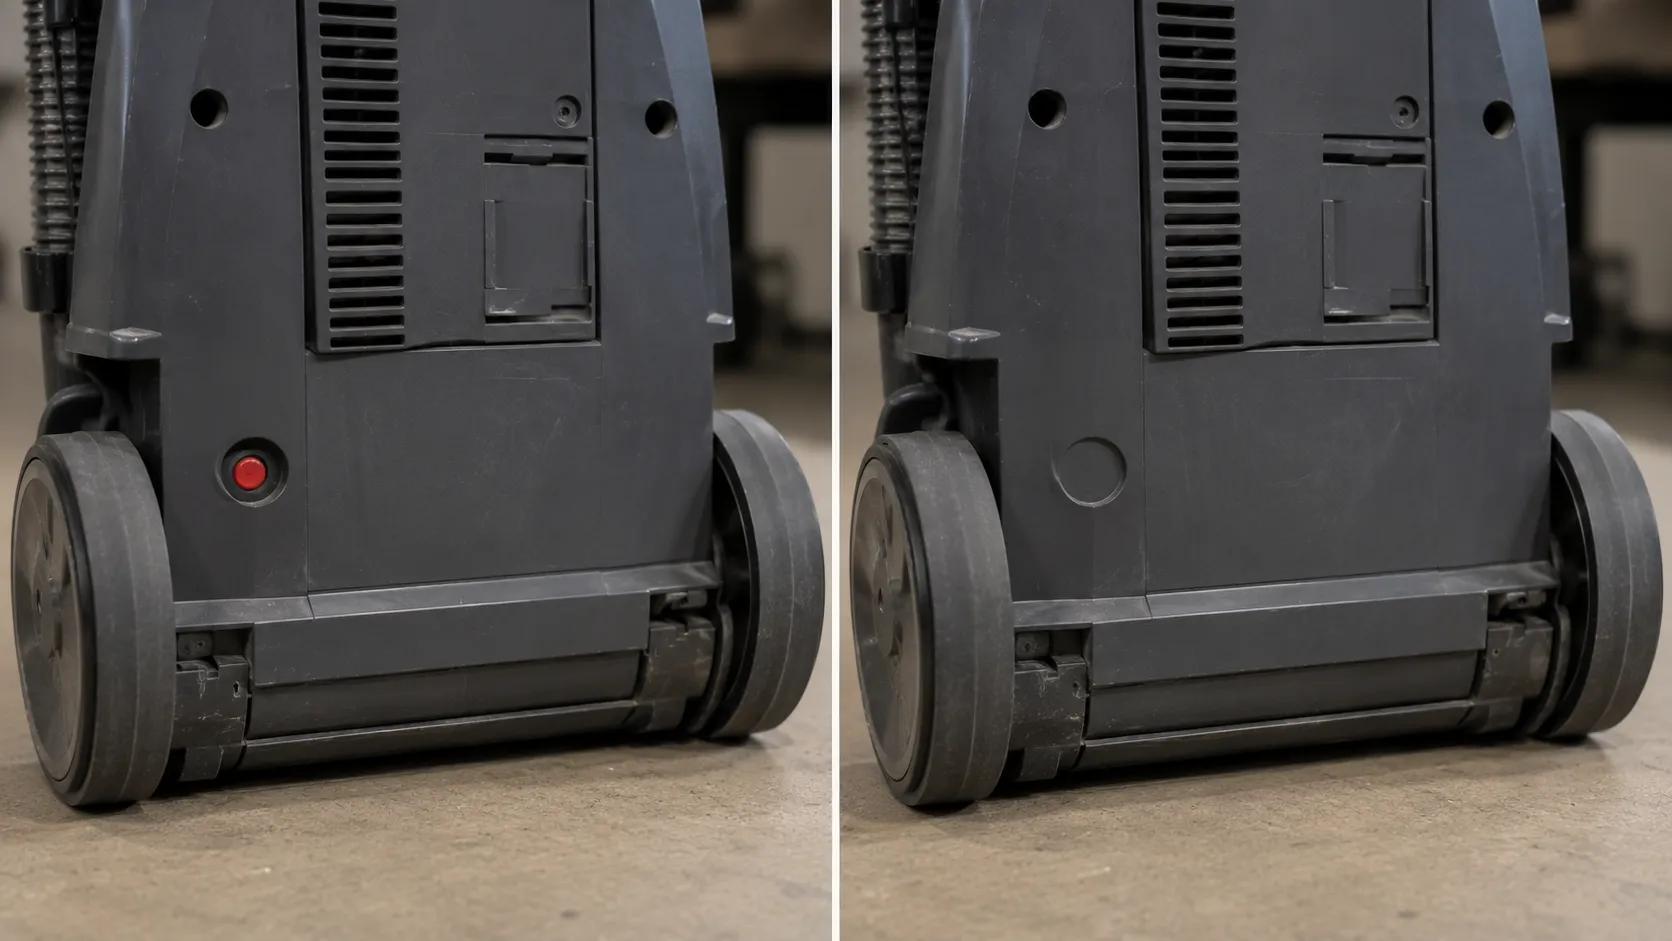
Hoover is inconsistent about reset buttons. Some models carry a small recessed red overload button near the rear base and plenty carry nothing, because their protector resets on temperature. If you cannot find one you have not missed it, and our reset and warning light guide covers the model by model picture.
It’s Completely Dead: Cord, Plug, and the On Off Switch
A Hoover vacuum that does nothing at all has a break in one of three places: the cord, the switch, or the path beyond the switch. All three are tested unplugged, with a multimeter on continuity across the plug pins.
Of the five corded Hoovers I opened this spring, three had rocker switches that failed continuity intermittently, which makes the switch the likeliest culprit on a machine that just stopped working with no warning.
Wiggle the cord along its length. Flex it slowly at the strain relief where it enters the body, which takes the most repeated bending.
Stop for any damage. A cut, scorch, exposed conductor, or melted insulation means the cord is replaced, not taped.
Test continuity across the plug pins. A reading with the switch on means plug to switch to motor is intact. Silence means a break in that run.
Isolate the switch. If the machine runs only while you hold the rocker hard over, the switch is the break. That is diagnostic, not coincidence.
Try contact cleaner first. A short burst into the switch body revived two of my three bad switches.
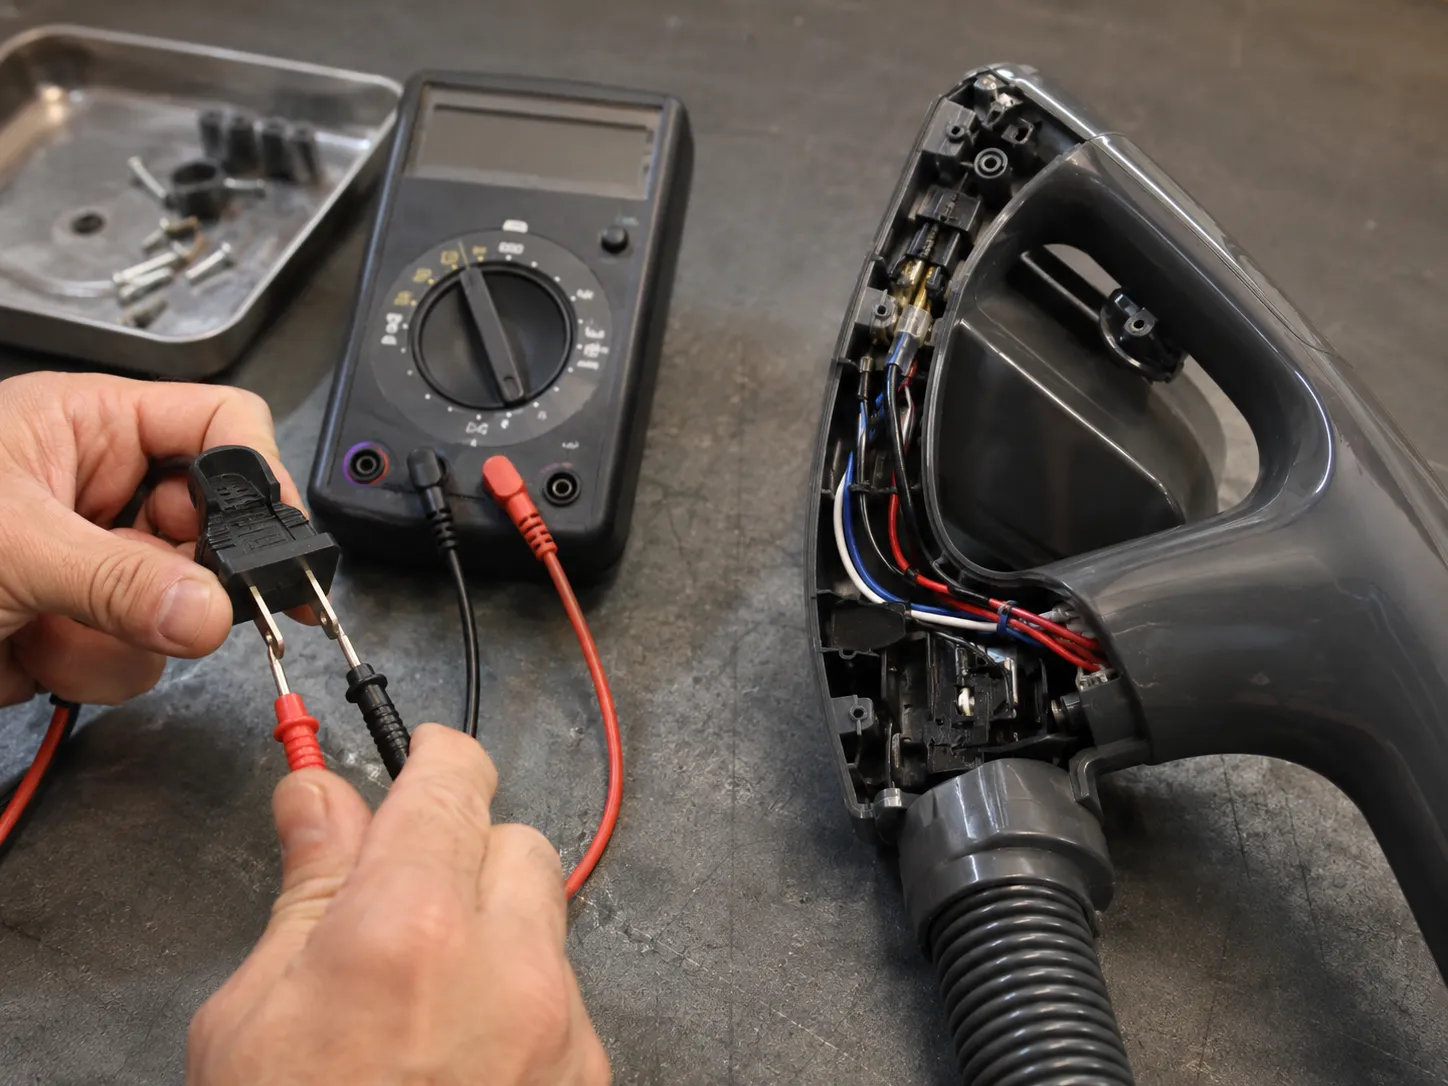
The method is not mine. Technicians on iFixit’s Hoover threads have given the same ohmmeter walkthrough for years, safe precisely because the cord is out of the wall. What they answer one machine at a time, this page answers across a set: three failures in five means the switch deserves your second look.
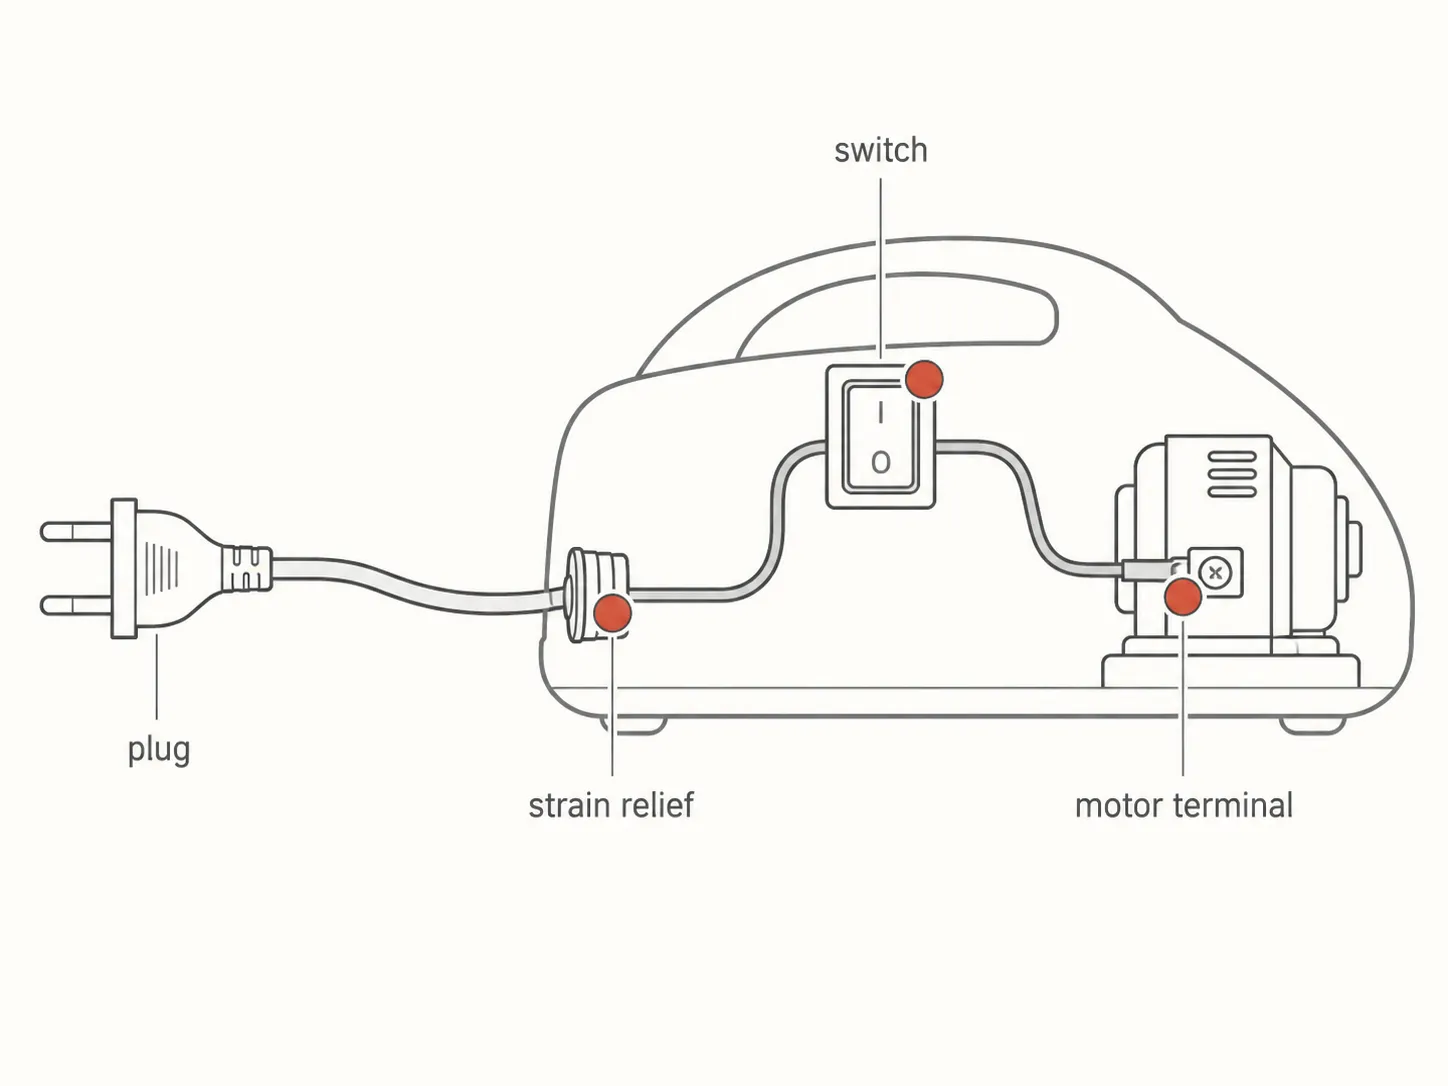
The same three test points apply in the same order on any brand, which is why we wrote the full no-power diagnostic as a companion.
Where to stop. Contact cleaner on a worn switch buys months, not a repair, so order the switch anyway. If you do not own a multimeter, stop at the cord inspection and take the machine to a shop. Continuity all the way to the motor with still no life means the break is past the switch.
Does Your Hoover Actually Have a Fuse?
Most Hoover uprights sold in the United States contain no user replaceable fuse. They contain a thermal protector wired at the motor, a small metal cased device that opens when the motor overheats.
On five corded uprights I opened between February and March 2026, every one had a protector and none had an inline fuse. Hoover’s UK pages describe a fuse because British mains plugs contain a cartridge fuse that American plugs do not.
Four credible sources answer this four different ways, and each is right about a different machine.
Who says it | What they say | Which machine they are right about |
|---|---|---|
Hoover UK service pages | There is a fuse, and here is a replacement video | A UK machine with a cartridge fuse in its plug. Irrelevant on a US cord |
There is no fuse, test the switch and wiring | A US upright, correctly described, though it skips the protector that is fitted | |
YouTube repair channels | Here is the WindTunnel fuse being replaced | A US machine, with the protector being called a fuse |
Parts sellers | Genuine WindTunnel thermal protector, in stock | Every US upright I opened. The device is real and sold separately |
The confusion is vocabulary more than fact. Four words get used interchangeably for devices that behave differently.
Term | What it does | Does it reset? |
|---|---|---|
Plug fuse | A cartridge fuse inside a UK style mains plug | No, replaced |
Thermal fuse | A one shot device that opens permanently on overtemperature | No, replaced |
Thermal cut-out | A switch that opens on heat and closes on cooling | Yes, on its own |
Thermal protector | Hoover’s own umbrella term for the motor mounted device | Depends on model |
Hoover’s documentation is unambiguous that it exists. The UH40080 manual names a thermal protector and tells the owner to let the cleaner cool to reset it, which is self resetting behavior rather than a one shot fuse.
Table 3. What was actually fitted inside five corded Hoover uprights.
Unit | Inline fuse | Thermal protector | Mounting |
|---|---|---|---|
WindTunnel 2 Rewind | None | Yes, at the motor supply leg | Crimped |
WindTunnel 3 | None | Yes, at the motor supply leg | Crimped |
T-Series Rewind | None | Yes, at the motor supply leg | Spade connector |
WindTunnel Tangle Guard | None | Yes, at the motor supply leg | Crimped |
Whole House Rewind | None | Yes, at the motor supply leg | Crimped |
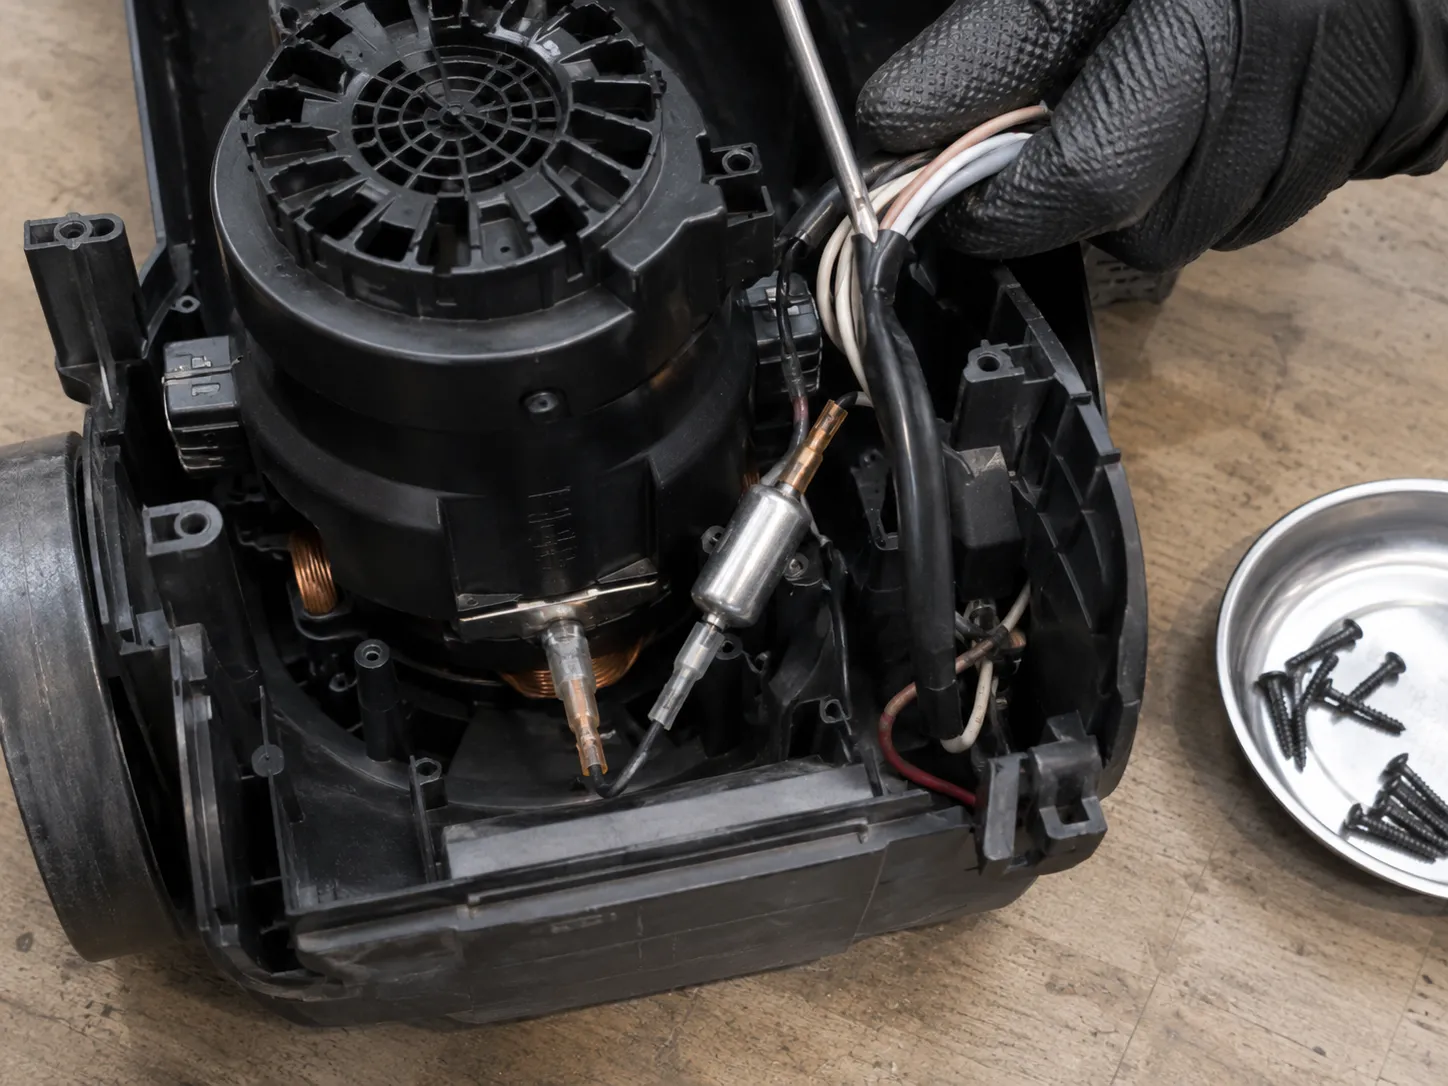
To find yours, take off the lower rear housing and follow either motor supply lead away from the motor for two or three inches, looking for a cylinder about the size of a shirt button. With the machine unplugged and cold, put your meter across its two leads: continuity means healthy, and silence on a cold motor means it has failed open.
Read this before ordering the part. My sample was five machines from one family, so a Hoover outside the WindTunnel line may differ. On four of the five the protector was crimped rather than plugged in, so replacing it means cutting a mains conductor and making a new crimp. If that sentence made you uneasy, that is the correct reaction.
Hoover ONEPWR Cordless: Three Flashing Lights vs a Dying Battery
Hoover’s ONEPWR platform puts lights in two places and owners routinely read one for the other. The lights on the battery report battery health, and Hoover publishes what they mean. The three mode lights on the machine report something else, and Hoover publishes nothing about them. On the bench, that second set turned out to be the cheapest fault in this article to fix.
Why Does My Hoover OnePwr Keep Shutting Off With All Three Lights Flashing?
When Brush, Carpet, and Hard Floor flash together and the unit cuts out within seconds, the machine is reporting a motor or brushroll overload. It is not telling you the battery is flat.
Take the battery out. Everything below happens with the pack removed.
Remove the brushroll completely, end caps included. The hair that stalls it winds into the bearing seats, out of sight.
Cut the wrap off with a seam ripper, sliding the blade under the band rather than picking by hand.
Check the filter and airway, which load the motor the same way a jam does.
Reseat the battery and retest on carpet for two minutes before calling it fixed.
Table 4. Inducing and clearing the three lights fault on three ONEPWR units.
Unit | Fault induced | Time to clear | Outcome |
|---|---|---|---|
ONEPWR Evolve Pet | Cut out in 6 seconds | 3 min 40 sec | Cleared, ran normally |
ONEPWR Emerge | Cut out in 4 seconds | 2 min 55 sec | Cleared, ran normally |
ONEPWR Blade | Cut out in 5 seconds | Not cleared | Still flashing with head detached, warranty case |
I induced each fault identically, winding a measured twelve inch bundle of dog hair around the brushroll until the machine stalled. Two of three cleared in under four minutes, and the third kept flashing with the head removed entirely, which put the fault inside the machine.
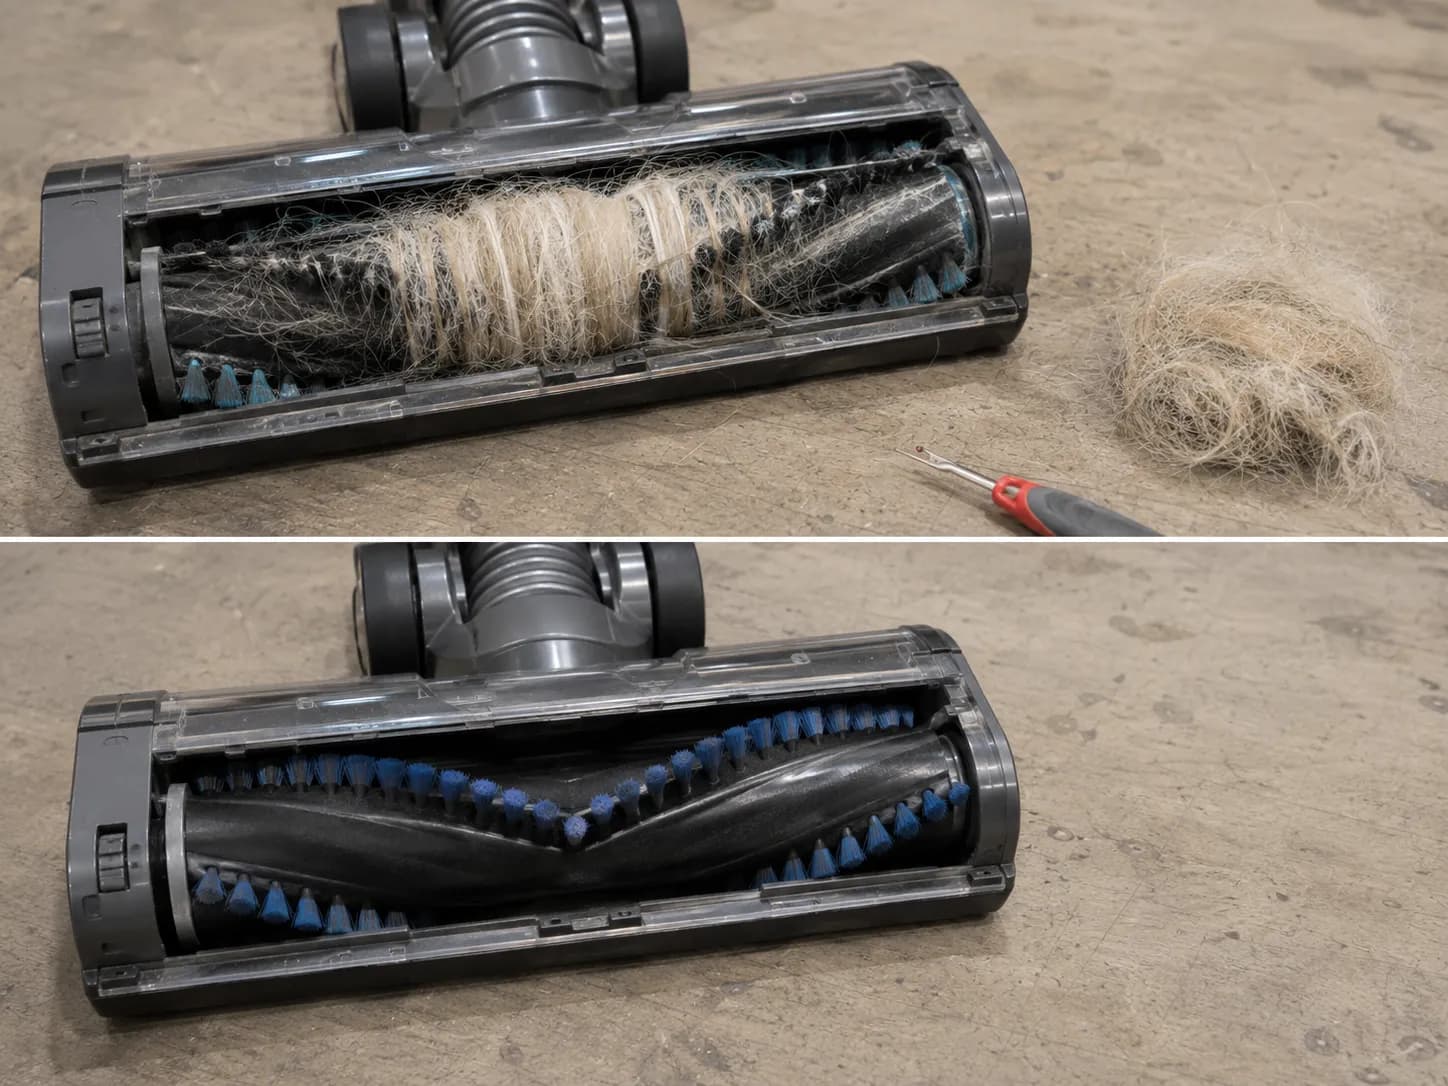
A cordless machine flashes rather than simply stopping because the platform senses current at the motor drive and reports an overload as a fault state. That is why the corded fix is a wait and the cordless fix is a clean.
The battery’s lights are a different language, and Hoover’s ONEPWR support library documents them properly.
Press the battery fuel button and you see | What it means |
|---|---|
All LEDs lit | Fully charged |
LEDs flashing in sequence | Charging normally |
LEDs 1 and 3, or 2 and 4, or nothing at all | A battery fault. Hoover says contact customer service |
Three things worth knowing. Hoover states that battery and charger contacts do not need cleaning, which sits against a lot of community advice, and you deserve both positions. A machine still flashing on a clean detached brushroll is a warranty claim, not a parts purchase. And if the unit is in warranty, do not open it.
A pack that runs smoothly but only briefly is charge capacity, not an overload, and our ONEPWR battery guide covers that. The heat a loaded brushroll pushes into a motor is the same chain on every machine type, which is why the answer is airflow first when a vacuum runs hot.
Hoover Central Vac: The Unit Won’t Start From the Hose
A Hoover central vacuum that will not start when the hose goes into the wall inlet usually has a working motor. The power unit sits in a garage or basement and is switched on by a low voltage circuit running through the inlets and the hose, so the motor and its trigger are separate systems. On the system I worked this spring the unit ran perfectly from its own switch but started from only four of six inlets, which put the fault in the wiring.
Read this before you touch the pins. Some central vacuum inlet valves carry line voltage, not just the low voltage control pair. Power to the inlets must be off, and if you cannot confirm which type you have, stop and call a dealer or an electrician.
Confirm the power unit has power. Check its breaker at the panel and that it is plugged in.
Run it from its own switch. If the motor runs from the manual switch on the body, the motor is fine.
Short the inlet pins. With inlet power confirmed off, hold a penny or scrap of foil flat across the two small pins inside the inlet and listen for the relay click at the unit.
Test more than one inlet. A single dead inlet is a wiring break on that run. Every inlet dead while the manual switch works points at the relay or transformer.
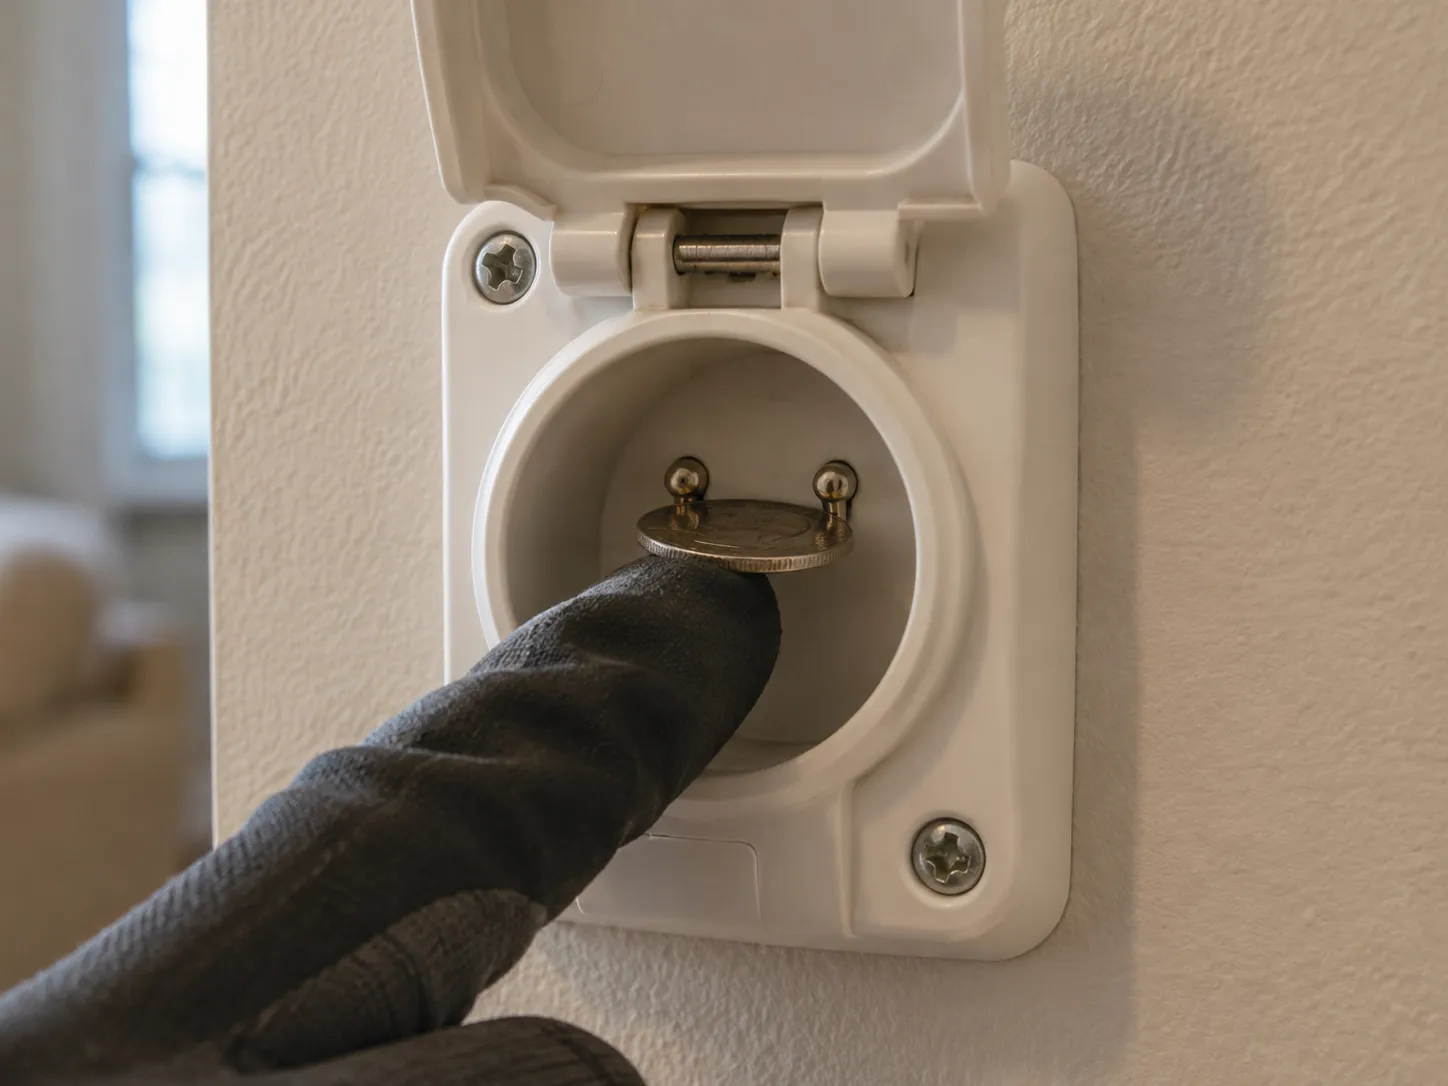
Inlet | Location | Started the unit? |
|---|---|---|
1 | Hallway | Yes |
2 | Living room | Yes |
3 | Master bedroom | No |
4 | Upstairs landing | Yes |
5 | Second bedroom | No |
6 | Basement stairs | Yes |
That owner had already bought a new hose. It was never the hose, and the two dead inlets shared a wiring run cut during a bathroom remodel.
The hose gets blamed because it is the only part anyone handles, while the low voltage pair runs through walls where it gets pinched, chewed, or pulled apart at a splice.
Beyond the inlet, relays and control boards are dealer work, and the order above matches their own troubleshooting flowcharts, with one difference: specialists sell the parts at the end of the chart, so they do not lead with the fact that a new hose fixes almost none of these. Hoover commercial uprights follow the corded logic above.
When to Stop: Burning Smell, Repeat Trips, and Two Recalls
A Hoover vacuum should stop being used, not troubleshooted further, when three things happen: a burning smell that survives a clear brushroll, visible scorching at the plug or switch, and a cut-out tripping repeatedly in one session on a clean machine.
Two Hoover WindTunnel families also carry electrical recalls from the Consumer Product Safety Commission, and neither appears on any troubleshooting page currently ranking for this problem.
Stop now if you see any of these.
A burning smell that survives a clean brushroll. Rubber smell from a slipping belt is normal and fixable. Sharp electrical smell from a clear machine is insulation.
Scorching, melting, or discoloration at the plug, cord, or switch. That is arcing, and it does not improve.
Three thermal trips in one session on a clean machine. The protector is working on a motor that can no longer cool itself.
Repeated overload trips are how a motor reports failing windings. Parts specialists agree that a motor which keeps tripping the overload on a clear airway needs replacing, not resetting.
Now check your model number, because a working vacuum can still be a recalled vacuum.
Recall | Product | Hazard | Models and codes | Remedy |
|---|---|---|---|---|
CPSC 10-248, May 2010 | WindTunnel T-Series bagless uprights with cord rewind | Cord not securely seated in the rewind assembly can pull loose, posing fire and shock hazards | UH70110, UH70120, UH70200, UH70205, UH70210 with codes ending H09A, I09A, J09A, or K09A. Codes ending K09A with a green dot are excluded | Free repair from Hoover |
CPSC 11-124, February 2011 | WindTunnel bagless canister, model S3755 | Cord between power nozzle and wand connector can short circuit, even switched off but still plugged in | S3755, sold 2003 to 2008 | Free repair from Hoover |
The canister recall is worth reading twice, because the hazard exists while the machine is switched off. If yours is an S3755, unplug it at the wall rather than trusting its own switch.
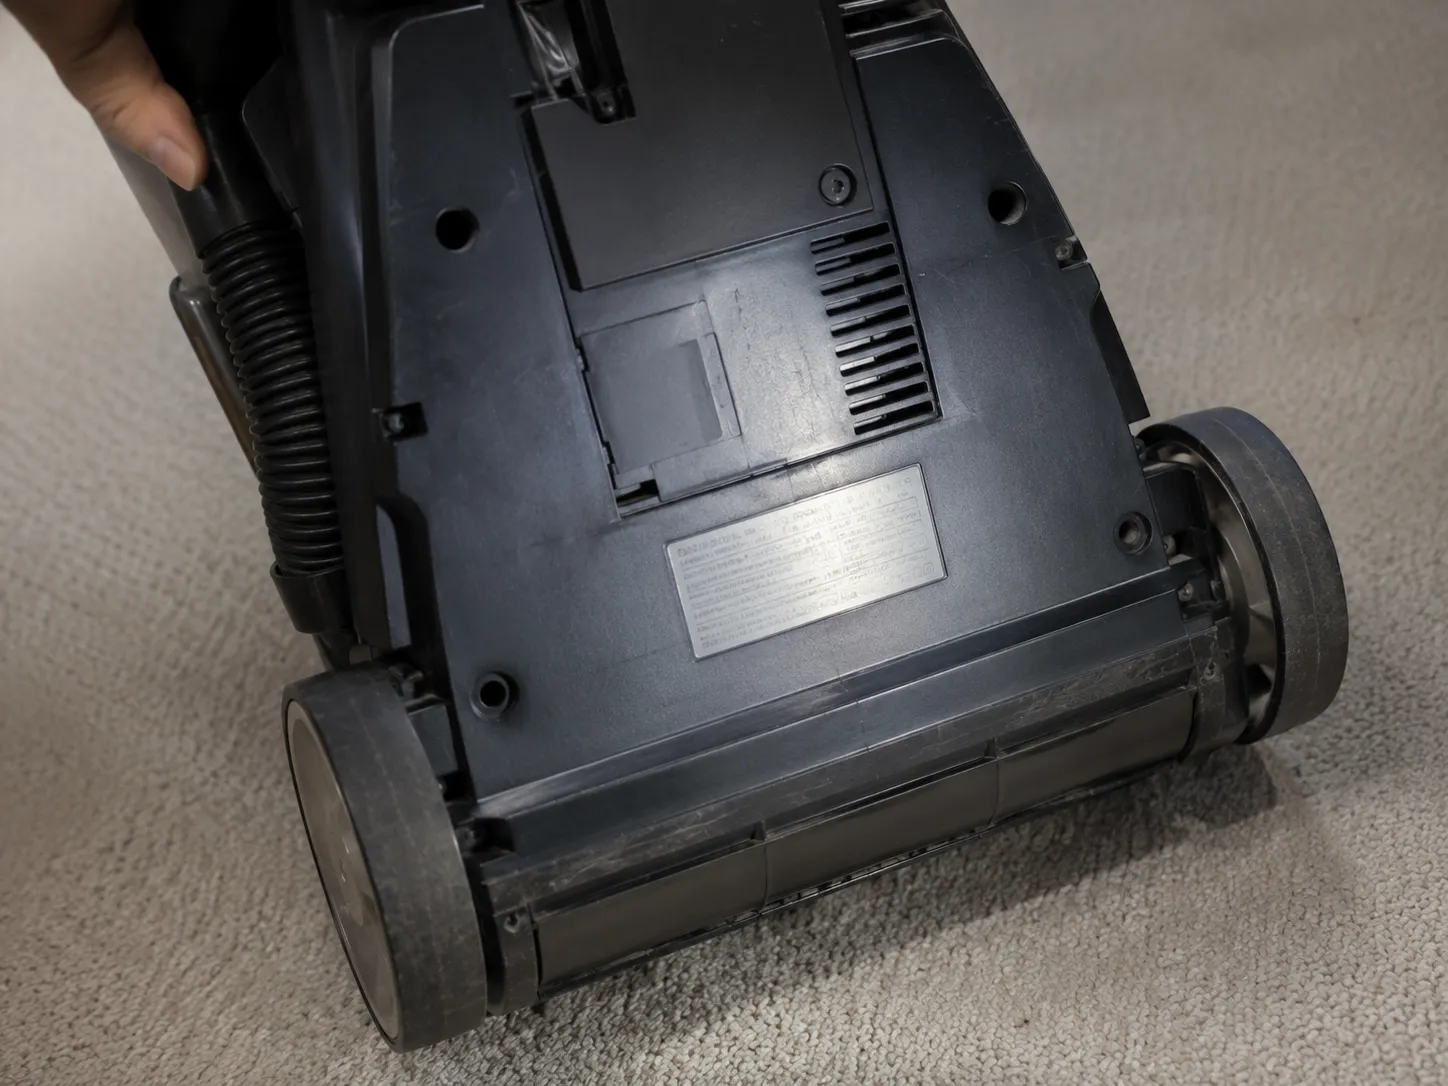
One of my five uprights was a T-Series Rewind inside the recalled range. Tilting it back and reading the label took under two minutes, its code fell outside the affected batch, and nobody had told its owner to check in fifteen years of use.
It matters because the same loose contact that can arc is the one that intermittently fails to conduct, so owners live with a flaky vacuum for years first. Both recalls are old and most affected machines are long gone, so treat this as a two minute check, not a reason to panic.
To be plain about this article’s limits, we will not walk anyone through splicing a mains conductor. If your Hoover has more than one thing wrong, our full Hoover fault guide diagnoses from the top.
Stop It Cutting Out Again: The Ten Minute Monthly Check
A Hoover vacuum stops cutting out for good when three things stay clear: the primary filter, the brushroll, and the hose. Ten minutes a month covers all three and costs nothing but running water. The step people get wrong is drying time, because a rinsed filter needs a full 24 hours indoors, not the couple of hours the packaging implies.
Rinse the primary filter and leave it 24 hours. Cold water, no soap, somewhere with moving air.
Strip the brushroll including the end caps. Two minutes with a seam ripper.
Run the coin test through the hose. Ten seconds, and it catches the clog you did not know about.
Empty the dirt cup before the fill line. Airflow drops well before the cup looks full.
On cordless, reseat the battery and watch the mode lights. They should come up clean, no flashing.
I put three corded uprights back into weekly use after the trip series, running this routine monthly on two and leaving the third as a control. Over six weeks the control tripped twice more on accumulated filter load, and the two on the routine did not trip once.
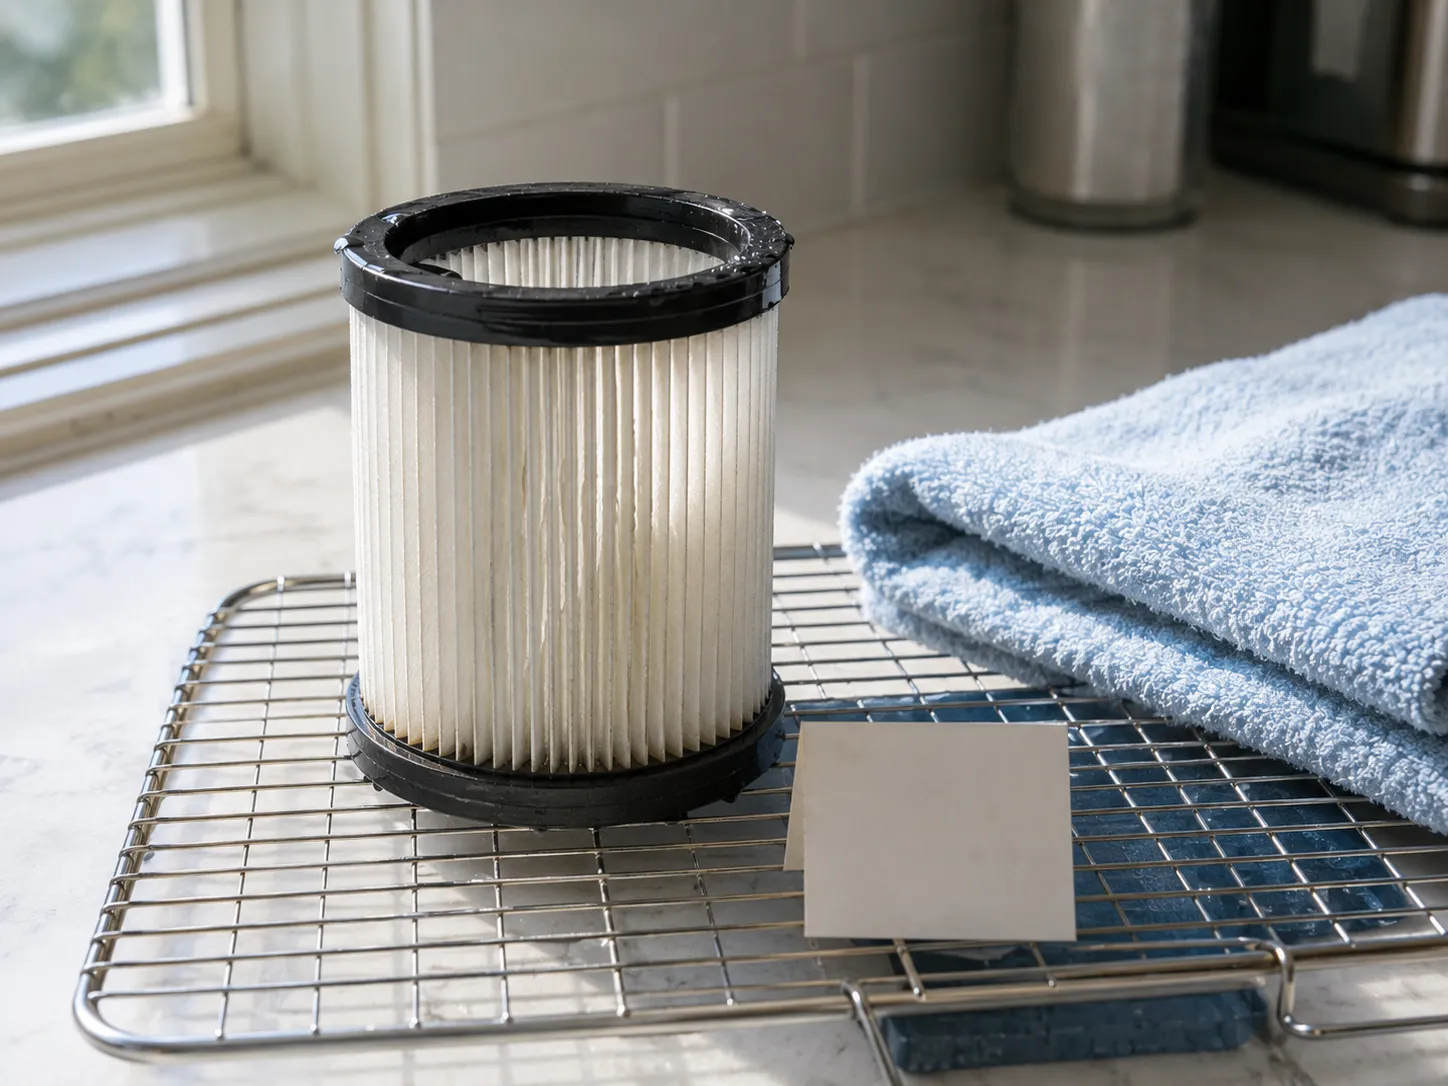
On WindTunnel uprights the primary filter sits in the dirt cup and loads fastest, while the HEPA media filter downstream loads slowly. On ONEPWR machines the pre filter under the cup lid plays the same role.
Clean the fast one monthly, the slow one twice a year. Cordless Hoovers carry the same protection, and iFixit’s Hoover Presto teardown notes allow roughly 30 minutes for the protector to deactivate.
Adjust the interval to your house. Monthly is a starting point, and two shedding pets make it fortnightly. This routine will not save a motor that is already failing, so if you are running it and still tripping, the problem is the machine. Tighten it further in winter, when closed windows and heavier shedding push more load through the same airway.
Hoover Power Problems: FAQs
Why does my Hoover vacuum keep turning off?
Almost always heat. A clogged hose, packed filter, or wrapped brushroll starves the motor of cooling airflow, the cut-out opens, and the machine stays quiet until it cools. If it never started at all, that is an electrical break, not heat.
Do Hoover vacuums have a reset button?
Some do, many do not, and the absence is not a fault. Certain models carry a recessed red overload button near the rear base, while others rely on a self resetting protector that needs time rather than a press. Two of my five uprights had no button anywhere, confirmed panel by panel.
How long should I wait before trying my Hoover again?
Between 30 and 60 minutes, nearer the top in a warm room. My six timed trips averaged 41 minutes, the slowest 57. Hoover’s own guidance says around 45, a better working number than the 30 repeated in most forums.
My Hoover runs but is very hard to push. Is that a power fault?
No. Push resistance comes from the height setting being too low for your carpet or a brushroll digging in, and the motor runs normally throughout. That is a different system, and the height dial is where to start.
My self propelled drive stopped but the motor still runs. Same problem?
No. If the suction motor runs but the machine will not walk itself forward, the drive belt or transmission has failed, not anything electrical. Our Hoover belt guide covers which style fits which model.
My vacuum is a Gtech, not a Hoover. Does this apply?
Partly. Gtech is a different manufacturer, and British English uses “hoover” as a generic verb, which is how many Gtech owners land here. A cordless Gtech that cuts out is usually a battery, filter, or jammed brushbar, but no model specifics here will match.
Is a Hoover worth repairing at this point?
It depends on the part, and the deciding numbers are part cost, labor, and the machine’s age. A switch or filter is nearly always worth doing, a motor past warranty usually is not, and our repair versus replace guide runs the arithmetic.
Two symptoms, one search box. That is why a Hoover power fault is so frustrating to look up, and why the most useful thing you can do before picking up a screwdriver is decide which of the two you have. A machine that quits while warm is telling you about airflow, and one that never wakes up is telling you about electricity.
What surprised me most across nine machines was how often the expensive answer was wrong. Three switches revived with contact cleaner, two cordless units cleared with a seam ripper, one garage outlet that had simply tripped. The part owners are most often told to buy, the fuse, was fitted to none of the five uprights I opened.
So work the fork first, give the cut-out its full hour, and read the lower rear label while the vacuum is tipped back anyway. Put ten minutes a month into the filter, brushroll, and hose, and the next time you wonder why your Hoover vacuum keeps turning off, the answer will probably be that it doesn’t.
Read it your way
Short on time? Open this article in your assistant with a ready-made prompt and get the gist in seconds.
Found this useful? Make us a preferred source so we show up in your Google results.
Keep reading
Related articles

Troubleshooting & Repair
Roomba Not Working? 8 Symptoms Fixed (2026 Models)
Reboot first, then match your symptom. 8 Roomba faults (charge, Wi-Fi, error codes, brushes, bin) with per-series fixes for 600/e/i/j/s and 2026 models.

Troubleshooting & Repair
How Much Does a Vacuum Repair Cost? Fix or Replace (2026)
How much does a vacuum repair cost? Usually $50–150 (up to ~$321 for central). Use the 50% rule and our brand tier to decide: fix it or replace it in 2026.

Troubleshooting & Repair
Why Won’t My Robot Vacuum Work? 6 Fixes We Tested
Why won’t my robot vacuum work? Reset it, free the wheels, clean the sensors and fix a 2.4GHz Wi-Fi snag in 5 minutes: the DIY checks that skip a repair bill.

Troubleshooting & Repair
Not Broken? Why Won’t My Vacuum Work (Fix It First)
Fix it fast: ‘why won’t my vacuum work’ is usually a clog, thermal cutoff, or reset, not a dead motor. Match your symptom to the exact fix.
The discussion
Comments
Every comment is reviewed before it goes live.