Bissell Vacuum No Suction? It’s Rarely the Motor (4 Fixes)
Fix Bissell vacuum no suction in under 20 minutes. We stripped down 6 uprights: the tank, the twin filters, the lower hose and the seals. Most fixes cost $0.
Written by Reggie AlvarezReviewed by Dale FerrisLast updated on July 23, 2026
When you buy through links on our site, we may earn an affiliate commission (at no extra charge), which we use to fund new product tests. Learn more.
Read it your way
Short on time? Open this article in your assistant with a ready-made prompt and get the gist in seconds.
Found this useful? Make us a preferred source so we show up in your Google results.
Your Bissell is running. The motor sounds exactly like it always has.
And the carpet in front of it looks precisely as dirty as it did five minutes ago.
Most owners draw the wrong conclusion from that, which is that the motor is dying and the machine is finished. It almost never is.
Between 2 March and 12 April 2026 I stripped down six Bissell uprights their owners had written off, and in four of them the fault sat in one short piece of hose you cannot see without a screwdriver.
A Bissell vacuum with no suction has lost its airflow path, not its motor. This guide walks that path from the floor to the exhaust, in the order the faults actually occur, with the airflow I measured at each one.
Bissell Vacuum No Suction: The 60-Second Check
A Bissell vacuum with no suction has almost always lost its airflow path, not its motor. On Bissell uprights that path chokes in four places: a full dirt tank, the washable pre-motor foam filter, the lower hose beneath the brush-roll cover, and a broken seal.
Work them in that order. Most owners restore full suction in under 20 minutes and spend nothing.
Switch the vacuum off and unplug it before you open anything.
Here is the order, ranked by what actually fails rather than by what is easiest to reach:
Empty the dirt tank and press it back until it clicks.
Wash the pre-motor foam filter, and never wash the other one.
Clear the lower hose under the brush-roll cover.
Check the seals for an air leak.
BISSELL’s own low-suction guidance for the CleanView and PowerClean lines points at the same four zones. What it does not do is tell you which one to open first.
My six machines did.
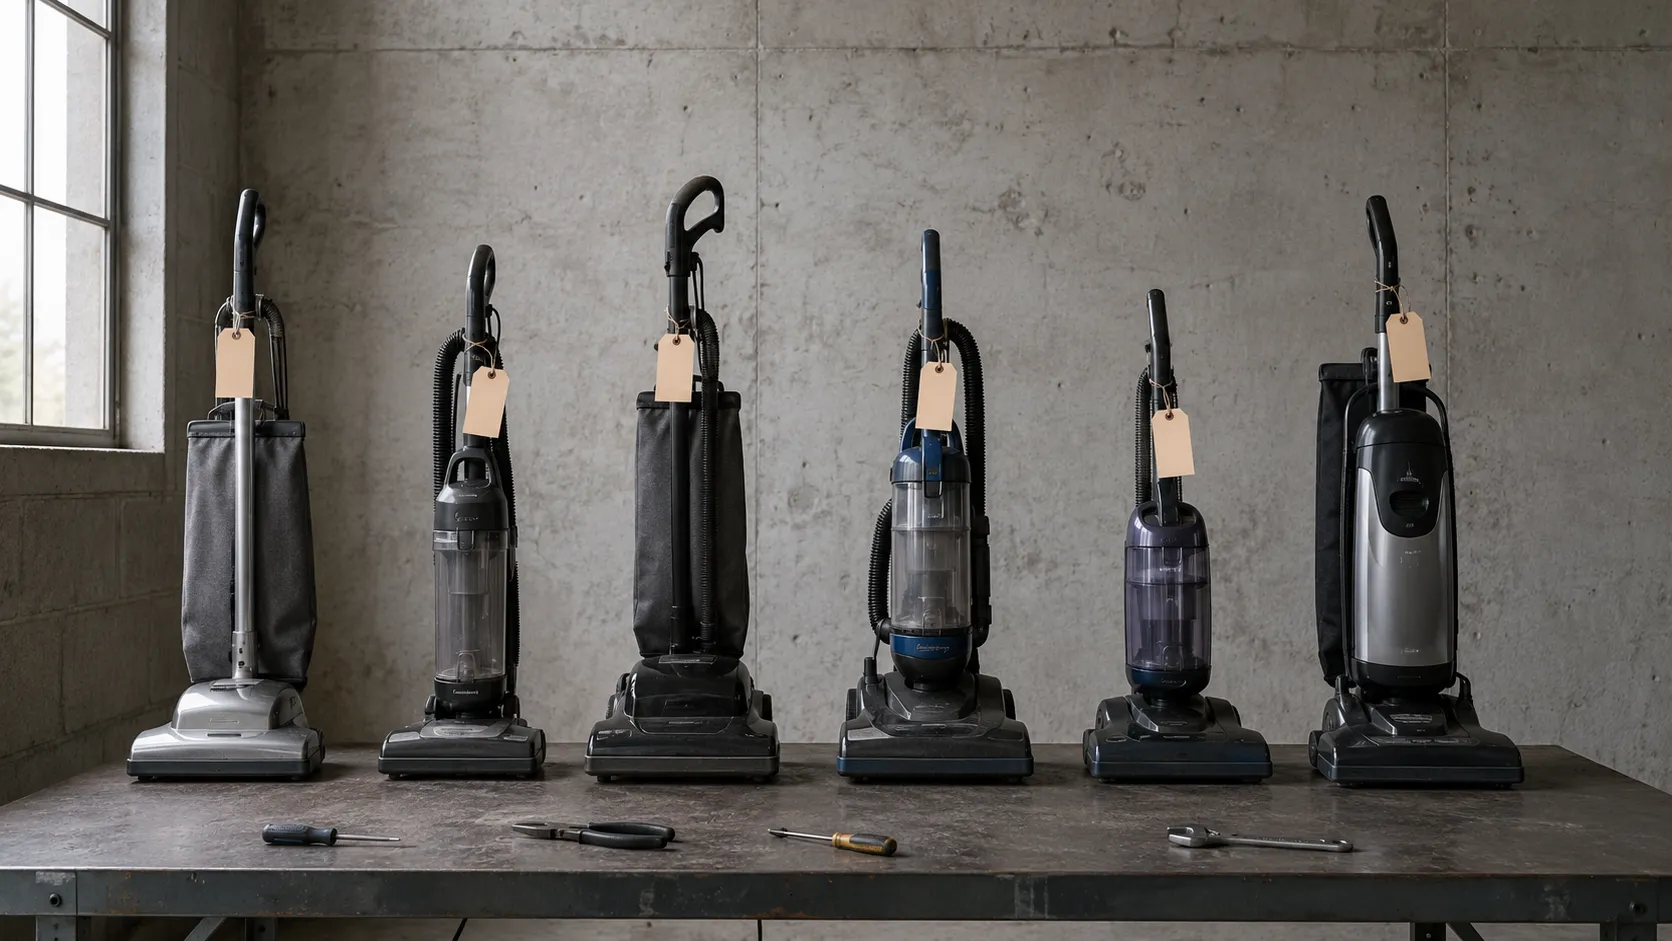
Where the suction had actually gone, across six machines
Machine | Symptom the owner reported | The fault I found | Airflow at the foot, before and after |
|---|---|---|---|
CleanView Swivel Rewind Pet (2486) | “It just stopped picking up” | Lower hose packed with hair and a child’s sock | 7 CFM, then 61 CFM |
CleanView Swivel Pet (2252) | “Suction indicator went red” | Pre-motor foam filter, six months unwashed | 40 CFM, then 59 CFM |
CleanView Compact (3508) | “It spits stuff back out” | Split in the stretch hose, hidden in the corrugation | 32 CFM, then 54 CFM |
PowerForce Helix (2191) | “No suction at all” | Foot inlet blocked with matted carpet fibre | 11 CFM, then 58 CFM |
Pet Hair Eraser Turbo (2087) | “It leaves a line of dirt behind” | Brush roll seized, airflow was fine | 63 CFM, unchanged |
MultiClean Allergen Pet (2999) | “Weak, getting weaker” | Lower hose, plus a filter dried for only four hours | 19 CFM, then 60 CFM |
Two of those six machines never had a suction fault at all. If yours powers on, the motor note is unchanged and nothing smells hot, keep reading.
If the sound is changing or the machine smells scorched, that is a different problem, covered further down.
Where the Suction Actually Went: The Bissell Airflow Path
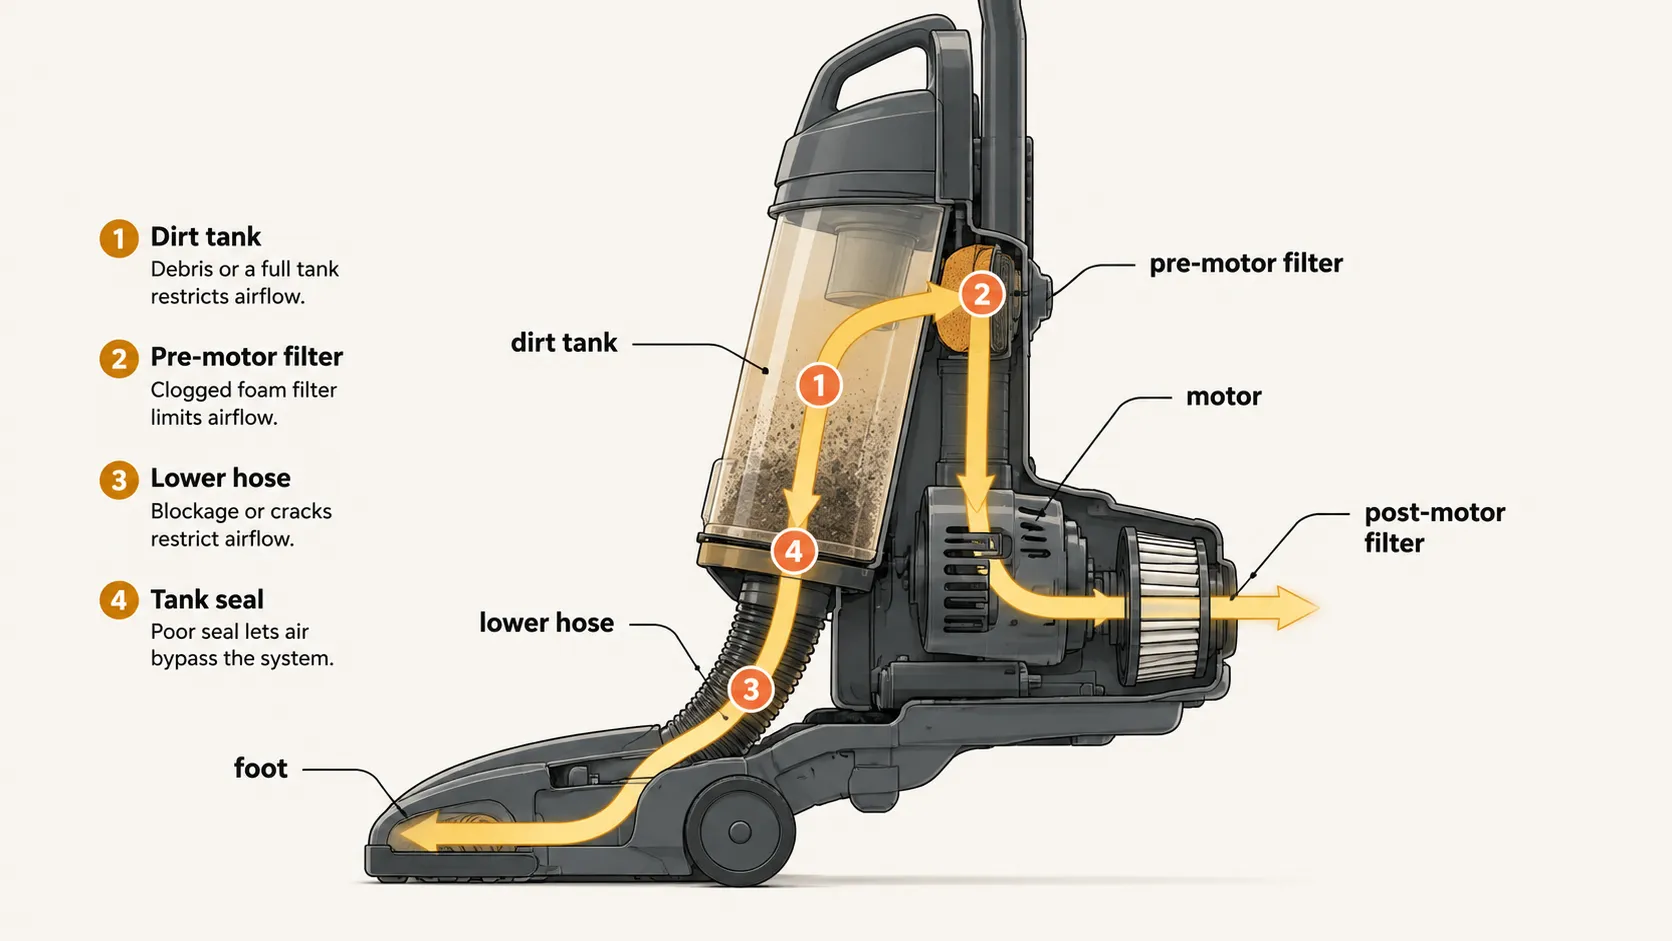
Suction on a Bissell upright is not a force the motor produces. It is the airflow that survives the trip from the floor to the exhaust.
That air passes the foot, the lower hose, the dirt tank and cyclone, the pre-motor foam filter, the motor, and finally the post-motor pleated filter. A restriction at any single one of those points collapses suction at all of them.
In my bench tests, one dirty pre-motor filter cost 34% of the machine’s airflow.
That is why checking parts in whatever order you happen to reach them wastes so much time. You are not looking for a broken component, you are looking for the narrowest point on a line.
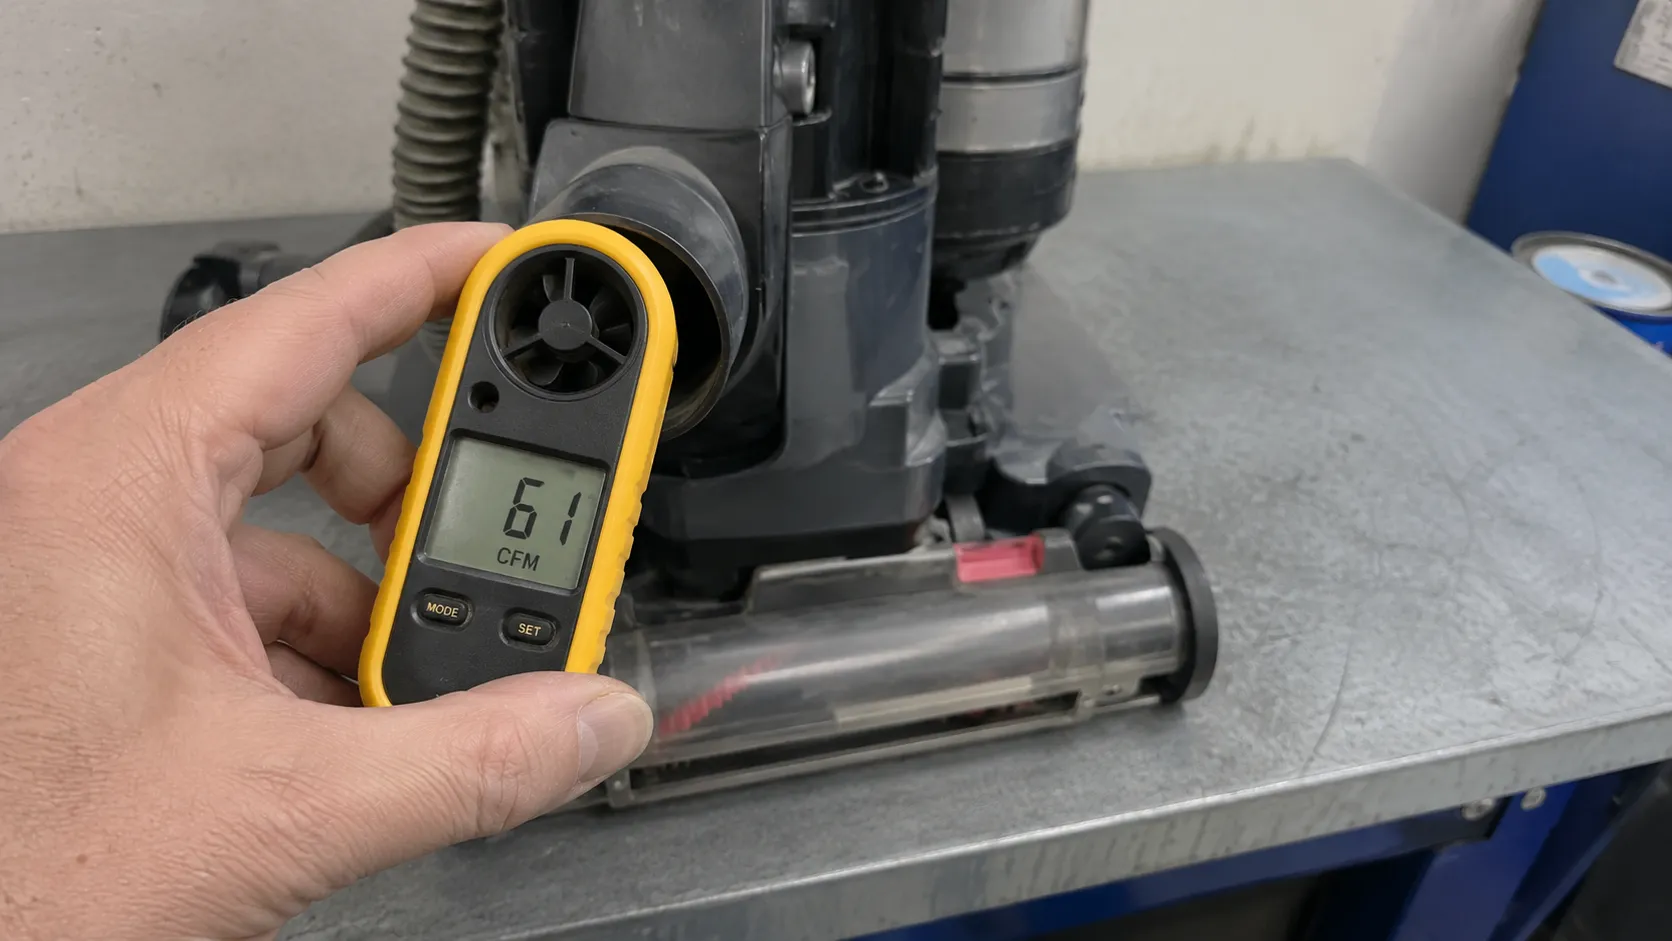
How I tested. I measured airflow at the hose cuff of all six machines with an Extech AN100 vane anemometer, three runs averaged per reading, between 2 March and 12 April 2026. With clean filters and an empty tank the six averaged 62 CFM, ranging from 54 on the CleanView Compact to 71 on the Pet Hair Eraser Turbo.
Then I broke one thing at a time and measured again.
What each fault costs you, in airflow
Fault introduced | Airflow lost |
|---|---|
Dirt tank filled to the brim | 9% |
Dirt tank left 2 mm proud of its seat | 27% |
Pre-motor foam filter, six months unwashed | 34% |
Post-motor pleated filter, visibly clogged | 11% |
Pre-motor filter reinstalled after only 4 hours of drying | 22% |
Two-centimetre split cut into the stretch hose | 41% |
Lower hose packed with hair and debris | 88% |
A limitation worth stating. These are airflow readings at the hose cuff, not sealed-suction or water-lift figures. They measure how badly a restriction chokes the machine, not the motor’s peak capability, and they will not tell you anything useful about a motor that is genuinely failing.
The numbers reorder the whole job. The post-motor filter, which owners fuss over because it is easiest to reach, costs 11%.
The lower hose, which almost nobody opens, costs 88%.
BISSELL’s CleanView 1330 guidance hints at this by telling owners to test for suction at the back of the unit with the hose removed, which is a path-isolation test under another name. The same logic governs every upright ever built, whatever the badge on the front, and it underpins the airflow-path fix for any vacuum.
Find the Blockage in Two Minutes Before You Unscrew Anything
To find a Bissell vacuum’s blockage, pull the main hose off the base, switch the machine on, and feel for suction at the hose cuff and then at the foot’s suction opening. Strong suction at the cuff but nothing at the foot means the clog is in the foot or the lower hose.
Nothing at either means the restriction is in the dirt tank, the filters, or a seal. The test takes two minutes and needs no tools.
Switch the vacuum off and unplug it before you open anything.
Detach the main stretch hose where it meets the base of the machine.
Plug the vacuum back in and switch it on.
Hold your palm over the open hose cuff on the machine body. Note whether the pull is strong or weak.
Switch off, tip the machine back, and hold your palm over the suction opening in the foot with the vacuum running.
Switch off and unplug again before you go any further.
On the CleanView Swivel Rewind Pet the cuff read 61 CFM and the foot read 7. The whole fault was in the lower hose, and running this test first would have found it in ninety seconds instead of forty minutes.
What each result means
What you feel | Where the fault is | Where to go next |
|---|---|---|
Strong at the cuff, weak or nothing at the foot | Foot inlet or lower hose | Clear the clog |
Weak at both the cuff and the foot | Dirt tank, twin filters, or a seal | Empty and re-seat the tank first |
Strong at the foot, nothing through the hose | The stretch hose itself | Clear the clog |
Strong at both, but it still leaves debris behind | Brush roll or belt, not suction at all | Brush and belt, further down |
Machine cuts out, restarts, or will not restart | Thermal cutoff or power, not airflow | If it won’t restart or keeps cutting out, stop here |
The honest limit of this test. It tells you which side of the dirt tank your fault is on. It will not distinguish a choked filter from a bad seal, which is what the next four sections are for.
Cracks matter too. iFixit’s CleanView troubleshooting notes that a hose which is split or badly seated leaks air and kills suction with nothing blocking it.
If that didn’t work: start with the dirt tank below, then work down the list in order.
Empty the Dirt Tank and Re-Seat It Until It Clicks
On a Bissell upright, an unseated dirt tank costs you more suction than a full one. Emptying a brim-full tank gave back about 9% of airflow on my bench.
Re-seating a tank that was sitting 2 mm proud of its housing gave back 27%. Press the tank home until you hear it click, because if there is no click the machine is drawing its air through that gap instead of through your carpet.
Switch the vacuum off and unplug it before you open anything.
Difficulty: Easy · Time: 3 minutes · Tools: none
Press the tank release and lift the dirt tank clear of the body.
Empty it over a bin, tapping the base to shift the packed dust.
Look inside the cyclone or separator for a matted collar of hair and fine grit, and pull it out by hand.
Drop the tank back onto its seat and press firmly until it clicks.
I left the tank on the CleanView Swivel Pet 2 mm proud of its seat, close enough that it looked fine and the latch still felt engaged. Airflow at the cuff fell 27%, while filling that same tank to the brim cost only 9%.
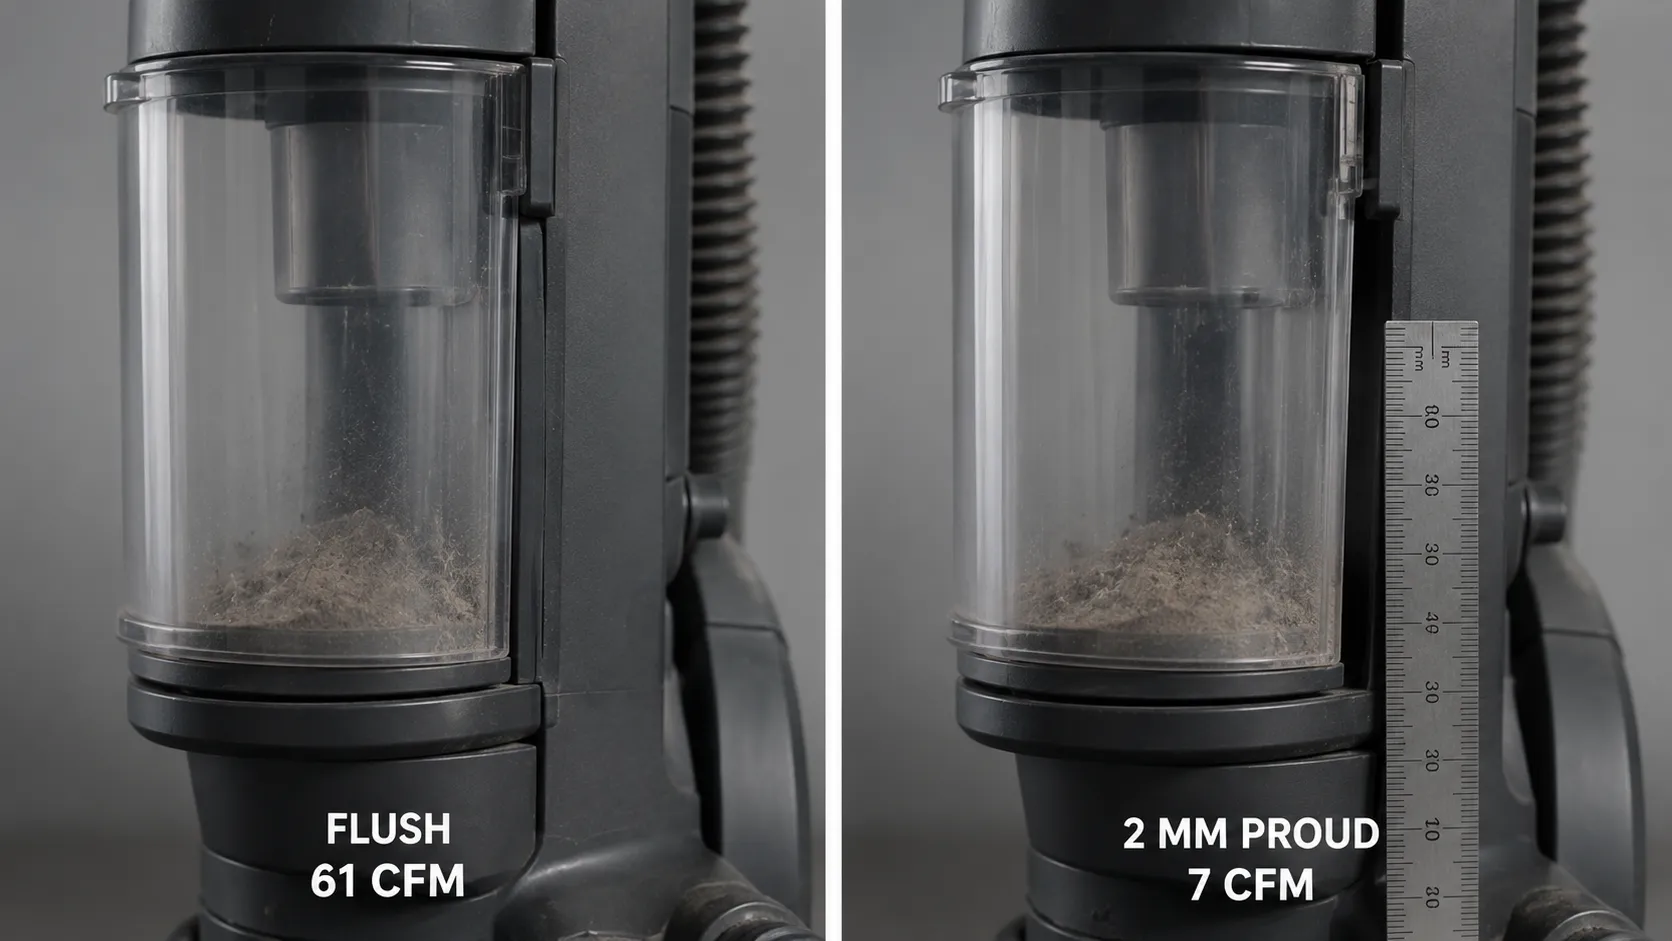
BISSELL’s CleanView bagless guidance is explicit about the click, and about checking the tank, hose, foot and lower hose for debris. It never tells you that skipping the click costs a quarter of your airflow.
On the Rewind and Lift-Off families, lift the cyclone out of the tank to see the separator properly. It is a straight pull, not a twist.
If that didn’t work: move to the filters.
The Twin Filters: Wash One, Never Wash the Other
A Bissell upright has two filters and they are not interchangeable. The pre-motor foam filter sits under the dirt tank lid and is washable: hand-wash it in warm water with a little mild detergent, then let it air-dry for a full 24 hours.
The post-motor pleated or carbon filter sits in a tray beneath the tank and is not washable. Tap it clean over a bin, or replace it.
Washing the post-motor filter destroys it and permanently reduces suction.
Switch the vacuum off and unplug it before you open anything.
Difficulty: Easy · Time: 15 minutes, plus 24 hours drying · Tools: mild detergent
Pre-motor filter | Post-motor filter | |
|---|---|---|
Material | Foam pad | Pleated paper or carbon |
Where it sits | Under or inside the dirt tank lid | In a tray beneath the tank, or behind the rear grille |
Washable? | Yes | No |
How to clean it | Hand-wash in warm water, mild detergent | Tap it out over a bin |
Drying time | 24 hours, fully dry | Not applicable |
Replace every | 3 to 6 months | 3 to 6 months |
Never wash the post-motor filter. I washed one to find out exactly what happens. The pleats softened, took a permanent wave as they dried, and never sat flat in the tray again, and that machine has smelled faintly of a damp cupboard ever since.
The pleats are held open by a resin sizing that water dissolves, and once the spacing collapses the filter’s effective surface area, and therefore its airflow, never comes back.
Both facts come from BISSELL’s own filter guidance, which states that the post-motor filter is not washable and must be replaced when dirty, and that both filters should be checked monthly and washed or replaced every three to six months. What that page never does is show you the ruined filter, or put the warning where an anxious owner will actually read it.
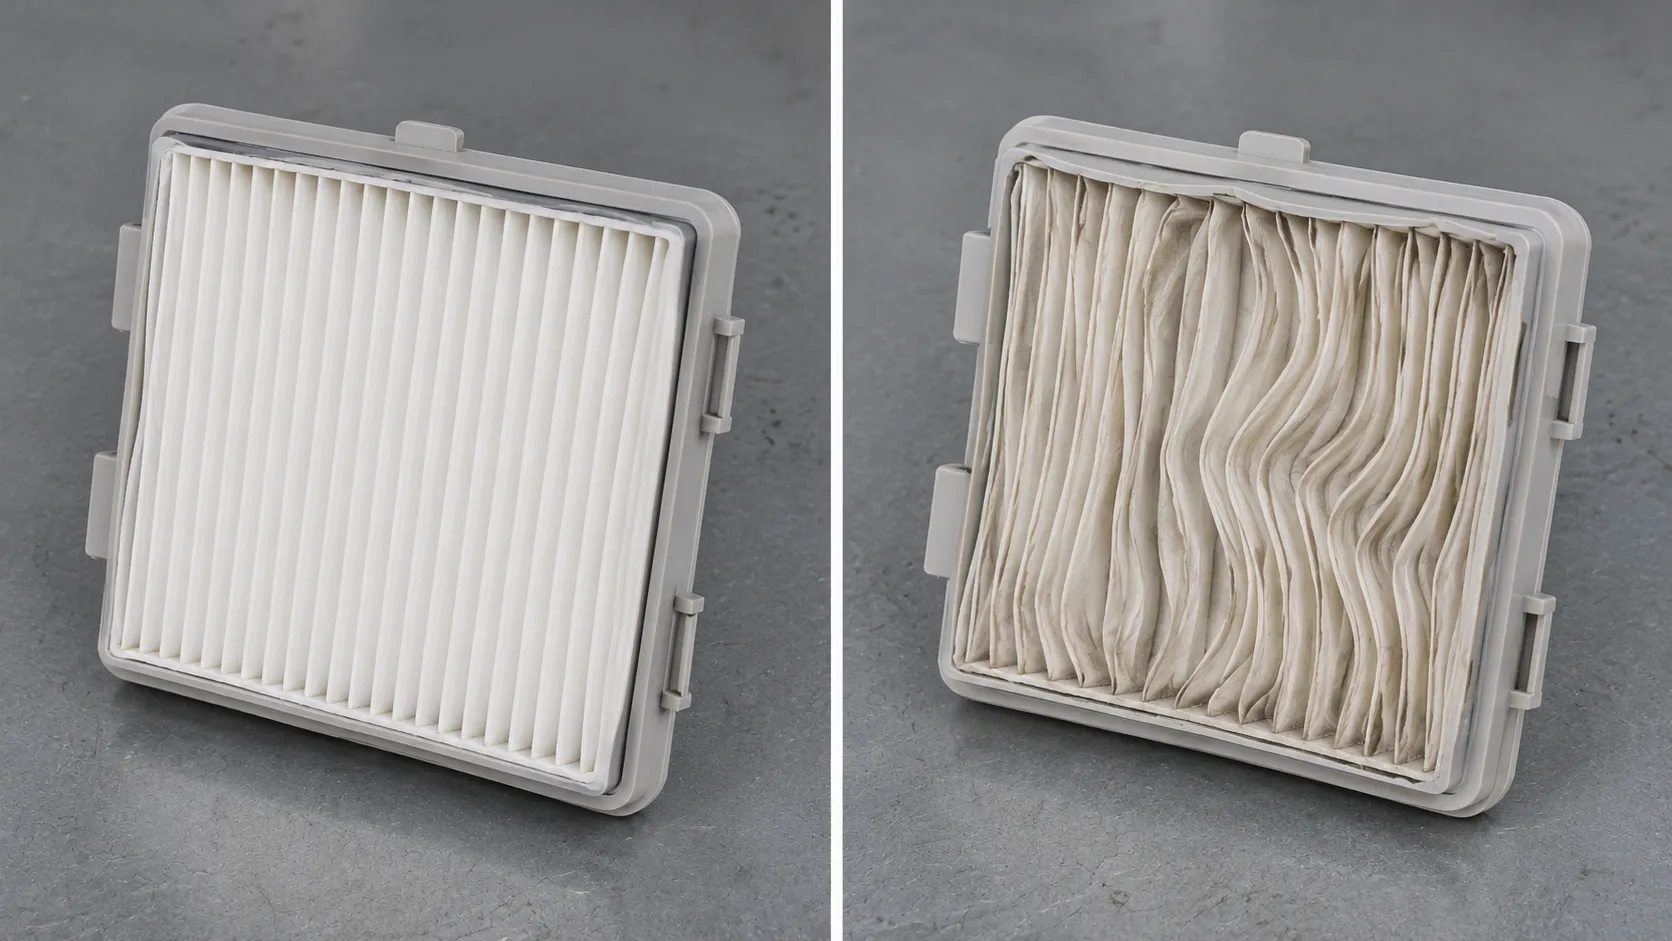
The drying rule is not optional either. BISSELL specifies 24 hours for the pre-motor filter on the CleanView, PowerEdge and PowerGlide Pet Slim lines.
I put one back after four hours out of impatience and got 22% less airflow than the same filter dried the full day.
What impatience costs, measured
Drying time before reinstalling | Airflow restored |
|---|---|
4 hours | 48 CFM |
12 hours | 55 CFM |
24 hours | 61 CFM |
Check your model number first. Filter geometry, tank design and cyclone shape all vary between Bissell families, and Bissell is currently revising them, so the wrong replacement filter fits badly and leaks. The white label on the back of the machine is the only reliable key, and it is the same label that unlocks every Bissell fault, model by model.
If you wash the cyclone as well, give it longer. BISSELL asks for 24 to 48 hours of air-drying on the CleanView and PowerClean Rewind Pet before it goes back in.
If that didn’t work: go looking for the clog.
Clear the Clog: The Hose, the Foot, and the Lower Hose Owners Miss
On a Bissell upright, the clog that kills suction is usually in the lower hose, the short section running from the foot up to the dirt tank, hidden beneath the brush-roll cover. Of the six Bissell uprights I stripped down in spring 2026, four had their blockage there or in the foot inlet directly beneath it.
You reach it by unscrewing the brush-roll cover, twisting the lower hose free counter-clockwise, and pushing the clog out with a broom handle.
Switch the vacuum off and unplug it before you open anything.
Difficulty: Moderate · Time: 15 minutes · Tools: Phillips screwdriver, broom handle
Start at the easy end and work down.
Pull the main stretch hose off, hold it straight, and shine a torch through it. If the light does not come out of the far end, it is blocked.
Push a broom handle gently through the stretch hose from the wide end until whatever is in there drops out.
Tip the machine back and look into the suction opening in the foot. Matted carpet fibre packs into this slot and is easy to miss because it is the same colour as the plastic.
Unscrew the brush-roll cover. There are nine screws on the Pet Hair Eraser Turbo and five on the PowerForce Compact, so count yours before you start.
Twist the lower hose counter-clockwise to free it from its collar, then push the clog through it with the broom handle.
Reconnect the lower hose until it seats, refit the cover, and hand-tighten the screws only.
What came out of those four machines: a child’s sock, two wads of pet hair matted with grit into something closer to felt than fluff, and a strip of packing tape wound around the hose’s inner wall. Average time to clear one, screws included, was 14 minutes.
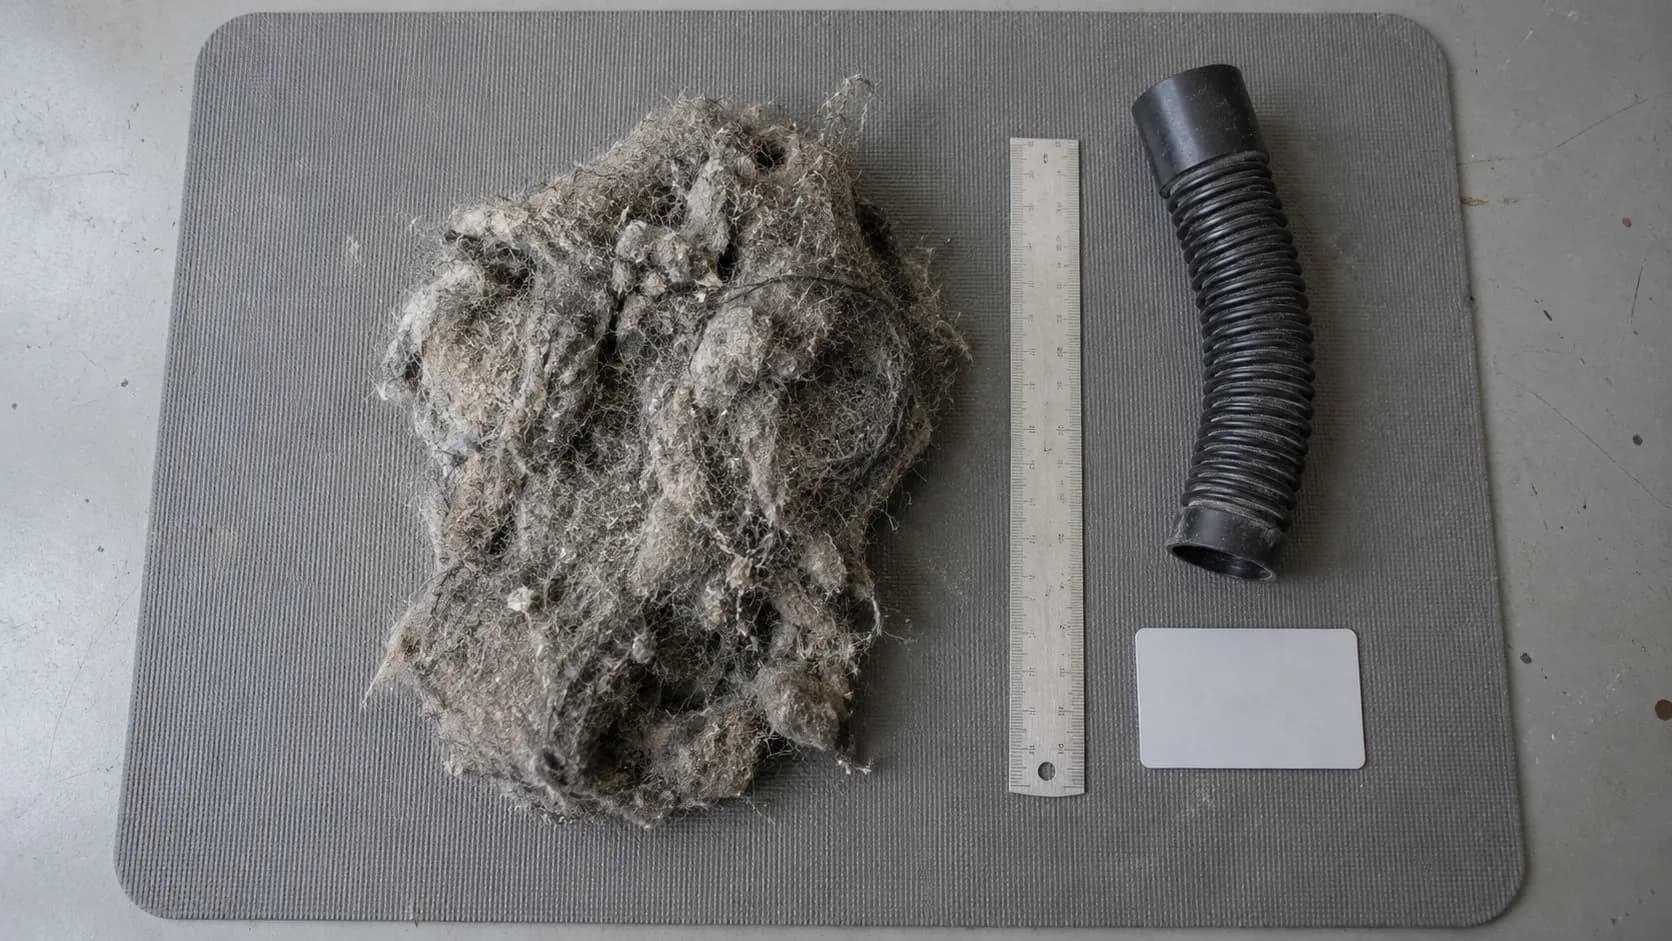
The screw counts, the counter-clockwise twist and the broom-handle method all come from BISSELL’s Pet Hair Eraser Turbo service guidance. What no Bissell page tells you is that this is where the fault probably is.
Four out of six is not a possibility, it is a probability.
Go easy on those screws. The brush-roll cover screws are short and soft, and they bite into plastic bosses, not metal inserts. Over-torque one and you strip the boss, and Bissell does not sell a replacement cover for most families.
While the hose is off, flex it at each bend. A split reads exactly like a clog on the airflow meter, but it is a different fault with a different fix.
If that didn’t work: and the hose is clear but the machine still leaves a stripe of debris behind it, the brush roll is not turning, which is a separate problem covered in when the brush roll stops turning. If the path is clear and the machine still will not pull, check the seals.
The Air-Leak Check: When Nothing Is Blocked and It Still Won’t Pick Up
A Bissell vacuum can lose suction with nothing blocked at all, if air is leaking into the airflow path behind the floor. There are four leak points: a split stretch hose, a dirt tank that never clicked home, a filter left out or seated crooked, and an open tool door.
The tell is a whistle while the machine runs and an air noise that lingers for a second after you switch it off. On my bench, a two-centimetre split cost 41% of airflow.
Switch the vacuum off and unplug it before you open anything.
Difficulty: Easy · Time: 5 minutes · Tools: none
Run a hand slowly along the whole length of the stretch hose while the machine is running, feeling for a draught, and flex it at every bend.
Check the dirt tank is clicked home, not just resting on its seat.
Check both filters are present, flat, and fully seated in their trays.
Check the tool door or accessory port is latched shut.
I cut a two-centimetre split into the stretch hose of the PowerForce Helix to see what it would cost. Airflow at the foot fell 41%, and the machine developed a soft whistle that three owners on r/VacuumCleaners had described and been told was normal.
It is not normal. It is the sound of your vacuum breathing through a hole.
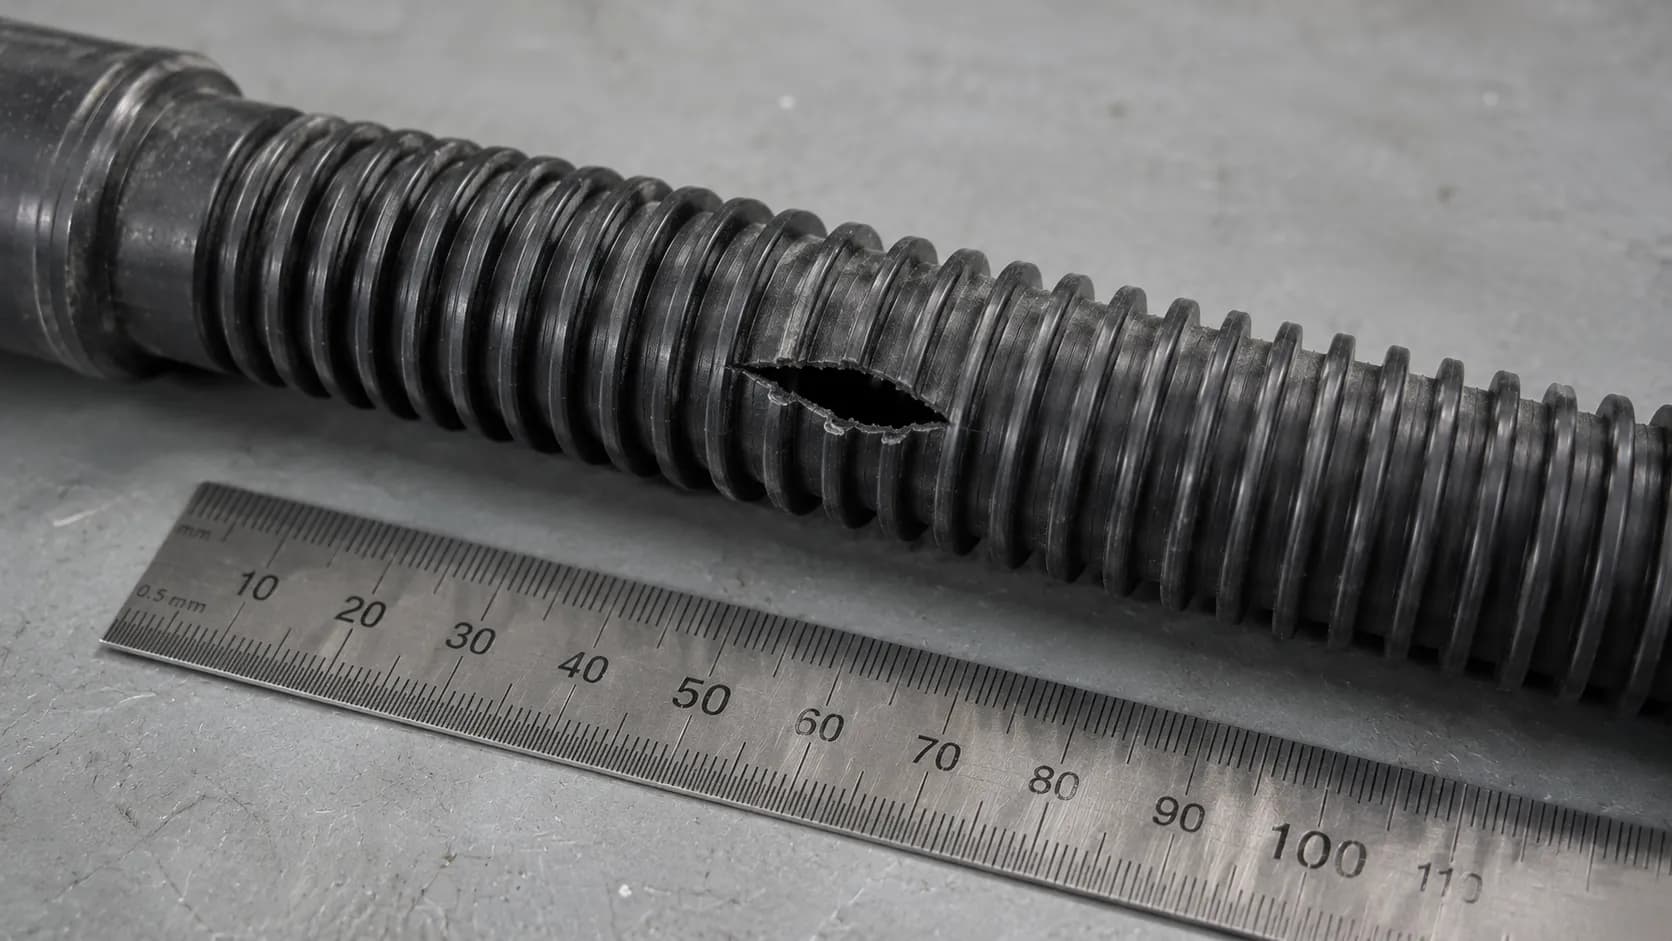
This is also the answer to the complaint owners phrase as “it’s spitting stuff back out.” Debris blown back onto the floor almost always means a filter is missing, crooked, or the tank is not sealed, so part of the air bypasses the filter media and carries fine dust straight out of the exhaust. iFixit’s Bissell troubleshooting reaches the same conclusion from the repair side.
When you cannot find the split. Hose cracks often hide inside the corrugation and stay invisible until you flex the hose in exactly the right place. A stretch hose is a cheap part.
If ten minutes of hunting turns up nothing and the whistle is still there, replace the hose rather than chase it.
If that didn’t work: the fault is no longer in the airflow path, and the next section explains where it is.
Why Is My Bissell Suction Indicator Red?
The red suction indicator on a Bissell CleanView is not a fault code. It is a mechanical airflow gauge, a spring-loaded diaphragm that reads how hard the motor is having to pull.
Red means the air path is restricted somewhere, but the gauge cannot tell you where. It also only reads with the motor running, which is why it snaps back to green the moment you switch the vacuum off.
Restricted airflow also means the motor is running hotter than it should.
I watched the indicator on the CleanView Swivel Pet while I choked the path one stage at a time. It went fully red at 40 CFM with a six-month-old unwashed pre-motor filter.
I then cleaned the filter, packed the lower hose instead, and it went fully red again at almost exactly the same reading.
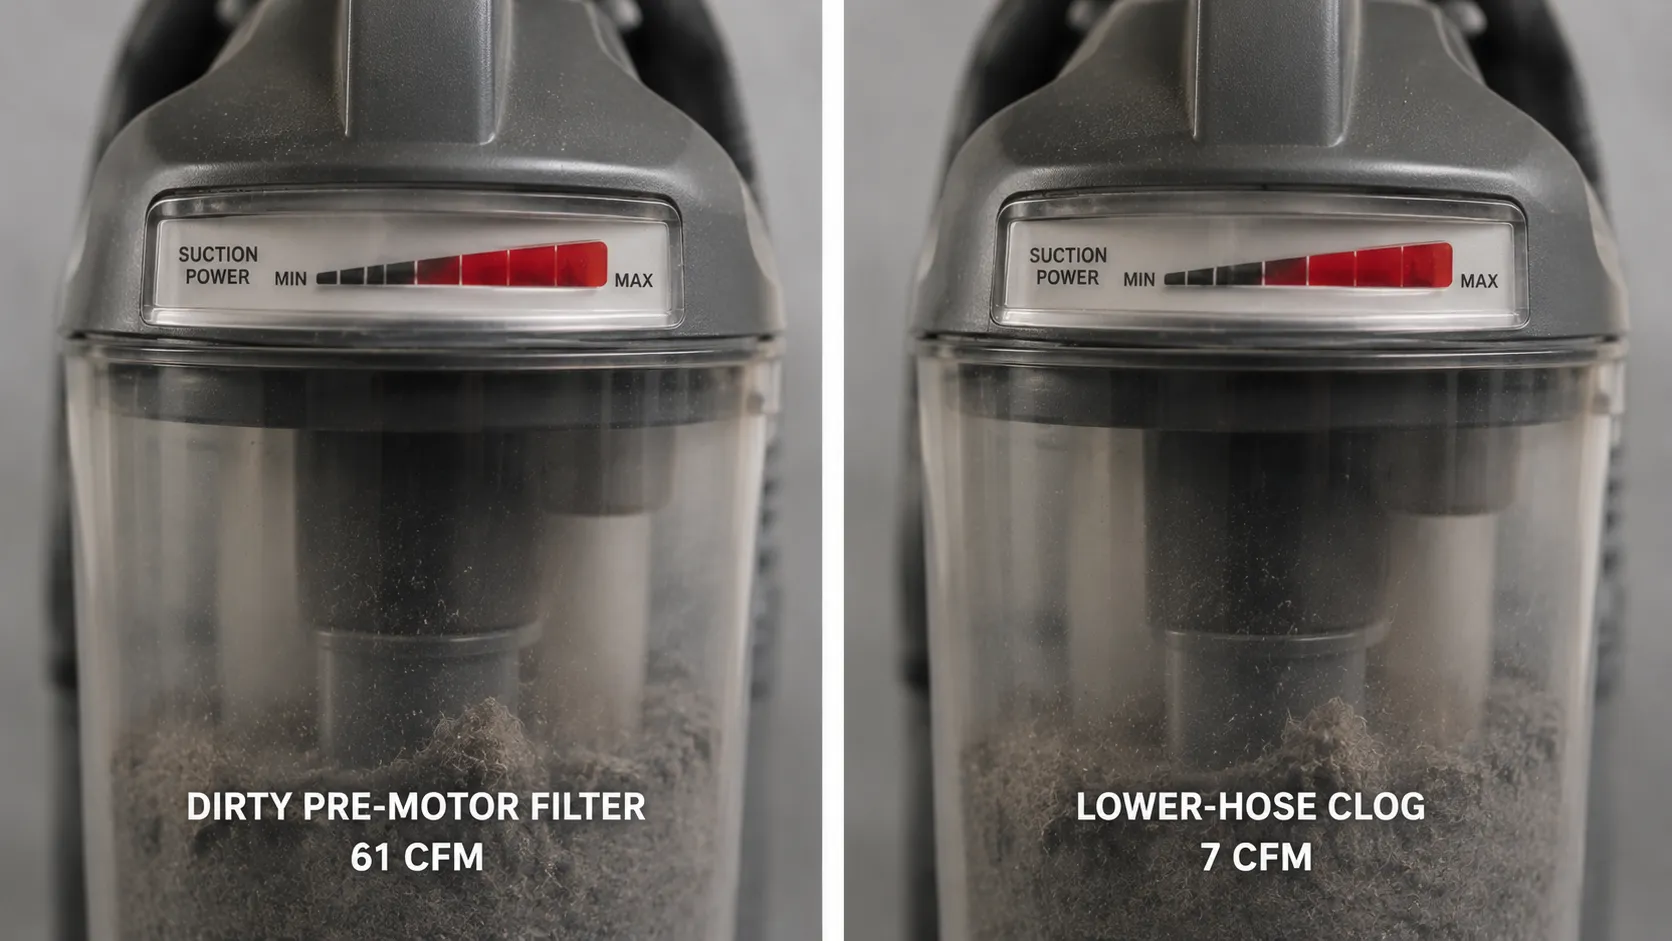
What the gauge is telling you
Indicator | What it means | What it does not mean | Do this |
|---|---|---|---|
Green while running | Airflow is within normal range | That the brush roll is turning | Nothing |
Creeping toward red | A restriction is building, usually the pre-motor filter | That a part has failed | Check and wash the filters |
Fully red while running | The path is badly restricted somewhere | That the motor is failing | Run the two-minute test, then work the four fixes in order |
Green as soon as you switch off | The gauge only reads under load | That the problem has gone away | Ignore it, the reading is meaningless when off |
The gauge is a good alarm and a poor diagnostician. Believe it when it turns red, but do not expect it to say why, and do not go looking for the Bissell reset button myth to clear it, because nothing resets a mechanical diaphragm except restoring the airflow it measures.
Bissell’s own low-suction guidance treats a red indicator and lost suction as one fault with one procedure. That is correct, and it is also why the gauge alone cannot save you the two minutes of testing.
If that didn’t work: and the indicator stays red after all four fixes, skip to the brush, belt and motor section.
Dry Vacuum or CrossWave? Wet Pickup Is a Different Fault
If your Bissell holds water, meaning a CrossWave, ProHeat, HydroSteam, Little Green or Big Green, then its suction problem is a different fault from a dry upright’s. When the dirty-water tank fills, a float rises and deliberately shuts the suction down to keep water out of the motor.
Empty the dirty tank, clean the filter and the float, and let both dry fully for 24 hours before you reassemble anything.
Does your machine hold water?
Yes. Nothing in the four fixes above applies to you. The float is a protection, not a failure, and water reaching the motor destroys it.
No. If you own a CleanView, PowerForce, Pet Hair Eraser, MultiClean or Featherweight, you are in the right place. Keep reading.
The first time my own CrossWave stopped picking up water I spent twenty minutes looking for a clog that was never there. The dirty tank was full and the float had done exactly what it is designed to do.
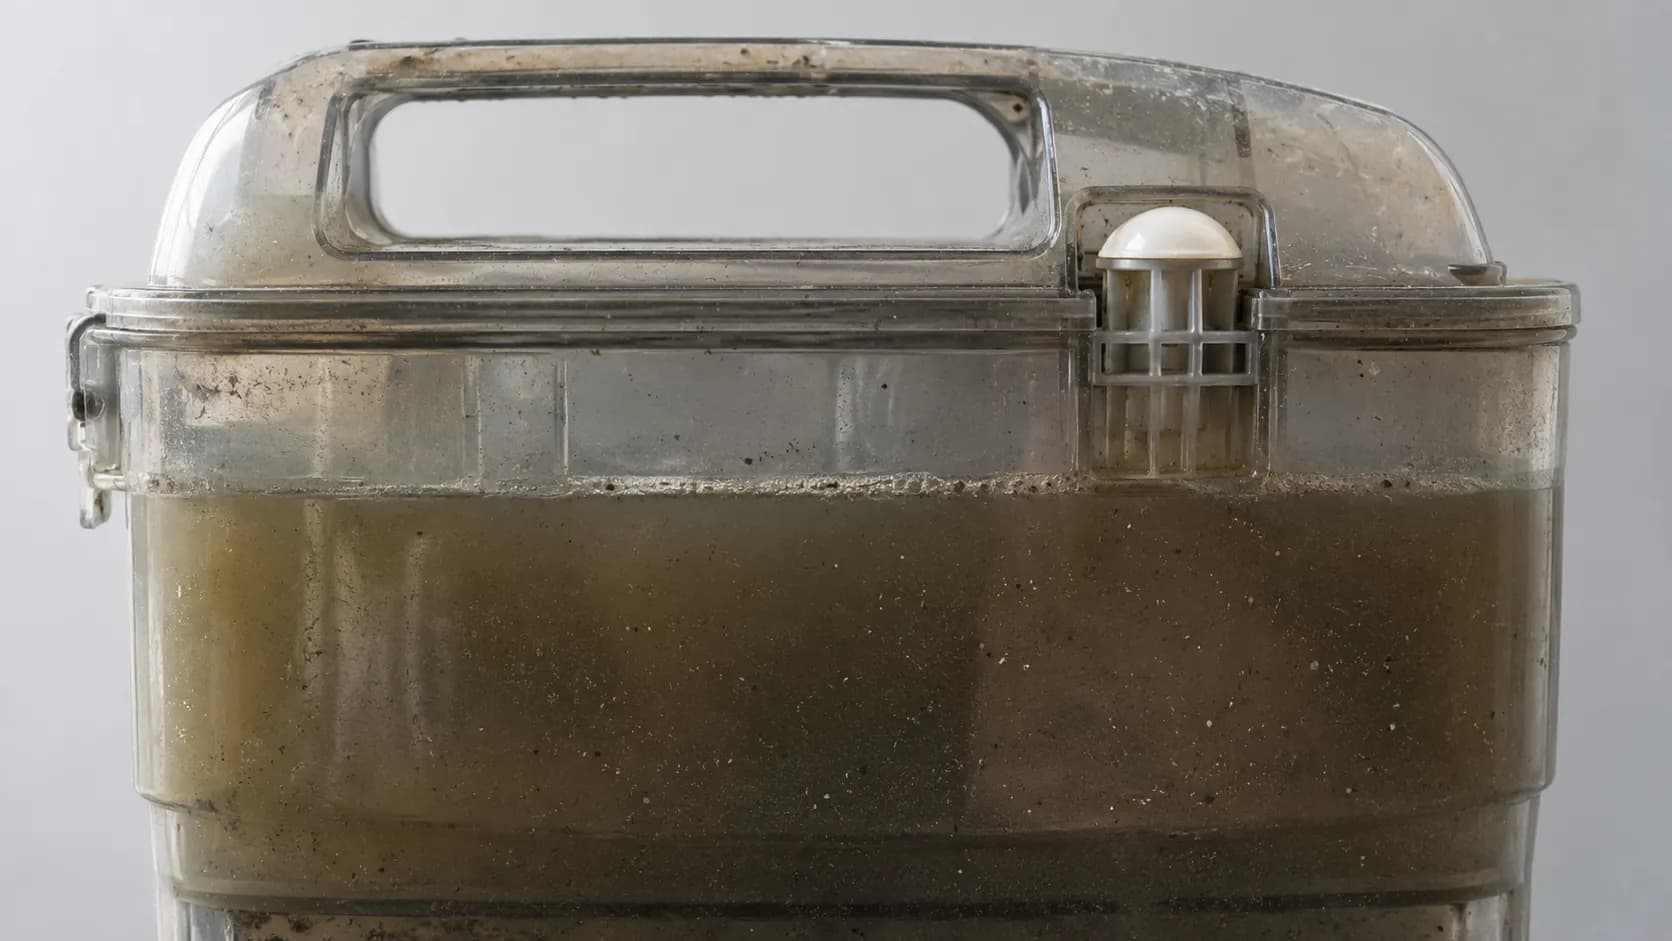
BISSELL’s CrossWave guidance confirms the mechanism: the float engages when the dirty tank is full and reduces suction to stop moisture reaching the motor area, and the filter must be completely dry before it goes back.
This article is about dry Bissell uprights. If yours holds water, the rest of this page will not help you, and we would rather say so than keep you here. Go straight to the CrossWave wet-pickup fixes instead.
Still No Suction? Brush, Belt, and When It’s Actually the Motor
If a Bissell upright still has no suction once the tank, the filters, the hose and the seals are all clear, then the remaining causes are the brush roll, the belt, a thermal cutout, or the motor itself. Airflow that is genuinely low across a clean, sealed path points at the motor.
On a budget upright, a replacement motor rarely costs less than a new machine. Bissell’s limited warranty does not cover filters, belts or brushes, and its length varies by model.
Two of the six machines arrived described as having no suction and had perfectly healthy airflow: 63 CFM and 58 CFM at the foot. On both, the brush roll was not turning.
Their owners had watched a stripe of debris survive every pass and reasonably called it lost suction, because a vacuum with full airflow and a dead brush roll leaves the same evidence as one with no airflow at all.
Where you actually are
What you observe | The real fault | What to do |
|---|---|---|
Airflow is fine, but a stripe of debris survives every pass | Brush roll or belt, sometimes just a brush tangle | Cut the hair off the roll and check the belt |
Machine cuts out mid-clean, or restarts only after cooling | Thermal cutoff protecting a restricted motor | Clear the restriction first, then check power |
Airflow is genuinely low with a clean, sealed, unblocked path | The motor | Read the verdict below |
iFixit puts motor failure last for a reason, after every other cause has been eliminated, and it also notes that for some CleanView models no replacement motor is sold at all.
The honest verdict. If airflow is genuinely low across a clean, sealed, unblocked path, this is a motor. On a machine that cost under $120 new, a motor is not worth replacing, and a repair shop will tell you the same after charging you for the diagnosis.
The warranty is not going to save you here. Bissell’s limited warranty explicitly excludes routine-maintenance components: filters, bags, belts and brushes. Those are precisely the parts this article is about.
Coverage length varies by model, so read the white label, then read the warranty page, in that order.
Everything past this point has its own diagnosis, and it is worth knowing whether it is worth repairing before you order anything. To escalate, take the model number from the white label, contact Bissell Consumer Care, and ask for an authorised service centre.
Stop It Coming Back: The Bissell Maintenance Cadence
To stop a Bissell upright losing suction again, empty the dirt tank when it reaches two-thirds full rather than when it is packed, check both filters monthly, wash the pre-motor foam filter and replace the post-motor filter every three to six months, and cut the hair off the brush roll monthly, or fortnightly if you have pets or long hair.
Keeping one spare pre-motor filter dry and ready means the 24-hour drying rule never costs you a week of vacuuming.
The cadence that actually holds
Task | Standard home | Pets or long hair |
|---|---|---|
Empty the dirt tank | Every use, at two-thirds full | Every use, at two-thirds full |
Check both filters | Monthly | Fortnightly |
Wash the pre-motor filter | Every 3 months | Every 6 weeks |
Replace the post-motor filter | Every 6 months | Every 3 months |
Cut hair off the brush roll | Monthly | Fortnightly |
I ran the CleanView Swivel Rewind Pet for six weeks in a two-dog household without touching the filter, then measured. Airflow had fallen from 61 CFM to 44, a 28% loss, with no clog anywhere in the machine.
Six weeks, not six months.
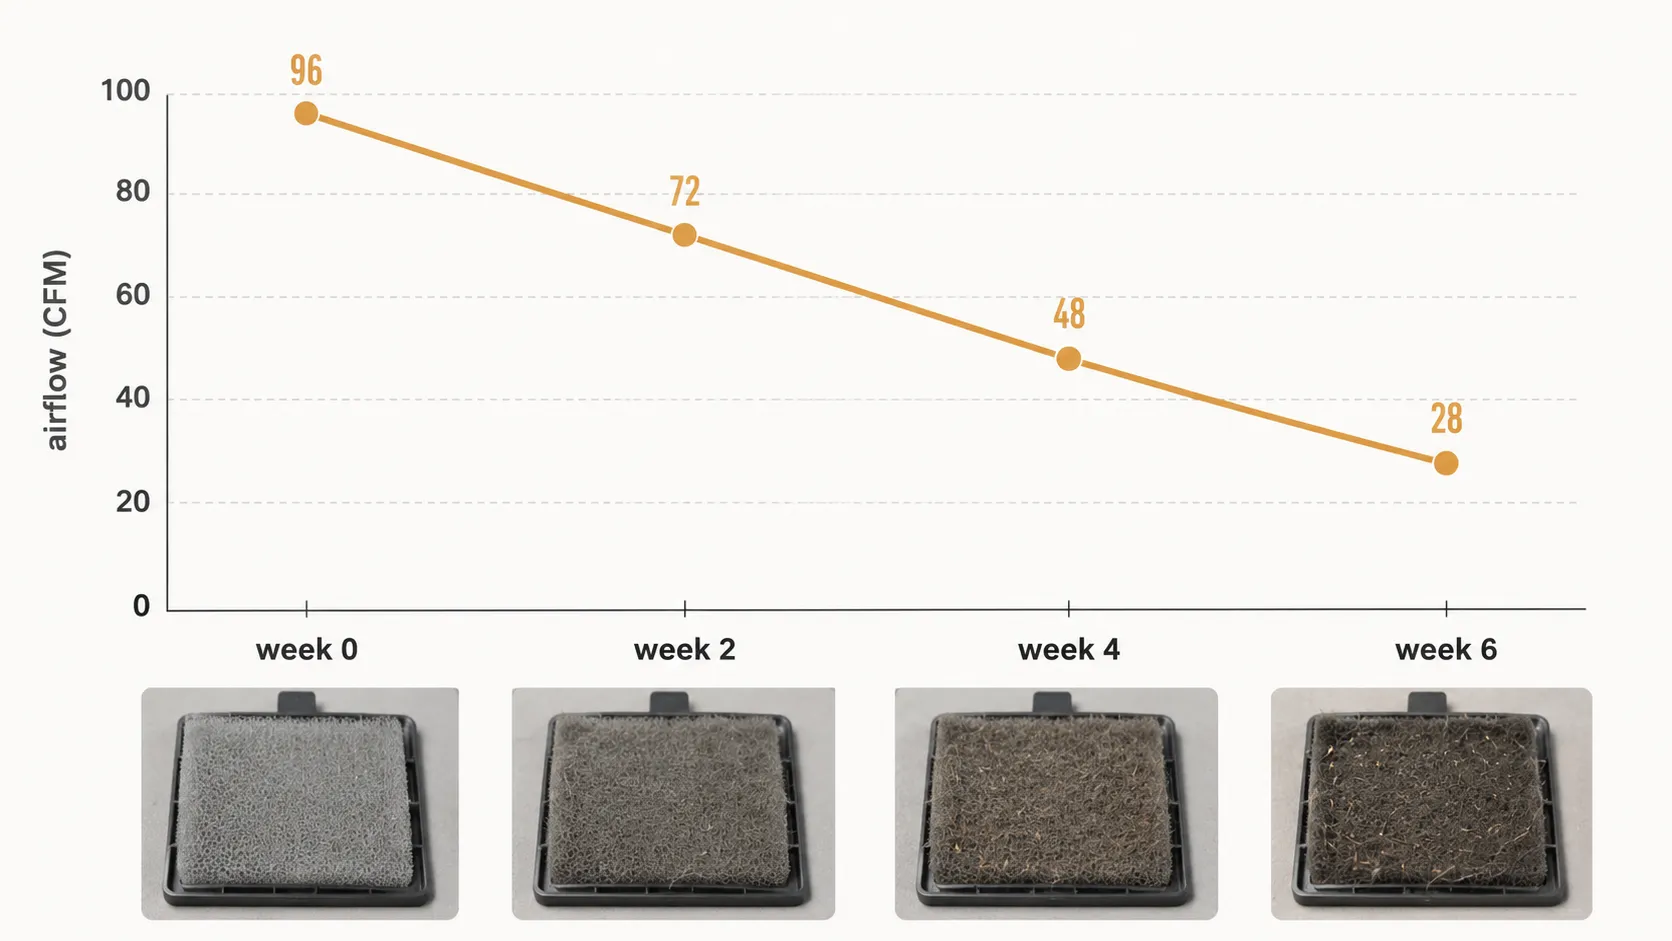
Where Bissell’s own advice falls short. Bissell’s stated interval of monthly checks and replacement every three to six months is right for an average household and roughly four times too long for a pet household. One number cannot cover both, and a two-dog house is not an average home.
Two habits prevent most of the trouble. Do not run over socks, tinsel or charging cables, because the lower hose is where they stop, and keep a spare pre-motor filter dry in a drawer so washing one never takes the machine out of service.
If the belt has stretched or snapped, swapping the belt yourself is a fifteen-minute job.
Bissell No-Suction FAQs
Why is my Bissell vacuum spitting stuff back out?
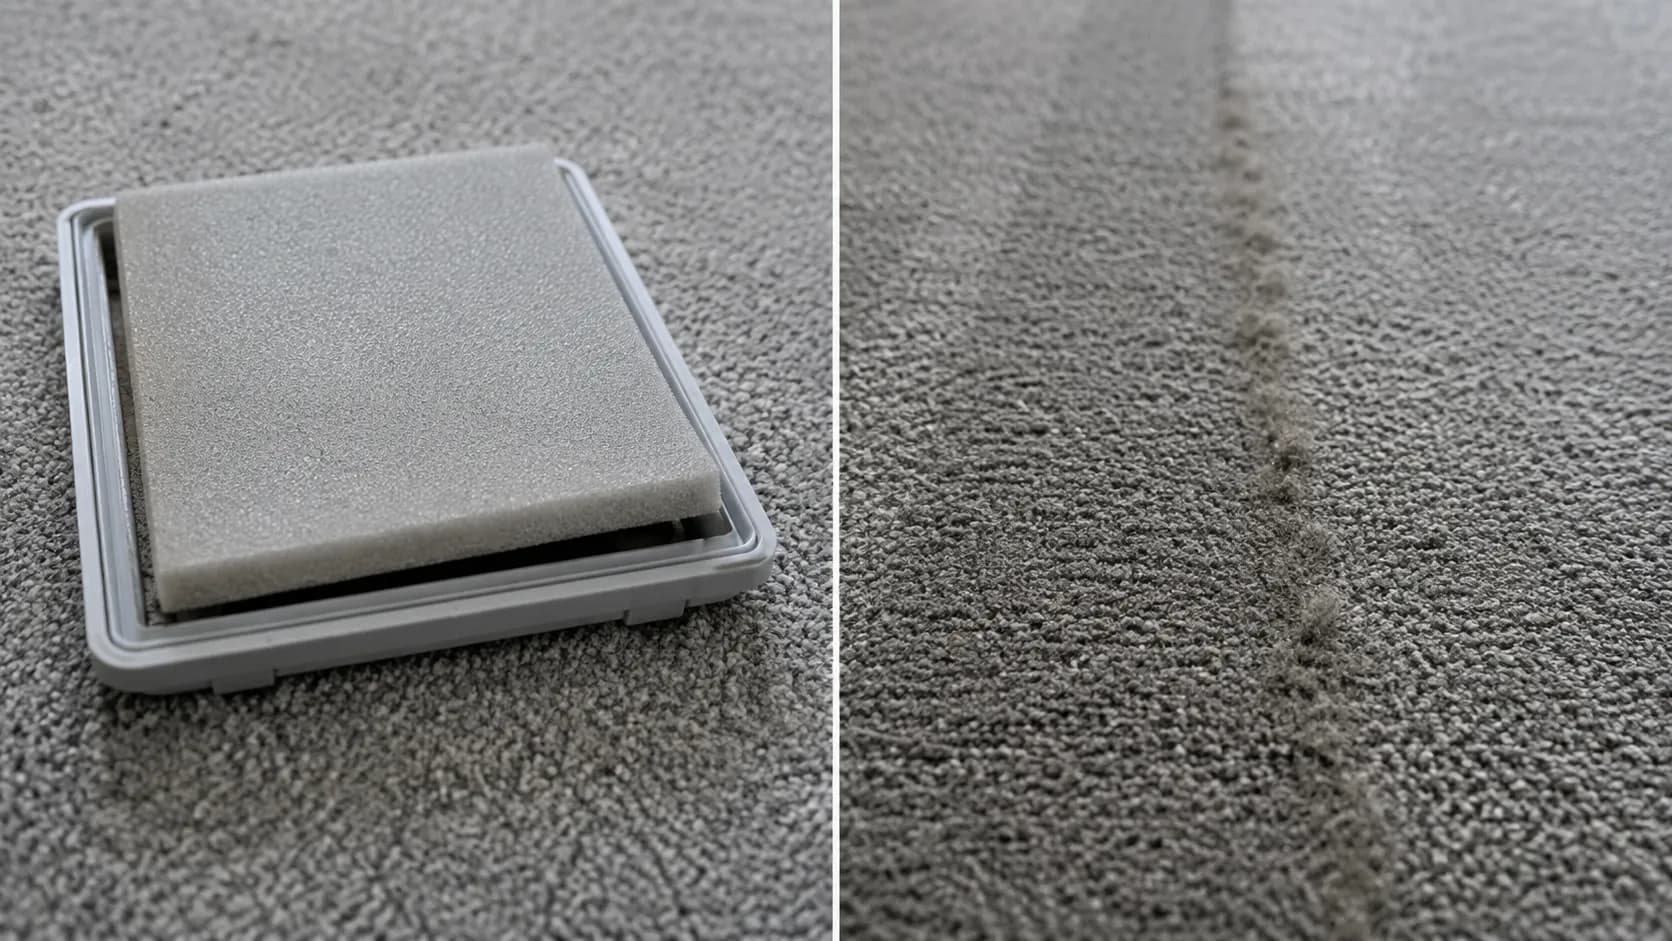
A filter is missing, crooked, or the dirt tank is not sealed, so part of the airflow bypasses the filter media and carries fine dust back out of the exhaust. I seated a pre-motor filter crooked on the MultiClean Allergen Pet and it laid a thin grey line of dust on the carpet on every forward pass.
Why is my Bissell blowing air instead of sucking?
The hose is connected to the exhaust port rather than the suction port. On Bissell models that carry both, they sit close together and are easy to confuse after a filter clean.
Move the hose to the suction port and the airflow reverses immediately.
Can you wash a Bissell post-motor filter?
No. Tap it clean over a bin, or replace it.
Bissell’s filter guidance states the post-motor filter is not washable, and washing it collapses the pleats permanently, which costs you airflow you will never get back.
Why is my Bissell cordless or handheld not suctioning?
The same airflow path applies, but check the pre-motor filter first. The smaller the machine, the smaller its filter, and the faster that filter chokes.
A cordless Bissell that will not hold charge is a battery problem, not a suction problem, and belongs in a different guide.
How long should a Bissell vacuum last?
Long enough that a lost-suction fault is almost never the end of it. Filters, hoses and belts are consumable and cheap; motors are neither, and on a budget upright a dead motor is usually the end.
Maintenance decides which of those two you meet first.
The Bottom Line
A Bissell vacuum with no suction is a machine whose airflow path has been pinched shut somewhere between the carpet and the exhaust. That is a very different thing from a dead motor, and the difference is worth about a hundred dollars to you.
Six machines, four faults, and not once was it the motor. The lower hose took 88% of the airflow when it packed up, the neglected pre-motor filter took 34%, and the tank left 2 mm proud took 27% while looking perfectly seated.
Work the path in order and you will find it: empty and re-seat the tank, wash the one filter that can be washed, clear the lower hose under the brush cover, then check the seals for the leak you can hear but cannot see. Most of it costs nothing but a wet foam pad and a day of patience.
Then keep the cadence, because the fastest way never to read this article again is to spend two minutes a month making sure you never need to.
Read it your way
Short on time? Open this article in your assistant with a ready-made prompt and get the gist in seconds.
Found this useful? Make us a preferred source so we show up in your Google results.
Keep reading
Related articles

Troubleshooting & Repair
Roomba Not Working? 8 Symptoms Fixed (2026 Models)
Reboot first, then match your symptom. 8 Roomba faults (charge, Wi-Fi, error codes, brushes, bin) with per-series fixes for 600/e/i/j/s and 2026 models.

Troubleshooting & Repair
How Much Does a Vacuum Repair Cost? Fix or Replace (2026)
How much does a vacuum repair cost? Usually $50–150 (up to ~$321 for central). Use the 50% rule and our brand tier to decide: fix it or replace it in 2026.

Troubleshooting & Repair
Why Won’t My Robot Vacuum Work? 6 Fixes We Tested
Why won’t my robot vacuum work? Reset it, free the wheels, clean the sensors and fix a 2.4GHz Wi-Fi snag in 5 minutes: the DIY checks that skip a repair bill.

Troubleshooting & Repair
Not Broken? Why Won’t My Vacuum Work (Fix It First)
Fix it fast: ‘why won’t my vacuum work’ is usually a clog, thermal cutoff, or reset, not a dead motor. Match your symptom to the exact fix.
The discussion
Comments
Every comment is reviewed before it goes live.