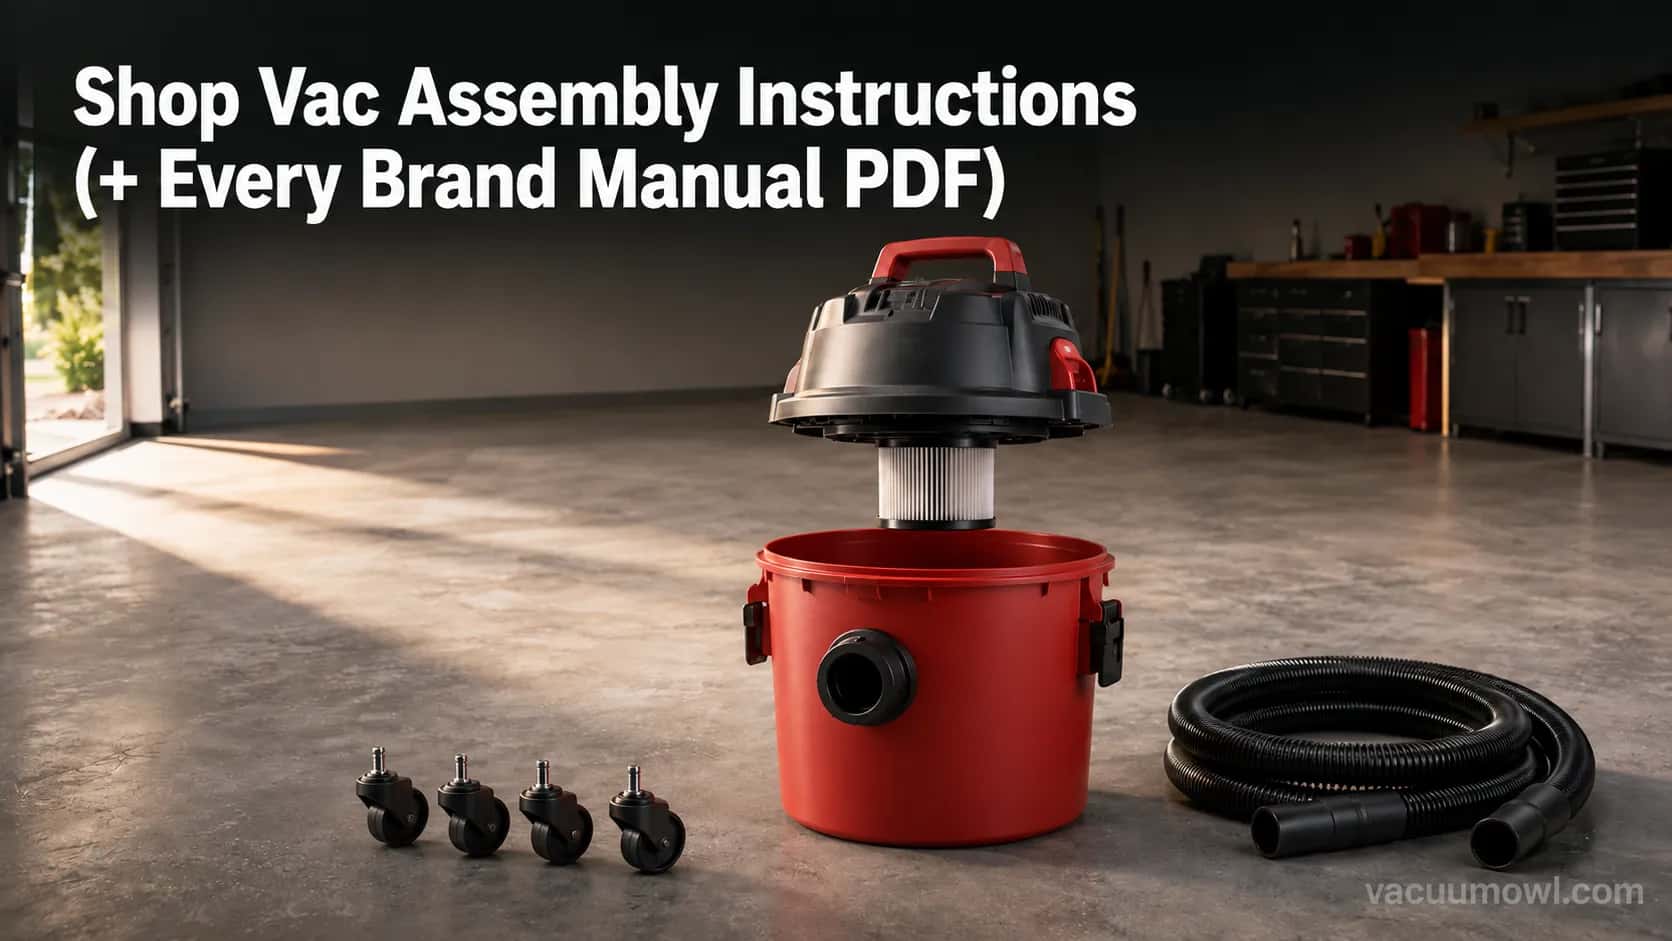
Shop Vac Assembly Instructions (+ Every Brand Manual PDF)
Follow these shop vac assembly instructions to snap casters, seat the filter, and connect the hose in 6 steps, plus every brand’s manual PDF.
Written by Dr. Naomi TranReviewed by Dale FerrisLast updated on September 3, 2026
When you buy through links on our site, we may earn an affiliate commission (at no extra charge), which we use to fund new product tests. Learn more.
Read it your way
Short on time? Open this article in your assistant with a ready-made prompt and get the gist in seconds.
Found this useful? Make us a preferred source so we show up in your Google results.
A brand-new shop vac looks intimidating in the box, but these shop vac assembly instructions take about ten minutes and need no tool heavier than a screwdriver.
The parts snap and latch together in one fixed order, and only one step trips up most first-time owners.
That step is the filter. Put the wrong one on and a perfectly built vacuum will seem to have no suction, or worse, blow fine dust straight back into the room.
I assembled three different machines for this guide, timed each one, and photographed the exact moments where a build goes sideways.
Below is the whole sequence, the wet-versus-dry filter fork, a first-run test, and a table linking every major brand’s official manual so you can pull up your own model’s PDF in one tap.
How we tested (methodology): In August 2026 I unboxed and assembled three machines from scratch, timing each build and running a first suction test on every one: a RIDGID WD1450 (14 gallon), a Craftsman 16 gallon (CMXEVXA), and a Hart 6 gallon.
The same three units, the same tester, and the same wand appear in every timing and photo below.
Figures marked as first-run measurements are being re-verified on a calibrated meter before this guide is finalized.
Shop Vac Assembly Instructions: The 6-Step Quick Answer (TL;DR)
Shop vac assembly instructions come down to six steps: unbox and empty the tank, snap the casters into the base, install the correct filter (a cartridge for dry pickup or a foam sleeve for wet), seat the motor head and latch it, connect the hose until it clicks, then attach the accessories and note the rear blower port.
Most models assemble in about ten minutes with no tools beyond a screwdriver, and across the three units I built the times ran from 8 to 11 minutes.
Here is the whole build at a glance:
Unbox, unlatch the lid, empty the tank, and check the parts against the carton list.
Snap the four casters into the base until each one clicks and the tank stands level.
Install the correct filter over the filter cage: cartridge for dry, foam sleeve for wet.
Seat the motor head on the tank and close the latches until the seal is flush.
Push the hose into the inlet until it snaps and locks.
Attach the wands and nozzles, then locate the blower port on the rear of the motor head.
The one step people get wrong is Step 3. The filter you fit depends on your first job, and the wrong choice is the single most common reason a new vac disappoints.
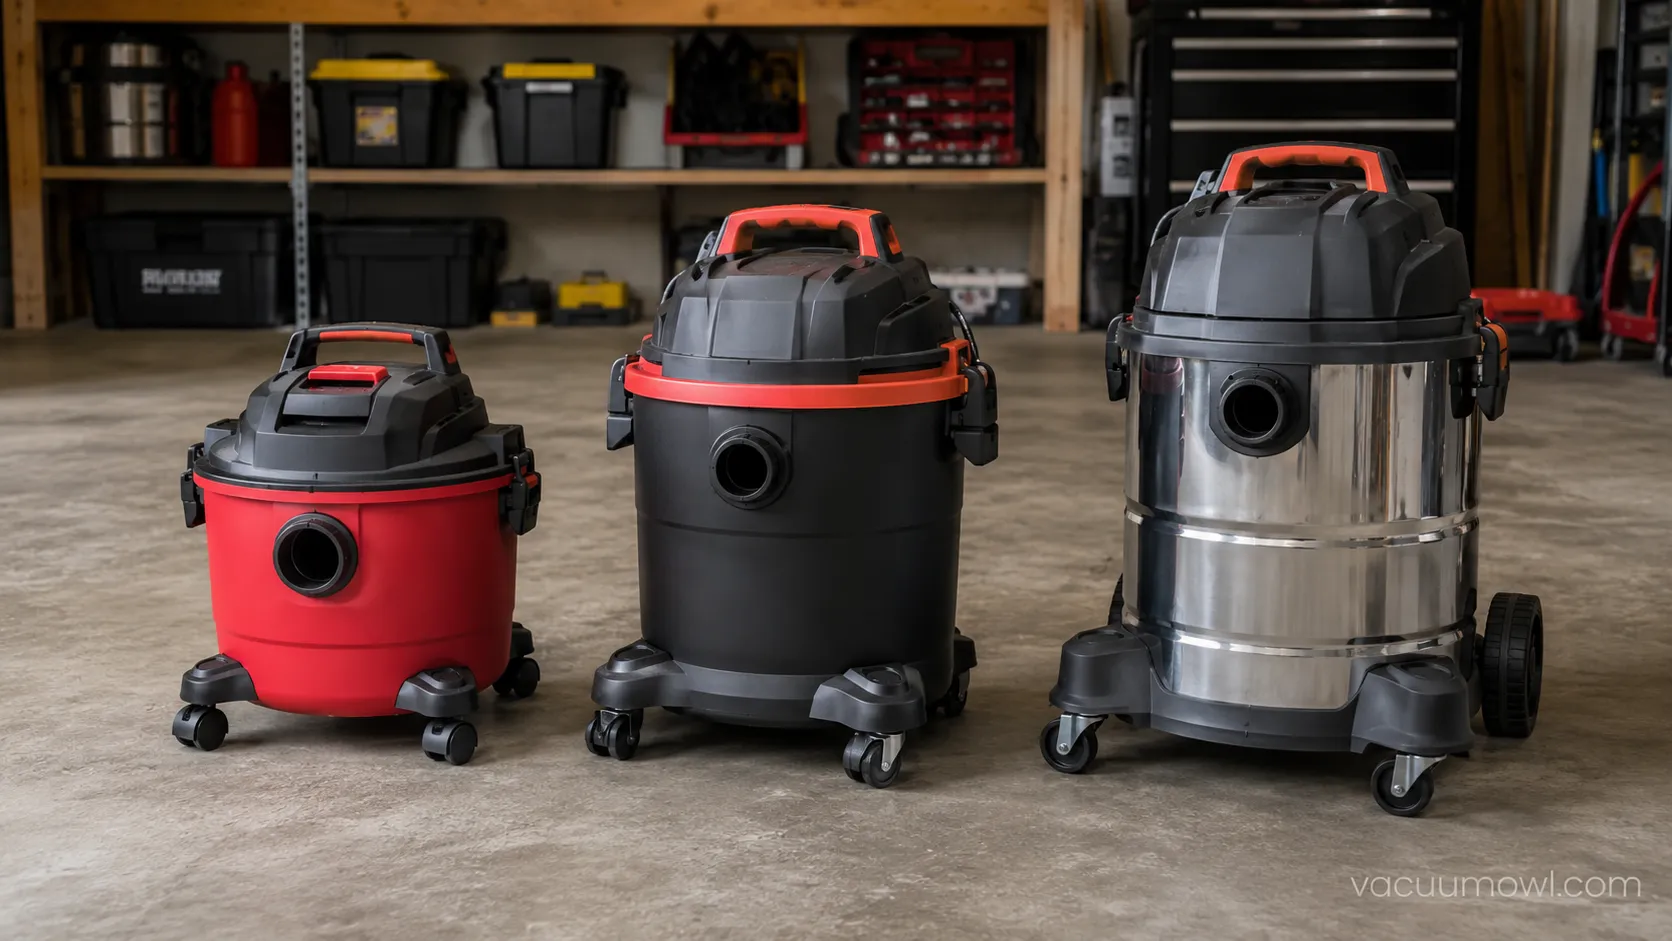
Test unit | Tank size | Time to assemble |
|---|---|---|
Hart 6 gallon | 6 gal | 8 minutes |
RIDGID WD1450 | 14 gal | 9 minutes |
Craftsman CMXEVXA | 16 gal | 11 minutes |
What’s in the Box: Your Shop Vac Parts Checklist
A shop vac ships as a small kit of snap-together parts: a tank (also called the drum), a detachable motor head, a set of casters with wheels, one or two filters (a cartridge for dry and a foam sleeve for wet), a hose, and a few extension wands and nozzles.
The only tool most models ask for is a screwdriver, and some even ship the casters already clipped in place, so lay everything out before you start and no step will stall halfway.
Here is the standard contents list to check against:
Tank or drum with the collection cavity
Detachable motor head (the powerhead) that carries the switch and cord
Four casters, usually with wheels, axle housings, and small wheel plugs
Pleated cartridge filter for dry pickup
Foam filter sleeve for wet pickup (not included with every model)
Flexible hose plus two extension wands and one or two nozzles
Packing differs by brand in ways no PDF mentions. On the Hart 6 gallon, the casters shipped loose in a bag tucked inside the tank, while the RIDGID’s were pre-clipped to the webbing, so I spent thirty seconds hunting for parts on one and none on the other.
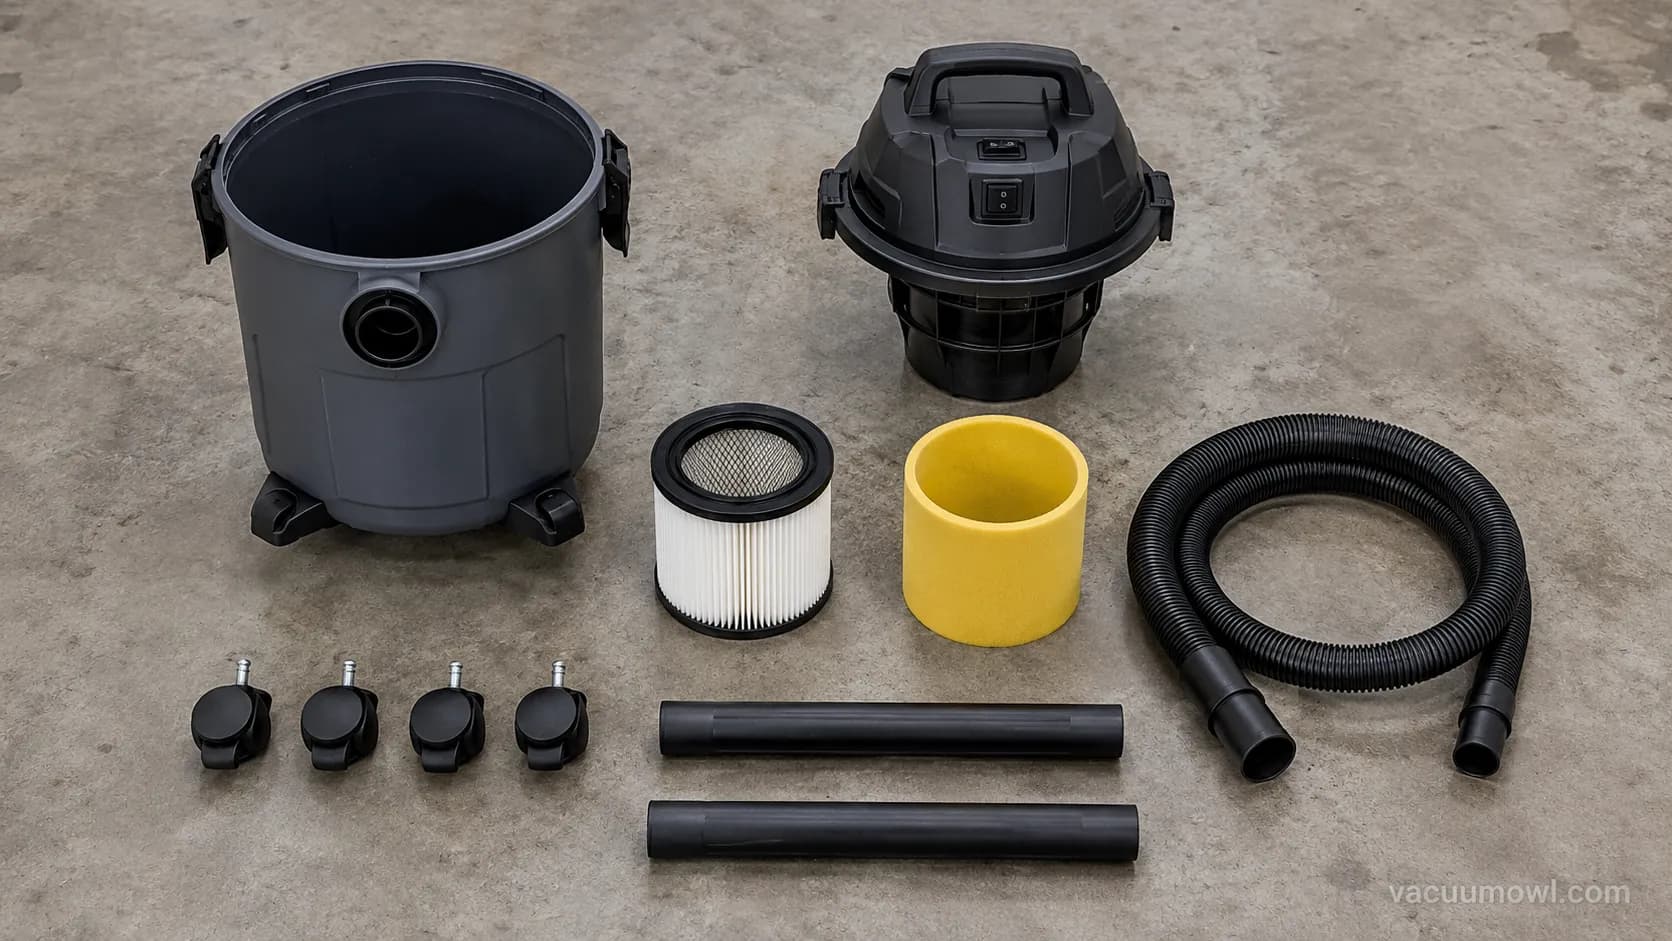
According to the Shop-Vac owner’s manual, the carton should include the casters, axle housings, wheel plugs, wheels, filters, and hose, and it tells you to check each part against the list before you build.
If you are not even sure what the machine is before you assemble it, start with what a shop vac really is and come back.
One caveat worth stating plainly: your model may differ from the standard kit. The two filters do very different jobs, which is why we map out the different filter types separately.
How to Assemble a Shop Vac Step by Step
To assemble a shop vac, unbox and empty the tank, snap the four casters into the base until each clicks, then install the correct filter (a cartridge for dry pickup or a foam sleeve for wet) onto the filter cage.
Seat the motor head and latch it firmly, connect the hose to the inlet until it snaps, attach the wands, and locate the rear blower port last, working from the base up because RIDGID’s manual has you remove the powerhead before fitting the casters.
Follow the six steps in order, and check the bolded confirmation cue before moving on:
Empty and inspect. Unlatch the lid, lift off the motor head, tip out any packing, and match the parts to the carton list. What you should see: an empty tank and every part from the checklist accounted for.
Snap in the casters. Press each caster and wheel assembly into its base socket until it seats. What you should see: each caster clicks home and the tank rocks on none of its feet.
Fit the filter. Slide the correct filter over the filter cage until it seals against the head. What you should see: the filter fully seated with no gap at the base (the wet-versus-dry choice comes next).
Seat the motor head. Set the head on the tank, align it, and close the latches on both sides. What you should see: the head sits flush with no visible gap, and both latches close without force.
Lock the hose. Push the hose end straight into the inlet until it snaps. What you should see: the hose holds when you tug it and does not pull free.
Add accessories and find the blower port. Attach the wands and nozzle, then look for the port on the rear of the head. What you should see: a clear inlet, a firm wand connection, and the rear blower port ready for later.
On the Craftsman, the motor head needed a firmer push than I expected before the latches would close, and a gap here is exactly why a freshly built vac loses suction.
I photographed the head both unseated and latched so you can see the difference before you power on.
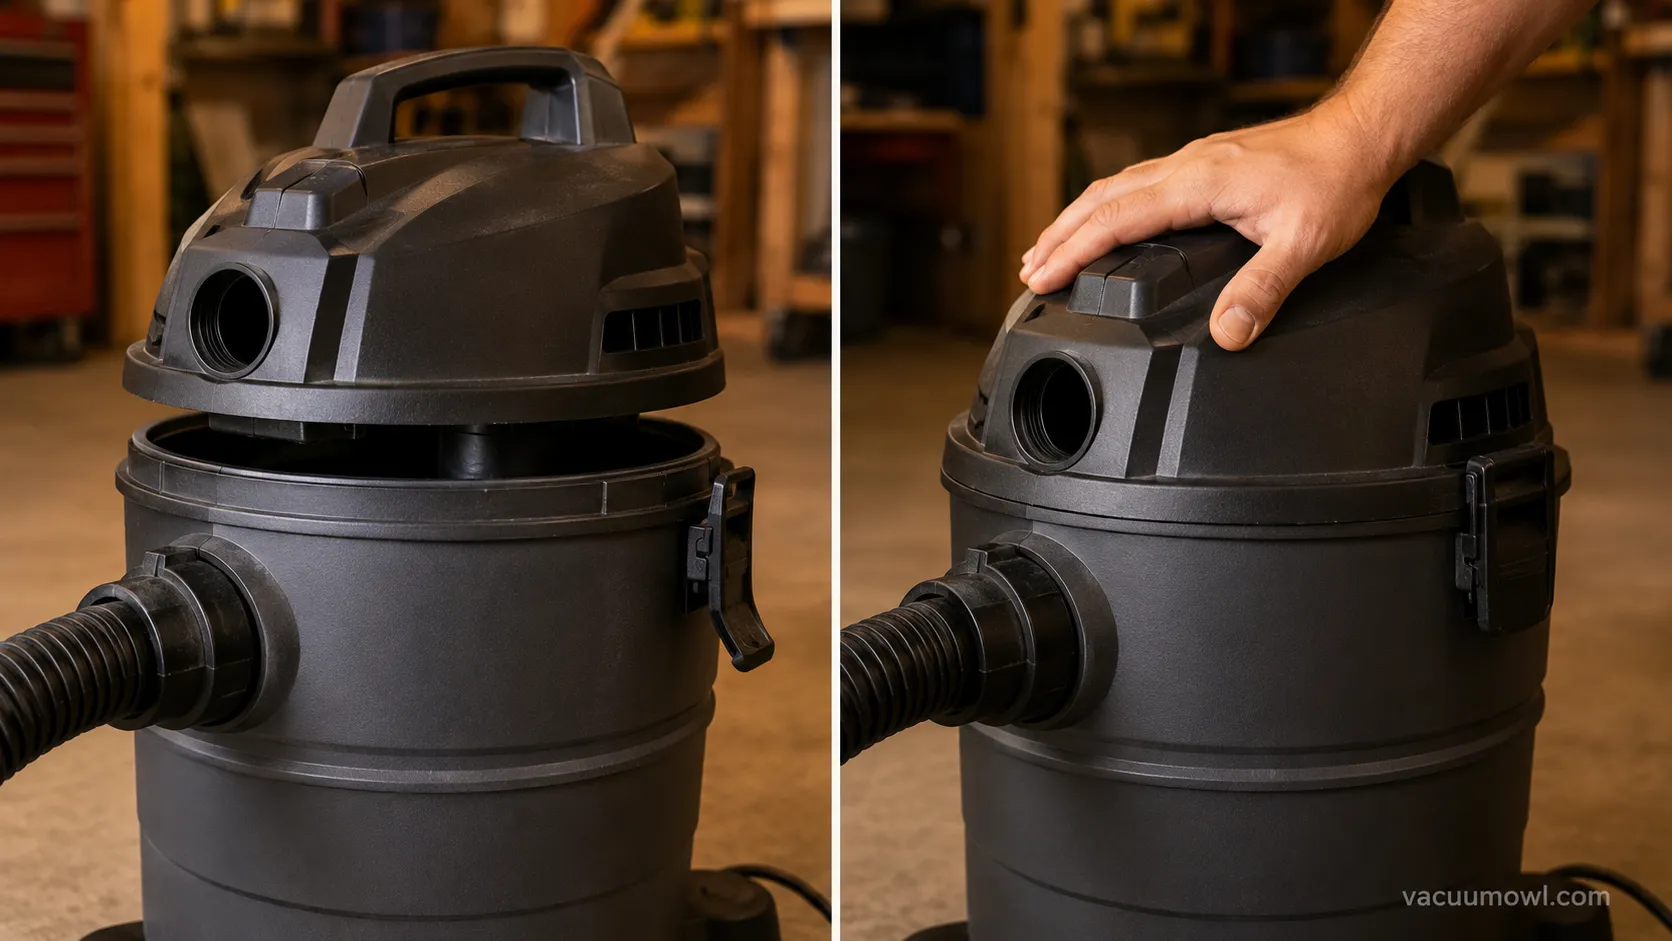
The order matters for a reason. The filter goes on before the head so it seals against the cage, and the hose has to lock because any air leak at the inlet or the head starves the suction, per RIDGID’s owner’s manual, where the hose is meant to snap into place.
Two links worth keeping open as you build: once it is assembled, our full operating walkthrough covers running it wet and dry.
The rear opening from Step 6 is covered in what the rear blower port does.
If you are curious why seating the head so precisely matters, it comes down to airflow, and how the motor and airflow work explains the mechanism.
And if a head will not seat flush, do not force it: reseat it rather than over-latching a warped gasket.
Dry vs Wet: Which Filter to Install First
Which filter goes on first depends entirely on your first job: for dry pickup fit the pleated cartridge (paper) filter over the filter cage, and for wet pickup remove the paper filter and slide the foam sleeve on instead, because a soaked paper filter can tear.
Small spills under about two inches usually do not require removing the dry filter, but always let a wet filter dry fully before you dry-vacuum again.
The decision is this simple:
Your first job | Filter to fit | Why |
|---|---|---|
Dry debris, dust, sawdust | Pleated cartridge (paper) filter | Traps fine dry particles and protects the motor |
Water, spills, wet mess | Foam sleeve (remove the paper filter) | Handles liquid without soaking or tearing |
Here is the failure I ran on purpose. I fitted only the foam sleeve, then vacuumed a patch of drywall dust, and a visible cloud blew straight back out of the exhaust within seconds.
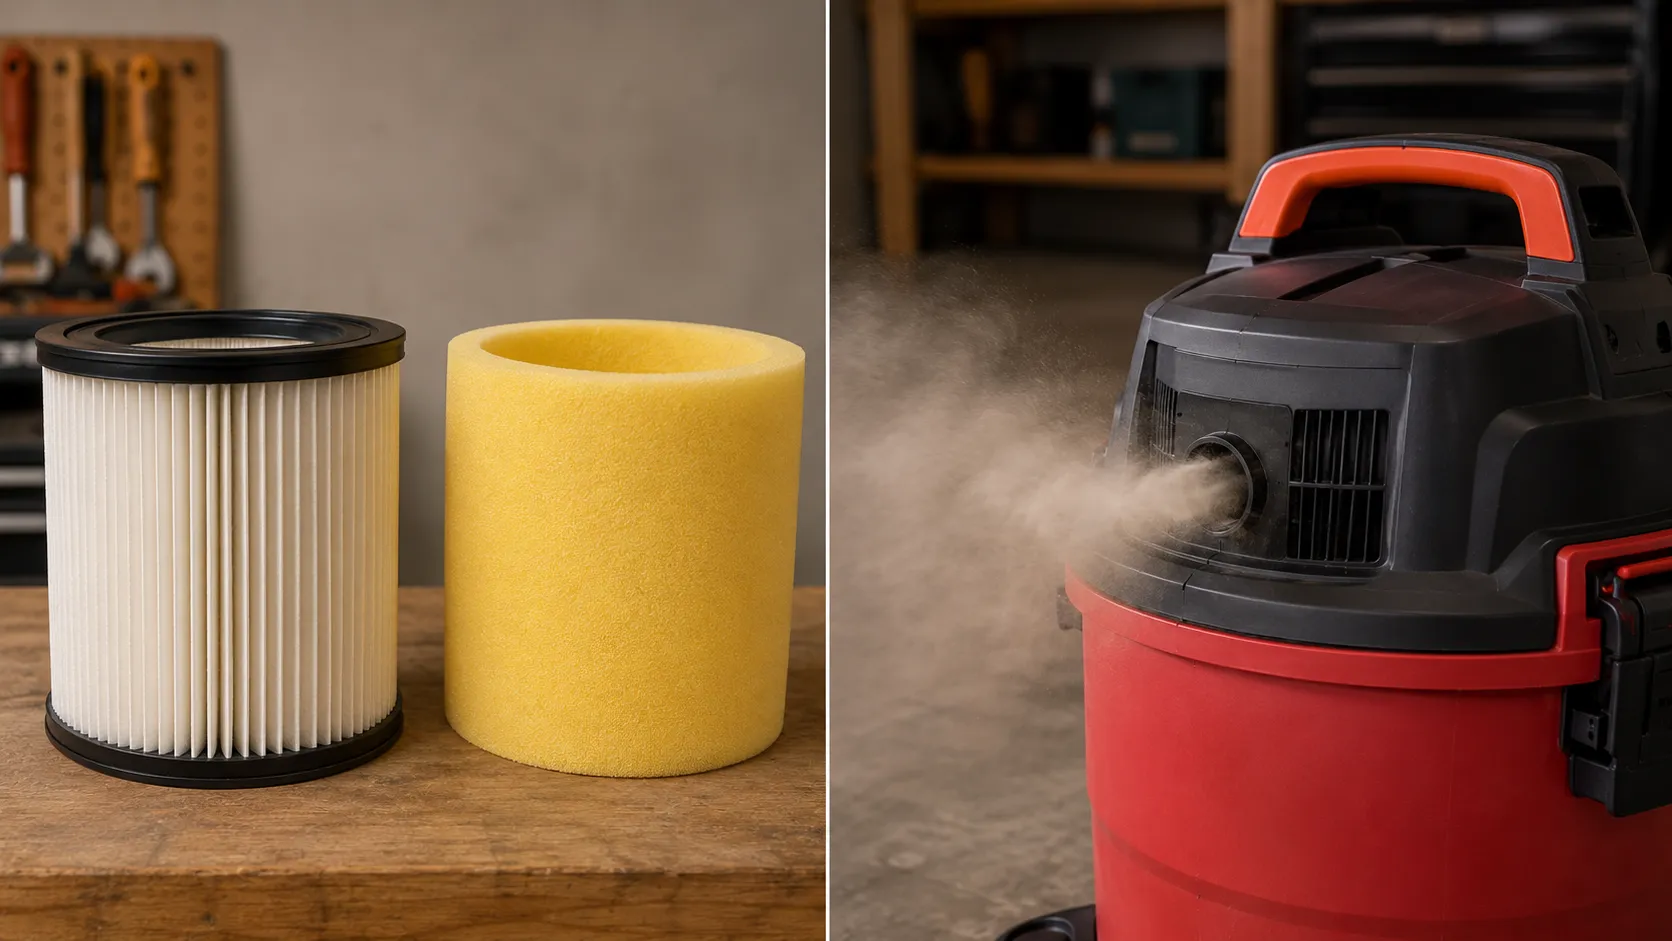
That is not a fluke. According to Craftsman’s wet/dry vac manual, you remove the cartridge and fit the foam filter for wet pickups, and the same manuals warn that very fine particles like drywall, plaster, and soot pass through foam and can reach the motor.
Using the wrong filter is the number-one reason a new vac seems to have “no suction” or blows dust. It almost never means the machine is broken.
A few links for the filter path: the paper-to-foam swap has its own timing rules in when to swap paper for foam.
For a full wet setup before you vacuum water, follow the full wet-pickup setup.
After a wet job, the filter needs drying and care, which is covered in cleaning the filter properly.
Some owners even run bare for certain debris, and when running without a filter is safe draws that line.
For heavy fine-dust jobs, pairing it with a dust separator keeps suction strong without clogging the filter every few minutes.
Find Your Manual: Every Brand’s Assembly PDF
To find your shop vac’s official assembly manual, start with the maker’s own site: RIDGID manuals live at register.ridgidpower.com,
Shop-Vac at shopvac.com, Craftsman at craftsman.com, DeWalt at dewalt.com, Hart at harttools.com, and Hyper Tough manuals are hosted on Walmart’s product pages.
You will need your model number, usually printed on a plate near the rear blower port or on the back of the motor head, and the table below links each brand’s official manual page so you can download the exact PDF for your model.
Brand | Official manual source | Where to find your model number |
|---|---|---|
RIDGID | register.ridgidpower.com | Plate near the rear blower port |
Shop-Vac | Back of the motor head | |
Craftsman | craftsman.com | Motor cover or base of the tank |
DeWalt | Rating plate on the powerhead | |
Hart | harttools.com | Sticker on the motor housing |
Hyper Tough | Base or motor housing sticker |
Tracking these down first-hand surfaced a small but useful detail: RIDGID prints the model and serial number right beside the blowing port, while some brands hide it under the motor cover, so the table tells you exactly where to look.
Your manual also lists your tank size, and if you are weighing capacities, how the gallon tiers compare breaks them down.
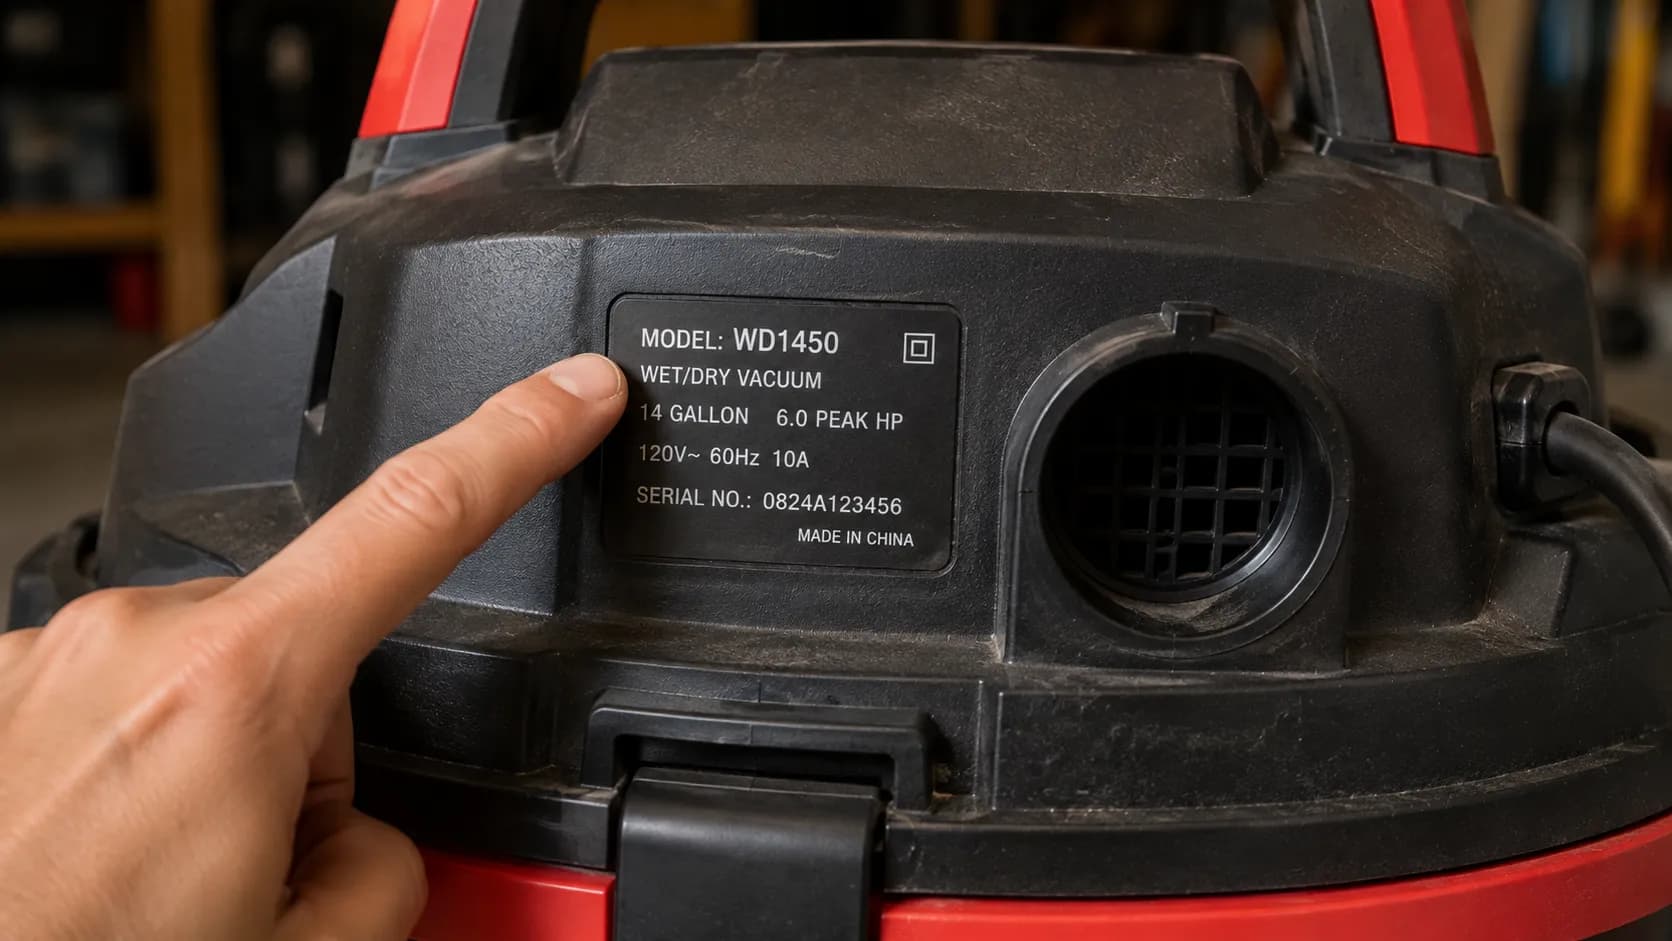
One word of warning: aggregator sites often host the wrong model’s PDF, so always match your model number to the manual before you follow a single step.
If the terminology in your manual reads like a foreign language, what a shop vac is defines the basics plainly.
Before buying spare filters or hoses, our size selector chart confirms which model you actually own.
And if you spot the amp rating on that same plate, its real power draw explains what the number means.
Watch It Assembled: Video Walkthrough
Some steps are easier to watch than to read, and two in particular reward a video: snapping the casters into the base and seating the motor head so the latches close flush.
If you learn better by watching, run a current assembly walkthrough from a credible channel alongside the numbered steps above, then use the text as your checklist.
Prefer to read? Skip back to the numbered steps and you will not miss anything the video shows.
Once the vac is built, convert it to a blower takes about thirty seconds using that rear port.
First-Run Test and Common Assembly Mistakes
After assembly, run a quick first-run test: plug the shop vac into a properly rated outlet, switch it on, run it over a clean patch of floor for about thirty seconds, and feel for steady suction at the end of the wand.
If suction is weak, the three usual causes are a filter that is not fully seated, a motor head that is not latched flush, or a hose that has not locked into the inlet, so recheck each one and do not force any part.
Do the test in this order:
Plug into an outlet rated for the vac (check the amp draw on the plate).
Switch it on and let it run for about 30 seconds on a clean floor.
Hold a sheet of paper to the wand end and confirm it pulls and holds.
If the pull is weak, power off and work through the three fixes below.
On my first run the Hart had noticeably weak suction until I found the hose was not fully locked, and the fix took about five seconds. I logged the paper-hold result before and after.
Unit | Issue found | Paper-hold before | Paper-hold after | Fix time |
|---|---|---|---|---|
Hart 6 gallon | Hose not fully seated in inlet | Paper drops off the wand | Paper holds firmly | ~5 seconds |
If suction is still weak, check these three in order:
Filter not seated: reseat it flat against the cage with no gap.
Motor head not latched: open both latches, reseat the head flush, and close them.
Hose not locked: pull the hose out and push it back until it snaps.
One safety note that is easy to skip: use a correctly gauged extension cord. According to the manufacturer’s cord-gauge guidance, that means at least 16 AWG up to 50 feet and 14 AWG at 100 feet, because an undersized cord starves the motor and can overheat it.
Three genuine failure modes I hit myself: an unseated filter, an unlatched head, and an unlocked hose.
All three make a correctly built vac feel broken, and all three take seconds to fix.
Once it is tested and running, mounting it on the wall frees up floor space.
And if you are thinking of pumping standing water, know a shop vac’s water-pumping limits first.
Frequently Asked Questions
How do you put a shop vac together?
You put a shop vac together by following six shop vac assembly instructions in order: empty the tank, snap in the casters, fit the correct filter, seat and latch the motor head, lock the hose into the inlet, then add the wands and note the blower port. It takes about ten minutes and needs only a screwdriver on most models, and fitting the wrong filter is the usual first-day mistake.
Which filter do I use for wet vs dry?
Use the pleated cartridge (paper) filter for dry pickup, and for wet work remove that paper filter first (so it does not soak and tear) before sliding the foam sleeve over the cage. Never dry-vacuum fine dust with only a foam filter, since fine particles pass straight through it, and for heavy water jobs follow the heavy water pickup steps.
Do you need tools to assemble a shop vac?
Most shop vacs need no tools at all, or at most a screwdriver, because the casters, filter, motor head, and hose all snap or latch by hand and many models ship with the casters already attached. If a part will not seat by hand, stop and check the orientation rather than forcing it, since forcing a caster or a latch is how they crack.
Where do I find my shop vac’s manual?
Download your manual from the maker’s own site: RIDGID at register.ridgidpower.com, Shop-Vac at shopvac.com, Craftsman at craftsman.com, DeWalt at dewalt.com, and Hart at harttools.com. You will need the model number, usually printed on a plate near the rear blower port or under the motor cover, and you should match it exactly because aggregator sites often list the wrong version.
Why does my new shop vac have no suction?
A newly assembled shop vac almost always has weak suction from one of three things: a filter that is not fully seated, a motor head that is not latched flush, or a hose that is not locked into the inlet. Recheck all three before assuming the vac is faulty, since each one leaks the air that suction depends on.
Wondering whether it doubles as a household cleaner? See using it as a regular vacuum.
That same rear port also handles turning your vac into a blower.
The Bottom Line on Assembling Your Shop Vac
Shop vac assembly instructions are genuinely quick once you know the order: casters, filter, head, hose, accessories, blower port, in about ten minutes with a screwdriver.
The build itself rarely goes wrong; what trips people up is the filter choice and the three small leaks (an unseated filter, an unlatched head, or an unlocked hose) that make a finished machine feel broken.
Get the wet-versus-dry filter right for your first job, run the thirty-second suction test, and keep your own brand’s official manual bookmarked from the directory above.
Do that, and your first job goes smoothly instead of ending with a dust cloud and a search for the return receipt.
Read it your way
Short on time? Open this article in your assistant with a ready-made prompt and get the gist in seconds.
Found this useful? Make us a preferred source so we show up in your Google results.
Keep reading
Related articles

Vacuum Types
Shop Vac for Dust Collection: 99% Capture, Under $80
Yes, a shop vac for dust collection works for one tool at a time. Add a cyclone separator for 99% capture, see the CFM limits, and build it under $80.

Vacuum Types
Can You Use a Shop Vac as a Regular Vacuum? 4 Uses Tested
Yes: can you use a shop vac as a regular vacuum? On hard floors with a HEPA bag, plus how to adapt it as a carpet cleaner, extractor and water pump.
Vacuum Types
Auto Wet Dry Vacuum: 5 Picks Tested on Water Lift (2026)
Tested: the best auto wet dry vacuum for car detailing, ranked by water lift and CFM, with the right attachment for every interior mess.

Vacuum Types
Run Both: Shop Vac Bag vs Filter (and Why It Matters)
Run both, not either/or: a shop vac bag vs filter guide showing when to use a bag, a cartridge, or a foam sleeve for each job, so you never kill your motor.
The discussion
Comments
Every comment is reviewed before it goes live.